
Related Manuals for Amina Evolution AIW150E


Summary of Contents for Amina Evolution AIW150E
-
Page 1: Installation Guide
Installation Guide AIW150E/350E/550E AIW150E-S200/350E-S200 V2 December 2013 Invisible Loudspeakers Products may vary from items pictured... - Page 2 Caution: Read before installing this product To ensure optimal performance, please read Ensure that all installation mounting surfaces > > this guide carefully and keep in a safe place are able to support the weight of the product. for future reference. After installation, avoid pushing on the wall >...
-
Page 3: Table Of Contents
Contents Section Message from the Managing Director Finishing Included in the carton / Packaging Plastering and decorating steps 1 + 2 How to use this manual Plastering and decorating steps 3, 4 + 5 Installation overview diagram Setup tips Section Setup tips Preparing the wall / ceiling and Further details... -
Page 4: Message From The Managing Director
MD - Amina Technologies Ltd About the Manufacturer Amina Technologies Ltd is the world’s leading designer and manufacturer of truly invisible loudspeaker solutions. Our invisible loudspeakers have been used in a wide range of both commercial and residential applications for over twelve years. -
Page 5: Included In The Carton / Packaging
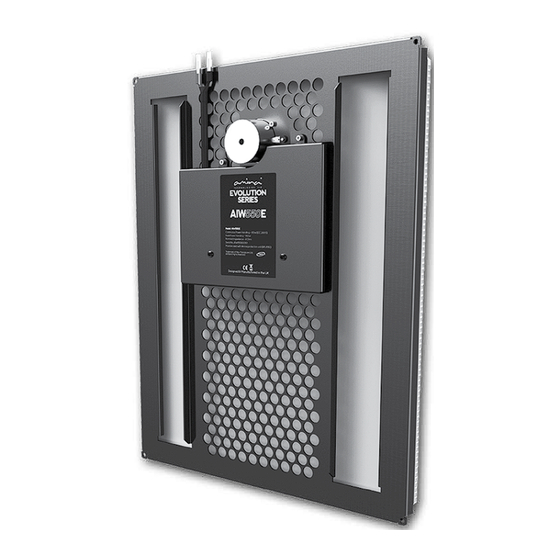
Included in the carton Please check that your carton contains the correct number of items. Model Number Single Pair AIW150E 1x Loudspeaker panel 2x Loudspeaker panels AIW150E-S200 AIW350E 1x APU (Protection unit) 1x APU (Protection unit) AIW350E-S200 AIW550E 1x Cut-out template... -
Page 6: How To Use This Manual
How to use this manual The following pages contain step by step advice to help you achieve a successful installation of your Evolution Series loudspeaker. The Evolution Series loudspeaker can be installed into walls or ceilings of various construction types. This installation guide covers the two basic building construction types; plasterboard cavity walls/ceilings and brick/concrete walls/ceilings. -
Page 7: Preparing The Wall / Ceiling And Fixing The Product
Installation overview Section Preparing the wall / ceiling and fixing the product Cavity Cavity installation Solid structure installation with fixing with backbox installation blocks For new builds or full refurbishment with backbox where sound transmission Typically a new build New builds or full refurbs needs to be reduced Start at page 10 or full refurbishment... - Page 8 Preparing the wall/ceiling and fixing the product Cavity installation Typically a new build or full refurbishment / Uses mounting blocks (sold separately) Locate joist work When you have chosen your speaker cut a small locations, before cutting a hole in the hole in plasterboard to check stud location plasterboard it is important that you locate...
- Page 9 Cavity installation with fixing blocks continued... Install speaker cable and insert insulation Ensure all speaker cables are pulled through to the speaker location with plenty of slack. This will make it easier to connect the cable to the speaker later on in the installation process.
- Page 10 Cavity installation continued... Connect the Evolution Series speaker Connect the speaker cable to the speaker using a high quality crimping tool. Your Evolution Series speaker is fitted with blue butt splice crimp connectors which are suitable for speaker cable thicknesses of 1.5mm - 2.6mm (16 - 14AWG).
- Page 11 Cavity installation with backbox For new builds or full refurbishment where sound transmission needs to be reduced or fire rating is required. Locate cable and position backbox Side View Choose speaker location and create aperture by following steps 01 + 02 on page 05.
- Page 12 Cavity installation with backbox continued... 05 Connect the speaker Side View Follow step 05 on page 07 12.5mm Secure the speaker Position the cable away from the rear of the loudspeaker. With the speaker resting on the backbox mounting lip, use screws provided to secure the speaker onto the backbox by self-tapping into the mounting lip, through the pilot holes provided at...
- Page 13 Solid wall installation with BackboxSW For new builds or full refurbs Create aperture in brickwork/ concrete Using the combination of an angle grinder and a jackhammer drill, create a cavity of 460mm x 355mm (18 ” x 14”) within the brickwork.
- Page 14 Solid wall installation with backbox continued... Install backbox no render Make a small hole in one of the rubber grommets and pull the speaker cable through it and into the backboxSW. There Mineral Wool are four slots in the base of the backboxSW and using suitable screws (not supplied), fix the backboxSW to the brickwork within Expanding foam...
- Page 15 Solid wall installation with Backbox Solid wall installation with backbox continued... continued... 05 Secure the speaker Secure the speaker Top View Ensure the speaker cable is laid behind the Ensure the speaker cable is laid behind the Brickwork/concrete mineral wool and cannot rest against the mineral wool and cannot rest against the speaker itself.
- Page 16 plast ered. Alignment and plastering preparation Alignment and plastering preparation existing plaster Speaker alignment required for plastering Retrofit / pre-skimmed plasterboard Retrofit / pre-skimmed surfaces Patch plastered nish After removing a 30-50mm (3/16 - 2”) wide Patch plastered finish sand down to create taper section of existing plaster surrounding the For walls /ceilings that have already been plaster...
- Page 17 For new drywall walls /ceilings that w ill be taped and joined. (North American construct ion) Retrofit / pre-skimmed plasterboard raw drywall Retrofit / pre-skimmed surfaces surface Speaker alignment required for plastering Feathered skim finish Feathered skim finish The front face of the speaker should be flush with the face of the new wall/ceiling if For walls /ceilings that hav e already been plasterboard...
- Page 18 For new drywall walls /ceilings that w ill be taped and joined. (North American construct ion) Retrofit / pre-skimmed surfaces raw drywall Retrofit / pre-skimmed surfaces surface Speaker alignment required for plastering Full wet skim finish Full wet skim finish The front face of the speaker should be flush with the face of the new wall/ceiling if For walls /ceilings that hav e already been...
- Page 19 plast ered. existing plaster Retrofit drywall Speaker alignment required for plastering Retrofit drywall Patch plastered finish After removing a 30-50mm (3/16 - 2”) wide Patch plaster nish sand down to create taper section of existing plaster surrounding the cutout, the front face of the speaker should For drywall walls /ceilings that w ill be taped For new drywall walls /ceilings that w ill be taped be flush with the paper face of the...
-
Page 20: Drywall (Patch Plastered)
For new drywall walls /ceilings that w ill be taped and joined. (North American construct ion) Retrofit drywall raw drywall surface Speaker alignment required for plastering Feathered skim finish The front face of the speaker should be flush with the face of the new wall/ceiling if For new drywall walls /ceilings that w ill be taped correctly installed. -
Page 21: Testing
Testing Testing the speakers Important: Always test the speaker before plastering over it and again once plaster is dry. The following procedure is required as a minimum. CAUTION: Without plaster on the surface of the speaker it is highly efficient and w ill generate very high sound pressure levels w ith minimal power input. -
Page 22: Finishing
Finishing Plastering and decorating Apply PVA Using a brush or foam roller, apply a thin coat of PVA (wood glue) to the entire speaker panel surface, this will assure proper adhesion between the panel surface and the plaster coating. Important: Amina recommends you leave the PVA to dry for at least several hours, this will ensure the panel surface and surrounding areas are totally dry, sealed... - Page 23 Plastering and decorating continued... Apply joint tape Apply professional plasterboard joint scrim (Amina recommend use of a self adhesive fibreglass scrim tape) over the joint between the speaker and the surrounding wall. Plastering Apply a second coat of PVA immediately before plastering.
-
Page 24: Setup Tips
Setup tips APU150 / APU350 / APU550 Your Evolution Series speaker must be used with the supplied APU protection device or > another approved protection device. For en models (supplied without an APU) an APU- RS8E rack mount device or an Amina approved active device (such as Cloud EQ in commercial systems) should be used. - Page 25 Setup tips Speaker Orientation > The Evolution Series can be installed either in portrait or landscape orientations. Typically the spacing between wall joists will dictate portrait orientation and Amina have optimised the dispersion characteristics for this setup. Therefore when installing into walls Amina suggest portrait orientation for best sound quality.
-
Page 26: Further Details
If the product needs repairing, please return it to your supplier or Amina Technologies Ltd again leaving as much plaster on the panel surface as possible. Once repaired, the product can be refixed into position following appropriate installation steps detailed earlier within the manual. -
Page 27: Troubleshooting
Troubleshooting Thorough testing of the speakers should be carried out both prior to and after plastering to avoid time consuming repairs or modifications at a later stage. Should you encounter any problems at either of the test stages the following guide is designed to help determine possible problem areas. -
Page 28: Specifications
EQ pass pass with EQ Fuse protection Self-resetting, current sensing type Compatibility AIW150E / 150S200 AIW350E / 350S200 AIW550E Number of channels Connection type Heavy duty lever action connection for input and output on each channel Maintenance requirements... -
Page 29: Spacesaver Information
Spacesaver information Using the Cut out Template for pre-install IQamina-spacesaver.pdf 1 29/10/2013 16:42:02 Staple to plasterboard/ drywall to act as a CUT HOLE THIS SIZE template. Invisible Loudspeaker Cutout Template Hole Size (WxH): 12” [305mm] X 15 15/16” [405mm] Using the cut out template 1. -
Page 30: Warranty Information
At the end of the speakers useful life and in compliance with the European directive on waste electrical and electronic equipment (WEEE), this product is to be returned to your supplier, or directly to Amina for recycling. If you have any questions please contact Amina Technologies Ltd. -
Page 31: Accessories
Accessories APU150, APU350 and APU-RS8E Passive, in-line protection units for Evolution Series speakers are available in 2-channel versions and in an 8-channel, 1U rack mountable version. AIW150 & AIW150-S200 – APU150 (2-channel) / APU-RS8E (8-channel) AIW350 & AIW350-S200 – APU350 (2-channel) / APU-RS8E (8-channel) AIW550 - APU550 (2-channel) / APU-RS8E (8-channel) These protection devices are required to be connected between Evolution speakers and your power amplifier under Amina’s warranty conditions. - Page 32 Amina Technologies Ltd Cirrus House, Glebe Road, Huntingdon Cambridge, PE29 7DL, UK T: +44 (0) 1480 354390 E: inspired@amina.co.uk W: www.amina.co.uk North America Direct: 1-905 655 6411 Toll free: 1-866 462 6462 Toll free Fax: 1-888 329 2491 E: salesna@amina.co.uk...
Need help?
Do you have a question about the Evolution AIW150E and is the answer not in the manual?
Questions and answers