Table of Contents
Advertisement
Quick Links
Audio for very smart homes
Installation Guide
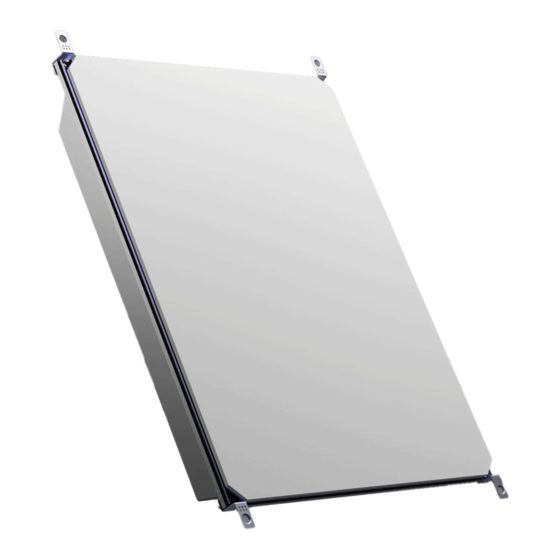
Amina MobiusiB, Plaster Over Invisible
Loudspeakers
This installation guide covers installation of the Amina MobiusiB Invisible loudspeakers into cavity
walls and ceilings.
Other installation guides are available to download at www.aminasound.com for walls built with
different construction methods.
Always choose the installation guide that matches the speaker and wall type for your installation.
®
Compatibility
THE INVISIBLE SPEAKER CO.
V0 draft 6 June 2019
®
Advertisement
Table of Contents

Related Manuals for Amina MobiusiB


Summary of Contents for Amina MobiusiB
- Page 1 Installation Guide Amina MobiusiB, Plaster Over Invisible Loudspeakers Compatibility This installation guide covers installation of the Amina MobiusiB Invisible loudspeakers into cavity walls and ceilings. Other installation guides are available to download at www.aminasound.com for walls built with different construction methods.
- Page 2 This method must not be used to install MobiusiB speakers into other wall types. Refer to www.aminasound.com to download installation guides for installation of the MobiusiB speaker into other wall types. What’s in the box The following items are included with each...
-
Page 3: Table Of Contents
Contents Caution: Read before installing this Testing ................ 22 product ................1 Testing the speaker ......... 22 Environmental ............3 Resistance test ..........22 Sound in your home ..........4 Connect the APU protection device..22 Sound in your work or leisure Sweep test ............ -
Page 4: Caution: Read Before Installing This
Amina Loudspeaker. All debris, loose screws, Amina loudspeaker be sure to check the excess materials etc, should be removed from appropriate regulations pertaining to the above ceilings to avoid unwanted rattles. -
Page 5: Product
• Do not attempt to modify or repair the product. Contact your distributor or Amina if a fault should occur. • When plastering over, ensure only 2mm of material covers the product. More than this will degrade the performance of the product and could lead to product failure. -
Page 6: Environmental
The use of the product • Amina Technologies take no directly embedded in solid walls is responsibility for inappropriate use of not recommended in multi occupancy materials and environmental conditions buildings. -
Page 7: Sound In Your Home
This creates an entertaining yet naturally person talking, a conventional speaker, a comfortable sound field for users and TV or an Amina speaker) will transfer in air occupiers. through open doors, ventilation structures, At the same time the physical embodiment... -
Page 8: Message From The Managing Director
At Amina we are proud of being at the years. forefront of flat panel Active Sound Board loudspeaker technology. All Luxurious hotels &... -
Page 9: Introduction
Check that your carton contains the This installation guide covers installation correct number of items and accessories. of the Amina MobiusiB range of Invisible loudspeakers into cavity walls and ceilings Retain this Installation Guide. If you pass of plasterboard construction. -
Page 10: Overview
5. Mounting tab x 4 6. Integrated Backbox 7. Active panel surface 8. Mounting strips The MobiusiB speaker is supplied with three connector options for the speaker wiring. • Conventional tubular splices that require a crimp tool for fitting (non-removable). •... -
Page 11: Setup Tips
However, if the room has Being planar (or flat) means that the a height greater than 4m (13’), Amina audio’s arrival time to the listener is the suggests installing them in the walls at a same for all frequencies, i.e. - Page 12 The cable connectors supplied with the MobiusiB speaker require 14 - 16AWG cable. For critical listening in ceilings, e.g. a Amina recommends you connect your 5.1 surround system, ensure that the...
-
Page 13: Installation
MobiusiB loudspeaker. To avoid any possible damage to Amina invisible loudspeakers they must be connected using the correct accessories, supplied by Amina. The tables to follow list these accessories. Speaker protectors Amina APU series speaker protectors are specifically designed to work with Amina invisible loudspeakers. - Page 14 Flexible 8 channel high pass filter and protection unit in a 1U case for optional rack mounting. Provides protection for installations of up to 8 Amina MobiusiB loudspeakers of any type. APU-RS16iC 16 channel high pass filter and protection unit in a single 1U case.
-
Page 15: Cutting The Opening For The Speaker
Installation Cutting the opening for the speaker Top view of plasterboard wall IMPORTANT: Studwork The MobiusiB must be fixed to the Stainless screws plasterboard only, using the supplied fix the speaker to mounting strips or suitable alternatives. the fixing strip... -
Page 16: Locating Joist Work
Ensure the spacing between them is at least 5mm greater than the width of the MobiusiB speaker. The following method is highly recommended to measure the distance between the joists. -
Page 17: Check Width Between The Joists
Installation Cutting the opening for the speaker Check width between the joists Measure from the centre of the opening to the joist on the left (A in the top image) and the joist on the right (B in the bottom image). -
Page 18: Fix The Template To The Wall
Installation Cutting the opening for the speaker CAUTION: We strongly advise that joists are not cut to make space for the speaker. Any activity of this sort may well influence the structural integrity of your property. Fix the template to the wall The speaker is supplied with a template. -
Page 19: Remove The Cut Section
Installation Cutting the opening for the speaker Remove the cut section Lift out the cut section of the wall. Check the size of the opening. This should measure - Speaker Opening size Mobius7iB 456mm x 355mm (18” x 14”) Mobius5iB 456mm x 355mm (18”... -
Page 20: Fitting The Speaker
Installation Fitting the speaker Fitting the mounting strips The MobiusiB is supplied with two 1 0 0 m m mounting strips. These are secured behind the upper and lower edges of the opening cut for the speaker. The mounting screws for the speaker will fasten into these. -
Page 21: Feed The Cable
Installation Fitting the speaker Feed the cable 14-16AWG Feed the cable from the amplifier to the opening where the speaker will fit. NOTE: Cable gauge must be either 14AWG or 16AWG to ensure compatibility with the connector splices provided with the loudspeaker. -
Page 22: Splice Options
Installation Fitting the speaker Splice options Amina MobiusiB speakers may be supplied with a choice of different connector splice options to join the cable from the amplifier to the speaker wires. The instructions on this page show connection using lever splices. If you prefer to use other types of splice, refer to the leaflet supplied with the splices. -
Page 23: Fit The Speaker Into The Wall
Installation Fitting the speaker Fit the speaker into the wall CAUTION: Before fitting the speaker, check the routing of your speaker cable. The cable and connector block should be positioned clear of the speaker back box. • Secure the cable to an adjacent joist if necessary. -
Page 24: Fix The Speaker In Place
Installation Fitting the speaker Fix the speaker in place The speaker is fixed through the plasterboard and into the mounting strips behind the opening. • Secure the speaker in place with the four stainless steel, countersunk screws (supplied). CAUTION: Ensure that the screws remain perpendicular to the wall as they are driven in. -
Page 25: Testing
APUi Resistance test Sweep test Using a multimeter and without the APU Amina recommends a tone sweep protection device connected, check the be used at a moderate volume level nominal impedance (DC resistance) of the (0.5 Vrms). Such a test will quickly... -
Page 26: Problems During Test
Testing Problems during test If you encounter any rattling or buzzing problems during test, check the following section to resolve these issues. CAUTION: Never proceed with plastering until the speaker has passed both sweep and music tests. The following list may help you trace the cause of any rattling or buzzing problems. -
Page 27: Finishing
Finishing Preparing the speaker for plastering Filling the perimeter • Before proceeding, check that the gap around the speaker is approximately 2mm all the way around. • Fill the gap with plaster to bond the edge of the panel to the edge of the plasterboard. -
Page 28: Plastering
Finishing Plastering Full plaster skim coat CAUTION: Never proceed with plastering until the speaker has passed both sweep and music tests. CAUTION: The maximum total plaster thickness must be no more than 2mm. CAUTION: The working environment must be dry enough to allow the plaster finish coat to dry within hours, not days. -
Page 29: Cutaway View
Finishing Cutaway view This cutaway view shows a section through the finished installation. 2mm gap fill Wall Fixing strips Skim Speaker panel Edge fill Speaker chassis Speaker housing Click here to return to the index on page 2... -
Page 30: Decorating
Decorating Drying Allow your plasterwork to dry completely. Re-test Before decorating, test the speaker again with a frequency sweep and music. CAUTION: 100Hz - 1kHz Do not use a battery or DC voltage supply to check continuity or phase check as there is no forward or backward movement of the panel. -
Page 31: Decorating
This has the potential to work its way back to the Amina loudspeakers exposing them to an unacceptably damp environment for an extended period. Bare plaster surfaces must be pre-treated with a primer / sealing coat that is permeable during its drying process. -
Page 32: Final Test
Final Test Checking the completed installation With decorating completed, run a final test of all the speakers in the system independently. CAUTION: 100Hz - 1kHz Do not use a battery or DC voltage supply to check continuity or phase check as there is no forward or backward movement of the panel. -
Page 33: Maintenance And Cleaning
If damage to the plaster work occurs, use repair plaster to restore the plaster surface prior to re-decorating. Amina Technologies Ltd recommends British Gypsum Gyproc- Joint-Filler as a repair plaster. Avoid pushing the wall or ceiling surface immediately in front of the speaker. -
Page 34: Accessories
ALF120 Amina have developed an astonishing subwoofer technology dubbed ‘distributed transmission line’ (DTL), which allows the design of a subwoofer thin enough to be... -
Page 35: Troubleshooting
If so, the product frequency response of the loudspeaker may need to be returned to Amina for before and after plastering. repair or replacement. •... -
Page 36: Distortion, Buzzing Or Rattles At Modest Volumes
The speaker • If the rattle persists, remove the will need to be sent to Amina for repair speaker from the wall and check your or replacement. wiring to the product. Ensure that wires,... -
Page 37: Specifications
Specifications Mobius series - Plaster over products Model number Mobius3B Mobius5iB Mobius7iB Dimensions (excluding 402mm x 304mm x 80mm 452mm x 349mm x 80mm 452mm x 349mm x 80mm ” x 12” x 3 ”) ” x 13 ” x 3 ”) ”... -
Page 38: Fire Resisting Installation
If an installation does require fire resistance then it will be necessary to install an Amina fire hood with each Mobius speaker, or create a fire-resisting compartment to the rear of the loudspeaker. -
Page 39: Contact Information
Contact information Amina Technologies Ltd Cirrus House, Glebe Road, Huntingdon Cambridge, PE29 7DL, UK T: +44 (0)1480 354390 E: info@aminasound.com - general enquiries and career opportunities E: support@aminasound.com - expert advice E: sales@aminasound.com - sales team W: www.aminasound.com Registered in the UK, company no: 3656822... - Page 40 ® THE INVISIBLE SPEAKER CO. Audio for very smart homes ® Amina Technologies Ltd Cirrus House, Glebe Road Huntingdon, Cambs, PE29 7DL England T: +44 (0)1480 354390 W: www.aminasound.com / E: info@aminasound.com Copyright 2019 MobiusiB new wall V0 draft 6...
Need help?
Do you have a question about the MobiusiB and is the answer not in the manual?
Questions and answers