Table of Contents
Advertisement
Quick Links
Advertisement
Table of Contents

Related Manuals for Amina BackboxSW 345


Summary of Contents for Amina BackboxSW 345
- Page 1 Installation guide BackboxSW 345/300/200...
-
Page 3: Table Of Contents
Index Caution: Read before installing this product ............4 Introduction ..........................4 Compatibility ........................4 Unpacking ..........................5 Unpack the unit........................5 Contents ..........................5 Overview .............................5 Installation ..........................6 BackboxSW size ........................6 Cavity size ..........................6 Marking up ..........................6 Final cavity depth ......................6 Removable plastic trim ....................6 Retrofit / pre-skimmed solid wall cutaway (Feathered plaster finish) ..7 Cavity depth ........................7 Finishing ..........................7... -
Page 4: Caution: Read Before Installing This Product
Caution: Read Introduction before installing Thank you for purchasing the Amina Technologies BackboxSW. This product this product has been designed to be used in the installation of Amina Series Invisible • To ensure correct installation, please Loudspeakers into solid (eg. brick, read this guide carefully and keep in concrete) walls and ceilings. -
Page 5: Unpacking
Unpacking Unpack the unit. Contents Retain this User Guide. If you pass the The carton should contain: unit on to a third party make sure you • BackboxSW (200, 300 or 345) pass on the User Guide. • Template Retain the packaging. If you dispose of •... -
Page 6: Installation
Installation BackboxSW size Final cavity depth Before starting work, check which The depth of cavity for the BackboxSW is speaker you are installing and refer to critical in ensuring that the plaster skim the table on page 4 to ensure that you over the speaker surface is exactly the have the correct model of BackboxSW. -
Page 7: Retrofit / Pre-Skimmed Solid Wall Cutaway (Feathered Plaster Finish)
Installation Retrofit / pre-skimmed solid wall cutaway (Feathered plaster finish) For solid walls /ceilings that have already Existing plaster been plastered and painted. skim Cavity depth Existing render The cutaway drawing on the right shows the alignment of the BackboxSW in the cavity. -
Page 8: Retrofit / Pre-Skimmed Solid Wall Cutaway (Patch Plaster Finish)
This method positions the speaker to be patch plastered with a 2mm ( ”) skim across the speaker front and blended with the existing plaster. Amina recommend British Gypsum Easi- fill® which allows a smooth accurate finish using fine sandpaper or a wet sponge. -
Page 9: New Build/New Solid Walls Cutaway (Full Wet Skim Finish)
Installation New build/New solid walls cutaway (Full wet skim finish) For solid walls /ceilings that are yet to be rendered or have already been rendered but not yet plaster skimmed. Render coat Cavity depth The cutaway drawing on the right shows the alignment of the BackboxSW in the cavity. -
Page 10: Cutting Cavities
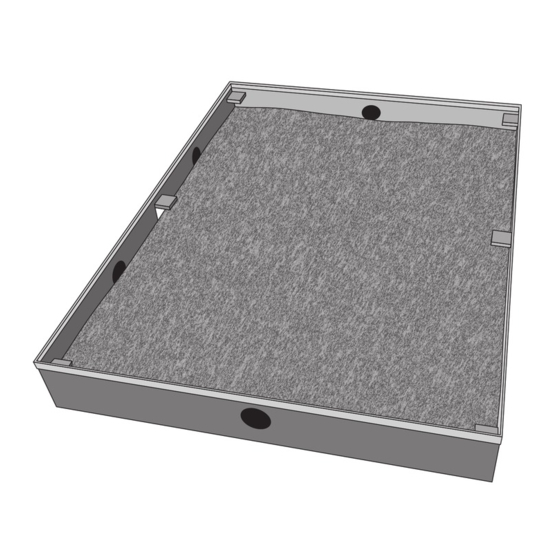
Installation Cutting cavities • Remove the denim pad from the BackboxSW and set it aside for use when fitting the speaker. • Cut each cavity into the masonry using the combination of an angle grinder and a jackhammer drill. When the cavity is close to size, test the fit of the BackboxSW in the cavity occasionally. -
Page 11: Mounting The Backboxsw
Installation Mounting the BackboxSW • Make a small hole in the rubber grommet at the cable entry point and pull the speaker cable through it and into the BackboxSW. • There are four keyhole slots in the back of the BackboxSW. Using suitable screws and wall plugs (not supplied), fix the BackboxSW to the brickwork/concrete within the cavity. -
Page 12: Fixing The Speaker
Installation Fixing the speaker Top view • Re-fit the denim damping pad into the BackboxSW. • Connect the speaker to the cable. • Remove the backing paper from the 6 adhesive pads on the speaker mounting tabs. It is imperative that the foam pads remain in place. -
Page 13: Removal
If any products become damaged during Then, with a sharp chisel or decorator’s removal, please return them to Amina scraper, carefully chip into the plaster to Technologies Ltd where the product can expose a small area of the panel surface. -
Page 14: Warranty
British Gypsum Ltd commercial applications and ten years in residential applications. Amina is a registered trademark of Amina Technologies Ltd At the end of the product’s useful life it should be responsibly receycled. The structural backbox is stainless steel, the denim pad is cotton. - Page 16 Amina Technologies Ltd Cirrus House, Glebe Road Huntingdon, Cambs, PE29 7DL England T: +44 1480 354390 W: www.amina.co.uk / E: inspired@amina.co.uk Copyright 2016 BackboxSW 2015 V1.1...
Need help?
Do you have a question about the BackboxSW 345 and is the answer not in the manual?
Questions and answers