Table of Contents
Advertisement
Quick Links
User Manual
Color video door phone CDV-71UM
• Thank you for purchasing COMMAX products.
• Thank you for purchasing COMMAX products.
• Please carefully read this User's Guide (in particular, precautions for safety) before using a product and follow
• Please carefully read this User's Guide (in particular, precautions for safety) before using a product and follow
instructions to use a product exactly.
instructions to use a product exactly.
• The company is not responsible for any safety accidents caused by abnormal operation of the product.
• The company is not responsible for any safety accidents caused by abnormal operation of the product.
Advertisement
Table of Contents

Related Manuals for Commax CDV-71UM


Summary of Contents for Commax CDV-71UM
-
Page 1: User Manual
User Manual Color video door phone CDV-71UM • Thank you for purchasing COMMAX products. • Thank you for purchasing COMMAX products. • Please carefully read this User’s Guide (in particular, precautions for safety) before using a product and follow • Please carefully read this User’s Guide (in particular, precautions for safety) before using a product and follow instructions to use a product exactly. -
Page 2: Table Of Contents
Greetings ● Thank you for choosing COMMAX. ● Please read this manual carefully before you use the product. Table of contents Greetings ........................1 Contents table ......................1 1. Warnings and caution ...................2 2. Part Names ......................4 3. Function and Description ..................5 4. -
Page 3: Warnings And Caution
1. Warnings and caution Please follow the things described below in order to prevent any danger or property damage. Prohibition. Warning No disassembly It may cause a serious damage or injury if violated. No touch Must follow strictly. Caution Shows plugging out the power cord It may cause a minor damage or injury if violated. - Page 4 Warning Please don’ t disassemble, If an abnormal sound, burning Please don’t insert any Please use only the designated repair or rebuild this product smell or smoke is coming out metallic or burnable materials batteries for the products of arbitrarily (please contact the of the product, please plug out into the ventilation hole.
-
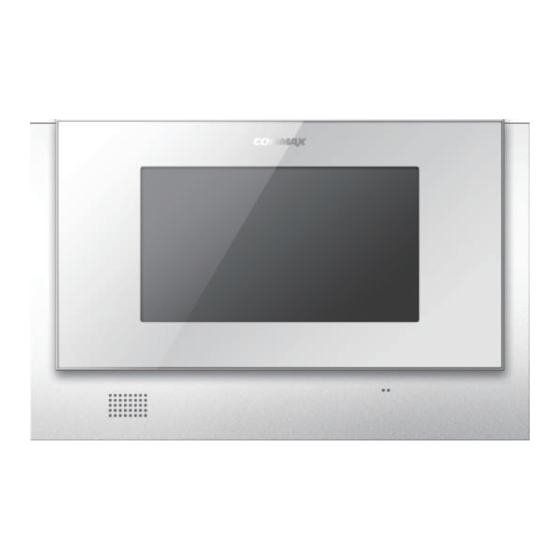
Page 5: Part Names
2. Part Names Description Description LCD Touch Screen Volume control Speaker Talk button SD Card Slot Door release button Power lamp Power switch Microphone Connecting terminal • This videophone product provides different functionality for connecting the second door camera. At the time of booting, the built-in program checks the connectivity of the second door camera and commands to supply the power to the second camera. -
Page 6: Function And Description
3. Function and Description Stand-by mode • As power is turned on by power switch, the blue LED located at the bottom of the front panel is turned on and the booting logo is displayed. After a few seconds, you will hear the beep tone and the videophone is now in standby mode. - Page 7 - If the " " icon is touched during a call from a videophone to a door camera, the handset of the interphone can be picked up to enable 3-way call. - If a visitor presses a paging button from the door camera 2 during a call between the videophone and the door camera 1, the first call from the door camera 1 is ended and the connection to the door camera 2 is made automatically.
- Page 8 (8) Video recording function • This function is activated when the settings is set to record video. If set as "Automatic Saving", the video is recorded every time paged from a door camera. When paged, recorded for 30 seconds and when talking, recorded for 60 seconds. The maximum recorded time is 90 seconds (30 seconds when paged + 60 seconds when answered) Caution 1 : Do not remove SD Card while recording still images or video.
- Page 9 Managing Folder and File Root folders created . \MOVIE . \PICTURE If below icon is displayed on the screen, please backup the data. ⇨ Recorded file name and format 000001C1.jpg 000002C2.jpg Still image 000003D1.jpg 000004D1.jpg 000001C1.asf 000002C2.asf Video 000003D1.asf 000004D2.asf...
- Page 10 ⇨ Limit of files for various SD Card size SDHC Card Size 4 GByte 8 GByte 16 GByte Still Images Limit of Video Files max 380 max 750 max 1,500 (60 Second long) Recording time Appx. 380 min Appx. 750 min Appx.
-
Page 11: Gui Description
4. GUI Description (1) As Powered On As powered on, the "COMMAX" booting logo is displayed and the system checks SD Card memeory availability. The SD Card icon "___" is displayed and the message, "SD CARD CHECKING..." is displayed on the screen. As the system initializing is completed, a beep sounds and the screen becomes off to enter standby mode. - Page 12 Icons and description Icon Description Function Checking Visitor Check recorded video or still images of visitors. Menu Settings Setup functions. Camera_1 Call or monitor the Door Camera_1. Camera_2 Call or monitor the Door Camera_2. CCTV_1 Monitor CCTV Camera_1 view. CCTV_2 Monitor CCTV Camera_2 view.
- Page 13 Icons and description Icon Description Function Video Check visitors of recorded video. Still Image Check visitors of still images. Home Return to main menu. Prev Move to previous menu. Recorded videos and still images are listed in 4 split screen in chronological order with time. Icons and description Icon Description...
- Page 14 (4) Check video As a single video is selected from the 4 split screen, the screen turns to full screen to playback the selected video. To delete the video, touch icon. Icons and description Icon Description Function Prev Move to previous menu or screen. Move to previous page.
- Page 15 (5) Delete recorded video Touch icon to delete the video. Touch "Yes" to delete. Icons and description Icon Description Function Prev Move to previous menu or screen. Move to previous page. DOWN Move to next page. Delete Delete the selected video. Command to delete.
- Page 16 (6) Settings Time, display, and language setup are enabled in Settings menu. Icons and description Icon Description Function Time Setting Date and time setup. Display Setting Display setup for contrast, brightness, hue. Language Setting Language setup (8 languages supported) Setting (More) Settings menu for other functions.
- Page 17 (7) Time The time stamp for recorded video and still images are recorded according to time setup in this menu. The year, month, date, hour and minute can be adjusted by left and right button. Touch the category to adjust. Touch Icon to complete the setup.
- Page 18 (8) Display Brightness, contrast, and hue can be set in this menu. Touch the category that you wish to adjust. Touch " " or " " Icon to change the value. Icons and description Icon Description Function BRIGHTNESS Adjust the brightness. CONTRAS Adjust the contrast.
- Page 19 (9) Language Language setup is enabled in this menu (Default language settings is English). Select the language you wish to set and touch to complete the settings. Icons and description Icon Description Function Save Save the language settings. Cancel Cancel the language settings. Home Return to main menu.
- Page 20 (10) More (settings for other functions) Settings for Saving Method (video or still image), Reset All Settings, Automatic/Manual Saving, and Motion detection (of CCTV camera) is enabled in this menu. Icons and description Icon Description Function Saving Method Recording option setup. (Video / Still image) All settings of the device including recorded All Initialization (Reset All Settings)
- Page 21 (11) Saving Method Recording option can be selected between video and still image. If video is selected, video is recorded and audio is also recorded for door camera recording. CCTV camera recording is only for video. If still image is selected, only the still image is recorded. Icons and description Icon Description...
- Page 22 (12) Reset All Settings This function resets all settings of the device to initial settings and inserted SD Card memory is formatted. All the recorded video and still images on the SD Card are completely deleted if "Reset All Settings" function is performed with the SD Card memory inserted in the device.
- Page 23 Icons and description Icon Description Function All settings of the device is set to initial settings and All Initialization (Reset All Settings) the inserted SD Card is formatted (Time and Language settings remain). Start reset all settings. Cancel reset all settings. Home Return to main menu.
- Page 24 (13) Automatic/Manual Saving This function is to select Automatic or Manual Saving option. Icons and description Icon Description Function Automatic Set recording option to automatic. Saving Manual Saving Set recording option to manual. Save Save Automatic/Manual Saving option settings. Cancel Cancel Automatic/Manual Saving option settings.
- Page 25 (14) MOTION Detection (including the sensitivity settings) The motion detection recording option of CCTV camera and its sensitivity can be set (Ref. Only one camera is recorded at a time and motion detection function applies to one camera as well. When door camera button is pressed while the CCTV camera motion detection recording is on, the recording channel is instantly changed to door camera from the CCTV camera).
- Page 26 (15) Page, Call, and Door release When paged from a door camera or the visitor icon is touched, the door camera view is displayed on the LCD screen. As the door camera view is displayed on the screen, touch the call icon connect to the door phone.
- Page 27 Icons and description Icon Description Function To start a call or end a call. Call Door release Touch to release a door lock during a call. Record video or still images manually by Manual Saving touching the icon during a call. Reject call Reject a call when paged from a door camera(video and ringtone become off (Exit)
- Page 28 (16) Interphone To page an interphone connected to the videophone In standby mode, touch the interphone icon to turn the touch screen to interphone mode. Touch the interphone call icon to make a call to an interphone. (*** when you page the interphone, you need to keep touching the icon). As the handset of the interphone is picked up, the call is made.
- Page 29 Icons and description Icon Description Function Call Start or end a call. Reject a call from an interphone (screen and ringtone are off and Reject (Exit) enter standby mode) or Exit from current menu Intephone Page an interphone.
-
Page 30: Wiring Schematic
5. Wiring schematic Camera connecting terminal (4 wires with polarity) 1. RED: Voice signal input 2. BLUE: GND 3. YELLOW: Power (+12V) 4. WHITE: Video signal input Sensor connecting terminal (3 wires with polarity) 1. RED: Power (+12V) 2. BLUE: GND 3. YELLOW: SENSOR Signal input CCTV Connector (2 wires with polarity) 1. - Page 31 CCTV Camera wiring ♠ CCTV CAMERA requires a separate power supply. ♠ Use the proper cable (Coaxial Cable) with appropriate specification for various distances between the CCTV CAMERA and the videophone. #① : RED--(VIDEO) #② : Blue-(GND)
-
Page 32: Product Components
6. Product components User Manual Wall Bracket Monitor(CDV-71UM) Mounting screw Monitor fixing Screw (4EA) (1EA) CCTV Camera Connector (2PX2EA) Door Camera Connector InterPhone Connector (4PX2EA) (4PX1EA) -
Page 33: Caution In Use
1. Turn on the power switch. 2. Please contact your local agent for product maintenance when you have a problem in use of CDV-71UM 3. For your safety, power switch with a safety device must be used in your building. - Page 34 513-11, Sangdaewon-dong, Jungwon-gu, Seongnam-si, Gyeonggi-do, Korea Int’l Business Dept. Tel. : +82-31-7393-540~550 Fax. : +82-31-745-2133 Web site : www.commax.com PM0771UM0010 Printed In Korea / 2014.05.104...
Need help?
Do you have a question about the CDV-71UM and is the answer not in the manual?
Questions and answers