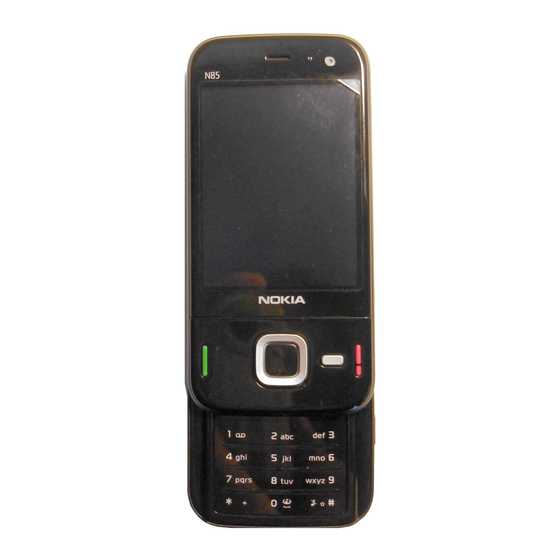
Nokia N85 User Manual
Hide thumbs
Also See for N85:
- User manual (385 pages) ,
- Get started (22 pages) ,
- Sevice manual (20 pages)
Table of Contents
Advertisement
Quick Links
Advertisement
Table of Contents

Related Manuals for Nokia N85


Summary of Contents for Nokia N85
- Page 1 Nokia N85 User Guide Issue 1.0...
- Page 2 Nokia Corporation. Other product and company names mentioned herein may be trademarks or tradenames of their respective owners. Reproduction, transfer, distribution, or storage of part or all of the contents in this document in any form without the prior written permission of Nokia is prohibited.
- Page 3 TO THE ACCURACY, RELIABILITY OR CONTENTS OF THIS DOCUMENT. NOKIA RESERVES THE RIGHT TO REVISE THIS DOCUMENT OR WITHDRAW IT AT ANY TIME WITHOUT PRIOR NOTICE. The availability of particular products and applications and services for these products may vary by region. Please check with your Nokia dealer for details, and availability of language options.
-
Page 4: Table Of Contents
Web feeds and blogs............32 Find help............16 Widgets................32 Content search...............33 Instructions inside - In-device help......16 Download and purchase items........33 Get started..............16 Bookmarks..............34 Nokia support and contact information.....16 Empty the cache............34 Additional applications..........17 End the connection............34 Software updates............17 Connection security............35 Application Update............17 Web settings..............35 Settings................18... - Page 5 Streaming links.............95 Extra services for Maps..........57 Presentations..............95 Music folder..........61 Home network...........96 Music player..............61 About home network...........96 Nokia Music Store............65 Settings for home network..........97 FM transmitter...............66 Set sharing on and define content......97 Nokia Podcasting............67 View and share media files..........98 Radio................70 Copy media files............99 Camera............75...
- Page 6 View and download video clips.........100 Make a video call............125 Video feeds..............101 Options during a video call........126 My videos..............101 Answer or decline a video call........127 Transfer videos from your PC........102 Video sharing..............127 Video centre settings..........102 Log................129 N-Gage............104 Internet calls..........132 About N-Gage..............104 About internet calls............132 N-Gage views...............104 Activate internet calls..........132...
- Page 7 Index............182 File manager..............150 Voice commands............150 Sync................151 Device manager............152 Speech .................152 Settings............154 General settings............154 Phone settings............160 Connection settings............162 Application settings............167 Troubleshooting........168 Nokia original enhancements....172 Enhancements.............172 Battery................172 Battery and charger information.....173 Battery and charger information......173 Nokia battery authentication guidelines....174 Care and maintenance......176...
-
Page 8: Safety
Safety Read these simple guidelines. Not following them ENHANCEMENTS AND BATTERIES may be dangerous or illegal. Read the complete user Use only approved enhancements and guide for further information. batteries. Do not connect incompatible SWITCH ON SAFELY products. Do not switch the device on when wireless WATER-RESISTANCE phone use is prohibited or when it may Your device is not water-resistant. -
Page 9: Network Services
Third-party sites all networks; other networks may require that you are not affiliated with Nokia, and Nokia does not make specific arrangements with your service provider endorse or assume liability for them. If you choose to before you can use the network services. -
Page 10: Get Started
— End key — Multimedia key — Light sensor — Secondary camera — Power key — Nokia AV Connector for compatible headsets, headphones, and TV-out connectors — Micro USB connector for charger and to connect — Earpiece to a compatible PC... -
Page 11: Keys And Parts (Back And Sides)
Keys and parts (back and Short Slide keys sides) Short slide keys enable multitasking. For example, if you are viewing images, with the Music player on the background, and you want to skip to the next or the previous track, press the Play/Pause key to make the forward and rewind keys available. -
Page 12: Switch The Device On
For more contact area on the information, contact a Nokia Care point or your card is facing down. device dealer. Insert the battery. To replace the cover, direct... -
Page 13: Charge The Battery
Charge the battery Depending on a type of device that is used for charging , it may take a while for charging to Regular charging start. If the device is switched on, you can select from Connect a compatible charger the USB mode options on the display of the to a wall outlet. - Page 14 Note that the Bluetooth, WLAN, GPS, and FM transmitter antennas are located in the back cover of your device. If you change the back cover, check that the new cover includes these antennas, otherwise these connections stop working.
-
Page 15: Get Connected
Get connected Nokia AV Connector (3.5 mm) — to connect to ● compatible headsets, headphones, home stereo sets, or TVs USB data cable — to connect to compatible ● devices, such as printers, PCs, and to charge your device See "USB", p. 44. -
Page 16: Find Help
If you click on information, downloads, and services related to an underlined word, a short explanation is your Nokia product. You may also download free displayed. Help uses the following indicators: configuration settings such as MMS, GPRS, e-mail, shows a link to a related help topic. -
Page 17: Additional Applications
The download and installation may take up to 20 applications are explained in the guides that are minutes with Device manager and up to 30 minutes available on the product support pages of the Nokia with Nokia Software Updater. website. -
Page 18: Settings
See "Settings", p. 154. apply. For more information, contact a Nokia Care point or your device dealer. Personal unblocking key (PUK) code and PUK2 ●... -
Page 19: Prolong Battery Life
If the network mode is set to dual mode in the on battery power. WLAN on your Nokia device network settings, the device searches for the switches off when you are not trying to connect, UMTS network. -
Page 20: Free Memory
Exit. Images and video clips in Photos. Back up the ● To turn on the power save mode, press the power ● files to a compatible PC using Nokia Nseries PC key, and select Activate power saving. To turn Suite. -
Page 21: Your Device
SIM card, you can insert your SIM card in it. When device available in the Welcome application. your Nokia N85 is switched on without a SIM card, the offline profile is automatically activated, and To access the Welcome application later, press transfer can be done. - Page 22 Nokia N85. With retrieval, content is transferred application is sent to the other device as a from the other device to your Nokia N85. You may message. To install the Switch application on the be asked to keep or delete the original content in other device, open the message, and follow the the other device, depending on the device model.
-
Page 23: Display Indicators
Use shortcuts to repeat a transfer You have received new e-mail in the remote mailbox. After a data transfer, you can save a shortcut with There are messages waiting to be sent in the the transfer settings to the main view to repeat the Outbox folder. -
Page 24: Shortcuts
A compatible text phone is connected to the Bluetooth connectivity is on. See "Bluetooth device. connectivity", p. 40. A data call is active (network service). Data is being transmitted using Bluetooth connectivity. When the indicator is blinking, your A GPRS packet data connection is active (network device is trying to connect with another device. -
Page 25: Navi™ Wheel
To change the profile, press the power key, and When the Navi wheel setting is switched on, you can select a profile. scroll quickly through Photos, Music Player, Nokia Video Centre, Contacts, and Messaging lists, or the To switch between the General and Silent profiles, multimedia menu. -
Page 26: Mobile Search
selected content is shown in the appropriate Contacts — Add your own contacts, send ● application. messages, or make voice calls. To add a new contact to an empty position on the list, press To open or close the the scroll key, and select a contact. To send a multimedia menu, message, in the multimedia menu, select a press the multimedia... -
Page 27: Headset
To use the headphones with a You can connect a compatible headset or remote control unit, connect compatible headphones to your device. You may the unit to the Nokia AV need to select the cable mode. Connector (3.5 mm) in the device, then connect the headphones to the unit. -
Page 28: Volume And Loudspeaker Control
To activate the offline profile, press the power key headset, other than those approved by Nokia for briefly, and select Offline. Or, press , and select use with this device, to the Nokia AV Connector, pay Tools Profiles > Offline. -
Page 29: Fast Downloading
profiles. If the device has been locked, enter the lock For availability and subscription to data connection code. services, contact your service provider. When you have activated the offline profile, you can HSDPA only affects the download speed; sending still use the wireless LAN, for example, to read your data to the network, such as messages and e-mail, e-mail or browse on the internet. -
Page 30: Web Browser
Web browser With the Web browser, you can view hypertext markup language (HTML) web pages on the internet Important: Only install and use applications as originally designed. You can also browse web and other software from trusted sources, such as pages that are designed specifically for mobile applications that are Symbian Signed or have devices, and use extensible hypertext markup... -
Page 31: Browser Toolbar
To save the web address of the current page as a Press 8 to show the page overview of the current ● bookmark, select Options Save as bookmark. page. Press 8 again to zoom in and view the > desired section of the page. To view snapshots of the pages you have visited Press 9 to enter a new web address. -
Page 32: Navigate Pages
Web feeds and blogs Reload — Refresh the page. ● Subscribe to web feeds (if available) — View a ● list of available web feeds on the current web Web feeds are xml files on web pages that are used page, and subscribe to a web feed. -
Page 33: Content Search
widgets appear as separate applications in the These items can be provided free of charge, or you Applications folder. can purchase them. Downloaded items are handled by the respective applications in your device, for You can download widgets using the Download! example, a downloaded photo can be saved in application or from the web. -
Page 34: Bookmarks
Bookmarks feeds are commonly found on major news organisation web pages, personal weblogs, online communities that offer the latest headlines, and The bookmarks view opens when you open the Web article summaries. Web feeds use RSS and Atom application. You can select web addresses from a list or from a collection of bookmarks in the Recently technologies. -
Page 35: Connection Security
To delete the information the network server Access point — Change the default access point. ● collects about your visits to various web pages, Some or all access points may be preset for your select Options Clear privacy data > Cookies. device by your service provider;... - Page 36 Automatic reload — If you want the web pages Acc. point for auto-update — Select the ● ● to be refreshed automatically while browsing, desired access point for updating. This option is select On. only available when Automatic updates is on. Font size —...
-
Page 37: Connections
Connections Your device offers several options to connect to the A WLAN connection is established when you create internet or to another compatible device or PC. a data connection using a WLAN internet access point. The active WLAN connection ends when you end the data connection. -
Page 38: Wlan Wizard
WLAN wizard When the device is in the offline profile, you can still use WLAN, if available. Remember to comply with The WLAN wizard helps you to connect to a WLAN any applicable safety requirements when and manage your WLAN connections. establishing and using a WLAN connection. -
Page 39: Connection Manager
To start a search for available WLANs, select the The infrastructure operating mode allows two status and Search for WLAN. To set WLAN scanning kinds of communication: wireless devices are off, select the status and select WLAN scanning connected to each other through a WLAN access off. -
Page 40: Bluetooth Connectivity
> Profile, and Phonebook Access Profile. To ensure interoperability between other devices supporting Bluetooth connectivity Bluetooth technology, use Nokia approved enhancements for this model. Check with the About Bluetooth connectivity manufacturers of other devices to determine their compatibility with this device. -
Page 41: Security Tips
Settings When you are not using Bluetooth connectivity, to control who can find your device and connect to it, Press , and select Tools > Bluetooth. select Bluetooth My phone's visibility > > When you open the application for the first time, Hidden. -
Page 42: Pair Devices
To interrupt the search, select Stop. Select the device, and enter the passcode. The same passcode must be entered on the other Select the device with which you want to device as well. connect. Some audio enhancements connect If the other device requires pairing before data automatically to your device after pairing. -
Page 43: Remote Sim Mode
Receive data using Bluetooth the query, the remote device is added to the list of blocked devices. connectivity Remote SIM mode When you receive data through Bluetooth connectivity, a tone sounds, and you are asked if Before the remote SIM mode can be activated, the you want to accept the message. -
Page 44: Usb
Exit remote SIM mode. You can use your device with a variety of compatible PC connectivity and data communications applications. With Nokia Nseries PC Suite you can, for example, transfer images between your device Press , and select Tools Connectivity >... -
Page 45: Personalise Your Device
Personalise your device You can personalise your device by changing the memory card, save the themes in the device standby mode, main menu, tones, themes, or font memory first. size. Most of the personalisation options, such as To change the layout of the main menu, select Menu changing the font size, can be accessed through the view. -
Page 46: Set Tones In Profiles
Tools > Profiles. want to return to using the default tones, select audio theme 'Nokia'. You can use profiles to set and customise the ringing tones, message alert tones, and other tones You can change the sounds for different events for different events, environments, or caller groups. -
Page 47: 3-D Tones
In the tones list, select Download sounds (network direction to another. This setting is not available service) to open a list of bookmarks. You can select for all ringing tones. a bookmark and open a connection to a web page Reverberation —... -
Page 48: Modify The Main Menu
Modify the main menu theme. The active standby display shows application shortcuts, and events from applications To change the main menu view, in the main menu, such as calendar and press and select Tools Settings > > player. General Personalisation Themes Menu >... -
Page 49: Positioning (Gps)
The GPS receiver Your device is preconfigured to use the Nokia A-GPS should only be used outdoors to allow reception of service, if no service provider-specific A-GPS settings GPS signals. -
Page 50: Hold Your Device Correctly
GPS connection in a vehicle may take longer. Nokia A-GPS service over a packet data connection. The GPS receiver draws its power from the device battery. Using the GPS receiver may drain the Define an access point for A-GPS —... -
Page 51: Position Requests
application, select Options Map view When you receive a position request, a message is > > info. displayed showing the service that is making the request. Select Accept to allow your position If your device has found information to be sent or Reject to deny the satellites, a bar for each... -
Page 52: Gps Data
Route guidance Add to category — Add a landmark to a ● category in Landmarks. Select each category to Press and select Tools Connectivity > > which you want to add the landmark. Navigation. Send — Send one or several landmarks to a ●... -
Page 53: Trip Meter
In the position view, you can view the position information of your current location. An estimate of the accuracy of the location is displayed. To save your current location as a landmark, select Options Save position. Landmarks are saved > locations with more information, and they can be used in other compatible applications and transferred between compatible devices. -
Page 54: Maps
Maps About Maps Almost all digital cartography is inaccurate and incomplete to some extent. Never rely solely on the cartography that you download for use in this In addition to the features mentioned in the user guide, with Maps 2.0 you can also purchase a license device. - Page 55 is attempting to establish a GPS connection, the more information on data transmission charges, attempt is interrupted. contact your service provider. A GPS indicator is shown on the display. The maps are automatically saved on a compatible memory card (if inserted and set as the default One bar is one satellite.
-
Page 56: Download Maps
Nokia Map Loader new map is automatically downloaded if you scroll Nokia Map Loader is PC software that you can use to to an area which is not covered by maps already download and install maps from the internet to a downloaded. -
Page 57: Find A Place
Tip: Use Nokia Map Loader to save on mobile To send a saved place to a compatible device, in the data transfer fees. Places view, press the scroll key, and select Send. If you send the place in a text message, the information is converted to plain text. - Page 58 > files of the selected language. You can also Extras licenses. > download voice guidance files using Nokia Map Traffic and guide information and related services Loader. See "Download maps", p. 56. are generated by third parties independent of To change the language later, in the Maps main Nokia.
-
Page 59: Traffic Information
Traffic information prioritises walkways and smaller roads, and omits highways and motorways. The length of a walking To purchase a licence for a real-time traffic route is limited to a maximum of 50 kilometres (31 information service, select Options Extras >... - Page 60 Guides To purchase and download different kinds of guides, such as city and travel guides, for different cities to your device, select Options Extras > > Guides. The guides provide information about attractions, restaurants, hotels, and other points of interest. The guides must be downloaded and purchased before use.
-
Page 61: Music Folder
Music folder Music player Tip: You can access the Music player from the multimedia menu. You may have to refresh the music and podcast Warning: Listen to music at a moderate libraries after you have updated the song or podcast level. -
Page 62: Music Menu
switch to another open application, press and hold To fast forward or rewind, press and hold To close the player, select Options > Exit. To go to the next item, press . To return to the Music menu beginning of the item, press . -
Page 63: Home Network With Music Player
To add songs, albums, artists, genres, and You can also copy files from your Nokia device to composers to a playlist from the different views of other devices that are connected to the home... -
Page 64: Transfer Music To Your Device
Transfer with Windows Media Player compatibility from your device's product pages on the Nokia website. Music synchronisation functions may vary between Nokia Nseries PC Suite 2.1 or later ● different versions of the Windows Media Player application. For more information, see the... -
Page 65: Nokia Music Store
Sync..., and check the Sync this device country, visit music.nokia.com. automatically check box. To access the Nokia Music Store, you must have a Select the playlists you want to synchronise valid internet access point in the device. automatically in the Available playlists pane,... -
Page 66: Fm Transmitter
To open Nokia Music Store, press , and select The operating distance of the FM transmitter is up Music Music store. to a maximum of 3 metres (10 feet). The > transmission may be subject to interference due to To find more music in different categories of the... -
Page 67: Nokia Podcasting
Options > Exit. Podcasting settings To adjust the volume, use the volume function in Before using Nokia Podcasting, set your connection the receiving device. Listen to music at a moderate and download settings. level. Continuous exposure to high volume may damage your hearing. - Page 68 General topics, such as football or Automatic updates only occur if a specific default hip-hop, usually give better results than a access point is selected and Nokia Podcasting is specific team or artist. running. If Nokia Podcasting is not running, the automatic updates are not activated.
- Page 69 Directories To send a directory folder as a multimedia message or using Bluetooth connectivity, select the folder Directories help you to find new podcast episodes Options > Send. to which to subscribe. When you receive a message with an .opml file To open directories, press , and select Music...
-
Page 70: Radio
Fully downloaded podcasts can be found in the multimedia message or by Bluetooth connectivity, Podcasts folder, but are not shown until the library select Options > Send. is refreshed. To update, delete, and send a group of selected podcasts at once, select Options Mark/ >... -
Page 71: Listen To The Radio
attempts to scan for an alternative frequency for the To adjust the volume, use the volume key. currently playing station, if the reception is weak. Warning: Listen to music at a moderate When you open the radio for the first time, a wizard level. -
Page 72: Saved Stations
Options Nokia Internet Radio > Station > Listen. To view available visual content With the Nokia Internet Radio application (network for a station with Visual Radio service, select service), you can listen to available radio stations Options Station Start visual service. -
Page 73: Search For Stations
To stop the playback, press the scroll key; to resume, press the scroll key again. Search for stations To adjust the volume, use the volume key. To search for radio stations in the Nokia Internet To view station information, select Options Radio service by their name, do the following: >... -
Page 74: Internet Radio Settings
GPRS connection bitrate — for GPRS packet Station directory. ● data connections The station directory is maintained by Nokia. If you 3G connection bitrate — for 3G packet data ● want to listen to internet radio stations outside the connections... -
Page 75: Camera
About the camera connectivity or a wireless LAN connection. You can also upload them to a compatible online album. Your Nokia N85 has two cameras. The main, high- resolution camera, is on the back of the device. The Activate the camera secondary, lower resolution camera is on the front. -
Page 76: Active Toolbar
— Capture mode indicator — Capture mode indicator — Active toolbar (not displayed during image — Active toolbar (not displayed during image capture). See "Active toolbar", p. 76. capture). See "Active toolbar", p. 76. — Battery charge level indicator — Battery charge level indicator —... -
Page 77: Capture Images
The settings in the active toolbar return to the to adjust sharpness (images only) default settings after you close the camera. to adjust contrast (images only) To view the active toolbar before and after to adjust light sensitivity (images only) capturing an image or recording a video, select The icons change to reflect the current setting. -
Page 78: After Taking A Picture
toolbar", p. 76.). A green locked focus indicator can then view the location where an image was appears on the display. If the focus was not captured. locked, a red focus indicator appears. Release To add location information to all captured the capture key, and press it halfway down material, in Camera, select Options... - Page 79 To send the image using a multimedia message, Keep a safe distance when using the flash. Do not ● e-mail, or other connection methods, such as use the flash on people or animals at close range. Bluetooth connectivity, press the call key, or Do not cover the flash while taking a picture.
-
Page 80: Capture Images In A Sequence
To activate your own scene, scroll to User To return to the sequence mode viewfinder, press defined, press the scroll key, and select Select. the capture key. To switch off the sequence mode, in the active Capture images in a sequence toolbar, select Sequence mode Single... -
Page 81: Video Recording
Tips on taking good photographs Changing the source, amount, and direction of light can change photographs dramatically. Here are Picture quality some typical lighting conditions: Use the appropriate picture quality. The camera has Light source behind the subject. Avoid placing ●... -
Page 82: Record Videos
Record videos If the camera is in the image mode, select the video mode from the active toolbar. To start recording, press the capture key. The red record icon ( ) is displayed and a tone sounds. To pause recording at any time, press Pause. Select Continue to resume. -
Page 83: Camera Settings
Camera settings To immediately play the video clip you just ● recorded, select Play There are two kinds of settings for the camera: If you do not want to keep the video, select ● setup settings and main settings. The setup settings Delete ( ). -
Page 84: Colour And Lighting Settings
Extended digital zoom — The setting is only White balance ( ) — Select the current ● ● available in the main camera.On (continuous) lighting condition. This allows the camera to allows the zoom increments to be smooth and reproduce colours more accurately. continuous between digital and extended digital Exposure compensation ( ) (image only) —... -
Page 85: Video Settings
change the setup settings after selecting a scene if Memory in use — Select where you want to ● needed. store your video clips. Restore camera settings — Restore the camera ● Video settings settings to default values. To change the main settings, in the video mode, select Options Settings... -
Page 86: Photos
To open a file, press the scroll key. Video clips open displayed. To and play in Video centre. See "Nokia Video browse the files Centre", p. 100. one by one, scroll left or right. To browse files in groups, scroll up or To copy or move files to another memory location, down. -
Page 87: View And Edit File Details
browse the files, slide your finger on the rim of the Title — View the thumbnail image of the file and ● scroll key. the current file name. To edit the file name, select the file name field. To open a file, press the scroll key. When an image Albums —... -
Page 88: Active Toolbar
Active toolbar Albums The active toolbar is available only when you have With albums, you can conveniently manage your selected an image or a video clip in a view. images and video clips. To view the albums list in Photos, select Albums in the main view. -
Page 89: Slide Show
Slide show Start Play > > > compatible TV, use a Nokia Video Connectivity Cable. forwards Play backwards to start the slide show. The slide show starts from the selected file. Before viewing the images and video clips on TV,... -
Page 90: Edit Images
To edit the pictures after taking them or the ones ringing tone is routed to the TV when the Nokia already saved in Photos, select Options > Edit. The Video Connectivity Cable is connected to the device. -
Page 91: Edit Videos
Crop image To save the changes and return to the previous view, press Back. To crop an image, select Options Apply > effect > Crop, and a predefined aspect ratio from Useful shortcuts the list. To crop the image size manually, select You can use the following shortcuts when editing Manual. -
Page 92: Print Images
Printer selection Add text — to add text to the beginning or the ● end of the video clip To print images with Image print, select the image — to trim the video and mark the sections ● and the print option in Photos, camera, image you want to keep in the video clip editor, or image viewer. -
Page 93: Share Images And Videos Online
For more information on the application, see the toolbar. guides available at the Nokia product support pages For more information on the application and or your local Nokia website. compatible service providers, see the Nokia product support pages or your local Nokia website. -
Page 94: Gallery
Gallery To access your images, video clips, and songs, or To open a file, press the scroll key. Video clips, RAM store and organise sound clips and streaming links, files, and streaming links open and play in Video press , and select Applications Media centre, and music and sound clips in Music player. -
Page 95: Streaming Links
Streaming links To open streaming links, press , and select Applications Media Gallery Streaming > > > links. Select a link, and press the scroll key. To add a new streaming link, select Options > link. Presentations With presentations, you can view SVG (scalable vector graphics) files, such as cartoons and maps. -
Page 96: Home Network
Home network About home network To use the WLAN function of your device in a home network, you must have a working WLAN home connection setup and have other UPnP enabled Your device is compatible with Universal Plug and Play (UPnP) and certified by Digital Living Network home devices to connect to the same home network. -
Page 97: Settings For Home Network
Do not set content device support pages on the Nokia website. sharing on before you have configured all the other settings. If you set content sharing on, the... -
Page 98: View And Share Media Files
Images & video — Select media files for sharing the video clips and sound clips are played only ● with other devices, or view the sharing status of in the other device. images and videos. To update the content of the To stop sharing, select Options Stop... -
Page 99: Copy Media Files
To stop sharing the media file, select Back Stop documentation of the devices. Keep any passcodes (available when playing videos and music). secret and in a safe place separate from the devices. Tip: You can print images saved in Photos You can view or change the settings of the WLAN through a home network with a UPnP internet access point in your device. -
Page 100: Nokia Video Centre
Nokia Video Centre With Nokia Video Centre (network service), you can To connect to a service, download and stream video clips over the air from select Video directory compatible internet video services using packet and the desired video data or WLAN. You can also transfer video clips from... -
Page 101: Video Feeds
if you exit the application. The downloaded video To refresh the content of all feeds, select Options > clips are saved in videos. To stream a video clip Refresh feeds. or view a downloaded one, select Options > To subscribe to new feeds, select Options >... -
Page 102: Transfer Videos From Your Pc
is playing, use the media keys. To adjust the volume, Select Mass storage as the connection mode. A press the volume key. compatible memory card needs to be inserted in the device. To turn sound on or off, select Options Mute >... - Page 103 Parental control — Activate the parental lock ● for video services, if the service provider has set age limits for videos. Thumbnails — Select whether to download and ● view thumbnail images in video feeds.
-
Page 104: N-Gage
For more information about data transfer plans, contact your mobile service provider. N-Gage is a mobile gaming platform available for a range of compatible Nokia mobile devices. You can access N-Gage games, players, and content through N-Gage views the N-Gage application on your device. You can also... -
Page 105: Get Started
available to play. You can also send messages to If you already have an N-Gage player name, select I your N-Gage friends. have an account, and enter your user name and password to log in. In Showroom, you can find information about To create a new player name: N-Gage games, including screenshots and player reviews. -
Page 106: Play And Manage Games
Track your progress Trial games — These are full game files to which ● you have access only for a limited time or which To view your current N-Gage points, go to Home, have limited content. When the trial expires, you and select Track My Progress. -
Page 107: Edit Profile Details
Edit profile details search for a particular N-Gage player, invite them to your Friends list, and then see which of your friends are online and available to play. You can also send To edit your public profile details, select Options >... -
Page 108: N-Gage Settings
Sort the friends list Send Message. The maximum size of a Private Message is 115 characters. To send the message, To sort your friends by availability, player name, or select Submit. N-Gage points, select Options Sort Friends > You need a GPRS, 3G, or wireless LAN connection to be able to use the messaging feature. - Page 109 Account Details — Your purchase preferences. ● When you purchase a game, you are asked if you want to save your billing details, including your credit card number, for faster purchasing in the future.
-
Page 110: Messaging
Messaging Only devices that have compatible features can Sent — The last messages that have been ● receive and display multimedia messages. The sent, excluding messages sent using Bluetooth appearance of a message may vary depending on connectivity, are stored here. You can change the the receiving device. -
Page 111: Write Text
Press each key only once for one letter. For you can add new words. example, to write "Nokia" when the English dictionary is selected, press 6 for N, 6 for o, 5 for When you write text, is displayed when you k, 4 for i, and 2 for a. -
Page 112: Write And Send Messages
To switch between the different character modes, character, changing the writing language gives you press #. access to characters in a different order. To delete a character, press C. To delete more than Edit text and lists one character, press and hold C. To copy and paste text, while pressing and holding The most common punctuation marks are available #, scroll left or right to highlight text. - Page 113 server, the message is left in the Outbox folder, and To capture an image or record a video or sound the device attempts to resend it periodically. clip for a multimedia message, select Options > Sending an e-mail requires a data connection, and Insert Insert image >...
-
Page 114: Messaging Inbox
Insert Insert presentation. The option is the message to your device, select Options > > shown only if MMS creation mode is set to Retrieve. Guided or Free. When you open a multimedia message ( ), you may see an image and a message. is shown if Messaging inbox sound is included, or... -
Page 115: Message Reader
Mailbox message or a link. For availability and subscription, contact your service provider. E-mail settings Message reader To use e-mail, you must have a valid internet access point (IAP) in the device and define your e-mail With Message reader you can listen to text, settings correctly. - Page 116 To view previously retrieved e-mail messages you are offline, you are asked if you want to offline, select No. retrieve this message from the mailbox. To create a new e-mail message, select To view e-mail attachments, open the message, and message E-mail in the Messaging main view or...
-
Page 117: View Messages On A Sim Card
Messaging settings mailbox, then make a connection from your device to the remote mailbox again to update the status. The settings may be preconfigured in your device, To delete an e-mail from the device and the remote or you may receive them in a message. To enter mailbox, select Options Delete... -
Page 118: Multimedia Message Settings
cannot be sent within the validity period, the Multimedia retrieval — Select how you want ● message is deleted from the message centre. to receive messages. To receive messages Message sent as — Contact your service automatically in your home cellular network, ●... -
Page 119: Manage Mailboxes
cannot be sent within this time period, the User name — Enter your user name given to you ● message is deleted from the message centre. by your service provider. Password — Enter your password. If you leave ● E-mail settings this field blank, you are prompted for the password when you try to connect to your Manage mailboxes... -
Page 120: Retrieval Settings
mail. You may only be able to use the outgoing note, and a mail indicator) when new mail is server of your service provider. Contact your received. service provider for more information. Retrieval settings The settings for User name, Password, Access Press , and select... -
Page 121: Other Settings
E-mail retrieval — To automatically retrieve the Select from the following: ● headings of new e-mail messages from your Reception — Select whether you want to ● remote mailbox at defined times, select receive cell broadcast messages. Enabled Only in home netw.. -
Page 122: Make Calls
Make calls Voice calls Options during a call In the standby mode, enter the phone number, To adjust the volume during a call, use the volume including the area code. To remove a number, key on the side of your device. You can also use the press C. -
Page 123: Voice And Video Mailboxes
Tip: When you have only one active voice call, number. Enter the number (obtained from your to put the call on hold, press the call key. To network service provider), and select OK. activate the call, press the call key again. Answer or decline a call During an active call, to route the sound from the handset to the loudspeaker, select... -
Page 124: Speed Dial A Phone Number
When the new call is answered, to join the first To assign a phone number to one of the number participant in the conference call, select keys (2-9), press , and select Tools Utilities > > Options > Conference. Speed dial. -
Page 125: Make A Video Call
tags in advance. The device creates a voice tag for The device plays a synthesised voice tag for the the entries in contacts, and compares the spoken recognised contact in the selected device voice tag to it. The voice recognition in the device language, and displays the name and number. -
Page 126: Options During A Video Call
Options during a video call You are not receiving video (the recipient is not sending video or the network is not transmitting it). To change between showing video or hearing only You have denied video sending from your sound, select Options >... -
Page 127: Answer Or Decline A Video Call
Answer or decline a video Video sharing requirements call Video sharing requires a UMTS connection. For more information on the service, UMTS network When a video call arrives, is displayed. availability, and fees associated with using this service, contact your service provider. To answer the video call, press the call key. -
Page 128: Share Live Video Or Video Clips
Person-to-person connection settings Ensure that your device UMTS access point ● connection settings are configured properly. A person-to-person connection is also known as a Session Initiation Protocol (SIP) connection. The SIP Share live video or video clips profile settings must be configured in your device before you can use video sharing. -
Page 129: Log
to adjust the brightness (available for sender call. The sender receives a message that you rejected the invitation. only) to mute or unmute the microphone When you receive a video clip, to mute the sound of the clip, select Mute. to switch the loudspeaker on and off To end video sharing, select Stop. -
Page 130: Call Duration
Call duration Outgoing Missed communication events Press , and select Tools > Log. To open the general log where you can monitor all To view the approximate duration of received and voice calls, text messages, or data and wireless LAN dialled calls, select Call duration. - Page 131 To view how much data is transferred and how long a certain packet data connection lasts, scroll to an incoming or outgoing event indicated by Pack., and select Options View details. >...
-
Page 132: Internet Calls
Internet calls About internet calls Scroll to the internet calls tab, and select Options Activate service. > With the internet call service (network service), you To search for available wireless LAN connections, can make and receive calls over the internet. select Options Search for... -
Page 133: Blocked Contacts
Internet call settings letter mode. Enter the internet address, and press the call key. To view or edit internet call settings, select Options > Contacts. Scroll to the internet calls tab, Blocked contacts and select Options Settings > Blocked contacts are prevented from seeing your Select from the following: online status. -
Page 134: Contacts (Phonebook)
Contacts (phonebook) In Contacts, you can save and update contact To delete several contact cards at the same time, information, such as phone numbers, home select Options Mark/Unmark to mark the > addresses, or e-mail addresses of your contacts. You desired contact cards, and press C to delete. -
Page 135: Add Ringing Tones For Contacts
Select a number or an address you want to set To start copying, select OK. as a default. If you do not want to copy the SIM contacts to your The default number or address is underlined in the device, select Cancel. The device asks if you want to contact card. -
Page 136: Manage Contact Groups
contacts. You need your PIN2 code to activate and Scroll to a contact, and press the scroll key to deactivate fixed dialling or edit your fixed dialling mark each contact you want to add. contacts. Select OK. When fixed dialling is activated, calls may be To rename a group, select Options >... -
Page 137: Media Folder
Media folder RealPlayer Send — Send a file using a multimedia message, ● e-mail, or other connection methods, such as Bluetooth connectivity. With RealPlayer, you can play video clips or stream media files over the air without saving them to the Use video —... -
Page 138: Adobe Flash Player
Adobe Flash Player content begins streaming, your device connects to the site and starts loading the content. The content is not saved in your device. Press , and select Applications Media > > Flash Player. RealPlayer settings Use Adobe Flash Player to view, play, and interact with compatible flash files made for mobile devices. -
Page 139: Recorder
Nokia Nseries PC Suite.Other transfer methods may not transfer the To buy more usage time for a media file, select an... -
Page 140: Time Management
Time management Clock in the settings, select Automatic time update > Alarm clock World clock Press , and select Applications > Clock. Press , and select Applications > Clock. To view your active and inactive alarms, scroll right To view the time in different locations, scroll right to the alarm tab. -
Page 141: Calendar Views
To add a new calendar entry opens, and the characters you enter are entry, scroll to the added to the subject field. In the to-do view, desired date, and select a to-do note entry opens. Options > When the calendar alarm sounds, select Silence entry and one of the... -
Page 142: Manage Calendar Entries
To mark a task as completed, scroll to it in the to-do view, and select Options Mark as done. > You can synchronise your calendar with a compatible PC using Nokia Nseries PC Suite. When creating a calendar entry, set the desired synchronisation option. -
Page 143: Office Folder
Office folder Quickoffice 2000, XP, and 2003. Not all variations or features of the file formats are supported. With the Quickoffice applications, you can To upgrade to a version of Quickword that supports view .doc, .xls, .ppt, .pps, and .txt documents and editing, when you have a file open, select download software. -
Page 144: Notes
2000, XP, and 2003. Not all variations or features of To synchronise or to define synchronisation the file formats are supported. settings for a note, select Options > Synchronisation Start or Settings. > To upgrade to a version of Quickpoint that supports editing, when you have a file open, select Adobe reader Options... - Page 145 In the first Amount field, enter the value you want to convert. The other Amount field changes automatically to show the converted value. Convert currency Select Type > Currency. Before you can make currency conversions, you must select a base currency and add exchange rates.
-
Page 146: Applications Folder
> Save. The saved result replaces the Only install software specifically designed for your previously stored result in the memory. device: Nokia N85. Software providers will often refer to the official model number of this product: To retrieve the results of a calculation from the N85-1. - Page 147 You can use Nokia Application Installer original application, remove the application, and in Nokia PC Suite to install an application to your install the application again from the original device. installation file or the backup copy. Icons in Application manager indicate the The .jar file is required for installing Java...
- Page 148 ● of memory and prevent you from storing other files. Symbian software that has no verified digital To maintain sufficient memory, use Nokia Nseries signature can be installed. PC Suite to back up installation files to a compatible Online certificate check —...
- Page 149 Open to change settings related to that specific application.
-
Page 150: Tools Folder
Tools folder File manager Edit memory card These options are available only if a compatible Press , and select Tools File mgr.. > memory card is inserted in the device. About File manager To rename or format a memory card, select Options Memory card options. -
Page 151: Sync
To activate enhanced voice commands to start Command verification — to select whether the ● applications and profiles, press and hold the right spoken command is accepted manually, by voice, selection key in the standby mode. or automatically Remove voice adapts. —... -
Page 152: Device Manager
Device manager To set the language for the message reader, select Language. To download additional languages to your device, select Options Download Press , and select Tools Utilities Device > > > languages. mgr.. Tip: When you download a new language, Use Device manager to connect to a server and you must download at least one voice for that receive configuration settings for your device, to... - Page 153 Audio source — select whether you want to ● listen to the message through the loudspeaker or the device.
-
Page 154: Settings
Settings Display Some settings may be preset for the device by your service provider, and you may not be able to change Light sensor — Scroll left or right to adjust the ● them. light sensor that observes the lighting conditions and adjusts the brightness of the display. -
Page 155: Enhancement Settings
Change Menu view — Select Horizontal icon Predictive text — Set predictive text input on ● ● to view a horizontal toolbar and the content or off for all editors in the device. The predictive from different applications on the screen. Select text dictionary is not available for all languages. -
Page 156: Slide Settings
Default profile — Set the profile that you want ● activated each time you connect a Nokia Video When the Navi wheel setting is set on, you can Connectivity Cable to your device. browse through files and lists in certain TV screen size —... -
Page 157: Security Settings
(network service). your service provider. If you forget the lock code, When calls are limited to closed user groups, calls contact a Nokia Care point or your service may be possible to the official emergency number provider. See "Access codes", p. 18. - Page 158 Digital certificates do not guarantee safety; they are You can only be sure of the correct identity of a used to verify the origin of software. server when the signature and the validity period of a server certificate have been checked. In the certificate management main view, you can see a list of authority certificates that are stored in You are notified if the identity of the server is not...
-
Page 159: Positioning Settings
Positioning settings Symbian installation: — The certificate is ● able to certify the origin of a new Symbian Press , and select Tools Settings > > operating system application. General > Positioning. Internet: — The certificate is able to certify ●... -
Page 160: Phone Settings
Phone settings Reject call with message — To send a text ● message to a caller informing why you could not In phone settings, you can edit settings related to answer the call, select Yes. phone calls and network. Message text —... -
Page 161: Call Divert
both lines can be answered irrespective of the Call barring (network service) allows you to restrict selected line. If you select Line 2 and have not the calls that you make or receive with the device. For example, you can restrict all outgoing subscribed to this network service, you are not international calls or incoming calls when you are able to make calls. -
Page 162: Connection Settings
Connection settings Network mode — Select which network to use. ● If you select Dual mode, the device uses the GSM or UMTS network automatically, according to the In connection settings, you can edit access points network parameters and the roaming and other connectivity settings. -
Page 163: Access Points
Internet access point (IAP) to send and receive e- already available are shown and can be shared by a ● mail and connect to the internet new access point. If you skip this step, you are asked to select a connection method and to define the Check the type of access point you need with your settings needed. -
Page 164: Packet Data Access Points
to connect to that network and define the order in Access point name — You obtain the access ● which the access points are used. point name from your service provider. User name — The user name may be needed to ●... -
Page 165: Packet Data Settings
addresses, contact your internet service WLAN security mode — Select the encryption ● provider. used: WEP, 802.1x, orWPA/WPA2 (802.1x and Proxy server address — Enter the address of WPA/WPA2 are not available for ad hoc ● the proxy server. networks). If you select Open network, no Proxy port number... -
Page 166: Sip Settings
SIP settings coverage, the device periodically tries to establish a packet data connection. If you select Press , and select Tools Settings When needed, the device uses a packet data > > Connection settings. > connection only if you start an application or action that needs it. -
Page 167: Application Settings
corresponding option. To change the options, you need your PIN2 code. Contact your service provider for the code. Application settings To edit the settings of some of the applications in your device, press , and select Tools > Settings > Applications. To edit the settings, you can also select Options >... -
Page 168: Troubleshooting
To view frequently asked questions about your device, visit the product support pages at dots appear on the screen every time I turn www.nokia.com/support . on my device? Q: What is my password for the lock, PIN, or A: This is a characteristic of this type of display. - Page 169 If this does not help, restart your compatible PC and your device. If the connection still does not A: The WLAN on your Nokia device is deactivated work, reconfigure the WLAN settings in both your when you are not connected or trying to connect to compatible PC and device.
- Page 170 > Settings Multimedia message Multimedia > > A: To save data, use Nokia Nseries PC Suite to retrieval Manual to have the multimedia synchronise with or to make a back-up copy of all messaging centre save messages to be retrieved data to a compatible computer.
- Page 171 Nokia Nseries PC Suite, see the Nokia Nseries PC Suite help or the Nokia support pages. Q: Can I use my device as a fax modem with a compatible PC? A: You cannot use your device as a fax modem.
-
Page 172: Nokia Original Enhancements
● Warning: Use only batteries, chargers, and must be made by qualified personnel only. enhancements approved by Nokia for use with this particular model. The use of any other types may Battery invalidate any approval or warranty, and may be dangerous. -
Page 173: Battery And Charger Information
When the talk and standby times are noticeably shorter than normal, replace the battery. Always try to keep the battery between 15°C and Use only Nokia approved batteries, and recharge 25°C (59°F and 77°F). Extreme temperatures reduce your battery only with Nokia approved chargers the capacity and lifetime of the battery. -
Page 174: Nokia Battery Authentication Guidelines
Keep when looking from another your battery out of the reach of small children. angle. Nokia battery authentication guidelines Always use original Nokia batteries for your safety. To check that you are getting an original Nokia... - Page 175 What if your battery is not authentic? If you cannot confirm that your Nokia battery with the hologram on the label is an authentic Nokia battery, please do not use the battery. Take it to the nearest authorised Nokia service point or dealer for assistance.
-
Page 176: Care And Maintenance
Care and maintenance Your device is a product of superior design and Do not drop, knock, or shake the device. Rough ● craftsmanship and should be treated with care. The handling can break internal circuit boards and following suggestions will help you protect your fine mechanics. - Page 177 is not working properly, take it to the nearest authorised service facility for service.
-
Page 178: Additional Safety Information
Additional safety information Small children Medical devices Your device and its accessories may contain small Operation of any radio transmitting equipment, parts. Keep them out of the reach of small children. including wireless phones, may interfere with the functionality of inadequately protected medical devices. -
Page 179: Vehicles
Hold the wireless device to the ear opposite the Only qualified personnel should service the device ● medical device to minimise the potential for or install the device in a vehicle. Faulty installation interference. or service may be dangerous and may invalidate any warranty that may apply to the device. -
Page 180: Emergency Calls
normally be advised to turn off your vehicle engine. guaranteed. You should never rely solely on any Sparks in such areas could cause an explosion or fire wireless device for essential communications like resulting in bodily injury or even death. Switch off medical emergencies. -
Page 181: Certification Information (Sar)
(SAR) reporting and testing requirements and the network band. Additional SAR information may be This mobile device meets guidelines for provided under product information at www.nokia exposure to radio waves. com. Your mobile device is a radio transmitter and receiver. It is designed not to exceed the limits for exposure to radio waves recommended by international guidelines. -
Page 182: Index
Index audio themes 45 browser auto-update for time/ bookmarks 34 A-GPS (assisted GPS) 49 date 140 browsing pages 30, 32 access codes 18 cache memory 34 access points 39, 163 downloads 33 groups 163 backing up device security 35 accessories memory 150 settings 35 enhancements... - Page 183 flash 79 deleting 134 display settings 154 DLNA 96 image quality 83 editing 134 imaging mode 77 groups 136 document applications 143 indicators 75 images in 134 downloads 33 DRM (digital rights lighting 84 names and numbers 134 location information 78 ringing tones 135 management) 138 duration of calls 130...
- Page 184 installation of licences 138 applications 146 light settings 154 gallery internet call services list view of menus 48 sounds 94 managing 133 location information 49 streaming links 95 internet calls 132 lock code 18 games 104 activating 132 locking general information 16 blocking contacts 133 keypad 157 making 132...
- Page 185 115 Nokia contact file details 87 information 16 selecting voice 152 red-eye 91 messages Nokia original tags 88 e-mail 115 enhancements 172 viewing 86 notes 144 PictBridge 92 folders for 110 icon for incoming 114 PIN code 18...
- Page 186 proxy settings 165 screen settings 154 home network 97 PUK codes 18 scroll key 25 internet calls 133 punctuation, text entry 112 security internet radio 74 certificates 157 language 155 web browser 35 Navi wheel 156 Quickmanager 144 security code 18 network 161 Quickpoint 143 security module 159...
- Page 187 slide show 89 time-out for backlight 154 voice calls SMS (short message tones 46 calls service) 112 ring settings 47 voice commands 124, 150 software applications 146 settings 154 voice recorder 139 software update 17 toolbar 76, 88 volume controls 28 songs 61 transferring data 21 sounds 45...
Need help?
Do you have a question about the N85 and is the answer not in the manual?
Questions and answers