Horizon Fitness Comfort 3 Owner's Manual
Hide thumbs
Also See for Comfort 3:
- Owner's manual (72 pages) ,
- Owner's manual (45 pages) ,
- Manual (84 pages)

Related Manuals for Horizon Fitness Comfort 3


Summary of Contents for Horizon Fitness Comfort 3
- Page 1 Comfort 8 i Comfort 3 Comfort 5 Comfort 7 Comfort R EXERCISE BIKE OWNER’S MANUAL Read the BIKE gUIdE before using this OWNER’S MANUAL.
- Page 3 IMPORTANT PRECAUTIONS SAVE THESE INSTRUCTIONS When using an exercise product, basic precautions should always be followed, including the following: Read all instructions before using this exercise bike. It is the responsibility of the owner to ensure that all users of this exercise bike are adequately informed of all warnings and precautions.
- Page 4 wARNINg READ AND SAVE ALL INSTRUCTIONS bEfORE ASSEmbLINg OR USINg THIS ExERCISE bIkE. IT IS STRONgLy RECOmmENDED TO TAkE THE fOLLOwINg SAfETy INSTRUCTIONS. • CAUTION: If you experience chest pains, nausea, dizziness or shortness of breath, stop exercising immediately and consult your physician before continuing.
- Page 5 ASSEMBLY wARNINg There are several areas during the assembly process that special attention must be paid. It is very important to follow the assembly instructions correctly and to make sure all parts are firmly tightened. If the assembly instructions are not followed correctly, the exercise bike could have parts that are not tightened and will seem loose and may cause irritating noises.
- Page 6 HANDLEBARS CONSOLE WARNING Consult a physician prior to CONSOLE MAST SEAT BACK using any exercise equipment. Possibility of serious injury if equipment is used improperly. Heart rate monitoring systems may be inaccurate. Over exercise may result in serious injury or death. Stop exercising Comfort R if you feel pain, faint, dizzy or short of breath.
-
Page 7: Tools Required
RECUMBENT BIKE PRE ASSEMBLY TOOLS REqUIRED: F 13/15mm Flat Wrench/Screwdriver F 5mm L-Wrench UNPACkINg F 6mm L-Wrench Unpack the product where you will be using it. Place the bike carton on a level Comfort flat surface. It is recommended that you place a protective covering on your floor. Recumbent PARTS INCLUDED: Bike... - Page 8 STEP 1 RECUMBENT BIKE ASSEMBLY HARDwARE fOR STEP 1 : Comfort BOLT (A) FLAT WASHER (B) M8x56 mm Φ9xΦ18x2.0T mm Recumbent Qty: 4 Qty: 4 Bike SPRING WASHER (C) NUT (D) M8x2.0T mm Qty: 4 Qty: 4 MAIN FRAME Open hardware for step 1. NUT (D) Attach the rear staBILIZer to the MaIN fraMe using 2 BoLts (a), 2 fLat washers (B), 2...
- Page 9 STEP 2 RECUMBENT BIKE ASSEMBLY HARDwARE fOR STEP 2 : SCREW (E) Comfort M4x12 mm Recumbent Qty: 2 Bike Open hardware for step 2. Slide water BottLe hoLder up CoNsoLe Mast and align screw holes in water BottLe hoLder with holes in CoNsoLe Mast. Attach the water BottLe hoLder using 2 sCrews (e).
- Page 10 STEP 3 RECUMBENT BIKE ASSEMBLY HARDwARE fOR STEP 3 : BOLT (G) FLAT WASHER (B) Comfort BOLT (F) M8X18 mm Φ9xΦ18x2.0T mm M8x60 mm Recumbent Qty: 2 Qty: 4 Qty: 4 Bike Open hardware for step 3. Slide CoNsoLe Mast groMMet from the bottom up the CoNsoLe Mast .
- Page 11 STEP 4 RECUMBENT BIKE ASSEMBLY HARDwARE fOR STEP 4 : BOLT (I) SPRING WASHERS (C) Comfort M8X18 mm M8x2.0T mm Recumbent Qty: 6 Qty: 6 Bike Open hardware for step 4. BOLT (I) Attach seat fraMe to the MaIN fraMe using 6 soCKet head Cap sCrews (I) and 6 sprINg washers (C) as shown.
- Page 12 STEP 5 RECUMBENT BIKE ASSEMBLY HARDwARE fOR STEP 5 : Comfort BOLT (J) FLAT WASHER (B) M8x45 mm Φ9xΦ18x2.0T mm Recumbent Qty: 8 Qty: 8 Bike Open hardware for step 5. Attach seat Base to seat fraMe using 4 BoLts SEAT BACK (J) and 4 fLat washers (B).
- Page 13 STEP 6 RECUMBENT BIKE ASSEMBLY HARDwARE fOR STEP 6 : BOLT (K) ARC WASHER (H) Comfort M10x65 mm Φ10.5xΦ20x2.0T mm Recumbent Qty: 2 Qty: 2 Bike Open hardware for step 6. Attach pULse grIp haNdLeBars to the seat fraMe using 2 BoLts (K) and 2 arC washers (h).
- Page 14 STEP 7 RECUMBENT BIKE ASSEMBLY HARDwARE fOR STEP 7 : Comfort PRE-ASSEMBLED SCREW M5X10 mm Recumbent Qty: 4 Bike CONSOLE hardware for step 7 is pre-installed. Attach the rIght pedaL to the rIght CraNK arM, tightening it clockwise with the provided CONSOLE MAST CONSOLE CABLE 13mm/15mm flat wrench.
- Page 15 RECUMBENT BIKE ASSEMBLY asseMBLY CoMpLete! Comfort Recumbent Bike Comfort r Overall dimension: 165 x 64 x 135 cm Net Weight: 47 kg / 103 lbs gross Weight: 54 kg / 119 lbs Max. User Weight: 136 kg / 300 lbs...
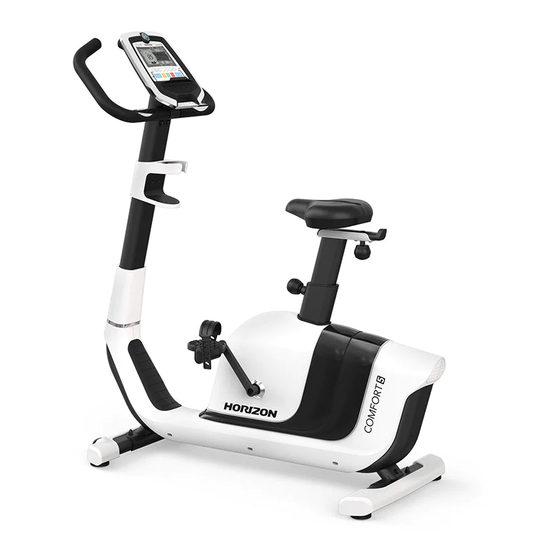
- Page 16 SMART DEVICE AND READING RACK CONSOLE WARNING Consult a physician prior to HANDLEBARS using any exercise equipment. Possibility of serious injury if HEART RATE GRIP equipment is used improperly. Heart rate monitoring systems Comfort may be inaccurate. Over exercise may result in serious Upright injury or death.
- Page 17 UPRIgHT BIKE PRE ASSEMBLy TOOLS REqUIRED: F 13/15mm Flat Wrench/Screwdriver F 5mm L-Wrench UNPACkINg Unpack the product where you will be using it. Place the bike carton on a level Comfort PARTS INCLUDED: flat surface. It is recommended that you place a protective covering on your floor. Upright F 1 Main Frame Bike...
- Page 18 2 sprINg washers (f) and 2 NUts (C). REAR STABILIZER Note: Lifting up the machine will help your assembly. FRONT STABILIZER First put in place the stabilizer and then insert the bolts will also make your assembly easier. BOLTS (A) CoMfort 3 showN...
- Page 19 STEP 1-2 UPRIgHT BIKE ASSEMBLY (COMFORT 8i ONLY) HARDwARE fOR STEP 1-2 : SCREW (D) Comfort M4x12 mm Upright Qty: 2 Bike Open hardware for step 1-2. SCREW (D) Carefully slide the aCCessorY traY to the MaIN fraMe. ACCESSORY TRAY Attach and tighten the aCCessorY traY to the MaIN fraMe using 2 sCrews (d).
- Page 20 SEAT HEIGHT MaIN fraMe. ADJUSTMENT KNOB MAIN FRAME Note: While assembling the SEAT please make sure the seat is in right position. Tilt up the front of the SEAT might help you gain a more stable riding experience. CoMfort 3 showN...
- Page 21 Mast and align screw holes in water BottLe hoLder with holes in CoNsoLe Mast. Attach the water BottLe hoLder using 2 sCrews (d). CONSOLE MAST WATER BOTTLE HOLDER Note: Be careful not to pinch any cable while assembling. SCREW (D) CoMfort 3 showN CoMfort 3 showN...
- Page 22 Attach the CoNsoLe Mast using 2 BoLts (g) POSITIONING NOTCH from the sides and 4 BoLts (e), 4 fLat washers (B) . MAIN FRAME CONSOLE CABLES Slide CoNsoLe Mast groMMet down over MaIN fraMe. BOLT (G) BOLT (E) FLAT WASHER (B) CoMfort 3 showN...
- Page 23 STEP 4-2 UPRIgHT BIKE ASSEMBLY (FOR COMFORT 7, 8i ONLY ) HARDwARE fOR STEP 4-2 : BOLT (G) FLAT WASHER (B) Comfort M8x15 mm Φ9xΦ20x2.0T mm Upright Qty: 4 Qty: 4 Bike SPRING WASHER (F) M8x2.0T mm Qty: 4 Open Hardware for step 4-2. Holding haNdLeBar close to CoNsoLe Mast and feed the haNdLBar wIres through the hole FLAT WASHER (B)
- Page 24 CoNsoLe Mast. Attach the CoNsoLe to the CoNsoLe Mast using 4 pre-INstaLLed sCrews. Note: You may need a 15mm wrench to assemble the RIGHT PEDAL pedal. Please be care not to pinch yourself when CoMfort 3 showN assembling.
- Page 25 Max. User Weight: 136 kg / 300 lbs Comfort 8i Overall dimension: 132 x 55 x 140 cm Net Weight: 42 kg / 92.5 lbs gross Weight: 47.5 kg / 104.5 lbs Max. User Weight: 136 kg / 300 lbs CoMfort 3 showN...
- Page 27 BIKE OPERATION This section explains how to use your bike’s console and programming. The BASIC OPERATION section in the BIKE gUIdE has instructions for the following: • LOCATION Of THE bIkE • POwER/gROUNDINg INSTRUCTIONS • SEAT POSITIONINg • mOVINg THE bIkE •...
- Page 28 Comfort 3 Shown Eingaben...
- Page 29 COmfORT 3 CONSOLE OPERATION Note: There is a thin protective sheet of clear plastic on the overlay of the console that should be removed before use. LCD DISPLAy wINDOwS: Time, distance, Calories, Speed, RPM, Resistance Level, Heart Rate, Calories, Watts, HR Wheel, Workout Profile.
- Page 30 Comfort 5 Shown Eingaben...
- Page 31 COmfORT 5/R CONSOLE OPERATION Note: There is a thin protective sheet of clear plastic on the overlay of the console that should be removed before use. LCD DISPLAy wINDOwS: Time, distance, Calories, Speed, RPM, Resistance Level, Heart Rate, Calories, Watts, HR Wheel, Profile. ENERgy SAVER: to minimize energy consumption, your machine will enter energy saver mode automatically (after entering stand-by mode for 15 mins) and cab be quickly woken up with a touch of a button.
- Page 32 Comfort 7 Shown Eingaben...
- Page 33 COmfORT 7 CONSOLE OPERATION Note: There is a thin protective sheet of clear plastic on the overlay of the console that should be removed before use. LCD DISPLAy wINDOwS: Time, distance, Calories, Speed, RPM, Resistance Level, Heart Rate, Calories, Watts, HR Wheel, Profile. ENERgy SAVER: to minimize energy consumption, your machine will enter energy saver mode automatically (after entering stand-by mode for 15 mins) and can be quickly woken up with a touch of a button.
- Page 34 Comfort 8i Shown Eingaben...
- Page 35 COmfORT 8i CONSOLE OPERATION Note: There is a thin protective sheet of clear plastic on the overlay of the console that should be removed before use. LCD DISPLAy wINDOwS: Time, distance, Calories, Speed, RPM, Resistance Level, Heart Rate, Calories, Watts, HR Wheel, Profile. ENERgy SAVER: to minimize energy consumption, your machine will enter energy saver mode automatically (after entering stand-by mode for 15 mins) and can be quickly woken up with a touch of a button.
-
Page 36: Display Windows
COMFORT 3 dISPLAYS COMFORT 5 dISPLAYS Comfort 3 Comfort 5 Comfort R DISPLAy wINDOwS • TImE: Shown as minutes : seconds. View the time remaining • mAxImUm HEART RATE: Shows your maximum heart or the time elapsed in your workout. - Page 37 COMFORT 7 dISPLAYS COMFORT 8i dISPLAYS Comfort 7 Comfort 8i DISPLAy wINDOwS • TImE: Shown as minutes : seconds. View the time remaining • HEART RATE wHEEL: displays your current activity zone or the time elapsed in your workout. during your workout. With this Heart rate wheel you can be certain if your exercise level fits your workot goal.
-
Page 38: Getting Started
gETTINg STARTED TO CLEAR SELECTION/RESET THE CONSOLE qUICk START Hold START/STOP for 3 seconds. 1) Make sure the power is on. 2) Press START / STOP to start exercise in MANUAL mode. fINISHINg yOUR wORkOUT 3) Press to adjust resistance level during the workout. When your workout is complete, the bike will stop and beep. - Page 39 PROgRAm INfORmATION Comfort 3: 10 Programs (Manual / Intervals / game / Weight Loss / Rolling / Cadence / Random / Constant Watts / THR Zone / Custom) Comfort 5: 12 Programs (Manual / Intervals / game / Weight Loss / Rolling / Cadence / Random / Constant Watts / THR Zone / % THR /...
- Page 40 Level 2 Level 3 Level 4 Level 5 Level 6 Level 7 Level 8 Level 9 Level 10 Level 11 (Comfort 3, 5, R) Level 12 INTERVALS Warm Up Program Segments - Repeat Cool down Seconds Segment Level 1 Level 2...
- Page 41 INTERVALS Warm Up Program Segments - Repeat Cool down Seconds Segment Level 1 Level 2 Level 3 Level 4 Level 5 Level 6 Level 7 Level 8 Level 9 Level 10 Level 11 Level 12 Level 13 Level 14 Level 15 (Comfort 8i) Level 16 3) gAmE: This warm up game simulates a Car Racing game.
- Page 42 LOSS Warm Up Program Segments - Repeat Cool down Seconds Segment Level 1 Level 2 Level 3 Level 4 Level 5 Level 6 Level 7 Level 8 Level 9 Level 10 Level 11 (Comfort 3, 5, R) Level 12...
- Page 43 wEIgHT LOSS Warm Up Program Segments - Repeat Cool down Seconds Segment Level 1 Level 2 Level 3 Level 4 Level 5 Level 6 Level 7 Level 8 Level 9 Level 10 Level 11 Level 12 Level 13 Level 14 Level 15 (Comfort 7) Level 16...
- Page 44 6) wEIgHT LOSS PLUS(COmfORT 7 & 8i ONLy): Promotes weight loss by increasing and decreasing the resistance, while keeping you in your fat burning zone. Time based program with 15 levels to choose from and greater intensity than the weight loss program.
- Page 45 Level 4 Level 5 Level 6 Level 7 Level 8 Level 9 Level 10 Level 11 Level 12 Level 13 (Comfort 3, 5, R) Level 14 ROLLINg Warm Up Program segments Cool down Seconds Segment Level 1 Level 2 Level 3...
- Page 46 CADENCE Warm up Cool down Seconds Segment Level 1 Level 2 Level 3 Level 4 Level 5 Level 6 Level 7 Level 8 Level 9 Level 10 Level 11 Level 12 Level 13 (Comfort 3, 5, R) Level 14...
- Page 47 CADENCE Warm up Cool down Seconds Segment Level 1 Level 2 Level 3 Level 4 Level 5 Level 6 Level 7 Level 8 Level 9 Level 10 Level 11 Level 12 Level 13 Level 14 Level 15 (Comfort 7) Level 16 CADENCE Warm up Cool down...
- Page 48 Segment Level 1 Level 2 Level 3 Level 4 Level 5 Level 6 Level 7 Level 8 Level 9 (Comfort 3, 5, R) Level 10 RANDOm Warm Up Program segments Cool down Seconds Segment Level 1 Level 2 Level 3...
- Page 49 RANDOm Warm Up Program segments Cool down Seconds Segment Level 1 Level 2 Level 3 Level 4 Level 5 Level 6 Level 7 Level 8 Level 9 Level 10 Level 11 Level 12 Level 13 (Comfort 8i) Level 14 10) CONSTANT wATTS: This workout automatically adjusts the resistance to keep you within a set Watts range and maintains your desired level of exercise intensity.
- Page 50 11) INTERVAL wATT PROgRAm (COmfORT 8i ONLy): Allows you to choose a high WATTs value and a low WATTs value. The interval program will switch between High and Low WATTs values, making for a very intense and effective workout. 1) Select Constant Watts program using and press enter. 2) Set time using and press enter .
- Page 51 12) THR zONE: Simulate the intensity of your favorite sport as the program resistance automatically adjusts to maintain a set Target Heart Rate range. (Suggest to use chest belt with this program. You may purchase chest belt separately from your dealer) 1) Select THR Zone program using and press ENTER.
- Page 52 14) STRENgTH bUILDER (COmfORT 8i ONLy): Help you gradually increase your muscle strength with a preset workout program. Time based program with 20 levels to choose from. User sets time and level using (up/down arrows) and ENTER. STRENgTH bUILDER Warm Up Program Segments - Repeat Cool down Seconds...
- Page 53 15) CUSTOm 1 & 2: Customized workout, time defaults to 15 minutes. (Comfort 3 does not have Custom 2) 1) First enter the program setting and profile display will guide you trough all the workout column. 2) Use upper and lower arrow to change the resistance and press enter to confirm. Console will display your current segment number and guide you through segment 1 to segment 15.
- Page 54 2) Use your media player buttons to adjust song settings. 3) Remove the AUdIO AdAPTOR CABLE when not in use. SyNCINg bIkE wITH PASSPORT (COmfORT 3 IS NOT INCLUDED) 1) Using the arrow key on the passport remote control to scroll to the setup icon and press the Select.
-
Page 55: Engineering Mode
ENgINEERINg mODE: To enter the engineering menu, press and hold the for 3-5 seconds. SwITCHINg bETwEEN bRITISH AND mETRIC mODE Use the arrow keys to navigate to Eng2 and press Enter. Use the Enter key to navigate to P1. Use the arrow keys to switch between STANdARd (BRITISH) and METRIC. - Page 56 COmfORT 3 ExPLODED VIEw...
- Page 57 COmfORT 3 PARTS LIST dESCRIPTION SPECIFICATIONS dESCRIPTION SPECIFICATIONS MAIN FRAME LEFT SHROUd PdC11985464L SEAT HEIgHT AdJUSTMENT KNOB PAZ161525A RIgHT SHROUd PdC11985464R INNER BUSHINg PdZ153100 CONSOLE MAST dECORATIVE RINg PEZ12280 BEARINg 6003ZZ CRANK dECORATIVE RINg PEZ582315 dRIVE PULLEY NEA24020A RUBBER STEP-THROUgH PAd...
- Page 58 dESCRIPTION SPECIFICATIONS dESCRIPTION SPECIFICATIONS SPACER NBO1031514 WASHER 18X10X2.0T SEAT PAd BEARINg 6203ZZ CONSOLE FLAT HEAd HEX SCREW M10X20MM TRUSS PHILIPS SCREW M5X12 NYLON NUT POWER AdAPTOR MIddLE CONSOLE CABLE FBg9009P BOTTLE HOLdER A PdA1447112 TRUSS HEX SCREW M8X15 BOTTLE HOLdER B PdA109119 CONSOLE MAST gROMMET PdC17971214...
- Page 59 COmfORT 5 ExPLODED VIEw...
- Page 60 COmfORT 5 PARTS LIST dESCRIPTION SPECIFICATIONS dESCRIPTION SPECIFICATIONS MAIN FRAME LEFT SHROUd PdC11985464L SEAT HEIgHT AdJUSTMENT KNOB PAZ161525A RIgHT SHROUd PdC11985464R INNER BUSHINg PdZ153100 CONSOLE MAST dECORATIVE RINg PEZ12280 BEARINg 6003ZZ CRANK dECORATIVE RINg PEZ582315 dRIVE PULLEY NEA24020A RUBBER STEP-THROUgH PAd PdC2131056 MAgNET Ø15X7T,1400gS...
- Page 61 dESCRIPTION SPECIFICATIONS dESCRIPTION SPECIFICATIONS SPACER NBO1031514 WASHER 18X10X2.0T SEAT PAd BEARINg 6203ZZ CONSOLE FLAT HEAd HEX SCREW M10X20MM TRUSS PHILIPS SCREW M5X12 NYLON NUT POWER AdAPTOR MIddLE CONSOLE CABLE FBg9009P BOTTLE HOLdER A PdA1447112 TRUSS HEX SCREW M8X15 BOTTLE HOLdER B PdA109119 CONSOLE MAST gROMMET PdC17971214...
- Page 62 COmfORT 7 ExPLODED VIEw...
- Page 63 COmfORT 7 PARTS LIST dESCRIPTION SPECIFICATIONS dESCRIPTION SPECIFICATIONS MAIN FRAME LEFT SHROUd PdC11985464L SEAT HEIgHT AdJUSTMENT KNOB PAZ161525A RIgHT SHROUd PdC11985464R INNER BUSHINg PdZ153100 CONSOLE MAST dECORATIVE RINg PEZ12280 BEARINg 6003ZZ CRANK dECORATIVE RINg PEZ582315 dRIVE PULLEY NEA24020A RUBBER STEP-THROUgH PAd PdC2131056 MAgNET Ø15X7T,1400gS...
- Page 64 dESCRIPTION SPECIFICATIONS dESCRIPTION SPECIFICATIONS Ø31.8X1.5 KNOB PCZ43650 TRUSS ENd CAP SPACER NBO1031514 AdJUSTMENT CABLE FBZ535 SEAT PAd LOWER CONSOLE CABLE FBg7009P CONSOLE MOTOR FBC4-2,150MM TRUSS PHILIPS SCREW M5X12 ROUNd HEAd PHILIPS SCREW M6X10 HANd gRIP HR SENSOR CABLE FBg6002PA FLY WHEEL POWER AdAPTOR ALLEN FLANgE SCREW NUT 3/8"X26( 15)
- Page 65 COmfORT 8i ExPLODED VIEw...
- Page 66 COmfORT 8i PARTS LIST dESCRIPTION SPECIFICATIONS dESCRIPTION SPECIFICATIONS MAIN FRAME WASHER Ø15XØ7X2.0T SEAT HEIgHT AdJUSTMENT KNOB PAZ161525A SPRINg WASHER M6X1.5T INNER BUSHINg PdZ153100 LEFT CRANK NBZ124170L,L170MM BEARINg 6003ZZ RIgHT CRANK NBZ124170R,L170MM dRIVE PULLEY NEA24020A CRANK COVER MAgNET Ø15X7T,1400gS HEX FLANgE SCREW M8X1.25X20MM,12.9,13 TRANSMISSION SHAFT NBZ18065A...
- Page 67 dESCRIPTION SPECIFICATIONS dESCRIPTION SPECIFICATIONS ROUNd HEAd PHILIPS SELF TAPPINg SCREW ST3X12 BOTTLE HOLdER B PdA109119 FOAM STICKER FAF6941851 CONSOLE MAST gROMMET PDC17971214 FRONT STABILIZER ACCESSORY PAZ577298 FRONT STABILIZER COVER PdC55398A AUdIO CABLE TRANSPORTATION WHEEL PBKXd-083 FLAT WASHER 20X9X2.0T TRUSS HEX SCREW M8X40 SPRINg WASHER M8X2.0T...
- Page 68 COmfORT R ExPLODED VIEw...
- Page 69 COmfORT R PARTS LIST dESCRIPTION SPECIFICATIONS dESCRIPTION SPECIFICATIONS 3/8"X26,7.0t( 15) MAIN FRAME ALLEN HEX FLANgE SLIP SCREW NUT BEARINg 6003ZZ FLAT WASHER Ø18XØ10X2.0T dRIVE PULLEY Ø240X19T,6,NEA24020A IdLE WHEEL FLEXINg PLATE NAZ19348 MAgNET Ø15X7T,1400gS TRUSS HEX SCREW M10X20MM,10.9 TRANSMISSION SHAFT LEFT CRANK NBZ18065A (180MM) NBZ124170L,L170MM-9/16"...
- Page 70 dESCRIPTION SPECIFICATIONS dESCRIPTION SPECIFICATIONS PBKXD-083 RUBBER STEP-THROUgH PAd PdC340150 TRANSPORTATION WHEEL CONSOLE MAST TRUSS HEX SCREW M8X40 10 TRUSS ENd CAP Ø31.8X1.5 ROUNd TUBE LEVELER PCg60508A (38MM) UPPER HANd gRIP HR CABLE FBC7003P TRUSS PHILIPS SCREW M4X16 FOAM gRIP 31.8X2.5TX420MM REAR STABILIZER ASSEMBLY TWIST TIE 1000MM...
- Page 71 dESCRIPTION SPECIFICATIONS HEX WRENCH "PLUS" WRENCH SEA131415 HEX WRENCH 6MM (65X25) LEFT PEdAL Jd-3A RIgHT PEdAL Jd-3A TRUSS SELF TAPPINg SCREW Ø4X12 COUNTER SINK HEX SCREW M10X65 (ALL THREAd) ARC WASHER Ø20XØ10.5X2.0T...
- Page 72 Ende der Nutzungsdauer einer sachgerechten Entsorgung zu (örtliche Sammelstelle). gb: waste Disposal Vision Fitness / Horizon Fitness / TEMPO Fitness / TREO Fitness products are recyclable. At the end if its useful life please dispose of this article correctly and safely (local refuse sites).
- Page 74 EXERCISE BIKE OWNER’S MANUAL Comfort Upright bike and Recumbent Bide Owner’s Manual 0712’13 Rev. 2.4 © 2013 Horizon Fitness...
Need help?
Do you have a question about the Comfort 3 and is the answer not in the manual?
Questions and answers