Table of Contents
Advertisement
Quick Links
Advertisement
Table of Contents

Related Manuals for Audison TH uno Thesis


Summary of Contents for Audison TH uno Thesis
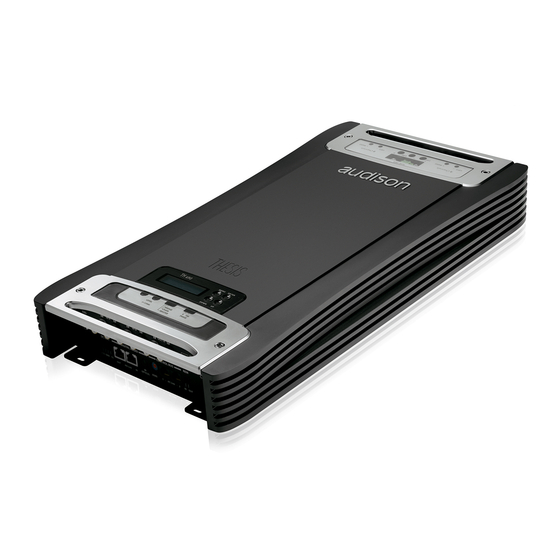
- Page 1 ADVANCED MANUAL TH uno Car Audio Mono Amplifier www.audison.eu...
-
Page 2: Table Of Contents
ADVANCED MANUAL / TH uno INDEX THESIS - The project Packaging Contents Installation Fixing template Rear Panel Functions Description How to remove the panel / the protection knob How to connect the power supply How to replace the fuse How to connect the speakers using one amplifier (MASTER) How to connect the speakers using two amplifiers in BRIDGE mode (MASTER+BRIDGE) - Page 3 Info and Alert sentences DRC - Digital Remote Control Info and Alert sentences How to connect How to install ACNet - Audison Control Network Descrizione delle funzioni System Display Amplifier Setting: Identification Amplifier Setting: Inputs Amplifier Setting: Sensitivity and Preout Level...
-
Page 4: Thesis - The Project
Heart of the system is a digital power microprocessor. It manages the amplifier functions and communicates with the user through a control panel as well as the Display Monitor, featuring the DRC remote control or, in a more complete and direct way, through the ACNet Audison Controller Network software. -
Page 5: Packaging Contents
ADVANCED MANUAL / TH uno Packaging Contents - TH uno amplifier - Printed Quick Start Guide - 1.0 m AC Link (RJ-12) cable - 1.0 m AD Link (RJ-45) cable - 2.0 m USB cable - USB/AC Link converter - TH crossover kit composed of: N. -
Page 6: Installation
ADVANCED MANUAL / TH uno Installation External size 510 mm / 20.07“ How to fix Fixing size f 4.3 x 10.5 mm 3/16” x 7/16” 478 mm / 18.82”... - Page 7 Fixing tem Warning: to properly print the template at the real size, select the “None” option into the “Page Scaling” setup. After printing, cut the sheets along the blue reference line and then glue them.
-
Page 8: Fixing Template
Fixing template... - Page 9 Mode A level panel spacer 66 mm (2.6”) Mode B level panel 26 mm (1.02”) spacer...
- Page 10 level panel spacer 66 mm (2.6”) level panel 26 mm (1.02”) spacer...
-
Page 11: Rear Panel
4 • SPEAKER B: Terminals to connect speakers. This output is connected in parallel with SPEAKER A to allow the connection of several speakers. 5 • FUSE: Protection Fuse Connection Audison AFS 150 A. How to remove the panel / the protection knob... -
Page 12: How To Connect The Power Supply
ADVANCED MANUAL / TH uno Rear Panel How to connect the power supply Super Capacitor Fuse Holder Battery Ground Ground... -
Page 13: How To Replace The Fuse
ADVANCED MANUAL / TH uno Rear Panel How to replace the fuse Fuse AFS 150 A (provided) -
Page 14: How To Connect The Speakers Using One Amplifier (Master)
ADVANCED MANUAL / TH uno Rear Panel How to connect the speakers using one amplifier (MASTER) PUSH LEVEL BRIDGE 0 180 CHAIN PHASE Hi : 0.3 ÷ 1.2V RMS Lo : 1.2 ÷ 4.8V RMS MASTER Speaker A Speaker B connected in parallel with Speaker A... -
Page 15: How To Connect The Speakers Using Two Amplifiers In Bridge Mode (Master+Bridge)
ADVANCED MANUAL / TH uno Rear Panel How to connect the speakers using two amplifiers in BRIDGE mode (MASTER + BRIDGE) PUSH LEVEL BRIDGE 0 180 CHAIN PHASE Hi : 0.3 ÷ 1.2V RMS Lo : 1.2 ÷ 4.8V RMS MASTER PUSH LEVEL... -
Page 16: How To Connect The Speakers Using More Than One Amplifier In Chain Mode (Master+Chain)
ADVANCED MANUAL / TH uno Rear Panel How to connect the speakers using more than one amplifier in CHAIN mode (MASTER + CHAIN) PUSH LEVEL BRIDGE 0 180 CHAIN PHASE Hi : 0.3 ÷ 1.2V RMS Lo : 1.2 ÷ 4.8V RMS MASTER Speaker Min 1 Ω... -
Page 17: Input Controls
ADVANCED MANUAL / TH uno Input controls Functions Description PUSH LEVEL BRIDGE 0 180 CHAIN PHASE Hi : 0.3 ÷ 1.2V RMS MASTER Lo : 1.2 ÷ 4.8V RMS 1 • LEVEL: Input sensitivity adjustment. It features 2 ranges, Hi from .3 to 1.2 VRMS and Low from 1.2 to 4.8 VRMS. -
Page 18: Front Panel
ADVANCED MANUAL / TH uno Front Panel Functions Description 1 • IN L/R: Analog Input Left / Right 2 • OUT L/R: Bypass Analog Output Left / Right. To check out how they work see page 20 ÷ 22 / 37 ÷ 42 3 •... -
Page 19: How To Connect The Remote
ADVANCED MANUAL / TH uno Front Panel How to connect the remote L: 7 mm (5/16”) MAX: 16 AWG Rem Out... -
Page 20: How To Connect The Source Through The Preamplified Analog Input (Master Mode)
ADVANCED MANUAL / TH uno Front Panel How to connect the source through the preamplified analog input (standard mode) TH configured in MASTER mode Input: Stereo Analog Pre Out: Stereo Analog Power Output: Mono Mix L+R TH uno Default preset PUSH LEVEL BRIDGE... -
Page 21: How To Connect The Source Through The In R Preamplified Analog Input (Master Mode)
ADVANCED MANUAL / TH uno Front Panel How to connect the source through the IN R preamplified analog input (standard mode) TH configured in MASTER mode Input: Mono IN R Analog Pre Out: Mono Analog = IN R Power Output: Mono = IN R TH uno Default preset... -
Page 22: How To Connect The Source Through The In L Preamplified Analog Input (Master Mode)
ADVANCED MANUAL / TH uno Front Panel How to connect the source through the IN L preamplified analog input (standard mode) TH configured in MASTER mode Input: Mono IN L Analog Pre Out: Mono Analog = IN L Power Output: Mono = IN L TH uno Default preset... -
Page 23: Electronic Crossover
ADVANCED MANUAL / TH uno Electronic Crossover Representing a high-end solution, the simplicity and power of the analog system found in the HV venti is thrust forward again in the TH, making use of the amplifiers versatility. The crossover ONLY acts on the amplifier power output, not on the PRE OUT output which is always a bypass. The alignment is a Butterworth type as, when either of the TH amplifiers is set up in a mono configuration, the slope of the filter can be set for 24 dB Oct operation. -
Page 24: X-Over Slope 12 Db
ADVANCED MANUAL / TH uno Electronic Crossover Crossover Slope 12 dB (default configuration) It is possible to set the crossover slope at 12 or 24 dB/Oct. - The TH-MXR.1 board must be inserted; - You need to operate on the ASC specific Setup Amplifier step. (See page 46). Through the Status Monitor it is possible to check anytime the presence of the filter as well as the set slope. -
Page 25: X-Over Slope 24 Db
ADVANCED MANUAL / TH uno Electronic Crossover Crossover Slope 24 dB If ASC is set at 24 dB Oct., it is anyway possible to set the crossover Low-pass at 12 or 24 dB Oct. - The TH-MXR.1 board must be inserted; - You need to operate on the TH-MXR.1 switch (see page 46). -
Page 26: How To Insert
ADVANCED MANUAL / TH uno Electronic Crossover How to insert Not inserted module TH uno (default configuration) You can verify the crossover presence by checking the ASC Status Monitor. See page 53 Inserting module TH uno PUSH LEVEL BRIDGE 0 180 CHAIN PHASE Hi :... -
Page 27: Examples
ADVANCED MANUAL / TH uno Example: TH amplifier on Subwoofer Analog Input In order to build a Standard System you have to: 1- Insert the TH-MXR.1 board with its relative filter module; 2- Connect power supply; 3- Connect the subwoofer; 4- Connect signal inputs and remote turn on;... -
Page 28: Two Way + Sub, Bi-Amplified, Th Amplifier, Analog Input
ADVANCED MANUAL / TH uno Example: Two Way + Sub, bi-amplified, TH amplifier Analog Input In order to build a Standard System: You have to follow same steps as per the above example. The only difference is for point 4, the second TH is a TH uno (mono);... -
Page 29: Three Way + Sub, Multi-Amplified, Th Amplifier, Analog Input
ADVANCED MANUAL / TH uno Example: Three Way + Sub, multi-amplified, TH amplifier Analog Input... -
Page 30: Two Way + Sub, Bi-Amplified, With And Without Th Amplifiers, Analog Input
ADVANCED MANUAL / TH uno Example: Two Way + Sub, bi-amplified, with and without TH amplifiers. Analog Input In order to build a Standard System: You have to follow same steps as per the above example. The only difference is that TH uno becomes the audio chain first amplifier, thus being able to manage the whole system;... -
Page 31: Three Way + Sub, Multi-Amplified, With And Without Th Amplifiers, Analog Input
ADVANCED MANUAL / TH uno Example: Three Way + Sub, multi-amplified, with and without TH amplifiers. Analog Input... -
Page 32: Thesis
Thesis TH amplifiers through the AD Link system (Audison Digital Link). Each amplifier independently takes care of the D/A conversion. While in the Digital Input mode the DRC needs to be connected, so it works as an actual general volume and source selector control, capable of repeating all the low frequency controls (Master Volume, Balance, Fader, Sub Volume). -
Page 33: Asc - Amplifier Status Controller
ADVANCED MANUAL / TH uno ASC - Amplifier Status Controller Functions Description TH uno Default display 1 • TH due STATUS DISPLAY: it is the visual element of the ASC system, a back-lit two line 32 character LCD display; While working, it can relate all of the configuration parameters memorised by the amplifier during the installation, as well as the operational status of the amplifier. -
Page 34: Setup Amplifier: Main Input
Select this entry when the amplifier is connected through the AD Link to a system managed by an Audison external processor (such as the Bit One). This entry gets active and is displayed only when the processor is connected. -
Page 35: Digital Inputs
ADVANCED MANUAL / TH uno Digital Inputs How to adjust the volume control and input selector using a digital source In the following pages you will find examples of how to connect the TH to a system driven by head units using the digital input. -
Page 36: Front Panel
ADVANCED MANUAL / TH uno Front Panel How to achieve same output volume level using an analog source (with its own volume control) and a digital source Once you have adjusted the system, therefore once the amplifiers input sensitivity has been adjusted, you can adjust the digital source volume level so that when selecting the analog or the digital source no difference in sound is perceptible while listening. - Page 37 ADVANCED MANUAL / TH uno Front Panel How to connect a source through the optical digital input in a system featuring more than one TH amplifier TH configured in MASTER mode Input: Digital Optical S/P DIF Pre Out: Digital AD Link (Repeats the IN OPTICAL signal) Power Output: Mono...
- Page 38 ADVANCED MANUAL / TH uno Front Panel How to connect a source through an optical digital input in a system featuring other non-TH amplifiers TH configured in MASTER mode Input: Digital Optical S/P DIF Pre Out: Stereo Analog (R and L Ch of Digital Input) Power Output: Mono TH uno...
-
Page 39: How To Connect An Analog And A Digital Source In A System Featuring More Than One Th Amplifier (In R Or In L)
ADVANCED MANUAL / TH uno Front Panel How to connect an analog and a digital source in a system featuring more than one TH amplifier TH configured in MASTER mode Input: Analog/Digital Optical S/P DIF Pre Out: Analog/Digital AD Link Power Output: Mono TH uno... - Page 40 ADVANCED MANUAL / TH uno Front Panel How to connect an analog and a digital source in a system featuring other non-TH amplifiers TH configured in MASTER mode Input: Analog/Digital Optical S/P DIF Pre Out: Stereo Analog Power Output: Mono TH uno Setting changed Setting changed...
- Page 41 ADVANCED MANUAL / TH uno Front Panel How to connect an analog and digital source in a system featuring more than one TH amplifier TH configured in MASTER mode Input: IN R or IN L Analog/Digital Optical S/P DIF Pre Out: Analog (=IN R or IN L) /Digital AD Link Power Output: In Analog: Mono (=IN R or IN L)
-
Page 42: How To Connect An Analog And A Digital Source In A System Featuring Other Non-Th Amplifiers (In R O In L)
ADVANCED MANUAL / TH uno Front Panel How to connect an analog and a digital source in a system featuring other non-TH amplifiers TH configured in MASTER mode Input: IN R or IN L Analog/Digital Optical S/P DIF Pre Out: Analog (=IN R or IN L) Power Output: In Analog: Mono (=IN R or IN L) -
Page 43: Asc - Amplifier Status Controller
ADVANCED MANUAL / TH uno ASC - Amplifier Status Controller Setup Amplifier: Amp ID AMP ID stands for Amplifier IDentification. The AMP ID is a way to identify the task the amplifier performs inside the system. The AMP ID does not affect the electric functioning and does not act on the amplifier electronic crossover. -
Page 44: Setup Amplifier: Amp Id-Preout
ADVANCED MANUAL / TH uno ASC - Amplifier Status Controller Setup Amplifier: Amp ID-Preout The AMP ID can also be assigned to the PRE OUT output. This function is extremely useful in case the TH amplifier is added to a pre-existing system featuring not only TH amplifiers or if you want to add to the TH system a non-TH amplifier. -
Page 45: Front Panel
ADVANCED MANUAL / TH uno Front Panel How to adjust the PRE OUT analog output As already said, the AMP ID can also be assigned to the PRE OUT output, but not only to it. Through the ACNet software also the PRE OUT sensitivity can be adjusted to align the gain of the amplifier connected to that output, thus adapting sensitivity according to the system general volume increase and decrease. -
Page 46: Asc - Amplifier Status Controller
ADVANCED MANUAL / TH uno ASC - Amplifier Status Controller Setup Amplifier : X-Over Slope You can choose the crossover filter slope. Select 1- 12 dB/oct: in this case, the Low-pass slope switch on the TH-MXR module will not be active. Select 2- 24 dB/oct: when this option is selected, the Low-pass slope switch on the TH-MXR module will anyway be active, thus providing the ability to mechanically choosing between 12 and 24 dB/oct. -
Page 47: Dual Power & Bias Control
ADVANCED MANUAL / TH uno ASC - Amplifier Status Controller DUAL POWER & BIAS CONTROL A revolutionary function called Dual Power was introduced for the first time in the HV venti. Controlling the amplifier’s output power configuration, this function allowed the predetermination of the amplifiers output power and of the grade of the outputs operational class. -
Page 48: Dual Power Values
ADVANCED MANUAL / TH uno ASC - Amplifier Status Controller DUAL POWER Values 850 W 850 W 200 W 200 W 100 mA 30 mA 10 mA 4 mA 8.5 A 6.2 A 4.3 A 2.2 A 1 Ω 1 Ω 2 Ω... -
Page 49: How To Change Presets On The Memory
ADVANCED MANUAL / TH uno ASC - Amplifier Status Controller Setup Amplifier: DUAL POWER Settings How to change presets on the Memory (DRC required) The TH due can be set with only one operational mode at a time, while the DRC can manage four customisable memories. -
Page 50: Three Way + Sub, Multi-Amplified, Th Amplifiers, Digital Input
ADVANCED MANUAL / TH uno Example: Three Way + Sub, multi-amplified, TH amplifiers Digital Input... -
Page 51: Three Way + Sub, Multi-Amplified, Th Amplifiers, Analog + Digital Input
ADVANCED MANUAL / TH uno Example: Three Way + Sub, multi-amplified, TH amplifiers Analog + Digital Input... -
Page 52: Three Way + Sub, Multi-Amplified, With Both Th And Non-Th Amplifiers, Analog + Digital Input
ADVANCED MANUAL / TH uno Example: Three Way + Sub, multi-amplified, with both TH and non-TH amplifiers. Analog + Digital Input... -
Page 53: Asc - Amplifier Status Controller
ADVANCED MANUAL / TH uno ASC - Amplifier Status Controller Status Monitor This feature of the ASC provides the ability to monitor the amplifier working status by moving through the different entries the data regarding the working TH amplifier will show. When displaying a value, if you do not act on any of the buttons for 5 seconds, the ASC automatically goes back to the default display screen. -
Page 54: Runtime Monitor
ADVANCED MANUAL / TH uno ASC - Amplifier Status Controller Runtime Monitor This function of the ASC provides the ability to alternately show on the amplifier display the information on its operational status. Through this setup you can select the fields you want to be visibile when the amplifier is on. For each field you can select YES to have the entry show on the display. -
Page 55: Info And Alert Sentences
You have to access to the ASC and at least set the AMP ID. General protection. The amplifier will try to restart 5 times. Amp off Contact Audison Technical Support. Overload protection. Check speaker load. This message Autoreset is displayed when an overload occurs. -
Page 56: Drc - Digital Remote Control
ADVANCED MANUAL / TH uno DRC - Digital Remote Control (not included with TH amplifier) The DRC is a microprocessor digital system providing remote control and monitoring of the TH amplifiers. Once connected it performs important functions such as: - Source selection (it also provides the ability to use the optical digital input as main source, checking its main volume) - Main volume control - Subwoofer volume control... -
Page 57: Info And Alert Sentences
TH AMPLIFIER AMPLIFIER ADDRESS (ADRS) MODEL PROTECTION TYPE Service general protection. Amp off Call Audison Technical Support. Overload protection. Autoreset Check speaker load. Clip output is reaching distortion threshold. Event’s alert Thermal protection. Check environmental temperature Autoreset and/or use a low bias AMC setting. -
Page 58: How To Connect
ADVANCED MANUAL / TH uno DRC - Digital Remote Control DRC - How to connect DRC/AC Link cable (provided) DRC - How to install 35 mm / 1.38” Ø 2 mm / 1/8” Flush mounting External mounting 3.5 mm / 0.14” 13.5 mm / 0.53”... -
Page 59: Acnet - Audison Control Network
ADVANCED MANUAL / TH uno ACNet - Audison Control Network Software to control Audison amplifier Hardware Requirements: 1024x768 Display Optimized - 96 dpi Font size - 1 x USB port (1.1 compliant) RJ12 (Provided) 1 - Switch on the PC... -
Page 60: Descrizione Delle Funzioni
ADVANCED MANUAL / ACNet ACNet - Audison Control Network Functions Description 1 • SYSTEM DISPLAY:on this area the TH amplifiers connected to the system through the ACLink will be displayed. This screen will show the TH amplifier model name and its ADRS. -
Page 61: System Display
ADVANCED MANUAL / ACNet ACNet - Audison Control Network System Display When installing a system composed by TH amplifiers it’s possible to create a network between them by using ACLink series connection. It is fundamental that a different ADRS starting from zero is assigned to each amplifier (see page 18). -
Page 62: Amplifier Setting: Identification
ADVANCED MANUAL / ACNet ACNet - Audison Control Network Amplifier Setting: Identification The amplifier identification provides its S/N - serial number (fixed), the owner name (free-text), the installer name (free-text) and the Firmware release included in the microprocessor inside the TH amplifier. -
Page 63: Amplifier Setting: Inputs
- If the amplifier being set receives the signal from another TH amp, connected in analog and digital AD Link, select Optical Slave . - If the amplifier being set receives the signal from an external audio processor (Ex: Audison Bit One) select AD Link. -
Page 64: Amplifier Setting: Sensitivity And Preout Level
ADVANCED MANUAL / ACNet ACNet - Audison Control Network Amplifier Setting: Sensitivity and Preout Level From this section featuring drop down menus, it is possible to regulate each amplifier’s input sensitivity, acting also on the High/Low Level. There are sliders for each channel which can work singularly or together if “linked”. The software enables the fine tuning between right and left, acting on the corresponding slider. -
Page 65: Amplifier Setting: Dual Power Memory
ADVANCED MANUAL / ACNet ACNet - Audison Control Network Amplifier Setting: Dual Power Memory In this section the TH amps operating modes memories can be selected. The availabIe preset are: Hi-AB Class (default), Hi-Current, A-Class, Energy Saving. They can be assigned to each single memory by using the drop down menus. -
Page 66: System Audio Control
ADVANCED MANUAL / ACNet ACNet - Audison Control Network System Audio Control These controls act on the whole system: - System Volume: it’s the main volume control of the system, the slider on Min position switches on the muting and shows “MUTE” in the specific box. The adjustment starts from -60 dB (muting) up to 0 dB Max, 0,5 dB steps. -
Page 67: Amplifier Status
ADVANCED MANUAL / ACNet ACNet - Audison Control Network Amplifier Status The ACNet software performs a real-time check-up of the amplifiers operating conditions. Once an amplifier is selected, the parameters monitored by the ASC microprocessor are shown on the specific boxes. -
Page 68: System Amplitude Setup
ADVANCED MANUAL / ACNet ACNet - Audison Control Network System Amplitude Setup Once each single amplifier in the system has been set, it is possible to use the setup window above, which allows the sensitivity adjustment of all amplifiers of the entire system. -
Page 69: System Dual Power Setup
ADVANCED MANUAL / ACNet ACNet - Audison Control Network System Dual Power Setup This setup enables the complete management of the operating mode of the amplifiers in the systems. The chart above presents in one window all the amplifier names and channels being used. -
Page 70: Technical Specifications
ADVANCED MANUAL / TH uno Technical Specifications Power supply Voltage 11 ÷ 15 VDC Idling current: A-Class 8.5 A Hi-AB Class 6.2 A Hi-Current 4.3 A Energy Saving 2.2 A Switched off 0.04 mA Consumption @ 14.4 VDC, 1 Ω, Max musical power 132 A Remote IN voltage 7 ÷...
Need help?
Do you have a question about the TH uno Thesis and is the answer not in the manual?
Questions and answers