Table of Contents
Advertisement
Quick Links
Download this manual
See also:
Instruction Manual
8x8 HDMI Matrix Switch over Single CAT5/6
With Deep Color & 3D Support
Model #: SW-HDM3D-C6-8x8E
Model #: HDM3D-C6SW-R
© 2012 Avenview Inc. All rights reserved.
The contents of this document are provided in connection with Avenview Inc. ("Avenview") products. Avenview makes no representations or warranties with
respect to the accuracy or completeness of the contents of this publication and reserves the right to make changes to specifications and product descriptions at any
time without notice. No license, whether express, implied, or otherwise, to any intellectual property rights is granted by this publication. Except as set forth in
Avenview Standard Terms and Conditions of Sale, Avenview assumes no liability whatsoever, and disclaims any express or implied warranty, relating to its products
including, but not limited to, the implied warranty of merchantability, fitness for a particular purpose, or infringement of any intellectual property right.
Reproduction of this manual, or parts thereof, in any form, without the express written permission of Avenview Inc. is strictly prohibited.
www.avenview.com|1
Advertisement
Table of Contents

Subscribe to Our Youtube Channel
Related Manuals for Avenview SW-HDM3D-C6-8X8E


Summary of Contents for Avenview SW-HDM3D-C6-8X8E
- Page 1 No license, whether express, implied, or otherwise, to any intellectual property rights is granted by this publication. Except as set forth in Avenview Standard Terms and Conditions of Sale, Avenview assumes no liability whatsoever, and disclaims any express or implied warranty, relating to its products including, but not limited to, the implied warranty of merchantability, fitness for a particular purpose, or infringement of any intellectual property right.
-
Page 2: Table Of Contents
Regulatory Notices Federal Communications Commission (FCC)........... 4 Introduction ..............................4 Package Contents ............................5 Before Installation ............................5 Panel Description ............................6 1.7.1 SW-HDM3D-C6-8x8E Front Panel ......................6 1.7.2 SW-HDM3D-C5-8x8E Rear Panel ......................6 1.7.3 HDM3D-C6SW-R ............................7 IR Control Patch ............................8 HDM3D-C6SW-R ..............................8 Installation (SW-HDM3D-C6-8x8E) ..................... -
Page 3: Section 1: Getting Started
Removal, installation, and set-up service charges. Safety Instructions The Avenview SW-HDM3D-C6-8x8E HDMI Matrix Switch over Single CAT6 with Full 3D Support and Ethernet has been tested for conformance to safety regulations and requirements, and has been certified for international use. However, like all electronic equipment’s, the SW-HDM3D-C6-8x8E should be used with care. -
Page 4: Regulatory Notices Federal Communications Commission (Fcc)
Introduction The Avenview SW-HDM3D-C6-8x8E, HDMI Matrix with IR, Full 3D Support and now Ethernet over Single CAT6 provides the most flexible and cost effective solution in the market to route high definition video sources plus multi-channel (up to 7.1 channel) digital audio from any of the eight HDMI sources to the remote displays at the same time. -
Page 5: Package Contents
Use the DC power adapter with correct specifications. If inappropriate power supply is used then it may cause a fire. Do not twist or pull by force ends of the UTP cable. It can cause malfunction. www.avenview.com|5... -
Page 6: Panel Description
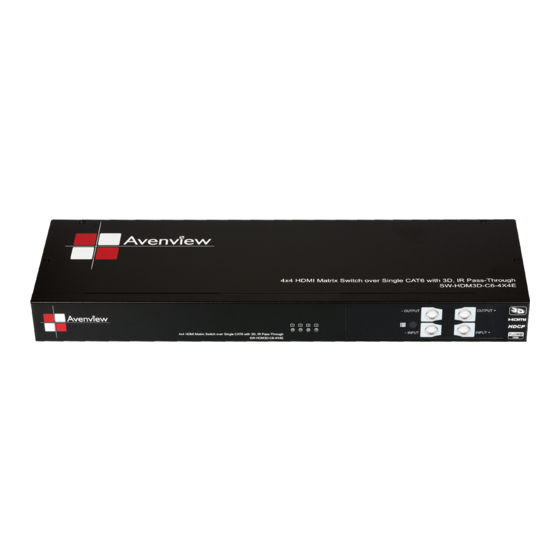
Panel Description 1.7.1 SW-HDM3D-C6-8x8E Front Panel SOURCE STATUS: Input source indicator LED SENSOR: IR sensor for receiving the IR commands from IR remote Output Push Button & 7-segment LED: Input Push Button & 7-segment LED: Front panel push buttons used to select the Front panel push buttons used to select the number of display channel &... -
Page 7: Hdm3D-C6Sw-R
(strongest) to 7 (weakest) for respective transmission length from longest possible range to short distance. Please adjust the signal level from 7 to 0 and stop turning the rotary switch whenever the audio/video is playing normally. Inappropriate signal level setting may cause overpowering issue that would shorten the product life significantly! www.avenview.com|7... -
Page 8: Ir Control Patch
Receives IR commands from remote control HDM3D-C6SW-R IR BLASTER: IR control on individual display device IR RECEIVER: IR receiver connected here can receive all IR command signals from the IR remote controls of SW-HDM3D-C6-8x8E and all other HDMI source devices. IR Blaster IR Receiver www.avenview.com|8... -
Page 9: Installation (Sw-Hdm3D-C6-8X8E)
2. Connect each HDMI CAT 5/6 output on the SW-HDM3D-C6-8x8E to respective CAT 5/6 input on the remote receiver HDM3D-C6SW-R 3. Connect IR BLASTER cable to the SW-HDM3D-C6-8x8E and direct the IR emitter to the build-in IR receiver of the sources 4. -
Page 10: Operation And Ir Control
3) After you select the desired mapping configuration number, the LED will blink twice and the mapping setting will be effective 4) If you push the “output+ (save)”button before the mapping setting is effective, the LED will show “一”“一”to quit the Preset Mapping Mode www.avenview.com|10... - Page 11 5) It will quit the Learn Output EDID Mode if you push the “input+ (default)”button before the setting is effective 6) The LED will show “0”“0” if the setting is success The LED will show “F”“F” if the setting is failure www.avenview.com|11...
-
Page 12: Rs232 Serial Port Control
Firmware Update Button COM Port Selection Network Button Connection Status Mapping Button Connect/Disconnect Button Default Reset Button Power On/Off Button In/Out Switch Button EDID Button Mute Output Button FW/SW Version Button Click “ ” button to show version information www.avenview.com|12... - Page 13 COM Port Selection Click “ ” button to select COM Port Connection Status 1) Connected Status: 2) Connecting Status: 3) Disconnected Status: Connect/Disconnect Button Click this button “ ” to change connection status www.avenview.com|13...
- Page 14 Power On/Off Button Click this button to power on/off Power on status(Blue): “ ” Click this button to power off device(Standby Mode) Power off status (Red): “ ” Click this button to power on device EDID Button www.avenview.com|14...
- Page 15 Click “Load” button to select the EDID file 3) Learn EDID From Display a) Select EDID Port b) Select Input c) Click “Learn” button to learn display EDID 4) Create EDID File a) Click “Create” button to create EDID file www.avenview.com|15...
- Page 16 Select the EDID content c) Click “Save EDID on Computer” to save the generated EDID as a file View EDID Content a) Select Input, or From File b) Click “View” button to read the EDID and analysis www.avenview.com|16...
- Page 17 7) Firmware Update Button 1) Click “Load File” to select the firmware file which you want to update 2) Click “Break” button 3) Quickly remove and reconnect the power input connector 4) Click “Start” button to begin the firmware update www.avenview.com|17...
- Page 18 3) Key in the device IP address to the pop-up windows 4) Close the pop-up windows 5) Click the connected button to connect 9) Mapping Button 1) Save Mapping: a) Select Mapping(1-8) b) Click “Save” button to save current mapping www.avenview.com|18...
- Page 19 The default reset process will take about 80~90 seconds 11) In/Out Switch Button Click the button on the checkerboard to select Input & Output port User can click the input number button to let all outputs select the same input Ex: All outputs select input 3 www.avenview.com|19...
- Page 20 12) Mute Output Button Click the circle button to turn off output’s video and audio Ex: Mute Output 2 www.avenview.com|20...
-
Page 21: Edid Learning
THREE methods to do EDID Learning as below, 1. Front Panel Push-in Button: Please refer to the Operation Approach\ Method A: Push-in Button 2. IR Remote Control: Please refer to the Operation Approach\ Method B: IR Remote Control www.avenview.com|21... -
Page 22: Section 2: Specifications
Section 2: Specifications Item Description Units SW-HDM3D-C6-8x8E HDM3D-C6SW-R 8x8 HDMI Matrix Switch over CAT6 HDMI Receiver over CAT5 with 3D Unit Description with 3D Support Support HDMI Compliance HDMI Deep Color & Full 3D HDCP Compliance Video Bandwidth Single Link 225 MHz (6.75Gbps) -
Page 23: Section 3: Ir Remote User Guide
Select the Input 1-8 OUTPUT Select the Outputs 1-8 Reserved Reserved Ex: Select Input 2 to Output 3 Push the Green circle button as illustrated to select Input 2 then push the red button to output the source to Output 3. www.avenview.com|23... - Page 24 Default EDID +1~8(1-8 default EDID) +1~8(input 1~8) + Learn default EDID Take 1.Press “DEFAULT EDID” button 2.Press number key “2” to select default EDID 2 3.Press number key “3” to select Input 3 Ex: Default EDID 2 Input 3 F(fail) (success) 4.Press “TAKE” button www.avenview.com|24...
- Page 25 Disclaimer While every precaution has been taken in the preparation of this document, Avenview Inc. assumes no liability with respect to the operation or use of Avenview hardware, software or other products and documentation described herein, for any act or omission of...
Need help?
Do you have a question about the SW-HDM3D-C6-8X8E and is the answer not in the manual?
Questions and answers