Table of Contents
Advertisement
Advertisement
Table of Contents
Troubleshooting

Related Manuals for Finlux 55UT3EC320S-T


Summary of Contents for Finlux 55UT3EC320S-T
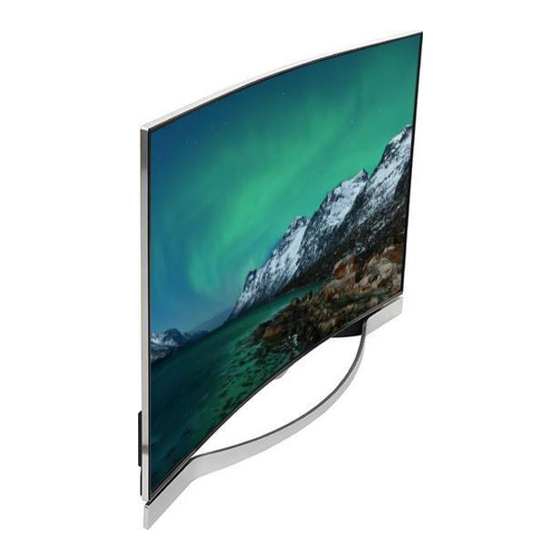
- Page 1 55 inch LED TV 55UT3EC320S-T Owner’s manual...
- Page 2 50296202...
-
Page 3: Table Of Contents
Contents Safety Information ..........2 Getting Started ............3 Notifications & Features & Accessories ....3 Specification ............5 Remote Control ............6 Connections............7 First Time Installation - USB Connections ....8 TV Menu Features and Functions ......11 General TV Operation .......... 14 Using the 3D Mode .......... -
Page 4: Safety Information
Safety Information If there is lightning or storms, or if the TV is not going to be used for a while (e.g. if going away CAUTION on holiday), disconnect the TV set from the mains. The mains plug is used to disconnect RISK OF ELECTRIC SHOCK TV set from the mains and therefore it must DO NOT OPEN... -
Page 5: Getting Started
Getting Started Notifications & Features & Accessories • Programme recording. Environmental Information • Programme timeshifting. This television is designed to consume less energy • OSD menu system. to help save the environment. To reduce energy consumption, you should take the following steps: • Scart socket for external devices (such as DVD Players, PVR, video games, etc.) You can use the Power Save Mode setting, located in the Picture menu. -
Page 6: Operation With The Buttons On The Tv
TV Control Buttons & Operation Connect Power IMPORTANT: The TV set is designed to operate on 220-240V AC, 50 Hz socket. After unpacking, allow the TV set to reach the ambient room temperature before you connect the set to the mains. Plug the power cable to the mains socket outlet. Antenna Connection Connect the aerial TV plug to AERIAL INPUT (ANT- TV) socket located on the rear bottom side of the TV. -
Page 7: Specification
Digital Teletext Information for Users on Disposal of Old Equipment and Batteries Press TXT ( button to view digital teletext [European Union only] information. Operate it with the coloured buttons, cursor buttons and the OK button. The operation method may These symbols indicate that equipment with these differ depending on the contents of the digital teletext. -
Page 8: Remote Control
Getting Started Remote Control 1. Source 2. Launches Netflix Application 3. Internet Portal 4. Play ( in media browser mode ) SOURCE 5. Programme recording 6. Rapid reverse ( in media browser mode ) LANG. 7. Mono/Stereo - Dual I-II / Current language (in DVB channels) 8. -
Page 9: Connections
Getting Started Connections Connector Type Cables Device NOTE: When connecting a device via the YPbPr or Mini Scart Side AV input, you must Connection use a connection cables Mini Scart adapter cable to enable connection. See (rear bottom) (supplied) t h e i l l u s t r a t i o n s a b o v e . | To e n a b l e P C a u d i o , y o u will need to use the SIDE Connection... -
Page 10: First Time Installation - Usb Connections
Getting Started First Time Installation - USB Connections Switching On/Off TV Media Playback via USB Input You can connect a 2.5” and 3.5” inch (hdd with external Connect the power cord to the 220-240V AC, 50 Hz. power supply) external hard disk drives or USB memory To Switch the TV On stick to your TV by using the USB inputs of the TV. -
Page 11: Slow Forward
Slow Forward It is recommended to use USB hard disk drive to recording HD programmes. If you press the (PAUSE) button while watching Do not plug out the USB/HDD during a recording. This recorded programmes, the slow forward feature will be may harm the connected USB/HDD. -
Page 12: System Audio Control
The TV remote is automatically able to perform the Quick Menu main functions after the connected HDMI source has The Quick Settings menu allows you to access some been selected. options quickly. This menu includes Power Save Mode, To terminate this operation and control the TV via 3D Mode, Virtual 3D, Picture Mode, Favourites, Sleep the remote again, press and hold the “0-Zero”... -
Page 13: Tv Menu Features And Functions
TV Menu Features and Functions System - Picture Menu Contents 3D Settings Press to view 3D settings. You can change the picture mode to suit your preference or requirements. The Picture mode can Mode be set to one of these options: Cinema, Game, Sports, Dynamic and Natural. Contrast Sets the lightness and darkness values of the screen. - Page 14 System - Sound Menu Contents Volume Adjusts the volume level. Equalizer Selects the equalizer mode. Custom settings can be made only when in user mode. Balance This setting is used for emphasizing left or right speaker balance. Headphone Sets headphone volume. Sound Mode You can select a sound mode (if the selected channel supports).
- Page 15 You can set the timeout value of the auto off feature. When the timeout value is reached Auto TV Off and the TV has not been operated for a selected time, the TV will go into standby mode. If the Standby Search is set to On, when the TV is in standby mode, available Standby Search broadcasts will be searched.
-
Page 16: General Tv Operation
General TV Operation Using the Channel List Record / Delete Record Timer The TV sorts all stored stations in the Channel List. You can edit this channel list, set favourites or set After you have selected a programme in the active stations to be listed by using the Channel List EPG menu, press the OK button. -
Page 17: Operating The 3D Mode
• Sometimes certain symptoms can occur in CAUTION - 3D Images unspecified conditions even if you do not have any • Read these safety instructions carefully to prevent previous history. In such a case, if you experience damage.and ensure your personal safety. any of the following symptoms, immediately stop •... -
Page 18: Vertical Viewing Angle
Horizontal Viewing Angle • 3D feature enables you to view 3D content using the supplied 3D glasses. • To enable and customize 3D mode on the TV, perform the following: • Press MENU button on the remote control and select Picture by using “... -
Page 19: 3D Bluetooth Active Shutter Glasses
3D Viewing Information - continued 3D Bluetooth Active Shutter Glasses Contents in the box HDMI 1080p@24 FP Supported Not Supported Not Supported CR 1620 3D Glasses x 2 Glasses 720p@50 FP Supported Not Supported Not Supported CR1620 x 2 cloth Operating Instructions 720p@60 FP Battery... -
Page 20: Power Off
Wait until they cool down, and contact the shop 1. Ensure TV is in 3D mode and glasses are where you purchased the product. within 0.5M of the TV. • Do not nail, hammer, or step on the battery. 2. In power on or power off state, press the power button for 3 seconds. -
Page 21: Connectivity Functions
Standard Specification Disposal of batteries and/or accumulators 3D method Liquid Crystal Shutter The crossed out wheeled dust bin symboI Dimensions Width: 147 mm indicates that batteries and/or accumulators Height: 39 mm must be collected and disposed of separately Depth: 154 mm from household waste. -
Page 22: Wireless Connectivity
Configuring Wired Device Settings • The location where the transmission is most effective differs depending on the usage environment. Network Type • The Wireless LAN adaptor supports 802.11 a,b,g & The Network type can be selected as Wired or Wireless, n type modems. It is highly recommended that you in accordance with the active connection to the TV set. -
Page 23: Wireless Display
• Connect to your router following the steps stated above option in the System>Settings>More menu. Select in the “Wireless Connectivity” section. the menu option and press the OK button to open the related menu. Using this menu you can discover •... -
Page 24: Internet Portal
2. Connect to a Wired or Wireless Network Internet Portal See the chapter Network Settings for detailed configuration Ensure the TV is connected to a Wired/Wireless information. Internet connection. After the connection is 3. Play Shared Files via Media Browser established, you can select or view portal options. -
Page 25: Iplayer Application
iPlayer Application You can access BBC iPlayer using your TV. To do this, an active internet connection is required. (See connecting to a Wired/Wireless Network section to connect your TV to internet). After the connection is established, you can select BBC iPlayer among the portal options. -
Page 26: Internet Browser
Internet Browser To use the internet browser, please select the internet browser logo from the portal section. • To navigate the web browser, use the arrow buttons pages and these will take you to the appropriate on the remote control. Press OK to continue. pages. -
Page 27: Software Upgrade
Software Upgrade Troubleshooting & Tips Your TV is capable of finding and updating automatically Tv will not turn on via the Aerial/Cable signal or over the Internet. Make sure the power cord is plugged in securely to Software upgrade search via user interface wall outlet. -
Page 28: Nero Mediahome Installation
Nero MediaHome Installation To install Nero MediaHome, please proceed as follows: Note: To use DLNA function, this software should be installed to your PC. 1. Enter the link below completely in the adress-bar of your web browser. http://www.nero.com/mediahome-tv 2. Click the Download button on the opening page. The installation file will be downloaded onto your 3. -
Page 29: Pc Input Typical Display Modes
PC Input Typical Display Modes AV and HDMI Signal Compatibility The following table is an illustration of some of the Source Supported Signals Available typical video display modes. Your TV may not support all resolutions. Your TV supports up to 1920x1200. NTSC 60 Index Resolution... -
Page 30: Supported File Formats For Usb Mode
Supported File Formats for USB Mode Media Extension Format Notes Video .dat, .mpg, Mpeg1-2 1080P@30fps - 50Mbit/sec .mpeg .ts, .trp, MPEG2 , H.264, H.264:1080Px2@25fps, 1080P@50fps MVC:1080P@ 24fps Other: 1080P@30fps - .tp, .m2ts VC1, AVS, MVC 50Mbit/sec .vob MPEG2 1080P@30fps 50Mbit/sec .mkv MPEG1-2-4, H.264:1080Px2@25fps, 1080P@ 50fps, 1080P@30fps - 50Mbit/sec... -
Page 31: Supported Dvi Resolutions
Supported DVI Resolutions When connecting devices to your TV’s connectors by using DVI converter cables(not supplied), you can refer to the following resolution information. 24Hz 25Hz 30Hz 56Hz 60Hz 66Hz 70Hz 72Hz 75Hz 640x400 þ 640x480 þ þ þ þ 800x600 þ... -
Page 32: Important Instructions
Important Instructions For your own safety read the following instructions carefully before attempting to connect this unit to the mains supply. MAINS (AC) OPERATION The wires in the mains lead are coloured in accordance with the following code : GREEN &... - Page 33 Product Fiche Commercial Brand:FINLUX Product No. 10094690 Model No. 55UT3EC320S-T Energy efficiency class Visible screen size 55 inches 140 cm (diagonal,approx.) (inch/cm) On mode average power consumption (Watt) Annual energy consumption (*) (kWh/annum) Standby power consumption (Watt) Off mode power consumption...
Need help?
Do you have a question about the 55UT3EC320S-T and is the answer not in the manual?
Questions and answers