Table of Contents
Advertisement
Available languages
Available languages
Advertisement
Table of Contents

Related Manuals for Axis T8134 Midspan 60W


Summary of Contents for Axis T8134 Midspan 60W
-
Page 1: Installation Guide
INSTALLATION GUIDE AXIS T8134 Midspan 60W Installation Guide... -
Page 2: Electromagnetic Compatibility (Emc)
Europe Liability Every care has been taken in the preparation of this This product complies with the applicable document. Please inform your local Axis office of CE marking directives and harmonized standards: any inaccuracies or omissions. Axis Communications • AB cannot be held responsible for any technical or... -
Page 3: Contact Information
Pollution Caused by Electronic Information Products AS/NZS CISPR 22. The product shall be connected (ACPEIP). using a shielded network cable (STP) that is properly grounded. Contact Information Axis Communications AB Japan この装置は、クラスB 情報技術装置です。こ Emdalavägen 14 の装置は、家庭環境で使用することを目 的 223 69 Lund としていますが、この装置がラジオやテレビ... -
Page 5: Hazard Levels
AXIS T8134 Midspan 60W Safety Information Read through this Installation Guide carefully before installing the product. Keep the Installation Guide for future reference. Hazard Levels Indicates a hazardous situation which, if not DANGER avoided, will result in death or serious injury. -
Page 6: Safety Instructions
• The Axis product shall be installed by a trained professional. NO TICE TICE TICE • The Axis product shall be used in compliance with local laws and regulations. • To use the Axis product outdoors, or in similar environments, it shall be installed in an approved outdoor housing. - Page 7 AXIS T8134 Midspan 60W Transportation NO TICE TICE TICE • When transporting the Axis product, use the original packaging or equivalent to prevent damage to the product.
-
Page 9: Installation Steps
AXIS T8134 Midspan 60W Installation Guide This Installation Guide provides instructions for installing AXIS T8134 on your network. Installation Steps Make sure the package contents, tools and other materials necessary for the installation are in order. See Package Contents on page 9 Study the hardware overview. -
Page 10: Specifications
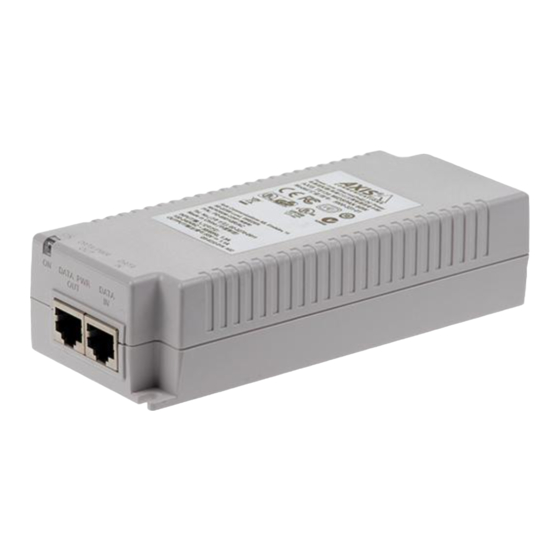
AXIS T8134 Midspan 60W Indicators AXIS T8134 Midspan LED Indicators Indication Color Port Power off Power on Orange Green A remote terminal is connected Orange, Non-standard powered device is flashing connected to the port terminal Port was powered at four pairs. Then port Green, was overloaded/shorted/under load. -
Page 11: Ethernet Interface
AXIS T8134 Midspan 60W Power Consumption Input Voltage 100 — 240 V AC 50/60 Hz Maximal Input Current 1.5 Ampere (max) 60 W Available Output Power (max) Nominal Output Voltage 55 V DC High Power over Ethernet, max. 60 W... - Page 12 AXIS T8134 Midspan 60W Connect the midspan (DATA & POWER OUT) to the camera, using the network cable (Category 5/5e/6) that has been connected to the camera. Connect the midspan to a grounded (earthed) mains power outlet (100–240 V AC) using the supplied power cable.
-
Page 13: Troubleshooting
Category 5/5e/6. • Do not use countersunk screws when mounting the midspan. Screw size 4 mm. Troubleshooting AXIS T8134 does not power up • Remove and re-apply power to the device and check the indicators during power up sequence. -
Page 14: Warranty Information
• If an external power splitter is in use, verify that it works. • If possible reconnect the same powered device into a different midspan. Warranty Information For information about Axis’ product warranty and thereto related information, see www.axis.com/warranty/... -
Page 15: Niveaux De Risques
AXIS T8134 Midspan 60W Informations sur la sécurité Lisez attentivement ce guide d'installation avant d'installer l'appareil. Conservez le guide d'installation pour toute référence ultérieure. Niveaux de risques Indique une situation dangereuse qui, si elle n'est DANGER pas évitée, entraînera le décès ou des blessures graves. - Page 16 AXIS T8134 Midspan 60W Consignes de sécurité AVERTISSEMENT • Le produit Axis doit être installé par un professionnel habilité.
- Page 17 • Conserver ce produit Axis dans un environnement sec et ventilé. • Ne pas exposer ce produit Axis aux chocs ou aux fortes pressions. • Ne pas exposer ce produit Axis aux vibrations. • Ne pas installer ce produit sur des supports, surfaces ou murs instables.
- Page 18 AXIS T8134 Midspan 60W Transport A A A VIS • Lors du transport du produit Axis, utilisez l'emballage d'origine ou un équivalent pour éviter d'endommager le produit.
-
Page 19: Procédures D'installation
AXIS T8134 Midspan 60W Guide d'installation Ce Guide d'installation fournit des instructions pour l'installation de l'injecteur AXIS T8134 sur votre réseau. Procédures d’installation Assurez-vous que les outils et autres matériels nécessaires à l'installation sont inclus dans l'emballage. Cf. Contenu de l'emballage page 19 Consultez la description du matériel. -
Page 20: Caractéristiques Techniques
AXIS T8134 Midspan 60W Voyants Voyants DEL de l'injecteur AXIS T8134 Voyant Couleur Indication Port Désactivé Hors tension Orange Sous tension Vert Un terminal distant est connecté Orange, Un appareil alimenté non conforme est clignotant connecté à la borne du port Vert, Le port était alimenté... -
Page 21: Interface Ethernet
AXIS T8134 Midspan 60W Conditions de stockage Mode Température Humidité stockage -20 °C à 70 °C Humidité relative maximale de 95 % (-4 °F à 158 °F) (sans condensation) Consommation électrique Tension d'entrée 100 — 240 V CA 50/60 Hz Courant d'entrée maximal... -
Page 22: Installation Du Matériel
AXIS T8134 Midspan 60W Connecteur réseau RJ45 avec alimentation haute puissance par Ethernet (PoE haute puissance). Installation du matériel Installation de l'injecteur AXIS T8134 Branchez l'injecteur (ENTRÉE DONNÉES) au commutateur réseau à l'aide d'un câble réseau (catégorie 5/5e/6). Branchez l'injecteur (SORTIE DONNÉES ET ALIMENTATION) à la caméra via le câble réseau (catégorie 5/5e/6) qui a été... -
Page 23: Dépannage
AXIS T8134 Midspan 60W A A A VIS • Conservez l'injecteur à l'abri de toute chaleur ou humidité excessive, des vibrations et de la poussière. • Veillez à ce que la longueur de câble entre la source du réseau Ethernet et le terminal ne dépasse pas 100 m (330 pi.). Le PoE n'est pas un répéteur et n'amplifie pas le signal des données... -
Page 24: Informations Sur La Garantie
Si un diviseur d’alimentation externe est utilisé, vérifiez qu'il fonctionne. • Si possible, branchez l'appareil connecté à un injecteur différent. Informations sur la garantie Pour obtenir plus d'amples informations sur la garantie du produit AXIS et des renseignements connexes, allez sur le site www.axis.com/warranty/... -
Page 25: Weitere Nachrichtenstufen
AXIS T8134 Midspan 60W Sicherheitsinformation Lesen Sie das Installationshandbuch sorgfältig durch bevor sie das Produkt installieren. Bewahren Sie das Installationshandbuch für zukünftige Zwecke auf. Gefährdungsstufen GEFAHR Weist auf eine gefährliche Situation hin, welche, falls nicht verhindert, zu Tod oder schweren Verletzungen führt. - Page 26 AXIS T8134 Midspan 60W Sicherheitsanweisungen WARNUNG • Das Axis Produkt muss von fachmännischem Personal installiert werden.
- Page 27 • Bei der Anwendung von Axis Produkten im Außenbereich oder ähnlichen Umgebungen, müssen diese in zugelassenen Außengehäusen installiert werden. • Lagern Sie das Axis Produkt in einer trockenen und belüfteten Umgebung. • Achten Sie darauf, dass das Axis Produkt weder Stößen noch starkem Druck ausgesetzt ist.
- Page 28 AXIS T8134 Midspan 60W Transport HINWEIS HINWEIS HINWEIS • Bei Bedarf transportieren Sie das Axis Produkt in der Originalverpackung oder einer entsprechenden Verpackung, so dass Schäden vermieden werden.
-
Page 29: Übersicht Über Die Hardware
AXIS T8134 Midspan 60W Installationsanleitung In dieser Anleitung wird die Installation von AXIS T8134 in einem Netzwerk beschrieben.. Installationsschritte Stellen Sie sicher, dass Packungsinhalte, Werkzeuge und andere für die Installation notwendige Materialien in Ordnung sind. Siehe Lieferumfang auf Seite 29 Machen Sie sich mit der Hardware-Übersicht vertraut. -
Page 30: Technische Daten
AXIS T8134 Midspan 60W DATA IN (EINGANG) Indikatoren AXIS T8134 Midspan-LED-Anzeigen Farbe Bedeutung Port Deaktiviert Orange Aktiviert Grün Ein Endgerät ist angeschlossen. Orange Ein nicht normgerechtes aktiviertes Gerät blinkend ist am Port angeschlossen. Grün Der Port wurde an vier Paaren blinkend aktiviert und anschließend überlastet,... - Page 31 AXIS T8134 Midspan 60W Lagerbedingungen Modus Temperatur Luftfeuchtigkeit Lagerung -20 °C bis 70 °C Max. 95 % RH (nicht (-4 °F bis 158 °F) kondensierend) Stromverbrauch Eingangsspannung 100-240 V Wechselstrom, 50/60 Maximaler Eingangsstrom 1,5 Ampere (max.) Verfügbare Ausgangsleistung 60 W...
-
Page 32: Installieren Der Hardware
AXIS T8134 Midspan 60W Netzwerkanschluss RJ45 mit High Power over Ethernet (High PoE). Installieren der Hardware Installieren von AXIS T8134 Verbinden Sie den Midspan (DATA IN) über ein Netzwerkkabel (Kategorie 5/5e/6) mit dem Netzwerkswitch. Verbinden Sie den Midspan (DATA & POWER OUT) über ein an die Kamera angeschlossenes Netzwerkkabel (Kategorie 5/5e/6) mit der Kamera. -
Page 33: Fehlerbehebung
• Verwenden Sie bei der Montage des Midspan keine Senkkopfschrauben. Schraubengröße: 4 mm. Fehlerbehebung AXIS T8134 lässt sich nicht einschalten • Ziehen Sie das Netzkabel vom Gerät ab, stecken Sie es erneut ein, und prüfen Sie dann die Anzeigen beim Hochfahren. - Page 34 Wenn Sie einen externen Power-Splitter verwenden, stellen Sie sicher, dass dieser funktioniert. • Wenn möglich, sollten Sie dasselbe betriebene Gerät an einen anderen Midspan anschließen. Garantieinformationen Informationen zur Garantie der Axis Produkte und hierzu verbundene Informationen, finden Sie unter www.axis.com/warranty/...
-
Page 35: Livelli Di Pericolo
AXIS T8134 Midspan 60W Informazioni di Sicurezza Leggere questa Guida all'Installazione prima di installare il prodotto. Conservare la Guida all'Installazione per usi futuri. Livelli di pericolo Indica una situazione pericolosa che, se non PERICOLO evitata, provoca morte o lesioni gravi. - Page 36 A A A VVISO VVISO VVISO • Il prodotto Axis deve essere utilizzato in conformità alle leggi e alle disposizioni locali. • Per utilizzare il prodotto Axis in ambienti esterni, o in ambienti simili, deve essere installato in una custodia per esterni approvata.
- Page 37 AXIS T8134 Midspan 60W Trasporti A A A VVISO VVISO VVISO • Durante il trasporto del prodotto Axis, utilizzare l'imballaggio originale o equivalente per evitare danni al prodotto.
-
Page 39: Procedure Di Installazione
AXIS T8134 Midspan 60W Guida all'installazione La presente guida all'installazione fornisce le istruzioni necessarie per installare AXIS T8134 nella rete in uso. Procedure di installazione Assicurarsi che il contenuto della confezione, gli strumenti e altri materiali necessari per l'installazione siano in ordine. -
Page 40: Dati Tecnici
AXIS T8134 Midspan 60W Indicatori Indicatori LED del Midspan AXIS T8134 Indicazione Colore Porta Alimentazione spenta Arancio Acceso Verde Un terminale remoto è collegato Arancio, luce Un dispositivo non standard è connesso lampeg- al terminale della porta giante Verde, luce... -
Page 41: Interfaccia Ethernet
AXIS T8134 Midspan 60W Condizioni di stoccaggio Temperatura Modalità Umidità Immagazzinaggio Da -20 °C a 70 °C Max. 95% relativa (da -4 °F a 158 °F) (senza condensa) Consumo energetico Tensione in ingresso 100 — 240 V AC 50/60 Hz... -
Page 42: Installazione Dell'hardware
AXIS T8134 Midspan 60W Connettore di rete RJ45 con High Power over Ethernet (High PoE). Installazione dell'Hardware Installazione di AXIS T8134 Collegare il midspan (INGRESSO DATI) allo switch di rete utilizzando un cavo di rete (categoria 5/5e/6). Collegare il midspan (USCITA DATI E ALIMENTAZIONE) alla telecamera tramite il cavo di rete (categoria 5/5e/6) che è... -
Page 43: Risoluzione Dei Problemi
AXIS T8134 Midspan 60W A A A VVISO VVISO VVISO • Tenere il midspan lontano da calore e umidità eccessivi, nonché da vibrazioni e polvere. • Verificare che la lunghezza del cavo Ethernet tra la presa di rete e il terminale remoto sia inferiore a 100 m. Il PoE non è un ripetitore e non amplifica il segnale dati Ethernet. -
Page 44: Informazioni Sulla Garanzia
Se si utilizza uno splitter di alimentazione esterno, verificare che funzioni correttamente. • Se possibile, ricollegare lo stesso dispositivo alimentato a un midspan diverso. Informazioni sulla garanzia Per informazioni sulla garanzia del prodotto Axis e informazioni ad esso relative, consultare la pagina www.axis.com/warranty/... -
Page 45: Niveles De Peligro
AXIS T8134 Midspan 60W Información de seguridad Lea esta Guía de instalación con atención antes de instalar el producto. Guarde la Guía de instalación para poder consultarla en otro momento. Niveles de peligro Indica una situación peligrosa que, si no se evita, PELIGRO provocará... -
Page 46: Instrucciones De Seguridad
AXIS T8134 Midspan 60W Instrucciones de seguridad ADVERTENCIA • El encargado de instalar el producto de Axis debe ser un profesional con experiencia. - Page 47 A A A VISO VISO VISO • El producto de Axis debe utilizarse de acuerdo con las leyes y normas locales. • Para usar el producto de Axis en exteriores, o en entornos similares, debe instalarse en una carcasa exterior aprobada.
- Page 48 AXIS T8134 Midspan 60W Transporte A A A VISO VISO VISO • Cuando transporte el producto de Axis, utilice el embalaje original o un equivalente para evitar daños en el producto.
-
Page 49: Pasos De La Instalación
AXIS T8134 Midspan 60W Guía de instalación Esta Guía de instalación incluye las instrucciones necesarias para instalar el AXIS T8134 en su red. Pasos de la instalación Asegúrese de que dispone del contenido del paquete, las herramientas y los demás materiales necesarios para la instalación. -
Page 50: Especificaciones
AXIS T8134 Midspan 60W Indicadores Indicadores LED para el midspan AXIS T8134 Color Indicación Puerto Apagado Sin alimentación Encendido Ámbar Verde Se ha conectado un terminal remoto Se ha conectado al terminal del puerto Ámbar un dispositivo no estándar con corriente... -
Page 51: Interfaz Ethernet
AXIS T8134 Midspan 60W Condiciones de almacenamiento Modo Temperatura Humedad Almacenamiento De -20 °C a 70 °C 95 % de humedad relativa máxima (sin condensación) Consumo Tensión de entrada 100 — 240 V CA 50/60 Hz Corriente de entrada máxima 1,5 A (máx.) -
Page 52: Instalación Del Hardware
AXIS T8134 Midspan 60W Conector de red Conector RJ45 con alimentación de alta potencia a través de Ethernet (High PoE). Instalación del hardware Instalación de AXIS T8134 Conecte el midspan (DATA IN) al conector de red mediante un cable de red (Categoría 5/5e/6). -
Page 53: Solución De Problemas
• No utilice tornillos de cabeza avellanada cuando instale el midspan. Tamaño de tornillo: 4 mm. Solución de problemas El AXIS T8134 no se enciende • Desenchufe la corriente del dispositivo y vuelva a enchufarla (compruebe los indicadores durante la secuencia de encendido). -
Page 54: Información De La Garantía
• Si es posible, vuelva a conectar el mismo dispositivo de alimentación a un midspan diferente. Información de la garantía Para obtener más información acerca de la garantía del producto Axis e información relacionada, visite www.axis.com/warranty/... - Page 55 AXIS T8134 Midspan 60W 安 安 安 全 全 全 情 情 情 報 報 報 本製品を設置する前に、このインストールガイドをよくお読み ください。インストールガイドは、後で参照できるように保管 しておいてください。 危 危 危 険 険 険 レ レ レ ベ ベ ベ ル ル ル 回避しない場合、死亡または重傷につな 危 危 危 険 険 険...
- Page 56 AXIS T8134 Midspan 60W 安 安 安 全 全 全 手 手 手 順 順 順 警 警 警 告 告 告 • 本製品の設置は、訓練を受けた専門技術者が行って ください。...
- Page 57 AXIS T8134 Midspan 60W 注 注 注 記 記 記 • 本製品は、お使いになる地域の法律や規制に準拠して 使用してください。 • 本製品を屋外またはそれに準じる環境で使用する場 合は、認定済みの屋外用筐体に収納して設置する必 要があります。 • 本製品は乾燥した換気のよい環境に保管してくださ い。 • 本製品に衝撃または強い圧力を加えないでください。 • 本製品に振動を加えないでください。 • 本製品を不安定なブラケット、表面、または壁に設置 しないでください。 • 本製品を振動するブラケット、表面、または壁に設置 しないでください。 • 本製品を設置する際には、適切な工具のみを使用して ください。 過剰な力がかかると、製品が損傷するこ とがあります。 • 化学薬品、腐食剤、噴霧式クリーナーは使用しないで ください。 • 清掃には、きれいな水に浸した清潔な布を使用して...
- Page 58 AXIS T8134 Midspan 60W 輸 輸 輸 送 送 送 注 注 注 記 記 記 • 本製品を運搬する際は、製品が損傷しないよう、元の 梱包か同等の梱包を使用してください。...
- Page 59 AXIS T8134 Midspan 60W イ イ イ ン ン ン ス ス ス ト ト ト ー ー ー ル ル ル ガ ガ ガ イ イ イ ド ド ド このインストールガイドでは、AXIS T8134をお使いのネット ワークにインストールする手順について説明します。 設 設 設 置 置 置 手 手 手 順 順 順...
- Page 60 AXIS T8134 Midspan 60W DATA & POWER OUT DATA IN イ イ イ ン ン ン ジ ジ ジ ケ ケ ケ ー ー ー タ タ タ ー ー ー AXIS T8134 T8134 ミ ミ ミ ッ ッ ッ ド ド ド ス ス ス パ パ パ ン ン ン イ イ イ ン ン ン ジ ジ ジ ケ ケ ケ ー ー ー タ タ タ ー ー ー LED...
- Page 61 AXIS T8134 Midspan 60W 保 保 保 管 管 管 条 条 条 件 件 件 モ モ モ ー ー ー ド ド ド 温 温 温 度 度 度 湿 湿 湿 度 度 度 ‑20 °C~70 °C 最大95% RH (結露...
- Page 62 AXIS T8134 Midspan 60W ネ ネ ネ ッ ッ ッ ト ト ト ワ ワ ワ ー ー ー ク ク ク コ コ コ ネ ネ ネ ク ク ク タ タ タ RJ45、High Power over Ethernet (High PoE) 対応。...
- Page 63 AXIS T8134 Midspan 60W 注 注 注 記 記 記 • ミッドスパンは極端な高温や高湿度、振動やホコリを 避けて設置してください。 • イーサネットネットワークのソースから端末機器ま でのケーブルの長さが100 mを超えないようにしま す。 PoEは中継装置ではなく、イーサネットデータ信 号を増幅しません。 • スプリッターを使用する場合は、ミッドスパンではな く端末装置に近いポイントに接続してください。 • ミッドスパンをAC電源に接続してください。ON‑OFFス イッチはありません。 • 設置に使用されているすべてのネットワークケーブ ルがSTP およびCategory 5/5e/6であることを確認して ください。 • ミッドスパンを取り付ける際は皿頭ネジを使用しない でください。 ネジサイズは4 mmです。 ト ト ト ラ ラ ラ ブ ブ ブ ル ル ル シ シ シ ュ ュ ュ ー ー ー テ テ テ ィ ィ ィ ン ン ン グ グ グ...
- Page 64 AXIS T8134 Midspan 60W 受電側機器がDATA & POWER OUTポートに接続されて • いることを確認します。 パワースプリッターを使用している場合は、正常に • 動作しているかを確認します。 ツイストペアケーブルまたはRJ45ケーブルに短絡 • (ショート) がないことを確認します。 受電側機器を別のミッドスパンに接続し、動作を確 • 認します。 端 端 端 末 末 末 機 機 機 器 器 器 は は は 動 動 動 作 作 作 し し し て て て い い い る る る が が が 、 、 、 デ デ デ ー ー ー タ タ タ リ リ リ ン ン ン ク ク ク が が が 確 確 確 立 立 立 さ さ さ れ れ れ な な な い い い...
- Page 66 Installation Guide Ver. M1.3 AXIS T8134 Midspan 60W Date: October 2014 © Axis Communications AB, 2014 Part No. 60125...
Need help?
Do you have a question about the T8134 Midspan 60W and is the answer not in the manual?
Questions and answers