
Related Manuals for Kinetik BPx1TL


Summary of Contents for Kinetik BPx1TL
- Page 1 By paul.aylett at 5:39 pm, Jul 15, 2015 Advanced Blood Pressure Monitor od Pressure Monitor User Manual BPx1TL BPx1 x x TL...
-
Page 2: Table Of Contents
Content Introduction What the results mean Re-measuring Shut Down Parts Memory Deleting Measurements from the Memory Setting up your Blood Pressure Monitor Interpretation of Blood Pressure (BP) Loading Battery Results Connecting the Cuff Putting on the Cuff Additional Information on Blood Pressure Backlight Indicator and Classification of Specification... -
Page 3: Introduction
Introduction Thank you for buying your Kinetik Advanced Blood Pressure Monitor. Whether you have already been diagnosed with high blood pressure or want to track any changes to your blood pressure, you have taken the first step to quick, easy and accurate measurement that will keep you and, if necessary, your doctor informed. -
Page 4: Parts
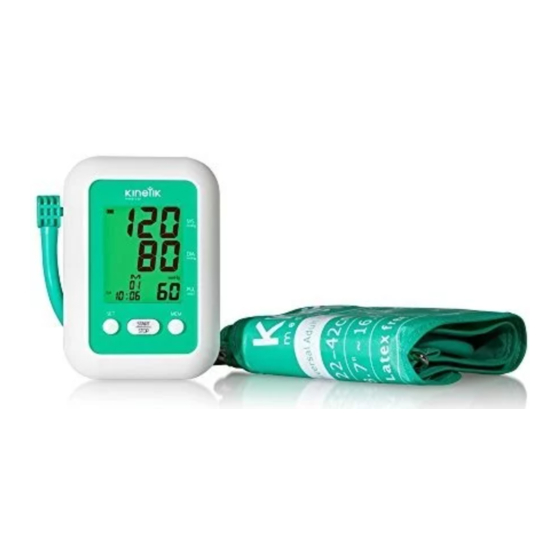
Parts Battery Indicator Systolic Blood Pressure Measurement Progress Indicator Diastolic Blood Pressure Average Value Symbol Unit Indicator Memory Pulse Date/Time Irregular Heartbeat Symbol Heartbeat Symbol Rubber tubule plug Rubber tubule plug Memory Cuff Start/Stop Start Rubber tubule (Power On/Off) (Pow... -
Page 5: Setting Up Your Blood Pressure Monitor
Setting up your Blood Pressure Monitor Loading the Batteries a. Open the battery cover at the back of the monitor. b. Insert three “AA” batteries, observing correct polarity. c. Close the battery cover. Do not mix old and new batteries or different types of batteries. Do not use rechargeable batteries. Only batteries of the same or equivalent type as recommended are to be used. -
Page 6: Putting On The Cuff
Setting up your Blood Pressure Monitor Putting on the Cuff a. Place the cuff 1~2cm above the elbow joint. b. Place hand on a flat surface with the palm facing up and with the rubber tube running down the center of the arm. Measuring can be done on light clothing such as a shirt or blouse. -
Page 7: Backlight Indicator And Classification Of Blood Pressure
Backlight Indicator and Classification of Blood Pressure The backlight will change according to your measured result. The table below shows the different blood pressure classifications as defined by the British Hypertension Society and the corresponding backlight colour. Please note that factors such as smoking, obesity & diabetes will affect your blood pressure. Always consult your physician or healthcare professional before starting a diet or exercise regime. -
Page 8: Irregular Heart Beat
Irregular Heart Beat This monitor can detect possible irregular heart beat (cardiac arrhythmia) disorders during measurement and if detected indicates the detection with the flashing icon “IHB”. Arrhythmia is a condition where the heart rhythm is abnormal as a result of defects in the bioelectrical system that controls the beating of the heart. -
Page 9: Using Your Blood Pressure Monitor
Using your Blood Pressure Monitor Your first test The British Hypertension Society (BHS) recommends that for your first test, you test both your arms. (Note: Ensure you do not suffer from any medical conditions which will prevent you from having your blood pressure measured in both arms). This will determine which arm should be used for future measurements. -
Page 10: Setting The Time And Date
Using your Blood Pressure Monitor Setting the time and date Once the batteries are inserted and the battery cover is put back into place, the display will flash the year 2015 in the bottom left hand corner. To adjust the Year press the MEM button repeatedly until correct (pressing and holding the MEM button will advance the year rapidly). -
Page 11: Start
Using your Blood Pressure Monitor Start a. We recommend that you carry out you test whilst sitting at a table (ensuring the cuff is at the same height as your heart). This will place your arm and the monitor in an ideal position for the best results. b. -
Page 12: Measuring Process
Using your Blood Pressure Monitor Measuring Process a. This monitor is uses Measure While Inflate technology. This means that the measurement is made as the cuff inflates, rather than fully inflating first then measuring during the deflation stage. As the cuff inflates the display will show the following: Measurement Progress Indicator Cuff Pressure in mmHg Pulse Detection*... -
Page 13: What The Results Mean
Using your Blood Pressure Monitor What the results mean a. The LCD screen will automatically display the systolic and diastolic pressure reading in mmHg and the pulse rate in pulse/min after each measurement. b. Record date, time, systolic reading, diastolic reading and pulse rate on your record card which you will find in the pack (including anything that may have influenced your blood pressure reading e.g. -
Page 14: Re-Measuring
Using your Blood Pressure Monitor Re-measuring If you want to measure again, just press the START/STOP button twice. Leave at least three minutes between measurements to allow blood circulation to the arm to return to normal. Do not measure your blood pressure too many times in one session as it may cause discomfort in the arm. -
Page 15: Memory
Using your Blood Pressure Monitor Memory The memory can store 90 sets of measurements and will additionally calculate the average (mean) of the last three readings. The results will be automatically stored. To check the memory, press the MEM button (either just after a measurement has been taken or while the unit is off). -
Page 16: Interpretation Of Blood Pressure (Bp) Results
Interpretation of Blood Pressure (BP) Results Category of Blood Systolic BP Diastolic BP Advice on Results Pressure (mmHg) (mmHg) Hypotension <100 <60 Practice a healthy lifestyle. Consult your doctor only if suffering symptoms of low BP (eg. fainting) Ideal <120 <80 Practice a healthy lifestyle. -
Page 17: Additional Information On Blood Pressure
Additional Information on Blood Pressure Your heart is just like a pump which works all the time to make the blood flow through all blood vessels. Blood pressure measures the force on the wall of the blood vessels caused by the pressure of the blood. -
Page 18: Specification
SPECIFICATION (1) Model: BPx1TL (12) Automatic power off: To be automatically cut off (2) Digital display system after 2minutes of not being use to save energy. (3) Measuring method: Oscillometric method (13) Battery life: Approx.2 months with 3 times usage per day... -
Page 19: Frequently Asked Questions
Frequently Asked Questions What is the difference between systolic and diastolic pressure? Your heart is just like a pump which works all the time to make the blood flow through all blood vessels. Blood pressure measures the force on the wall of the blood vessels caused by the pressure of the blood. Systolic pressure is the pressure of the blood when your heart beats to pump blood out. -
Page 20: Frequently Asked Questions
Frequently Asked Questions Do I need to test at the same time, every time? We recommend that measurements are taken at the same time, under the same conditions and in the same position each time because of the way your blood pressure constantly fluctuates depending on the time of day. This will help you to keep a more accurate record over time and reduce any possible variances to your readings. -
Page 21: Abnormality & Troubleshooting
Abnormality & Troubleshooting Error Indicators The following symbol will appear on the display when measuring abnormally. Symbol Cause Correction Cuff not fitted correctly or air leakage Wrap the cuff correctly and tightly ensuring the connection detected. between the air plug and the unit is good. Movement detected during measurement. -
Page 22: Maintenance
If at any time you question the accuracy of the measurement, please contact the retailer immediately. 7. Please use only Kinetik branded cuffs and accessories with this product. Harvard Medical Devices Ltd. -
Page 23: Blood Pressure Record Table
Blood Pressure Record Table Please log the date, time and your SYS (systolic) and DIA (Diastolic) blood pressure levels. We recommend you share this information with your Doctor... -
Page 24: Explanation Of Symbols On Unit
Please recycle where facilities exist. Check with your local Authority or retailer for recycling advice. Symbol for “Manufacturer”. This product complies with MDD93/42/EEC requirements. 0197 Symbol for “European Representative”. Keep Dry. Model Reference. KINETIK BPx1TL UK IB 20150713...
Need help?
Do you have a question about the BPx1TL and is the answer not in the manual?
Questions and answers