Table of Contents
Advertisement
Quick Links
Guangdong Transtek Medical Electronics Co., Ltd.
Zone A, No.105, Dongli Road, Torch Development
District, 528437 Zhongshan, Guangdong, China
Medical Device Safety Service GmbH
EC REP
Schiffgraben 41, 30175 Hannover, Germany
Kinetik TMB-1970 UK IB 20221130
User Manual
Blood Pressure Monitor
Thank you so much for selecting the Kinetik Wellbeing Blood Pressure
Monitor
Please read the user manual carefully and thoroughtly so as to ensure
the safe usage of this product. Keep the manual safe for future reference
in case you have problems.
Arm Type
TMB-1970
Advertisement
Table of Contents

Related Manuals for Kinetik TMB-1970


Summary of Contents for Kinetik TMB-1970
- Page 1 User Manual Blood Pressure Monitor Arm Type TMB-1970 Thank you so much for selecting the Kinetik Wellbeing Blood Pressure Guangdong Transtek Medical Electronics Co., Ltd. Monitor Zone A, No.105, Dongli Road, Torch Development District, 528437 Zhongshan, Guangdong, China Please read the user manual carefully and thoroughtly so as to ensure the safe usage of this product.
-
Page 2: Table Of Contents
TABLE OF CONTENTS SUPPORT..........................2 INTRODUCTION........................3 General Description Indications for Use Contraindications Measurement Principle Safety Information LCD Display Signal Monitor Components List BEFORE YOU START......................10 Installing and Replacing the Batteries Setting the Date and Time About User ID MEASUREMENT........................14 Tie the Cuff Start the Measurement DATA MANAGEMENT......................16 Recall the Records... -
Page 3: Support
If you have a question, have a look at our Troubleshooting page! Readings taken by the TMB-1970 are equivalent to those obtained by For further assistance, why not contact our Customer Care team a trained observer using the cuff and stethoscope auscultation method. -
Page 4: Introduction
INTRODUCTION INTRODUCTION CAUTION Safety Information * This device is intended for indoor, home use. * This device is not intended for public use. The signs below might be in the user manual, labeling or other component. * This device is portable, but it is not intended for use during patient transport. They are the requirement of standard and using. -
Page 5: Lcd Display Signal
INTRODUCTION INTRODUCTION LCD display signal CAUTION * Warning: This device is not AP/APG equipment. Do not use the device where flammable anesthetic are present, or in environments mixture with air of with oxygen or nitrous oxide. * The device contains sensitive electronic components.To avoid measurement errors, avoid taking blood pressure measurements near a strong electromagnetic field radiated interference signal or electrical fast transient/burst signal. -
Page 6: Monitor Components
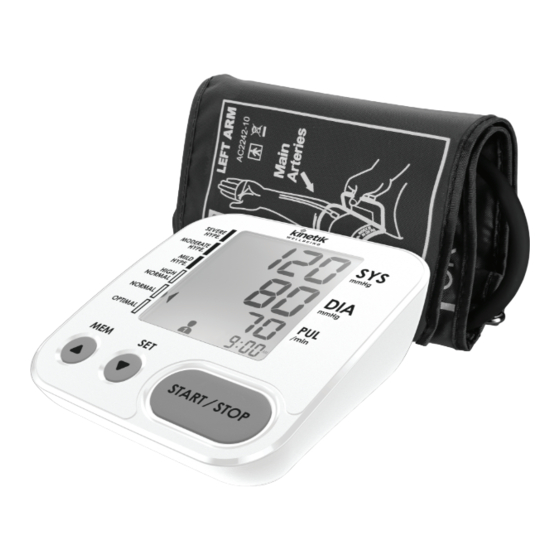
INTRODUCTION INTRODUCTION Monitor Components List 1.Blood Pressure Monitor 2.Cuff (Type BF applied part) (TMB-1970) ( 22~42 cm) CUFF AIR HOSE AIR CONNECTOR PLUG LCD DISPLAY START/STOP BUTTON 3. 4× AAA batteries 4.User manual SET BUTTON MEM BUTTON Component list of... -
Page 7: Before You Start
BEFORE YOU START BEFORE YOU START Installing and Replacing the Batteries Setting the Date and Time It is important to set the date and time before using your blood • Open the battery cover. pressure monitor for the first time, so that a correct time stamp can be •... -
Page 8: About User Id
BEFORE YOU START BEFORE YOU START After confirming the minute, the LCD will display “do nE” and the monitor will shut off after several seconds. Month About user ID There is only one user ID available. The user has 90 memory spaces, and is designed for 1 person to save measured values. -
Page 9: Tie The Cuff Start The Measurement
MEASUREMENT MEASUREMENT Tie the Cuff Start the Measurement 1. When the monitor is off, press the “START/STOP” button, the LCD Remove all jewelry, such as watches and bracelets from your left arm.Note: If your doctor has diagnosed display will show shortly. you with poor circulation in your left arm, use your right arm. -
Page 10: Data Management
DATA MANAGEMENT DATA MANAGEMENT Recall the Records Delete the Records If you did not get the correct measurement, you can delete one When the monitor is off, press the “MEM” button, record or all records by following steps below. the lastest record will display. Delete one record: Press the “MEM”... -
Page 11: Information For User
DATA MANAGEMENT INFORMATION FOR USER Delete all records: Tips for Measurement Press the 'MEM' button to enter the memory mode, then press and hold the 'SET' button. Measurements may be inaccurate if taken in the following The LCD will display and flash 'dEL ALL'. circumstances. -
Page 12: Maintenance
INFORMATION FOR USER ABOUT BLOOD PRESSURE Maintenance What are systolic pressure and diastolic pressure? When ventricles contract and pump blood out of the In order to get the best performance, please follow the Systolic Diastolic heart, the blood pressure reaches its maximum value instructions below. -
Page 13: Why Does My Blood Pressure Fluctuate Throughout The Day
ABOUT BLOOD PRESSURE Why does my blood pressure This section includes a list of error messages and frequently asked questions for problems you may encounter with your blood fluctuate throughout the pressure monitor. If the product is not operating as you think it day? should, check here before arranging for servicing. -
Page 14: Contact Information
Contact Information Battery powered mode: Power supply 6V DC 4x AAA batteries For more information about our products, please visit Display mode Digital LCD display V.A.52 mm × 58 mm www.kinetikwellbeing.com Measurement mode Oscillographic testing mode Rated cuff pressure: 0 mmHg~299 mmHg Measurement pressure: Measurement range SYS: 60 mmHg~230 mmHg... -
Page 15: Emc Guidance
Warning: Portable RF communications equipment (including peripherals such as antenna cables and external Not applicable antennas) should be used no closer than 30 cm (12 inches) to any part of the equipment TMB-1970, including transient/burst cables specified by the manufacturer. Otherwise, degradation of the performance of this equipment could result. - Page 16 EMC GUIDANCE Table 3 Guidance and manufacturer’s declaration - electromagnetic Immunity IMMUNITY Radiated RF Test Band Service Modulation Modulation Distance (m) TEST IEC61000-4-3 Frequency (MHz) LEVEL (Test (MHz) (V/m) specifications 380-390 TETRA Pulse ENCLOSURE modulation b) PORT 18Hz IMMUNITY to FM c) ±...
Need help?
Do you have a question about the TMB-1970 and is the answer not in the manual?
Questions and answers