
Related Manuals for Smeg KSEG54XE


Summary of Contents for Smeg KSEG54XE
- Page 1 Libretto d’ uso User manual Manuel d’utilisation Gebrauchsanleitung Gebruiksaanwijzing Manual de uso Livro para utilização Brugsvejledning Användningshandbok Руководство по эксплуатации Instrukcja użytkowania Bruksveiledning KSEG54XE - KSEG77XE...
- Page 2 INDICE CONSIGLI E SUGGERIMENTI .............................. 5 CARATTERISTICHE ................................6 INSTALLAZIONE ................................... 8 USO ...................................... 10 MANUTENZIONE ................................12 INDEX RECOMMENDATIONS AND SUGGESTIONS ........................14 CHARACTERISTICS ................................15 INSTALLATION ..................................17 USE ...................................... 19 MAINTENANCE ................................... 21 SOMMAIRE CONSEILS ET SUGGESTIONS ............................23 CARACTERISTIQUES .................................
- Page 3 ÍNDICE CONSELHOS E SUGESTÕES ............................59 CARACTERÍSTICAS ................................60 INSTALAÇÃO..................................62 UTILIZAÇÃO ..................................64 MANUTENÇÃO ..................................66 INDHOLD RÅD OG ANVISNINGER ..............................68 APPARATBESKRIVELSE ..............................69 INSTALLATION ..................................71 BRUG ....................................73 VEDLIGEHOLDELSE ................................75 INNHOLD ANBEFALINGER OG FORSLAG ............................77 EGENSKAPER..................................
-
Page 4: Recommendations And Suggestions
RECOMMENDATIONS AND SUGGESTIONS The Instructions for Use apply to several versions of this appliance. Accordingly, you may find descriptions of individual features that do not apply to your specific appliance. INSTALLATION • The manufacturer will not be held liable for any damages resulting from incorrect or improper installation. -
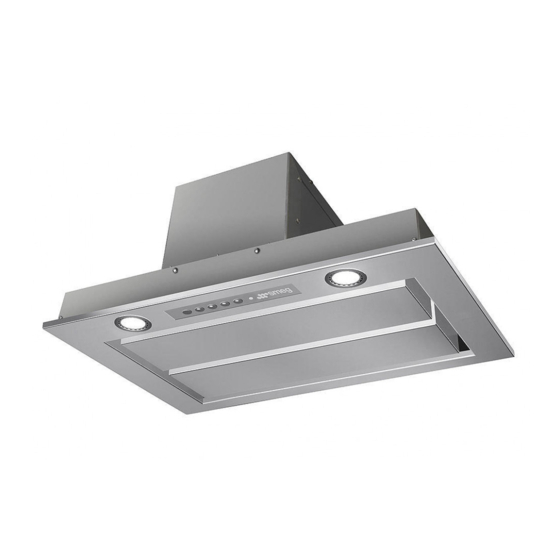
Page 5: Characteristics
CHARACTERISTICS Dimensions Min. Min. 650mm 650mm Components Ref. Q.ty Product Components Hood Canopy complete with: Controls, Light, Fan unit, Filters Directional air outlet grille Flange Flange with Valve ø 150 Ref. Q.ty Installation Components Hood body fixing brackets Screws 3.5 x 16 Screws 2.9 x 12.7 Q.ty Documentation Instruction Manual... - Page 6 Installation – Air outlet version • The Hood is fitted with a system that allows the direction of the air outlet to be adjusted. • On installation, the Hood is set up with the air outlet in the Top position (fig.1). •...
- Page 7 INSTALLATION Drilling the Support surface and Fitting the Hood • The Hood can be installed directly on the underside of wall-mounted units (650 mm min. from the Cooker Top) using the snap- on side supports and screws provided. • Create an opening in the bottom of the wall mounted unit, as shown (fig.1), leaving a distance of at least 20mm from the front.
- Page 8 Connections DUCTED VERSION AIR EXHAUST SYSTEM When installing the ducted version, connect the hood to ø 150 ø 120 the chimney using either a flexible or rigid pipe ø 150 or 120mm, the choice of which is left to the installer. To install a ø...
- Page 9 Control panel Function Turns the lighting system on and off. Press and hold for approx. 2 seconds to turn the lighting system on and off at reduced intensity. Turn the suction motor on and off at speed one. Press and hold the button for approximately 2 seconds, After 100 working hours all the with all the loads turned off (Motor and Lights), to reset LEDs (L1-L2-L3-L4) will light up...
-
Page 10: Control Panel
REMOTE CONTROL (OPTIONAL) The appliance can be controlled using a remote control powered by a 1.5 V carbon-zinc alkaline batteries of the standard LR03-AAA type (not included). • Do not place the remote control near to heat sources. • Used batteries must be disposed of in the proper manner. -
Page 11: Maintenance
MAINTENANCE Cleaning the Comfort Panels • Pull the Comfort Panel to open it. • Disconnect the panel from the hood canopy by sliding the fix- ing pin lever. • The comfort panel must never be washed in a dishwasher. • Clean the outside by using a damp cloth and neutral liquid de- tergent. -
Page 12: Installation
Activated Charcoal Filter (Recirculation Version) • This cannot be washed or regenerated, and must be changed when all the command LEDs start to flash, or at least once every 4 months. Activating the alarm signal • In Recirculation Version Hoods, the Filter Saturation Alarm must be activated on installation or at a later date.
Need help?
Do you have a question about the KSEG54XE and is the answer not in the manual?
Questions and answers