
Related Manuals for BOLIY PRO3600SI


Summary of Contents for BOLIY PRO3600SI
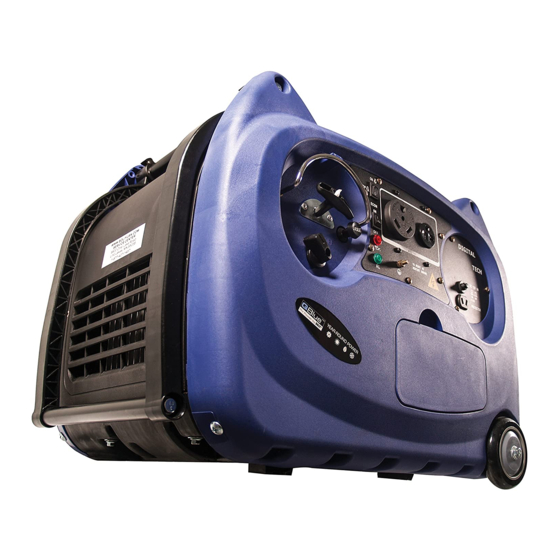
- Page 1 BOLIY BOLIY POWER GENERATOR SHOP MANUAL DIGITAL GENERATOR Pro3600Si Pro3600SiE (electric start) BOLIY POWER ©2010-2011 www.boliypower.com...
- Page 2 Preface This manual covers the construction, function and servicing procedure of the BOLIY Pro3600Si/E model generators. This manual is principally concerned with the generator specifications, function, troubleshooting and repair. There is a separate manual to cover engine overhaul which includes the starting systems.
-
Page 3: Table Of Contents
Table of Contents 1. Specifications ........................3 1.1 Specifications.........................3 2. Service information ......................6 2.1 The importance of proper service ..................6 2.2 Important safety precautions ..................6 2.3 Service rules ........................7 2.4 Electrical Precautions ....................7 2.5 Serial number location....................8 2.6 Maintenance standards ....................9 3. -
Page 4: Specifications
1.1 SPECIFICATIONS DIMENSIONS & WEIGHT OVERALL LENGTH ( mm / in ) 585 / 23 OVERALL WIDTH ( mm / in ) 420 / 16.5 OVERALL HEIGHT ( mm / in ) 470 /18.5 DRY WEIGHT ( kg / lb. ) 31/ 68 GROSS WEIGHT ( kg / lb. - Page 5 GENERATOR TYPE AC OUTPUT, Multistage permanent-magnet generator RATED OUTPUT ( WATTS ) 3,000 OUTPUT ( WATTS ) 3,300 FULL TANK OUTPUT ( WATTS ) 13,500 RUN TIME AT 1/2 RATED LOAD 8.3 hours RUN TIME AT RATED LOAD 4.5 hours POWER CONVERSION RATE 85%*92% RATED VOLTAGE ( V )
- Page 6 BOLIY Pro 3600Si & 3600Si/E DSP INVERTER GENERATOR WIRING DIAGRAM Color code 1 - Main coil 13 - Ignition coil B - Black 2 - Sub coil 14 - Spark plug G - Green 3 - Control unit 15 - AC-CDI unit...
-
Page 7: Service Information
2. Service information 2.1 The importance of proper servicing Proper servicing is essential to the safety of the operator and the reliability of the generator. Any error or oversight made by the technician while servicing can easily result in faulty operation and/or damage to the equipment or injury to the operator. -
Page 8: Service Rules
2.3 Service rules *Use genuine BOLIY or BOLIY-recommended parts and lubricants or their equivalents. Parts that do not meet BOLIY design specifications may damage the engine. *Use the special tools designed for the product. *Always install new gaskets, O-rings, etc. when reassembling components. -
Page 9: Serial Number Location
*Clamp the wire harnesses securely so that they do not interfere with the rotating parts, moving parts and hot parts. *Route and connect the wire harnesses properly. Be sure that the harnesses are not slack, twisted or pulled overly taut. *Route the wire harnesses properly so that they do not contact sharp edges and corners and the end of the bolts and screws on the body. -
Page 10: Maintenance Standards
2.6 Maintenance standards Engine Part Item Standard(mm) Service limit Cylinder Sleeve I.D. 66.02~66.04 66.15 Piston Skirt O.D 67.97~67.99 66.67 Piston-to-cylinder clearance 0.040~0.060 0.12 Piston pin 15.990~16.000 .15.95 Pin-to-piston clearance 0.002~0.018 0.080 Piston ring Ring width Top 1.420~1.440 1.32 Second 1.420~1.440 1.32 Ring side clearance Top/second 0.02~0.06... - Page 11 Generator P a r t I t e m T y p e S t a n d a r d S e r v i c e 1 2 0 V L i m i t I g n i t i o n c o i l R e s i s t a n c e Y e l l o w / G r e e n - R e d 0 .
-
Page 12: Maintenance
3 MAINTENANCE 3.1 Maintenance schedule Item Attention Each First month Every 3 months Every 6 months Every year or or 20 Hrs. or 50Hrs. or 100 Hrs. 300 Hrs. Spark Clean-Adjust plug Valve Check-Adjust clearance Crankshaft Check System Idile Check-Ajust Speed Exhaust Check... -
Page 13: Engine Oil
3.2 Engine Oil Check Engine Oil leak Check the engine whether or not have leak oil. If leak replace gasket, or oil seal or O ring. A. Checking Oil Level Engine should be shut off and generator be on level ground when checking the oil level. 1. -
Page 14: Fule Leak
3.3 Fuel leak 1 Check Check fuel tank, fuel switch,fuel pipe and carburetor. Caution: Every 2 years replace the fuel pipe and fuel filter. Caution: No fire when you clean it. 1. Take off hat. 2. get the strainer Check strainer Damage-replace If ok-Clean it. -
Page 15: Air Filter Maintenance
3 .4 Ai r Fi l te r Ma i n te n a n ce ( 1 ) Op e n th e s e r v i c e d o o r. ( 2 ) Op e n th e c o v e r o f ai r fi l te r a n d ta ke o u t th e fi l te r e l e m e n t. -
Page 16: Exhuast
3 .5 Exh a u st 1. Take off Wire netting, collar clamp,and bolt etc. 2. remove carbon dust. The exhaust as picture method to knock. 3. Clean the wire netting. Waring: Don't use metal silk for clean. That will damage the material. -
Page 17: Adjusting Of Valve Clearance
3.6 Adjusting valve clearance Attention Valve adjustment should only be performed on a cool engine. (1) Remove back case, then take off valve cover. (2) Pull the starter rope gently and set the piston in top dead center (Use a stick in the spark plug hole measure the depth). (3) Insert a feeler gauge into the gap between rocker and valve to measure the valve clearance. -
Page 18: Compress Pressure
3.7 compress pressure Remark: When finish adjust Valve Clearance, then measure the compress pressure. 1. For running few mins. 2. Remove spark plug. 3. Use manometer and adapter for measure. Manometer Adapter Measure: Measure pressure you need pull the starter when the pressure finger stop, read the NO.. The standard:400-600kpa(4-6kg/cm3,57-85 psi ) Waring: When start engine, spark plug need connect for ground, that no spark. -
Page 19: Rating Speed
3.8 Rating speed Frist connect the speed meter Accord with standard speed = right If not right please check chapter3. for repair. Check step: 1) Start engine (0% load) 2) Turn to off ECON switch. 3)Measure the speed. 3800-3950r/min 3.9 Hose 1.Check: Hose Crack/- Replace. -
Page 20: Spark Plug
4.0 Spark plug Attention Check the cylinder position should only be performed on a cool engine. When you take off the spark plug must keep no durity into engine. 1. Take off the spark plug and spark cap. take off the spark plug. 2. -
Page 21: Econ Switch
4.2 ECON switch Check step: When switch "ON" Start engine When turn to "OFF" Check the engine speed. STOP 4.3 Check electric components Start the engine pilot lamp(1) for illume. STOP STOP AC plug. If bad-replace... -
Page 22: Troubleshooting
4.4 Troubleshooting Section 1- Fuel related problems 1. Fuel leak 2. Fuel flow 3. Stepping motor Section 2- Generator won*t start 1. No Start, Cranks, has spark & fuel. 2. Choke pin Section 3- No Start, no spark. 1. No Start, Cranks, has no spark. 2. - Page 23 Section 1- 1- Fuel Leak For the Pro3600Si/Pro3600SiE, it could be the valve or it could be the tank leaking between the plastic tank. Both are replaceable. Determine which is leaking and either part is replaceable. For all generators, check all fuellines, valve, and carburetor.
-
Page 24: Section 2-Generator Won't Start
Section 2- 1-No Start, Cranks, has spark & fuel. 2- Choke pin. It's possible that the choke pin that fell out. Look under the choke plate for a pin operating the choke mechanism. If not, change the choke plate and thechoke cable. Section 3- No Start, Cranks, has no spark. -
Page 25: Section 4-No Ac Output (Inverter Series)
Section 4- No AC Output (Inverter series) This could be a loose wire from the inverter to the receptacles. Check to see if the red and black wires are securely plugged in and the wires are securely attached to the receptacles. Check 3pin blue connector. - Page 26 Section6-The controller box failure. 1.The engine can not change speed. The step motor no control. Method: Adjust controller (120V / 60Hz) is ECON=OFF adjust knob, when ECON=OFF, the three -phase voltage reading is AC 210V± 5V, in clockwise to increase the voltage, in counter-clockwise to reduce the voltage.
Need help?
Do you have a question about the PRO3600SI and is the answer not in the manual?
Questions and answers