Table of Contents
Advertisement
Quick Links
Advertisement
Table of Contents

Related Manuals for Super Circuits MDVR21P


Summary of Contents for Super Circuits MDVR21P
- Page 1 Rugged Body-Worn µDVR Users Manual Version 03...
-
Page 2: Safety Precautions
DISCLAIMER Trademark Information Other names and products may be trademarks or registered trademarks of their respective owners. Product Information Product design and specifications are subject to change without notice. This includes primary product specifications, software, software drivers, and user’s manual. This User Manual is a general reference guide for the product. - Page 3 If recharging operation fails to complete even when a specified recharging time has elapsed, immediately stop further recharging. Otherwise, acid leakage, overheating, smoke emission, bursting and/or ignition can occur. Do not put the battery pack into a microwave oven or pressurized container. Rapid heating or disrupted sealing can lead to acid leakage, overheating, smoke emission, bursting and/or ignition.
-
Page 4: Table Of Contents
TABLE OF CONTENT 1. Outlook of µDVR ..........................2 2. Specifications............................3 3. Features..............................4 3.1 Buttons on µDVR ..........................4 3.2 Video Audio Input..........................5 3.3 Video Audio Output ........................6 3.4 Menu UI............................6 3.5 LED Light ............................6 3.6 LCD Display ..........................6 3.7 Remote Controller..........................6 4. - Page 5 5.5.4 Motion Detection ........................17 5.5.5 Pre/Post Alarm ........................18 5.6 System setting ..........................18 5.6.1 TV 5.6.2 LCD Sleep 5.6.3 LED 5.6.4 Beep .................18 5.6.6 DATE/TIME .........................19 5.6.7 Storage ..........................19 5.6.8 Default Setting ........................21 6. USB Function ............................22 7. Trouble Shooting ..........................23...
-
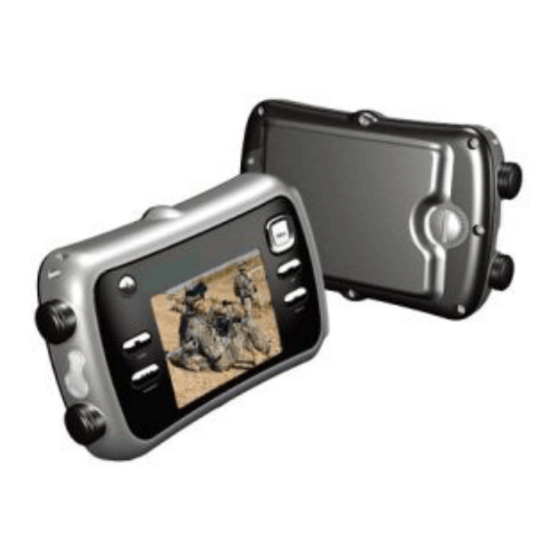
Page 6: Outlook Of Μdvr
1. Outlook of µDVR Power Audio/Video In & Camera Power Record IR Receiver for the Remote Controller Up & FF LED Indicator Down & FB Audio/ Video Out ESC & Snapshot Enter & Stop RS-232 Extendable port 5V DC Input USB Port (Port is disabled when using SD Card Slot... -
Page 7: Specifications
2. Specifications Item Description Audio/Video & Power 3 in 1 jack: 1 Video In (NTSC/PAL auto select) 1 Audio In (Mono) 1 5V power output for Camera (12V optional) Audio/Video output 1 Video Out (NTSC/PAL manual select) 1 Audio Out (Mono) USB port 1 mini USB port (USB 2.0) Storage Media... -
Page 8: Features
3. Features 3.1 Buttons on µDVR POWER Button: Power ON/OFF ( Press and hold the power button for 3 seconds until the LED indicator lights red and the screen appears. To turn off the power, press and hold the power button again. REC Button : Condition Action... -
Page 9: Video Audio Input
ENTER Button : Condition Action In Preview Mode Enter Menu pages In Play Mode Stop playing back last movie PLAY with Menu select Stop playing back selected movie In Menu Mode Confirm to select Lock Button : To activate the button LOCK/UNLOCK function In preview mode and pre-alarm, press DOWN, then UP, then ENTER to active LOCK/UNLOCK function. -
Page 10: Video Audio Output
3.3 Video Audio Output Selectable NTSC/PAL output L/R line input and output or 1 Microphone input and put. 3.4 Menu UI OSD (On Screen Display ) menu presentation Up, Down, Enter, ESC operation button 3.5 LED Light Red LED a. Solid red – µDVR unit is recording b. - Page 11 Record Snapshot When turning the system on, press the LCD button can set the LCD on/off Power On/Off Stop/ESC (Stop playing Video or Recording, ESC = Escape) Play back or pause the last Video clip Fast Forward. (Speed by X2、X4、X8、X16 ) Back Forward.
-
Page 12: Functions
Press to Volume Up while playing back the video clips. (Volume +) Volume Down when play PAL/ NTSC switch. Be sure to plug the AC adaptor in the Elite mini DVR before you use the RC to power 4. Functions 4.1 Screen Display SD is running out of storage space (when over write mode is disabled) -
Page 13: Recording
Indicates ACDC Adapter is recharging the battery Motion Detect The white-color icon indicates the function is enable. The red-color icon indicates the function is disable which have following condition has been occurred: 1. Video Loss function is enabling. 2. Recording 3. -
Page 14: Snapshot
4.3 Snapshot Content Storage Path: \JPEG\YYMMDD\ File Naming a. the 1 picture in ss second hhmmss.JPG b. the remaining pictures in ss second hhmmssxx.JPG selectable to sticker on time and date to the picture 4.4 Playback PAUSE, FF (x2/x4/x8/x16), FB (x2/x4/x8/x16), STEP_F, STEP_B, with remote controller FF (x2/x4/x8/x16), FB (x2/x4/x8/x16) with buttons Volume control... -
Page 15: Time And Date
The µDVR does not support individual file deletion in order to maintain the evidence collection integrity System default settings stored in the on-board memory Always format the new SD/SD-HC card before using it. Refer to section in the manual titled “Formatting an SD memory card” for further details. -
Page 16: Μdvr Main Menu
d. Hue: 50 FPS: 30 Resolution: HVGA Audio: OFF Motion Detect: OFF Motion Sensitivity: 5 Date Print: ON TV: NTSC LCD Sleep: 30 LED: ON Beep: OFF Language: English Date Format: MM/DD/YY Device: SD CARD Warn Low: 15% 5. µDVR Main Menu 5.1 Main Menu 5.2 Play Video... -
Page 17: Play Pause
Record starting time Duration Month List(MM/YYYY Total_Record) Record List(Day hh:mm:ss hh:mm:ss) Video clip from PLAY 5.2.1 Play Pause Video clip for PAUSE... -
Page 18: Play Fast Forward
5.2.2 Play Fast Forward Video clip for, FF (x2/x4/x8/x16) 5.2.3 Play Back Forward Video clip for FB (x2/x4/x8/x16) There is two different ways can be operated above functions: 1. Used buttons STEP_F , STEP_B , with remote controller 2. Press buttons on system. -
Page 19: Camera Setting
Content Storage Path: \JPEG\YYMMDD\ File Naming: the 1 picture in ss second -- hhmmss.JPG the remaining pictures in ss second — hhmmssxx.JPG Selectable to stamp time & date Time & date oo the picture 5.4 Camera Setting BRIGHTNESS:0~100 CONTRAST:0~100 COLOR:0~100 HUE:0~100 5.5 Record Setting FPS:30/25/20/15/10/5... -
Page 20: Video/Audio
Video clip from REC Pre Alarm Record Choose with or without Audio for recording Content Storage Path: \Year\Month\Day\Hour-Minute-Second Support continue recording after power loss Support HVGA (640 x 240) and VGA (640 x 480) quality recording; 5.5.1 Video/Audio FPS: 30/25/20/15/10/5 RESOLUTION: VGA/HVGA AUDIO: ON/OFF... -
Page 21: Video Loss
5.5.3 Video Loss FUNCTION: ON/OFF Will display “VIDEO LOSS” while detecting video source lost Menu selectable to enable/disable on ‘stop recording’ at 5 seconds after detecting video loss 5.5.4 Motion Detection FUNCTION: ON/OFF SENSITIVITY: 1-10 ALARM TIME: 10-60... -
Page 22: Pre/Post Alarm
The function is selectable via menu The record duration after triggering, and the trigger sensitivity is selectable via menu Detecting motion and active recording until scene stalling for 10 seconds Back to back trigger is support with record duration extended 5.5.5 Pre/Post Alarm FUNCTION: ON/OFF Pre-Alarm: 30 or 60 Sec... -
Page 23: Date/Time
STORAGE: SD card DEFAULT: 5.6.6 DATE/TIME FORMAT: MMDDYY/DDMMY Y/YYMMDD Configurable in three formats: YY/MM/DD, DD/MM/YY and MM/DD/YY 5.6.7 Storage 5.6.7.1 Device DEVICE: SD CARD WARN LOW:15/10/5 OVERWRITE: ON/ OFF... - Page 24 5.6.7.2 Status Shows memory status, the free and used space 5.6.7.3 Warning Low The low storage warning shows when the available storage equals to the preset warning percentage Users can program three low storage warnings from 5%, 10% or 15% of the overall SD/SD-HC card The warning is disabled when the µDVR is set to recycled recording 5.6.7.4 FORMAT...
-
Page 25: Default Setting
5.6.8 Default Setting Change the settings back to the manufacturer’s default Followings are the factory default settings: Camera Setup a. Brightness: 50 b. Contrast: 50 c Color: 50 d. Hue: 50 FPS: 30 Resolution: VGA Audio: OFF Motion Detect: OFF Motion Sensitivity: 5 Date Print: ON TV: NTSC... -
Page 26: Usb Function
6. USB Function Connecting the USB cable to the µDVR 1. While all of the Windows based operating system does not directly recognize the Linux file system which is the main file system of the µDVR, the iMx software will automatically install the EXT2 file module when running the installation. -
Page 27: Trouble Shooting
(3) Select one free device as the Local disk for µDVR, for example, a Local Disk (Q:). Select the free device for µDVR 7. Trouble Shooting Q 1: Why I can not turn on the Micro DVR? A 1: The possible reason is because of Weak batteries ( appears in the display), or the AC power adapter is disconnected. - Page 28 A 3: It may be because you did not insert the SD memory card. We recommend that you insert the SD memory card with recorded video clips. Q 4: Why the video clip looks too bright or too dark? A 4: It may be because you did not properly set the BRIGHTNESS in the CAMERA SETTING menu. We recommend that you adjust the desired setting of the BRIGHTNESS.
Need help?
Do you have a question about the MDVR21P and is the answer not in the manual?
Questions and answers