Table of Contents
Advertisement
Quick Links
Advertisement
Table of Contents

Related Manuals for Lyngdorf Audio RoomPerfect RP-1


Summary of Contents for Lyngdorf Audio RoomPerfect RP-1
- Page 1 Owner´s manual RoomPerfect™ RP-1 Room Processor RP-1 MENU MENU ENTER ENTER...
-
Page 3: Table Of Contents
Table of Contents Operating Voltage Unpacking the RP-1 Serial Number Registration Introduction Accessories Front Panel Display Indicators Rear Panel Remote Control Connecting the RP-1 - Connecting to sources and amplifi ers - Setup options of Main and Line outputs Menu System - Navigating the Menu System Menu Tree Introduction to RoomPerfect™... -
Page 4: Operating Voltage
Carefully remove the unit and accessory kit from the carton, visually check for shipping damage. Contact both the shipper and your Lyngdorf Audio representative immediately if the unit bears any sign of damage from mishandeling. All Lyngdorf Audio equipment is carefully inspected before leaving our factory. -
Page 5: Introduction
Introduction Congratulations on the purchase of your Lyngdorf Audio RP-1 with RoomPerfect™. This ‘Black Box’ expands your existing music system with the most advanced room correction system on the market. It is implemented in such a way that you will always achieve the perfect result. No com- puter needed, no acoustic knowledge needed, no user input needed. -
Page 6: Accessories
Accessories You should fi nd the following accessories included: Mains cord Microphone digital info analog menu TUNER channel volume ENTER random repeat Remote control Warnings CAUTION: RISK OF ELECTRICAL SHOCK. DO NOT OPEN. CAUTION: TO REDUCE THE RISK OF ELECTRICAL SHOCK, DO NOT REMOVE COVER. NO USER-SERVICEABLE PARTS INSIDE. -
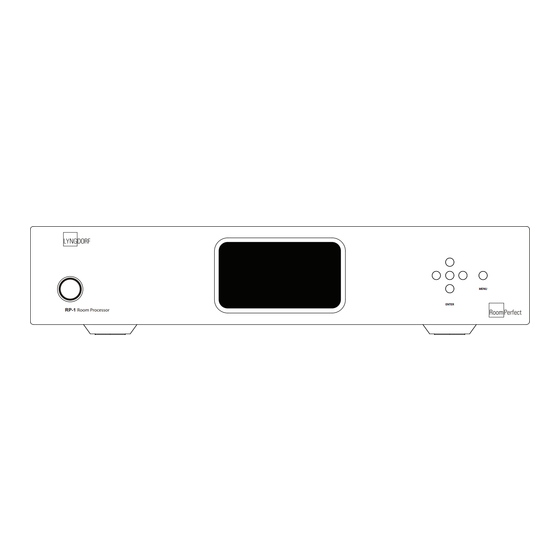
Page 7: Front Panel
Front Panel RP-1 Room Processor Controls The buttons/controls on the front panel of the RP-1 can all be operated with a direct press. Mains Switch Powers the RP-1 on/off. Display Display with all information on menu system and status. Navigation Keys Pressing the Enter button for 3 seconds will set the RP-1 in stand-by mode and turns On the RP-1 from stand-by mode with a short press. -
Page 8: Display Indicators
Display Indicators 1. Menu Alphanumeric Display (2*20 Characters). 2. Standby Indicator Power On is indicated with display showing all information on status. Standby mode is indicated with the Standby Indicator being lit only. 3. RoomPerfect Logo Is illuminated whena RoomPerfect fi lter is engaged. Rear Panel Analog Output Double pairs of balanced/XLR Left/Right analog outputs (Main and Line out). - Page 9 3. Analog Input Balanced/XLR Left/Right Analog input. Never connect balanced and unbalanced Input at the same time. 4. Analog Input Unbalanced/RCA Left/Right Analog input. The default Input setting is “Balanced / XLR”. This can be changed to “Unbalanced / RCA” from the “Input Connection” menu. If the setting is not set correctly you may experience humming.
-
Page 10: Remote Control
Remote Control The remote control is used to access the menu system as well as the buttons directly accessible on the front panel. To control the RP-1 the RCS (Room Correction System) key must be pressed. The functionality of the buttons when RCS is pressed are as follows: Standby The standby button puts the RP-1 in stand-by mode. - Page 11 16. Volume Up/down No function. 17. Up / Down / Left / Right In normal operation mode the Up/Down toggles between Bypass, Focus and Global fi lter and the Left/ Right toggles between Neutral and the available voicings. In menu mode they are used for navigation in the menu system. Pressing and holding down the Up/ Down, Right/Left keys, changes some selected values fast.
-
Page 12: Connecting The
Connecting the RP-1 The photos used are only meant as visual aids to show the versatility of the RP-1, Lyngdorf Audio doesn’t necessarily carry all other products with the described speci- fi cations in the product assortment. Connecting to sources and amplifi ers The RP-1 is very simple to hook up. - Page 13 If your integrated amplifi er or preamp has a ‘tape 2’ loop (sometimes called recording loop) or ‘Pre in/out’: • Connect the output of the ‘tape 2’ loop / ‘Pre out’ to the input of the RP-1. • Then connect the output of the RP-1 to the input of the ‘tape 2’ loop / ‘Pre in’. Using this confi...
-
Page 14: Setup Options Of Main And Line Outputs
Setup options of Main and Line outputs As described in “Routing” and “Crossover Frequency” there are many ways to utilize the Main and Line out- puts. Here we have described the three most common set-up´s. Please note the products, outputs and cross- over frequencies are chosen randomly in these descriptions. -
Page 15: Menu System
Menu System The Main Display on the front panel of the RP-1 shows all functionality and current status of the RP-1. An overview of the menu tree can be seen in the ‘Menu Tree’ chapter. Navigating the Menu System Pressing the Menu button on the front panel or the remote enters the menu or steps back one level in the menu system. -
Page 16: Menu Tree
Menu Tree This is an overview of the entire RP-1 menu structure. RP-1 Main Menu RoomPerfect Guided setup Advanced options Display Display Timeout Disp . Brightness Input Connection Input Sensitivity Change Focus Pos Measure Room Pos RoomKnowledge RoomCorrection Advanced setup Communication Comm Address Comm Speed... -
Page 17: Introduction To Roomperfect
Introduction to RoomPerfect™ Once the guided set-up has been successfully completed you have the option to listen to music through two listening settings; Focus and Global room correction fi lters. To toggle between the two fi lters and ‘Bypass’ you simply press the Up/Down buttons on the front panel or remote control.They can also be selected directly with the numerical buttons on the remote, 0 for bypass, 1 for Focus or 9 for Global. -
Page 18: Roomperfect
RoomPerfect™ The sub menus accessible in the RoomPerfect™ menu are: Advanced options is only available when Guided set-up has been performed. Guided Setup When you enter the RoomPerfect™ Main Menu for the fi rst time, only the Guided setup is available. Press Enter to initiate the guided set-up. -
Page 19: Setting The Measurement Volume Level
Setting the Measurement Volume Level When setting the measurement volume level, it is important that you always judge whether the calibra- tion volume is too loud. The calibration volume should not be so loud that it causes: • uncomfortably loud sounds that are inconvenient to you or your environment, or •... -
Page 20: Focus Measurement
When the message ‘Calibration ok. Press Enter to continue’ is displayed, the calibration volume has suc- cessfully been set and saved. Focus Measurement When the calibration is OK, press Enter to start the measuring process and ‘Measuring Focus position …’ will be displayed. Each measurement comprises four steps: •... -
Page 21: Adding More Room Measurements
For an optimal room correction it is very important that the measurements are: 1. performed more than 1 meter (approx. 3 feet) away from the loudspeakers, 2. not performed behind the loudspeaker, and 3. that there is at least 50 cm/1.5 ft between each measurement. When a random measuring position and microphone orientation has been chosen press Enter. -
Page 22: Calculation Of Focus And Global Filters
Calculation of Focus and Global Filters When RoomPerfect™ calculates the fi lters the display shows the following, ‘Calculating fi lters - Please wait’. The fi lter calculation process can be expected to take anywhere between 5 seconds and a minute de- pending on the specifi... -
Page 23: Advanced Options
Advanced Options This section describes the options in the advanced menu, which is available after Guided Setup has been completed. Here you can change the listening position and add more room measurements, check the RoomKnowledge of your current set-up, and check the RoomCorrection for the different fi lters. Change Focus Pos If the RP-1 is connected before the volume control of your amplifi... -
Page 24: Roomknowledge
‘Add more room meas.? Yes/No’ will show in the display: • choose Yes to add another room measurement or, • choose No to stop adding more room measurements. If No is chosen the RP-1 is will return to full scale output. ‘Save room measurement(s)? Yes/No’... -
Page 25: Display
Display The sub menus accessible in the Display menu are: Display Timeout Display Timeout Display Timeout set-up is used for enabling/disabling the 10 sec. display ’switch’off’ feature. If enabled the Main Display reading will switch off after 10 sec of inactivity from the front panel buttons or re- mote. -
Page 26: Input Sensitivity
Input Sensitivity The Input Sensitivity setting enables you to match the line level output of your pre-amplifi er to the input sensitivity of the Lyngdorf Audio RP-1. The normal settings are: • Select ‘High’ for input levels <= 2.2Vrms and the output/input levels of your pre- and power amplifi... -
Page 27: Line Out Level
Line Out Level This adjusts the overall output level in steps of -0.1 db, it can be attenuated to –40 dB in total. Routing In Routing it is possible to apply different settings to the Main and Line outputs: Symbol Highpass fi... -
Page 28: Crossover Frequency
By using a high crossover frequency, the rear wall quarter wavelength refl ection is removed from the main speakers. If a Lyngdorf Audio boundary woofer is used in a 2+2 set-up, a crossover frequency of 400 is recom- mended due to the high bandwidth of the boundary woofer. -
Page 29: Delay
However, if the distance isn’t identical and/or you are using a sub- woofer, or a Lyngdorf Audio 2+2 system, you need to set a delay in order to ensure that the sound from each loudspeaker reaches the listening position simultaneously. -
Page 30: Firmware Versions
Firmware Versions Firmware versions The Firmware Versions menu is used to check the current fi rmware version of your RP-1 and the Room- Perfect™ module as well as the RoomPerfect™ serial number. Factory Reset Factory Reset The Factory Reset setting is used to restore all settings, including RoomPerfect, in the RP-1 to the fac- tory settings. -
Page 31: Troubleshooting
Troubleshooting RoomPerfect™ No microphone connected The error message ‘No microphone connected’ is displayed when no microphone is connected to the RP-1. Solution: • Connect the microphone on the back panel. No signal 1. The error message ‘Fault – No signal’ is displayed when the incoming signal is classifi ed as pure noise. -
Page 32: Rp-1
Troubleshooting RP-1 Speakers are humming when the RP-1 is turned on Balanced and unbalanced for Main out connections are used at the same time. Solution: • Disconnect the interfering connection. Speakers are humming when the RP-1 is turned on Balanced and unbalanced for Line out connections are used at the same time. Solution: •... -
Page 33: Firmware Upgrading
Firmware Upgrading The RP-1 fi rmware can be upgraded using the ‘Lyngdorf Audio – Serial Load’ software. This is in the PC package available from www.Lyngdorf.com. Press the Enter button while powering On to bring the product into upgrade mode. -
Page 34: Connectors
Connectors Mains Connector Mains voltage to the RP-1 is applied via an IEC320 type connector. The supplied cable with safety ground should be used to connect the RP-1 to a mains outlet. Make sure the rear selector is in the correct setting and connect the power input only to an appropiate AC source. -
Page 35: Technical Specifi Cations
Technical Specifi cations Audio Parameter Balanced input connectors Balanced input impedance Unbalanced input connectors Unbalanced input impedance Input sensitivity DAC Out impedance Unbalanced output Balanced output Frequency Response 20 - 20KHz +/-0.1dB THD+N A-wgt Analog to Analog S/N Ratio Analog to Analog Dynamic Range Analog to Analog Channel Separation... -
Page 36: Technical Assistance
For latest version of the fi rmware, the newest version of this document and ‘Questions and Answers’, please check the ‘Support’ section on the Lyngdorf Audio website. If you have any problems with or questions regarding your Lyngdorf Audio product, please contact your nearest Lyngdorf Audio representative or:... -
Page 37: Appendix
Appendix Voicing Curves For further information on the Voicing setting, please refer to the “Voicing” chapter. Music 1 Ma gnitude R esponse: Music 1 10 Hz 100 Hz 1kHz 10kHz F requency (Hz) Relaxed Ma gnitude R esponse: R ela x ed 10 Hz 100 Hz 1kHz... - Page 40 www.lyngdorf.com...
Need help?
Do you have a question about the RoomPerfect RP-1 and is the answer not in the manual?
Questions and answers