Table of Contents
Advertisement
Quick Links
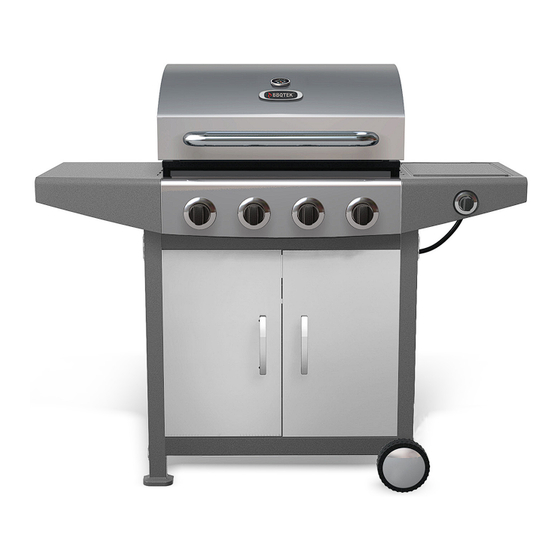
Model Number GFS2616AD-1 (1301 3019)
BBQTEK 60K BTU PRO 4+1 BURNER GRILL
SAVE THIESE INSTRUCTIONS FOR FUTURE USE.
IF YOU ARE ASSEMBLING THIS UNIT FOR SOMEONE ELSE,
GIVE THIS MANUAL TO HIM OR HER FOR FUTURE USE.
FOR CUSTOMER SERVICE:
CALL 1-877-885-8227 (TOLL-FREE)
10:00 A.M. – 7:00 P.M. (EST),
MONDAY-FRIDAY
E-MAIL: SERVICE@BBQTEK.COM
LOG ON: WWW.BBQTEK.COM
- 1 -
Advertisement
Table of Contents

Related Manuals for BBQ GFS2616AD-1


Summary of Contents for BBQ GFS2616AD-1
- Page 1 Model Number GFS2616AD-1 (1301 3019) BBQTEK 60K BTU PRO 4+1 BURNER GRILL SAVE THIESE INSTRUCTIONS FOR FUTURE USE. IF YOU ARE ASSEMBLING THIS UNIT FOR SOMEONE ELSE, GIVE THIS MANUAL TO HIM OR HER FOR FUTURE USE. FOR CUSTOMER SERVICE: CALL 1-877-885-8227 (TOLL-FREE) 10:00 A.M.
-
Page 2: Grill Operation
Grill Operation 1-2-3 Before Grilling Step 1 Keep your grill a safe distance away from your property.* Step 2 Always perform a Leak Test on all connections and hoses. * Step 3 Keep children away from the grill. During Grilling (To avoid tripping safety valves, please follow these instructions carefully!) Step 1 First open lid and turn gas tank on slowly. -
Page 3: Table Of Contents
Table of Contents For Your Safety.........................4 Illustrated Parts List .........................6 Hardware List...........................8 Assembly Instructions…..………………..................9 Operating Your Grill........................13 Connecting & Disconnecting Gas Cylinder................14 Checking for Leaks........................14 Lighting Your Grill........................15 Excess flow safety valve reset procedure................17 Care and Maintenance......................18 Troubleshooting........................18 Warranty Program........................21 - 3 -... -
Page 4: For Your Safety
For Your Safety Dear Valued Customer, Congratulations on your new barbecue grill purchase! You’ve made the right choice. In this manual, you will find assembly instructions, suggestions for grilling and helpful hints, as well as guidelines for the safe operation, proper care and use of your grill. -
Page 5: General Information
Safe Locations for Use of This Outdoor Grill CAUTION Never use this outdoor grill inside any building, garage, shed or breezeway, or inside any boat, trailer or recreational vehicle to prevent a possible fire and to prevent the possibility of carbon monoxide poisoning or asphyxiation. WARNING Do not use this appliance under overhead combustible surface or covered area (e.g., awnings, umbrellas, porches or gazeboes). -
Page 6: Illustrated Parts List
Illustrated Parts List Body Assembly…………...1PC Left cart back leg….. ……..1 PC Lower cart front beam…...1PC Warming Rack……………1PC Tank baffle-A…. ……….…1 PC Cart upper side beam….2PCS Cooking Grid…………..2PCS Stopper…………..………...1 PC Cart side panel………….2PCS Heat plate…………….…3 PCS Bottom panel……………...1 PC Caster cap……………….2PCS Cup Support……….……..1 PC Left cart front leg…………..1PC Caster……………...…….2PCS... -
Page 7: Parts List
Parts List Body B, Warming Rack………1PC C, Cooking Grid……..2PCS D, Heat plate…………4 PCS Assembly…….1PC E, Cup Support………..1 PC F, Grease Cup…………1 PC G, Left Side H, Right Side Shelf…...…1PC Shelf……. . .1PC I, Upper cart back beam 1PC J, Lower cart back beam.1PC K, Left cart back leg……1 PC L, Tank baffle-A……. -
Page 8: Hardware List
Hardware List AAA:18 PCS BBB:18 PCS CCC:18 PCS Spring Washer ¢ 6.2 x ¢ 9 x1.2 Flat Washer ¢ 6.2 x ¢ 16 x1.0 Bolt M6x15 DDD:2 PCS EEE:2 PCS FFF:4 PCS Collar Bolt M6x12 GGG:2PCS HHH:1PC Wrench Screwdriver Hardware listed above is not scaled to exact size. (A screwdriver is required for assembly and is included for your convenience) - 8 -... -
Page 9: Assembly Instructions
Assemble Instructions Remove all contents from the carton packaging. Make sure all parts are present before attempting assembly. Once the grill is fully assembled, go back and check to make certain all the bolts are secure. Tighten again using the screwdriver provided if necessary. - Page 10 Step 4 Insert the axle (Z) into the holes on the right front leg and back leg. Put one collar (EEE) on each end of the axle, and then put one wheel (Y) on each end of the axle. Screw one lock nut (DDD) on each end of the axle using the wrench (GGG) provided.
- Page 11 Step 8 Place the body assembly (A) on the cart assembly. Align the holes on front legs with the holes on the body assembly(A), then insert one bolt (AAA), one spring washer (CCC) and one flat washer (DDD) into each hole. Tighten by hand until secure. Align the hole on each back leg with the holes on body assembly.
- Page 12 c) Insert the four feet of warming rack (B) into the holes on top of grill body. d) Hook the grease cup support (E) into the holes on grease tray and place the grease cup (F) on the cup support. e) Insert and screw the stopper (M) into the hole on the upper cart back beam.
-
Page 13: Operating Your Grill
Fully Assembled View Operating Your Grill CAUTION Use only the regulator provided. If a replacement is necessary, call our customer service center. The use of unauthorized parts can create an unsafe condition and environment. The LP gas supply cylinder(s) to be used must be: a) Constructed and marked in accordance with the specifications for LP gas cylinders of the U.S. -
Page 14: Connecting & Disconnecting Gas Cylinder
cylinder for vapor withdrawal and equipped with a listed overfill prevention device (OPD). DANGER A fire causing death or serious injury may occur if the following is not followed exactly: Never store or use gasoline or other volatile substances in the vicinity of this grill. Never store a spare propane cylinder in the vicinity of this grill, or in the vicinity of another potential heat source. -
Page 15: Lighting Your Grill
If bubbles appear, you have a leak. Proceed to step 6. Disconnect the regulator from the tank and reconnect. Make sure the connection is secured. Retest with solution. If you continue to see bubbles, replace the cylinder. Lighting Your Grill DANGER Failure to open lid while igniting the grill’s burners or not waiting five minutes to allow gas to clear if the grill does not light, may result in an explosion, which could cause serious bodily injury or death. - Page 16 turn the knob to the “OFF” position immediately. Wait five minutes for the gas to clear and repeat the procedure. 5. Adjust valve knob to the desired cooking temperature Using the Lighting Stick to Light the Side Burner 1. Open lid while lighting the burner. Lid must remain open while burner is lit 2.
-
Page 17: Excess Flow Safety Valve Reset Procedure
Excess flow safety valve reset procedure ● The new regulators are equipped with a safety device that restricts the gas flow in the event of a gas leak. However, unsafe practices of grill operation could activate the safety device without having a gas leak. ●... -
Page 18: Care And Maintenance
Care and Maintenance IMPORTANT Always allow to completely cool off before covering your grill to prevent corrosion from condensation. CAUTION All cleaning and maintenance should be done when the grill is cool, with the fuel supply turned off at the control dial and the propane cylinder disconnected. - Page 19 Electrode cracked or broken - Replace electrode sparks at crack Burner doesn't light using a No gas flow Check if propane tank is empty. If match not, refer to Excessive flow safety valve reset procedure on page Coupling nut and regulator are Turn off coupling nut about not fully connected one-half to three quarters...
- Page 20 Low on propane gas Replace cylinder Excess flow valve tripped Refer to Excessive flow safety valve reset procedure on page Flare-up Grease fill-up Clean grill Excessive fat in meat Trim fat from meat before grilling Excessive cooking temperature Adjust (lower) temperature Persistent grease fire Grease trapped by food was Turn knobs to OFF.
-
Page 21: Warranty Program
If you have any questions about our products or warranty, please visit our website www.bbqtek.com, or e-mail to us service@bbqtek.com, or call our service center at 1-877-885-8227 (TOLL-FREE), 10:00 A.M. – 7:00 P.M. (EST), MONDAY-FRIDAY. Manufactured by : Lucas BBQ Co., Ltd. FOR CUSTOMER SERVICE: CALL 1-877-885-8227 (TOLL-FREE) 10:00 A.M.
Need help?
Do you have a question about the GFS2616AD-1 and is the answer not in the manual?
Questions and answers