Table of Contents
Advertisement
Quick Links
WARNING:
Improper installation,
adjustment, alteration, service
or maintenance can cause
injury or property damage.
Read the installation,
operation and maintenance
instructions thoroughly
before installing or servicing
this equipment.
DANGER:
Failure to follow these
instructions could result in
fire or explosion that could
cause property damage,
personal injury or death.
DANGER:
DO NOT use gas grill for
indoor cooking or heating.
TOXIC fumes can accumulate
and cause asphyxiation. DO
NOT use in or on boats or
recreational vehicles.
PROP 65 WARNING:
Chemicals known to the state
of California to cause cancer,
birth defects or other
reproductive harm are created
by the combustion of
propane.
WARNING:
FOR YOUR SAFETY:
For Outdoor Use Only
(outside any enclosure)
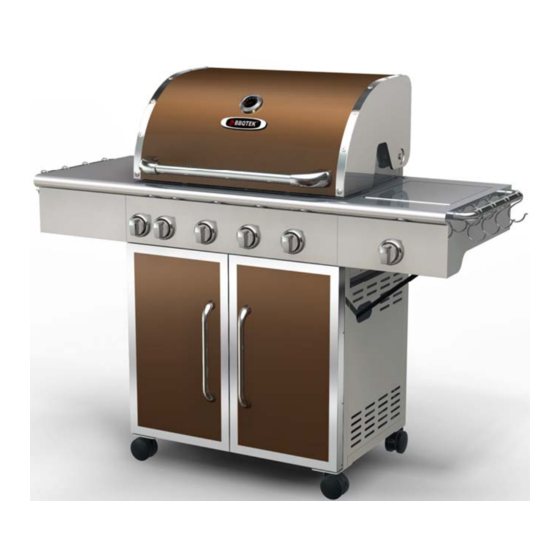
GSF2818K
Owner's Manual
Outdoor LP Gas Barbecue Grill
SAVE THESE INSTRUCTIONS FOR FUTURE REFERENCE.
IF YOU ARE ASSEMBLING THIS UNIT FOR SOMEONE ELSE,
GIVE THIS MANUAL TO HIM OR HER TO SAVE FOR FUTURE
REFERENCE.
FOR CUSTOMER SERVICE, EMAIL TO
SERVICE@BBQTEK.COM OR
CALL 1-877-885-8225 (TOLL-FREE), 07:00 A.M. – 16:00 P.M.
(EST), MONDAY-FRIDAY.
Service Center: 1-877-885-8225
0
MODEL# GSF2818K
Advertisement
Table of Contents

Related Manuals for BBQ GSF2818K


Summary of Contents for BBQ GSF2818K
- Page 1 MODEL# GSF2818K Outdoor LP Gas Barbecue Grill WARNING: Improper installation, adjustment, alteration, service or maintenance can cause injury or property damage. Read the installation, operation and maintenance instructions thoroughly before installing or servicing this equipment. DANGER: Failure to follow these...
- Page 2 NOTE: This grill must be used with propane gas only (propane gas cylinder not included). Installer: Leave this manual with the consumer. Consumer: Retain this manual for future reference. GSF2818K Owner’s Manual...
-
Page 3: Table Of Contents
Operating Your Grill....................... 14 Connecting & Disconnecting The Gas Cylinder............14 Checking for Leaks......................15 Lighting Your Grill......................15 Excess Flow Safety Valve Reset Procedure ............... 17 Care and Maintenance ....................18 Troubleshooting ......................19 Warranty Program ......................21 GSF2818K Owner’s Manual... -
Page 4: For Your Safety
DANGER: Never use this outdoor grill inside any building, garage, shed or breezeway, or inside any boat, trailer or recreational vehicle to prevent a possible fire and to prevent the possibility of carbon monoxide poisoning or asphyxiation. GSF2818K Owner’s Manual... -
Page 5: General Information
Step 3. Ensure that the valve nozzle is pointing straight and completely inserted into the venturi tube. General Information A propane gas cylinder is required for operation. This gas grill is NOT intended for commercial use. 3. Don't obstruct the ventilation opening of the cylinder enclosure. GSF2818K Owner’s Manual... -
Page 6: Package Contents
SIDE KNOB SEAT CART LEFT SIDE PANEL SIDE KNOB GREASE CUP CART BACK PANEL GREASE CUP SUPPORT TANK CLIP CART RIGHT SIDE PANEL CART FRONT FRAME CART BOTTOM PLATE TANK SUPPORT LEFT DOOR SWIVEL CASTER RIGHT DOOR WARMING RACK GSF2818K Owner’s Manual... -
Page 7: Hardware Contents
Screwdriver 1 PC M6 Nut 4 PCS M6 x 12 Bolt 4 PCS Wrench 2 PCS Hardware listed above is not scaled to exact size. (A screwdriver is required on assembly and is included for your convenience). GSF2818K Owner’s Manual... -
Page 8: Assembly Instructions
Insert one bolt (AA) with one spring washer (CC) and one flat washer (BB) into each pre-drilled holes. Tighten bolts by hand until secure. Repeat the procedure for the heat insulation panel and cart right side panel assembly. d) Tighten all bolts using the screwdriver provided. GSF2818K Owner’s Manual... - Page 9 (See the above diagram). Step 5 (Grease cup & support assembly) a) Hook the grease cup support (H) into the two holes on the heat insulation panel. b) Place the grease cup (G) onto the grease cup support. GSF2818K Owner’s Manual...
- Page 10 Push down the top pin of left door Repeat the procedure for the right door (L) assembly. d) Close the two doors. GSF2818K Owner’s Manual...
- Page 11 (BB) into each pre-drilled hole. Tighten bolts by hand until secured. a) Go back and tighten all bolts using the screwdriver provided. b) Repeat the procedure for the assembly of right side shelf (R) and side bar tool hanger. GSF2818K Owner’s Manual...
- Page 12 Screw one bolt (EE) with one flat washer (FF) into each pre-drilled hole by hand. b) Tighten the bolts using the screwdriver provided. Insert the side knob (T) onto the valve shaft. GSF2818K Owner’s Manual...
- Page 13 Place the heat shield (O) onto the heat shield support. b) Place the cooking grids (N) upon the heat shield. Place the warming rack (M) on the warming rack support as shown. d) Close the top lid. GSF2818K Owner’s Manual...
- Page 14 Connect the tank with regulator by screwing the regulator collar onto the tank valve. (See diagram to left) d) Conduct the leak test on page 15 to make certain all connections are connected securely. Fully Assembled View Right Side Left Side GSF2818K Owner’s Manual...
-
Page 15: Operating Your Grill
9. Place dust cap on cylinder valve outlet whenever the cylinder is not in use. Install only the type of dust cap on cylinder valve outlet that is provided with the cylinder valve. Other types of caps or plugs may result in leakage of propane. GSF2818K Owner’s Manual... -
Page 16: Checking For Leaks
3. Press the valve knob and rotate it counterclockwise to the ‘’HIGH’’ position. The burner should light immediately. If more than one burner is desired, repeat the procedure 2-3 until all desired burners are lit. 4. Adjust valve knob(s) to the desired cooking temperature. GSF2818K Owner’s Manual... - Page 17 2. Keep the center line of GSF2818K 3. Tighten the screw and make certain it is venturi tube and nozzle Owner’s Manual secured.
-
Page 18: Excess Flow Safety Valve Reset Procedure
When all front burners are lit, close the grill lid. Wait for 10-15 minutes; the temperature should reach 400 – 450°F. WARNING: The cylinder valve always has to be above the horizontal position, for the cylinder to have vapor withdrawl only. GSF2818K Owner’s Manual... -
Page 19: Care And Maintenance
Inspect burner for damage (cracks or holes). If damage is found, replace with a new burner. Reinstall burner. Make certain the gas valve orifices are correctly positioned, pointing straight into burner inlet (venturi tube). Also, check position of spark electrode. GSF2818K Owner’s Manual... -
Page 20: Troubleshooting
Turn front of grill to face wind or Flame blow out. Increase flame height. Low on propane gas. Replace or refill propane tank. Excess flow valve tripped. Refer to the Excessive flow safety valve reset procedure on page 17. GSF2818K Owner’s Manual... - Page 21 If flames are blue and noisy – close flap at the end of the venturi tubes in 1/8 in. increments until flames are correct. *Propane Models must be open a minimum of 1/8 in. GSF2818K Owner’s Manual...
-
Page 22: Warranty Program
If you have any questions related to the product or warranty, please visit our website at www.bbqtek.com or email us to service@bbqtek.com or call our customer service center at 1-877-885-8225, 07:00 A.M. to 16:00 P.M. (EST), Monday through Friday.
Need help?
Do you have a question about the GSF2818K and is the answer not in the manual?
Questions and answers