Arrma Raider Maintenance Manual
Hide thumbs
Also See for Raider:
- Owner's manual (14 pages) ,
- Instruction manual (44 pages) ,
- Manual (40 pages)
Table of Contents
Advertisement
Quick Links
Advertisement
Table of Contents

Subscribe to Our Youtube Channel
Related Manuals for Arrma Raider


Summary of Contents for Arrma Raider
- Page 1 Downloaded from: ArrmaForum.com...
-
Page 2: Table Of Contents
Support Info Camber-Link Length Steering Arm Length Camber-Link Position At ARRMA we want you to love running your kit and make owning a high performance RC car as simple Shock Position as possible. If you have any questions about running,... -
Page 3: Chassis Overview
Block GO FOR IT! is the ARRMA worldwide user community. Here you will be able to connect with other ARRMA owners around the world and get access to: • Tips and tricks of how to get the best from your kit. -
Page 4: Recommended Tools
Cleaner or Cloth Brush Spray Nitro Car Cleaner Basic Trouble Shooting - need help? Visit the support area and forums at ARRMA-RC.COM Trouble Shooting Matrix Problem Possible Cause Solution VEHICLE DOES NOT MOVE Batteries are incorrectly installed in Check transmitter batteries and refit - see... -
Page 5: Maintenance
C h e c k c o m p o n e n t s a n d r e p l a c e - v i s i t ARRMA-RC.com for advice MEGA waterproof ESC is damaged Replace with new unit - visit ARRMA-RC.com for advice and upgrades! Maintenance Maintenance Schedule This chart is just a guide. -
Page 6: Chassis Maintenance
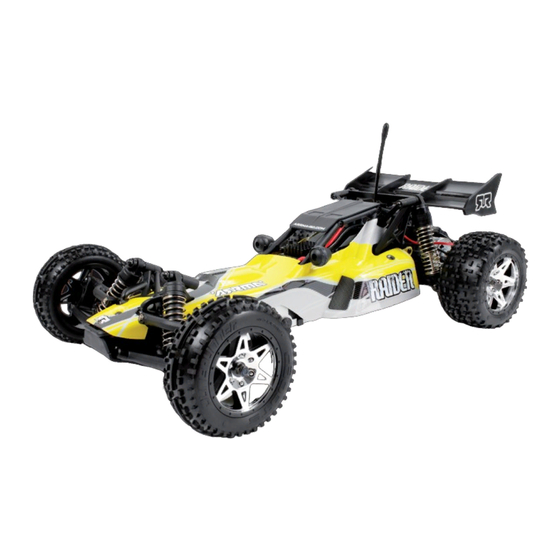
PARTS ARE DAMAGED Please contact your local distributor to order replacement parts. N.B. Raider chassis shown as an example - information applies to all variants. Wheel and Tyre Maintenance N.B. Fury shown as an example - information applies to all variants. -
Page 7: Slipper Clutch Adjustment
Slipper Clutch Adjustment ARRMA-RC.COM/ Tools Required SUPPORT/ The function of the slipper clutch is to protect the gearbox, differential and motor from shocks and also to allow you to tune how the torque from the motor 'comes-in' when you accelerate to suit different surface 2mm Hex Driver 5.5 &... -
Page 8: Slipper Pad Replacement
Slipper Pad Replacement Tools Required ARRMA-RC.COM/ SUPPORT/ Every 20 runs or so it may be necessary to replace your slipper clutch 'pads'. This depends on how the slipper is setup and your driving style. If you find that it is hard to get the setting you want from your slipper 2mm Hex Driver 5.5 &... -
Page 9: Driveshaft Maintenance
Driveshaft Maintenance Tools Required ARRMA-RC.COM/ SUPPORT/ Every 20 runs or so it may be necessary to clean and re-grease the drive- shafts as well as check for wear and/or damage. Running in dusty, sandy or wet conditions will mean 7mm Nut Driver or Cross Wrench... -
Page 10: Wheel Bearing Replacement
Wheel Bearing Replacement ARRMA-RC.COM/ Tools Required SUPPORT/ Ev er y 50 r uns or so it may be necessary to inspect the wheel bearings for wear. Running... -
Page 11: Factory Settings
Factory Settings Shocks Front 26mm 1.5mm Front Rear Ride Height Piston 21.5 Kit - 2 x 1.3mm Kit - 2 x 1.3mm Camber Oil wt. -1.5 350 cst 350 cst Lower shock ° position Toe Angle Spring 0 (Zero) Kit - Chrome Kit - Chrome °... - Page 12 Rear Differential Camber Link 70000 cst Oil wt. position Ride Height Motor/Gears Camber -1.5 ° 44mm Spur Gear Motor Kit - 15 Turn Kit - 87 tooth Pinion Gear Kit - 18 tooth Kit - MEGA Lower shock position WWW.ARRMA-RC.COM...
-
Page 13: Chassis Tuning
Chassis Tuning N . B . Ra i d e r s h o w n a s a n exa m p l e - i n f o r m a t i o n a p p l i e s t o a l l v a r i a n t s . Ride Height The ride height is set using preload spacers between the top of the shock... -
Page 14: Shock Removal
Less chassis roll To find out what spring options there are for your kit please visit Less chance of 'bottoming out' ARRMA-RC.com or speak to your local distributor. Better on smooth surfaces Shock Oil H o w t o c h a n g e y o u r s h o c k o i l The standard shock oil in your kit’s shocks is... -
Page 15: Drivetrain Tuning
Gear Chart Your ARRMA kit has one gear ratio and this can be altered by changing the pinion or spur gear in the transmission. The standard gearing of your kit is designed to give the best compromise between speed and acceleration. Increasing the top speed will reduce acceleration and vice versa. -
Page 16: Motor Removal
7mm Nut Driver Cross Wrench To see what motor upgrades are available for your car please visit ARRMA-RC.com or your local ARRMA distributor. Remove rear right wheel with 7mm nut driver/ Remove spur gear cover with 2mm hex driver cross wrench. -
Page 17: Differential Removal
Differential Removal and Replacement ARRMA-RC.COM/ Tools Required SUPPORT/ 1.3mm Hex Driver 2mm Hex Driver 2.5mm Hex Driver 7mm Nut Driver Cross Wrench Long-nose Pliers Remove rear wheels with 7mm nut driver/cross Separate both rear camber-link ball joints with long- wrench. Disconnect motor wires. - Page 18 Differential Exploded View Maintenance kits available: Differential Bearings - 610001 Differential Gear/Idler Gear Set - 310003 Differential Output Shafts - 310008 Differential Gear Maintenance Set - 310009 WWW.ARRMA-RC.COM...
-
Page 19: Radio-Gear Maintenance
2mm Hex Driver will need to access the receiver. Remove three bolts securing receiver box lid (Raider only) Remove four roof bolts with 2mm with 2mm hex key, remove lid. Reinstallation is hex driver, remove roof. the reverse the removal process. -
Page 20: Servo Removal
Set with 7mm hex driver. Disconnect servo arm ball-joint and remove steering assembly from servo box. Reassembly is the reverse the removal process. Servo Removal ARRMA-RC.COM/ Upgrading your servo will give quicker 2mm Hex Driver SUPPORT/ Tools Required and more powerful steering. - Page 21 Servo Removal (cont.) 1mm+ Remove two servo mount screws and one servo Refit the two servo mounts with a 2mm hex driver. arm screw with 2mm hex driver. If necessary, Ensure the gap between the side of the servo and replace servo with a standard or uprated item.
Need help?
Do you have a question about the Raider and is the answer not in the manual?
Questions and answers