
Related Manuals for Zanussi ZOB 461


Summary of Contents for Zanussi ZOB 461
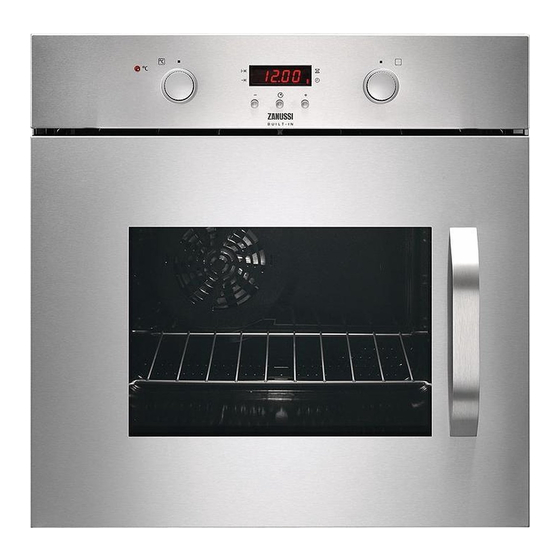
- Page 1 User Informations manual pour l’utilisateur Built-in Four encastrable oven ZOB 461 Downloaded from www.vandenborre.be...
- Page 2 2 electrolux Thank you for selecting our appliance We wish you lots of enjoyment with your new appliance and we hope that you will consider our brand again when purchasing household appliances. Please read this user manual carefully and keep it throughout the product life cycle as a reference document.
-
Page 3: Table Of Contents
electrolux 3 Contents Warnings and Important Safety Information ..................4 Description of the appliance ......................6 Controls ............................7 Before using the oven for the first time .................... 8 Electronic programmer ........................9 Using the Oven ........................... 14 Baking and Roasting Tables ......................18 Cleaning and Maintenance ...................... -
Page 4: Warnings And Important Safety Information
4 electrolux English Warnings and Important Safety Information Always keep these user instructions with the appliance. Should the appliance be passed on to third persons or sold, or if you leave this appliance behind when you move house, it is very important that the new user has access to these user instructions and the accompanying information. -
Page 5: Customer Service
electrolux 5 People Safety • This appliance is intended for use by adults. It is dangerous to allow children to use it or play with it. • Children should be kept away while the oven is working. Also, after you have switched the oven off, it remains hot for a long time. -
Page 6: Description Of The Appliance
6 electrolux Description of the appliance 1. Control panel 7. Air vents for cooling fan 2. Oven function control knob 8. Grill 3. Electronic programmer 9. Oven light 4. Thermostat control knob 10. Oven fan 5. Mains on indicator 11. Rating plate 6. -
Page 7: Controls
electrolux 7 Controls Push-Pull control knobs This model is provided with push-pull control knobs. These knobs can be completely sunken inside the control panel when the oven is not working. Oven Function Control Knob The oven is off. Conventional cooking - The heat comes from both the top and bottom element, ensuring even heating inside the oven. -
Page 8: Before Using The Oven For The First Time
8 electrolux The cooling fan Safety Thermostat The cooling fan is designed to cool the the To prevent dangerous overheating (through oven and the control panel. The fan switches on incorrect use of the appliance or defective automatically after a few minutes of cooking. components), the oven is fitted with a safety Warm air is blown out through the aperture near thermostat, which interrupts the power supply. -
Page 9: Electronic Programmer
electrolux 9 Electronic programmer 1. Push button for selecting a function 2. Decreasing control button “ ” 3. Increasing control button “ ” 4. Display 5. “Cooking Duration” pilot lamp 6. “End of cooking” pilot lamp 7. “Minute minder” pilot lamp 8. -
Page 10: Cooking Duration Function
10 electrolux “Cooking Duration” function This function allows the oven to automatically switch off at the end of a programmed cooking duration time. Place food in the oven, select a cooking function and adjust the cooking temperature. Press button repeatedly to select the “Cooking Duration”... - Page 11 electrolux 11 “End of cooking” function With this function, you can set the oven to switch off automatically when a programmed end of cooking time is over. Place food in the oven, select a cooking function and adjust the cooking temperature.
-
Page 12: Minute Minder Function
12 electrolux “Cooking duration” and “End of cooking time” combined The functions “Cooking duration” and “End of cooking time” can be used simultaneously to set the oven to switch on and off automatically at a later time. 1. With the “Cooking duration” function (carry out the cooking duration setting as described in the relevant chapter) set the duration time. - Page 13 electrolux 13 How to switch off the display 1. Press two programmer push buttons simoultaneously and keep them pressed for about 5 seconds. The display will switch off. 2. To switch on the display, press any button. The display can be switched off only if no other functions have been set.
-
Page 14: Using The Oven
14 electrolux Using the oven The oven is supplied with an exclusive system which produces a natural circulation of air and the constant recycling of steam. This system makes it possible to cook in a steamy environment and keep the dishes soft inside and crusty outside. - Page 15 electrolux 15 Replaceable telescopic runners Place the telescopic runner with the locking system on the chosen level as shown in the side pictures. The „stop elements“ at the extremities of the runner MUST face upwards. It is possible to buy telescopic runners separately.
-
Page 16: Fan Cooking
16 electrolux When toasting bread, we suggest that the top Fan cooking runner position is used. The food is cooked by means of preheated air The food should be turned over during force blown evenly round the inside of the cooking, as required. - Page 17 electrolux 17 Hints and Tips Conventional Cooking The middle shelf position allows for the best On baking: heat distribution. To increase base browning Cakes and pastries usually require a medium simply lower the shelf position. To increase top temperature (150°C-200°C) and therefore it is browning, raise the shelf position.
-
Page 18: Baking And Roasting Tables
18 electrolux To reduce the build up of smoke in the oven, it is recommended to pour a little water in the roasting pan. To prevent condensation forming, add water several times. The plates can be kept warm in the oven at minimum temperature until serving. - Page 19 electrolux 19 Baking and Roasting Tables Conventional and Fan cooking Timings do not include pre-heating. The empty oven should always be pre-heated for 10 minutes. Cooking times Conventional Cooking Fan Cooking TYPE OF in minutes NOTES temp temp °C DISH °C CAKES Whisked recipies...
-
Page 20: Electrolux
20 electrolux Grilling Timings do not include pre-heating. The empty oven should always be pre-heated for 10 minutes. Cooking time in Quantity Grilling TYPE OF DISH minutes 1st side Pieces temp.°C 2nd side Fillet steaks 12~15 12~14 Beef-steaks 10~12 Sausages 12~15 10~12 Pork chops... -
Page 21: Cleaning And Maintenance
electrolux 21 Cleaning and Maintenance Before cleaning switch the oven off External cleaning and let it cool down. Regularly wipe over the control panel, oven The appliance must not be cleaned door and door seal using a soft cloth well wrung with a superheated steam cleaner or a out in warm water to which a little liquid detergent steam jet cleaner. -
Page 22: Downloaded From Www.vandenborre.be
22 electrolux Cleaning the oven door The following instructions explain how to disassemble the oven door as it is supplied by the Manufacturer. If your oven door has been reversed, please note that the references to the right or left side have to be switched. Figure 1. -
Page 23: Downloaded From Www.vandenborre.be
electrolux 23 After cleaning, place the inner glass back in its original position by inserting it in the rubber distance holders C. The inner pane B (with side decors) must be arranged with the decorated surface to the inner side of the door. The slight roughness of the printing must not be discernible when you stroke your fingers over the visible surface. -
Page 24: Downloaded From Www.vandenborre.be
24 electrolux Grill Heating Element This model has been fitted with a hinged grill ele- ment to make the roof of the oven especially easy to clean. Before proceeding ensure the oven is cool and disconnected from the electricity supply. 1. -
Page 25: Downloaded From Www.vandenborre.be
electrolux 25 The telescopic runners must not be cleaned in the dishwasher. Do not attempt to remove the telescopic runners until the oven has cooled down. Do not pull out the telescopic runners to remove them from the side rails. Sharp edges could cause injuries. -
Page 26: What Happens If Something Goes Wrong
26 electrolux What happens if something goes wrong If the appliance is not working correctly, please check the following before contacting the Electrolux Service Centre. SOLUTION PROBLEM The oven is not switching on. Check that both a cooking function and temperature have been selected. -
Page 27: Technical Data
electrolux 27 Technical Data Heating element ratings Bottom heating element 1000 W Full oven (Top+Bottom) 1800 W Inner Grill 1650 W Full Grill 2450 W Fan cooking 1825 W Pizza 2650 W Oven light 25 W Hot air fan 25 W Cooling Fan 25 W 2725 W... -
Page 28: Instructions For The Installer
28 electrolux Instructions for the Installer Installation and connection must be After the connection has been carried out, the done in compliance with the heating elements must be tested by being regulations in force. Any interventions operated for about 3 minutes. must be carried out when the Terminal block appliance is switched off. -
Page 29: Instructions Fo Building In
electrolux 29 Instructions for Building In For problem-free functioning of the built-in appliance, the kitchen unit or the recess into which the appliance is built must have suitable dimensions. In accordance with the regulations in force, all parts which ensure the shock protection of live and insulated parts must be fastened in such a way that they cannot be undone without tools. -
Page 30: Service And Spare Parts
30 electrolux Securing the oven to the cabinet (Fig. D). Fit the appliance into the cabinet recess. Open the oven door and secure the oven to the kitchen cabinet by placing the four distance holders (A) in the holes provided in the oven frame and then inserting the four wood screws Fig. -
Page 31: Declaration Of Guarantee Terms
electrolux 31 Declaration of guarantee terms Our appliances are produced with the greatest of care. However, a defect may still occur. Our consumer services department will repair this upon request, either during or after the guarantee period. The service life of the appliance will not, however, be reduced as a result. This declaration of guarantee terms is based on European Union Directive 99/44/EC and the provisions of the Civil Code. -
Page 32: Downloaded From Www.vandenborre.be
32 electrolux 13. A repair under guarantee does not mean that the normal guarantee period will be extended nor that a new guarantee period begins. 14. We give a twelve month guarantee for repairs, limited to the same defect. 15. Except in the event where liability is legally imposed, this declaration of guarantee terms excludes any compensation for damage outside the appliance for which the consumer wishes to assert his rights. -
Page 33: European Guarantee
electrolux 33 European guarantee This appliance is guaranteed by Electrolux in each of the countries listed at the back of this user manual, for the period specified in the appliance guarantee or otherwise by law. If you move from one of these countries to another of the countries listed below the appliance guarantee will move with you subject to the following qualifications: •... -
Page 34: Downloaded From Www.vandenborre.be
34 electrolux Downloaded from www.vandenborre.be... -
Page 35: Downloaded From Www.vandenborre.be
electrolux 35 Nous vous remercions d'avoir choisi cet appareil. Nous vous souhaitons de profiter pleinement de votre nouvel appareil et espérons que vous choisirez de nouveau notre marque lors de votre prochain achat d’appareil électroménager. Veuillez lire attentivement cette notice d'utilisation et conservez-la comme documentation de référence pendant toute la durée de vie du produit. - Page 36 36 electrolux Table des matières Avertissements et informations importantes sur la sécurité ............37 Description de l’appareil ....................... 39 Commandes ..........................40 Avant d’utiliser le four pour la première fois .................. 41 Programmateur électronique ......................42 Comment utiliser le four ........................ 46 Tableaux de cuisson ........................
-
Page 37: Avertissements Et Informations Importantes Sur La Sécurité
electrolux 37 Français Avertissements et informations importantes sur la sécurité Veillez à toujours conserver ce manuel avec l’appareil. En cas de revente ou de passage de l’appareil à un tiers, il est particulièrement important que le nouvel utilisateur puisse avoir accès au présent manuel et aux informations qui l’accompagnent. -
Page 38: Downloaded From Www.vandenborre.be
38 electrolux Sécurité personnes L’utilisation de cet appareil est réservée aux • personnes adultes. Le fait de laisser les en- Le symbole figurant sur l’appareil ou fants utiliser ou jouer avec l’appareil comporte sur son emballage indique que cet appareil ne des risques. -
Page 39: Description De L'appareil
electrolux 39 Description de l’appareil 1. Bandeau de commandes 7. Bouches d’aération ventilateur de refroidissement 2. Manette du four 8. Gril 3. Programmateur électronique 9. Éclairage du four 4. Bouton thermostat 10. Ventilateur du four 5. Voyant de mise sous tension 11. -
Page 40: Commandes
40 electrolux Commandes Manettes escamotables modèles sont équipés manettesescamotables qui, lorsque le four n’est pasutilisé, sont complètement rentrées dans lebandeau de commande. Pour pouvoiragir sur les manettes, suivez les indications de la figure. Manette du four Le four est éteint. Cuisson traditionnelle - La chaleur est produite tant par la voûte que par la sole, garantissant une répartition homogène de la... -
Page 41: Avant D'utiliser Le Four Pour La Première Fois
electrolux 41 Voyant thermostat Le ventilateur de refroidissement Le voyant du thermostat s’allume dès que le Le ventilateur de refroidissement est conçu bouton du thermostat est tourné. Le voyant restera pour refroidir le four et le bandeau de commandes. allumé jusqu’à ce que la température correcte soit Il se met automatiquement en service quelques atteinte. -
Page 42: Programmateur Électronique
42 electrolux Programmateur électronique 1. Touche de sélection d’une fonction 2. Touche pour diminuer “ ” 3. Touche pour augmenter “ ” 4. Affichage 5. Voyant “Durée de cuisson” 6. Voyant “Fin de cuisson” 7. Voyant “Compte-minutes” 8. Voyant “Heure du jour” Le four fonctionne uniquement si l’heure du jour a été... -
Page 43: Downloaded From Www.vandenborre.be
electrolux 43 Fonction “Durée de cuisson” Cette fonction permet d’arrêter le four automatiquement dès que la durée de cuisson programmée est écoulée. Introduisez les aliments dans le four, sélectionnez une fonction de cuisson et réglez la température de cuisson souhaitée. Appuyez sur la touche à... -
Page 44: Downloaded From Www.vandenborre.be
44 electrolux Fonction “Fin de cuisson” Cette fonction vous permet d’éteindre le four automatiquement dès que la durée de cuisson est écoulée. Introduisez les aliments dans le four, sélectionnez une fonction de cuisson et réglez la température de cuisson souhaitée. Appuyez sur la touche à... -
Page 45: Downloaded From Www.vandenborre.be
electrolux 45 1. À l’aide de la fonction “Durée de cuisson” (programmez le temps de cuisson comme dé- crit au chapitre correspondant), réglez la du- rée de cuisson. Puis, appuyez sur la touche : l’afficheur visualise le réglage pro- grammé. 2. -
Page 46: Comment Utiliser Le Four
46 electrolux Comment éteindre l’affichage 1. Appuyez simultanément sur deux touches de programmation et maintenez-les enfoncées pendant 5 secondes environ. L’affichage s’éteint. 2. Pour allumer l’affichage, appuyez sur une tou- che quelconque. Il est possible d’éteindre l’affichage uni- quement dans le cas où aucune autre fonction n’a été... -
Page 47: Downloaded From Www.vandenborre.be
electrolux 47 Rails télescopiques amovibles Placez le rail télescopique avec le dispositif de verrouillage sur le gradin choisi comme indiqué ci- contre. Les « butées » aux extrémités du rail DOIVENT être orientées face vers le haut. Il est possible d’acheter des rails télescopiques séparément. -
Page 48: Quiches
48 electrolux Multichaleur tournante Comment utiliser le gril complet Les aliments sont cuits grâce à de l’air pulsé 1. Tournez la manette du four sur la position préchauffé, réparti de façon homogène dans l’enceinte du four par un ventilateur installé sur 2. - Page 49 electrolux 49 Comment procéder ? Cuisson traditionnelle 1. Positionnez le sélecteur sur la position Le gradin intermédiaire permet une distribution le thermostat sur la témperature désirée. optimale de la chaleur. Pour cuire plus intensé- ment la base, déplacez la grille au gradin infé- 2.
-
Page 50: Downloaded From Www.vandenborre.be
50 electrolux l’effet de la pression, cela signifie que la viande est cuite à point. Les rosbifs et les filets, qui doivent rester roses à l’intérieur, doivent être cuits à haute température pendant un temps relativement court. Si vous cuisez de la viande directement sur la clayette, insérez la lèchefrite immédiatement au- dessous pour récolter les sucs. -
Page 51: Tableaux De Cuisson
electrolux 51 Tableaux de cuisson Cuisson traditionnelle et Multichaleur tournante Les temps de cuisson n’incluent pas le préchauffage. Il est nécessaire de toujours préchauffer le four pendant 10 minutes. Multichaleur Cuisson traditionnelle Temps de tournante TYPE DE cuisson en REMARQUES temp minutes temp °C... -
Page 52: Downloaded From Www.vandenborre.be
52 electrolux Griller Les temps de cuisson n’incluent pas le préchauffage. Il est nécessaire de toujours préchauffer le four pendant 10 minutes. Temps de cuisson Quantité Griller TYPE DE PLAT en minutes 1e face Pièces temp. °C 2e face Steaks dans le filet 12~15 12~14 Biftecks... -
Page 53: Nettoyage Et Entretien
electrolux 53 Nettoyage et entretien Nettoyage de la carrosserie Avant de procéder au nettoyage du four, laissez-le refroidir complètement. Nettoyez régulièrement le bandeau de N’utilisez en aucun cas de nettoyeur commandes, la porte du four et le joint de la porte à... -
Page 54: Downloaded From Www.vandenborre.be
54 electrolux Nettoyage de la porte du four Les instructions suivantes décrivent comment démonter la porte du four telle que fournie par le fabricant. Si le sens d’ouverture de la porte a été modifié, veuillez noter que les références au côté droit ou au côté gauche doivent être inversées. -
Page 55: Downloaded From Www.vandenborre.be
electrolux 55 Après avoir retiré la vitre interne, nettoyez la porte du four et la vitre. Il est conseillé de nettoyer la porte du four avec une éponge humide seulement et de la sécher ensuite avec un chiffon doux. N’utilisez jamais de tampons métalliques, de substances acides ou abrasives susceptibles d’abîmer le revêtement. -
Page 56: Downloaded From Www.vandenborre.be
56 electrolux Élément chauffant du gril Ce modèle est doté d’un gril pivotant pour faciliter le nettoyage de la voûte du four. Avant de procéder au nettoyage n’oubliez pas de laisser refroidir le four et de le débrancher de la prise secteur. -
Page 57: Downloaded From Www.vandenborre.be
electrolux 57 Ne retirez pas les glissières télescopiques tant que le four n'est pas refroidi. Ne dégagez pas complètement les glissières télescopiques pour les retirer des rails. Les coins tranchants peuvent causer des blessures. Attention, les roulettes ne doivent pas être graissées. -
Page 58: En Cas De Problème
58 electrolux En cas de problème Si l’appareil présente des anomalies de fonctionnement, veuillez contrôler les points suivants avant de contacter le service Après-vente : PROBLÈME SOLUTION Le four ne s’allume pas. Contrôlez que vous avez sélectionné une fonction et une température de cuisson Vérifiez que l’appareil est correctement branché... -
Page 59: Caractéristiques Techniques
electrolux 59 Caractéristiques techniques Puissance nominale des résistances Résistance inférieure 1000 W Résistance supérieure 800 W Four complet (Haut+Bas) 1800 W Multichaleur tournante 1825 W Gril 1650 W Gril complet 2450 W Pizza 2650 W Éclairage du four 25 W Moteur du ventilateur d’air chaud 25 W Moteur du ventilateur de refroidissement 25 W... -
Page 60: Instructions À L'intention De L'installateur
60 electrolux Instructions à l’intention de l’installateur Les types de câble d’alimentation suivants L’installation et les branchements peuvent convenir, en tenant compte de la section doivent être réalisés conformément aux réglementations en vigueur. transversale nominale requise : H07 RN-F, H05 Intervenir sur l’appareil uniquement RN-F, H05 RR-F, H05 VV-F, H05 V2V2-F (T90), après l’avoir débranché. -
Page 61: Instructions Pour L'encastrement
electrolux 61 Instructions pour l’encastrement Afin d ‘assurer le fonctionnement optimal de l’appareil, il est nécessaire que le meuble de cuisine ou la niche dans laquelle il sera encastré possède des dimensions appropriées. Conformément aux réglementations en vigueur, toutes les pièces assurant la protection anti-choc des éléments sous tension et isolés doivent êtres serrées de manière telle à... -
Page 62: Plaque Signalétique
62 electrolux Fixation de l’appareil au meuble 1. Ouvrir la porte du four. 2. Fixer le four à l’élément en plaçant les quatre supports fournis avec l’appareil (Fig. D - A) et qui s’encastrent exactement dans les orifices du châssis, puis insérer quatre vis en bois (Fig. -
Page 63: Garantie/Service Après-Vente
electrolux 63 Garantie/service-clientèle Belgique DÉCLARATION DE CONDITIONS DE GARANTIE. Nos appareils sont produits avec le plus grand soin. Malgré cela, un défaut peut toujours se présenter. Notre service clientèle se chargera de réparer ceci sur demande, pendant ou après la période de garantie. -
Page 64: Downloaded From Www.vandenborre.be
64 electrolux 12. Si au cours de la période de garantie, la réparation répétée d'une même défectuosité n'est pas con- cluante, ou si les frais de réparations sont jugés disproportionnés, le remplacement de l'appareil défectueux par un autre de même valeur peut être accompli en concertation avec le consomma- teur. -
Page 65: Garantie Européenne
electrolux 65 Garantie européenne Cet appareil est garanti par Electrolux dans chacun des pays énumérés au dos de cette notice et pour la période spécifiée par la garantie ou, à défaut, par la législation en vigueur. Si vous déménagez d'un pays dans un autre pays repris dans la liste, la garantie déménagera avec vous dans les conditions suivantes : •... -
Page 66: Downloaded From Www.vandenborre.be
66 electrolux Downloaded from www.vandenborre.be... -
Page 67: Downloaded From Www.vandenborre.be
electrolux 67 Downloaded from www.vandenborre.be... -
Page 68: Downloaded From Www.vandenborre.be
68 electrolux www.zanussi.be www.zanussi.nl www.zanussi.com.es 35696-6203 07/08 Downloaded from www.vandenborre.be...
Need help?
Do you have a question about the ZOB 461 and is the answer not in the manual?
Questions and answers