ESAB Multipower 460PULSE Instruction Manual
Dc welding power sources
Hide thumbs
Also See for Multipower 460PULSE:
- Instruction manual (52 pages) ,
- Instruction manual (40 pages)

Subscribe to Our Youtube Channel
Related Manuals for ESAB Multipower 460PULSE


Summary of Contents for ESAB Multipower 460PULSE
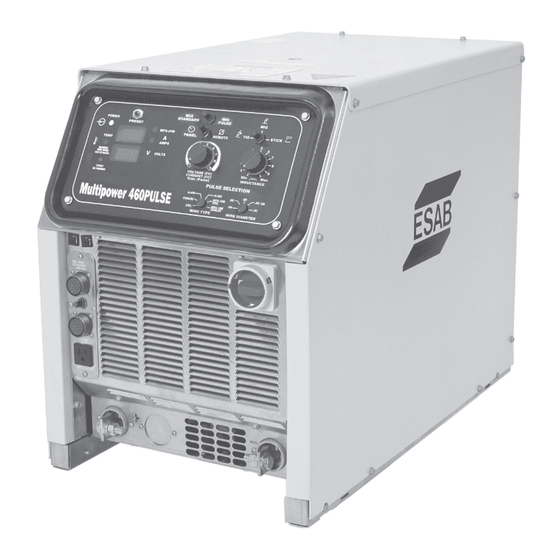
- Page 1 Multipower 460PULSE DC WELDING POWER SOURCES INSTRUCTION MANUAL ESAB ITEM NO. 0558002877, Multipower 460PULSE - 230/460/575 vac, 3 ph., 60 Hz F-15-721-A 05/2003...
-
Page 2: User Responsibility
BE SURE THIS INFORMATION REACHES THE OPERATOR. YOU CAN GET EXTRA COPIES THROUGH YOUR SUPPLIER. These INSTRUCTIONS are for experienced operators. If you are not fully familiar with the principles of operation and safe practices for arc welding and cutting equipment, we urge you to read our booklet, "Precautions and Safe Practices for Arc Welding, Cutting, and Gouging,"... -
Page 3: Table Of Contents
TABLE OF CONTENTS SECTION TITLE PAGE SECTION 1 SAFETY .............................. 5 SECTION 2 DESCRIPTION ............................ 11 General ............................... 13 Description ............................13 SECTION 3 INSTALLATION ..........................19 SECTION 4 OPERATION ............................23 SECTION 5 MAINTENANCE ..........................39 Cleaning .............................. 39 SECTION 6 TROUBLESHOOTING ........................ - Page 4 TABLE OF CONTENTS...
-
Page 5: Safety
SECTION 1 SAFETY PRECAUTIONS WARNING: hese Safety Precautions are for 5. Do not use equipment beyond its ratings. For example, your protection. They summarize precaution- overloaded welding cable can overheat and create a fire ary information from the references listed in hazard. -
Page 6: Safety Precautions
SECTION 1 SAFETY PRECAUTIONS EQUIPMENT MAINTENANCE -- Faulty or FUMES AND GASES -- Fumes and improperly maintained equipment can gases, can cause discomfort or harm, cause injury or death. Therefore: particularly in confined spaces. Do not breathe fumes and gases. Shield- 1. - Page 7 SECTION 1 PRECAUCION DE SEGURIDAD 4. Tenga siempre a la mano equipo extintor de fuego para uso ADVERTENCIA: Estas Precauciones de instantáneo, como por ejemplo una manguera con agua, cubeta con Seguridad son para su protección. Ellas hacen agua, cubeta con arena, o extintor portátil. Asegúrese que usted esta resumen de información proveniente de las entrenado para su uso.
- Page 8 SECTION 1 PRECAUCION DE SEGURIDAD HUMO Y GASES -- El humo y los gases, MANTENIMIENTO DEL EQUIPO -- Equipo pueden causar malestar daño, defectuoso o mal mantenido puede causar particularmente en espacios sin ventilación. daño o muerte. Por lo tanto: No inhale el humo o gases.
- Page 9 SECTION 1 PRÉCAUTIONS DE SÉCURITÉ a. Éloigner suffisamment tous les matériaux combus- AVERTISSEMENT: Ces règles de sécurité ont pour objet d’ tibles du secteur où l’on exécute des soudures ou des assurer votre protection. Veillez à lire et à observer les précautions énoncées ci-dessous avant de monter l’...
- Page 10 L’armoire de commande est 52529 “Precautions and Safe Practices for Arc Weld- munie d’un ventilateur destiné à empêcher la forma- ing, Cutting and Gouging” publié par ESAB. Nous tion de poches d’hydrogène, lesquelles présentent un conseillons également de consulter les publications danger d’explosion;...
-
Page 11: Description
Welding Range ........10A/12V to 500A/40V Open Circuit Voltage Max........... 80vdc How to Order: Primary Input Voltage and Current @ 100% Duty Cycle Multipower 460PULSE 230/460/575Vac 230/460/575Vac, 60Hz 3ph ....66/33/26 amps 50/60 Hz 3ph ......... 0558002877 Power Factor at Rated Output ........89% Efficiency at Rated Output .......... - Page 12 SECTION 2 DESCRIPTION Options & Accessories: Remote Hand Control......0558002871 This pendant provides remote output control and a contactor closure switch to close the contactor making the output terminals “hot”. The PANEL/REMOTE switch on the Multip- ower 460PULSE control panel must be placed in the RE- MOTE position when using this accessory.
-
Page 13: General
SECTION 2 DESCRIPTION 2.0. GENERAL Before the Multipower 460PULSE power source is put into operation, the safety section at the front of this manual should be read completely. This will help avoid possible injury due to misuse or improper installation. - Page 14 Tig (GTAW) and arc gouging in the CC (constant current) mode. Features • Auto Fan - The Multipower 460PULSE fan will run when the power source is first powered up and will continue running for 6 minutes then shut down.
- Page 15 (Refer to Figure 2-3 and 2-4) 1. FAULT LAMP The RED fault light on the Multipower 460PULSE front panel indicates a problem with set-up parameters. A "Steady" light "On" indicates there is no program for the material and wire diameter selected. A "Blinking" light indicates the wire feed speed is out of the recommended range.
- Page 16 SECTION 2 DESCRIPTION 5. VOLTAGE/CURRENT TRIM The arc voltage is controlled with this knob when the WELD PROCESS selector switch is in the MIG position. The Mig arc voltage can be preset by pressing the PRESET button and reading the arc volts in the bottom digital display while rotating this knob.
- Page 17 SECTION 2 DESCRIPTION short circuit frequency, fast reacting arc, to a lower short circuit frequency, soft and less spattering arc as the dial is turned clockwise. The optimized arc performance will vary depending on shielding gas, wire type and wire diameter. The operator can adjust this control to optimize welding characteristics.
- Page 18 SECTION 2 DESCRIPTION 2. WIRE FEEDER CONTROL RECEPTACLE This 19-pin receptacle (J1) accepts the control cable from the wire feeder and handles all the control signals needed to operate a 42 Vac wire feeder. 3. REMOTE CONTROL RECEPTACLE This receptacle (J2) is provided for an optional 14-pin control cable from the optional remote pendant, Tig torch control or foot control .
-
Page 19: Installation
SECTION 3 INSTALLATION 3.0. INSTALLATION A. LOCATION A proper installation site is necessary for the power source to provide depend- able service. A proper installation site permits freedom of air movement through the unit while minimizing exposure to dust, dirt, moisture, and corrosive vapors. A minimum of 18 inches (46 cm) is required between the side and rear panels of the power source and the nearest obstruction. - Page 20 SECTION 3 INSTALLATION 1. The primary power leads must be insulated copper conductors. Three power leads and one ground wire are required. Either rubber covered cable or conduit (flexible or solid) may be used. Table 3-1 provides recommended input conductors and line fuse sizes. 2.
- Page 21 SECTION 3 INSTALLATION 5. Figures 3-3, 3-4 and 3-5 illustrate the input voltage terminal boards and the input voltage link connections. The particular voltages from which this power source may be operated are stated on the rating plate. The voltage links were factory set for highest voltage stated on the rating plate (575VAC). If the power source is to be operated on another stated input voltage, the links must be reset for that particular input voltage.
-
Page 22: Section 3 Installation
The Tig torch and stick electrode holder connect directly to the appropriate Before making any connections to the Multipower 460PULSE output lugs on the lower front panel. The choice of the power source output terminals make sure that all primary input power to the Positive or Negative terminal depends on the welding process and electrode machine is off. -
Page 23: Operation
A. WIRE FEEDER COMPATIBILITY Never operate the power source with The Multipower 460PULSE power source can be used with several ESAB 42 volt the covers removed. In addition to the wire feeders. The model wire feeder being used will determine the setup method safety hazards, improper cooling may and operator interface. -
Page 24: Section 4 Operation
Step 1. Connect wire feeder to Multipower 460PULSE and set PANEL/RE- MOTE switch to REMOTE position. -
Page 25: Section 4 Operation
F. TIG WELDING When the PROCESS switch is placed in the TIG position, the Multipower 460PULSE is automatically set for CC (constant current) welding using the ESAB Touch TIG starting method. The voltage and current at the output lugs is maintained at low values until the tungsten electrode is shorted to the workpiece. - Page 26 SECTION 4 OPERATION Arc Force is automatically enabled when the WELD PROCESS switch is set to the STICK position. The level of Arc Force is automatically adjusted by the current preset being used. When the WELD PROCESS switch is Step 1. Be sure to set the polarity to DCEP (Electrode Positive) by placing the moved to the TIG or STICK position, Electrode Holder cable in the Positive connection lug on the front of electrode becomes electrically...
- Page 27 Gouging ONLY!!!!!!! I. MIG PULSE WELDING The Multipower 460PULSE is designed to provide simple to use, high quality, preprogrammed synergic and non-synergic pulsed Mig welding. Synergic pulsed Mig welding means that pulse parameters (such as pulse height, pulse width, background current and pulse frequency) are automatically adjusted by the Multipower 460PULSE as the wire feed speed is changed by the operator.
-
Page 28: Operation Section
When the PROCESS switch is placed in the MIG position and the MIG MODE switch is placed in the PULSE position, the Multipower 460PULSE is set for CC over CC (constant current) pulse welding. The power source will output open circuit voltage (OCV) when the Mig Gun trigger is depressed. - Page 29 Step 5. Press and release the PRESET button. Turn the wire speed knob on the wire feeder to the desired speed in the top digital display win- dow of the Multipower 460PULSE. Step 6. Set the shielding gas flow rate to 35 cfh by activating the gas purge switch on the wire feeder or pulling the gun trigger and turning the adjustment knob on the Flowmeter.
- Page 30 E. NON-SYNERGIC PULSE OPERATION The Multipower 460PULSE has the unique ability to Pulse MIG weld in the NON- SYNERGIC mode. Non-synergic operation means the pulse parameters can be selected by choosing the WIRE TYPE, WIRE DIAMETER, and presetting a WIRE FEED SPEED on the Multipower 460PULSE panel.
- Page 31 Jumper Plug Removed and Harness connected Non-Synergic Mode - The pulse parameters are determined by the position of the pulse selection switches, the Multipower 460PULSE TRIM knob and Wire Feed Speed set on the wire feeder. Figure 4-8 Jumper Plug Removed and Harness Connected...
- Page 32 SECTION 4 OPERATION F. PULSE PARAMETERS Tables 4-3 through 4-8 list the approximate pulse weld parameters for each material and diameter available. These are provided for general reference only. Actual pulse parameters can vary with the equipment set-up, welding application and shielding gases being used.
- Page 33 SECTION 4 OPERATION Table 4-3 Multipower 460PULSE Carbon Steel Data Table .035 Steel .040 Steel Pulse Pulse Pulse Back- Pulse Pulse Pulse Back- Pulse Pulse Peak Range Peak Width ground Frequency Range Width ground Frequency (Amps) (IPM) (Amps) (ms) (Amps)
- Page 34 SECTION 4 OPERATION Table 4-4 Multipower 460PULSE Stainless Steel Data Table .035 Stainless .040 Stainless Pulse Pulse Pulse Back- Pulse Pulse Pulse Back- Pulse Pulse Peak Range Peak Width ground Frequency Range Width ground Frequency (Amps) (IPM) (Amps) (ms) (Amps)
- Page 35 SECTION 4 OPERATION Table 4-5 Multipower 460PULSE 4000 Aluminum .035 4043 AIuminum .040 4043 Aluminum Pulse Pulse Pulse Back- Pulse Pulse Pulse Back- Pulse Pulse Peak Range Peak Width ground Frequency Range Width ground Frequency (Amps) (IPM) (Amps) (ms) (Amps)
- Page 36 SECTION 4 OPERATION Table 4-6 Multipower 460PULSE 5000 Aluminuml Data Table .035 5356 Aluminum .040 5356 Aluminum Pulse Pulse Pulse Pulse Back- Pulse Pulse Pulse Pulse Peak Back- Range Peak Width ground Frequency Range Width Frequency (Amps) ground (IPM) (Amps)
- Page 37 SECTION 4 OPERATION Table 4-7 Multipower 460PULSE Metal Core Carbon Steel Data Table .035 Metal Core CS .040 Metal Core CS Pulse Pulse Pulse Pulse Pulse Pulse Pulse Back- Pulse Peak Back- Range Peak Width Frequency Range Width Frequency ground...
- Page 38 SECTION 4 OPERATION Table 4-8 Multipower 460PULSE Metal Core Stainless Steel Data Table .035 Metal Core SS .040 Metal Core SS Pulse Pulse Pulse Pulse Pulse Pulse Pulse WFS Range Back- Pulse Peak Back- Peak Width Frequency Range Width Frequency...
-
Page 39: Maintenance
SECTION 5 MAINTENANCE 5.0. CLEANING Periodically, remove the cover from the power source and blow accumulated If this power source does not op- dust and dirt from the air passages and interior components by using clean low erate properly, stop work imme- pressure air. - Page 40 SECTION 5 MAINTENANCE...
-
Page 41: Troubleshooting
SECTION 6 TROUBLESHOOTING 6.0. TROUBLESHOOTING If the power source is operating improperly, the following troubleshooting information may be used to locate the source of the trouble. DISCONNECT primary power at wall Check the problem against the symptoms in the following troubleshooting switch, or circuit breaker, before at- guide (Table 6-1.) The remedy for the problem may be quite simple. -
Page 42: Schematic Diagrams
SECTION 6 TROUBLESHOOTING... - Page 43 SECTION 6 TROUBLESHOOTING...
- Page 44 SECTION 6 TROUBLESHOOTING...
- Page 45 SECTION 6 TROUBLESHOOTING...
- Page 46 SECTION 6 TROUBLESHOOTING...
-
Page 47: Replacement Parts
B. ORDERING To assure proper operation, it is recommended that only genuine ESAB parts and products be used with this equipment. The use of non-ESAB parts may void your warranty. Replacement parts may be ordered from your ESAB distributor or from: ESAB Welding &... - Page 48 SECTION 7 REPLACEMENT PARTS 12, 13 8, 9 4, 5 Figure 7-1 - Front View, Multipower 460PULSE...
- Page 49 SECTION 7 REPLACEMENT PARTS Figure 7-1 - Front View, Multipower 460PULSE QTY. ITEM CIRCUIT REQ. DESCRIPTION SYMBOL 678025 Terminal Assembly 952219 Outlet 110V (Square) 952937 Connection Box Rcpt. 14FS X-ROT 634515 SW TGGL SPDT 2 Pos 14A 125V Q/D S3, 5...
- Page 50 SECTION 7 REPLACEMENT PARTS Figure 7-2 - Inside Front View, Multipower 460PULSE QTY. ITEM REQ. DESCRIPTION SYMBOL 99511916 Diode Fwd 200V 250A 99511915 Diode Rev 200V 250A 954864 Label 3 Phase 2062334 Fan Motor 1/3 HP 1625 RPM 954699 Label Warning Fan Hazard 36173 Blade Fan 14"...
- Page 51 SECTION 7 REPLACEMENT PARTS...
- Page 52 SECTION 7 REPLACEMENT PARTS Figure 7-3 - Inside Rear View, Multipower 460PULSE QTY. ITEM REQ. DESCRIPTION SYMBOL 17280110 Res WW Fix'd ST 100W 5% 100.00 R3, R4 0558002712 Transformer 230/460/575V 672065 Strap Terminal 36110 Board Input Terminal 230/460/575V...
- Page 53 SECTION 7 REPLACEMENT PARTS Figure 7-4 External Rear View, Multipower 460PULSE QTY. ITEM CIRCUIT REQ. DESCRIPTION SYMBOL 1312733 Label for Install Use COP Wire 950219 Relief Strain 2" (Non-enclosed) 672786 Bolt Eye 0558001371 Panel Top Kydex Env 0558001370 Panel Left Side Kydex...
- Page 54 SECTION 7 REPLACEMENT PARTS Figure 7-5 External Top View, Multipower 460 QTY. ITEM REQ. DESCRIPTION SYMBOL 952938 SCR 480V 18A Panel MNT 951997 Transducer Current 951085 SW THML D/T 176 15A 120V Q/D 0558002557 IGBT 600V/300A Q1, 2, 3 951940 Capacitor 1.0uf 600VDC 10% 0558002844 Capacitor, 35000UF 100VDC...
- Page 55 SECTION 7 REPLACEMENT PARTS...
- Page 56 NOTES...
- Page 57 NOTES...
- Page 58 NOTES...
-
Page 59: Revision History
REVISION HISTORY 05/2003 - General editorial changes. - Page 60 ESAB Welding & Cutting Products, Florence, SC Welding Equipment COMMUNICATION GUIDE - CUSTOMER SERVICES A. CUSTOMER SERVICE QUESTIONS: Telephone: (800)362-7080 / Fax: (800) 634-7548 Order Entry Product Availability Pricing Delivery Order Changes Saleable Goods Returns Shipping Information Hours: 8:00 AM to 7:00 PM EST B.
Need help?
Do you have a question about the Multipower 460PULSE and is the answer not in the manual?
Questions and answers