Table of Contents
Advertisement
Quick Links
Download this manual
See also:
Setup Manual
Advertisement
Table of Contents
Troubleshooting

Related Manuals for Monarch 7411

Summary of Contents for Monarch 7411
- Page 1 7411™ Print Server 7411™ Print Server ® Monarch 802.11b/g Wired/Wireless 802.11b/g Wired/Wireless ® 9825 Printers Operating Instructions TC7411ENOI Rev. AD 5/08 ©2006 Paxar Americas, Inc. a subsidiary of Avery Dennison Corp. All rights reserved.
- Page 2 Paxar Americas, Inc. Trademarks Paxar® is a trademark of Paxar Corporation. Monarch®, 9825®, 7411, and 9860 are trademarks of Paxar Americas, Inc. Avery Dennison® is a trademark of Avery Dennison Corp. Centronics is a trademark of Centronics Data Computer Corporation.
-
Page 3: Table Of Contents
T A B L E O F C O N T E N T S GETTING STARTED Overview ....................1-1 System Requirements ................1-2 Network Protocols Supported ..............1-2 Checking the Print Server Hardware ............1-3 Verifying Successful Installation ...............1-3 Verifying Successful Installation ...............1-4 Sample Test Page ................1-5 CONFIGURING THE 802.11b/g AND IP SETTINGS Configuring the Print Server ..............2-1... - Page 4 USING THE WEB INTERFACE Logging In ....................4-2 Configuring the Printer ................4-3 Configuring the Print Port Settings ............4-5 Configuring Print Services ................4-6 Setting NetWare Parameters..............4-7 Changing TCP/IP Settings ................4-8 Configuring PrintraNet ................4-9 Changing Wireless Settings ..............4-10 Configuring Alerts and Traps ..............4-11 Receiving An Alert................
- Page 5 TROUBLESHOOTING General Troubleshooting Information ............5-1 Troubleshooting Wireless Configuration Problems........5-4 Troubleshooting Network Configuration ............5-5 Loading the Firmware ................5-5 Technical Support..................5-5 TELNET CONSOLE COMMANDS Help Commands ..................6-3 General Commands .................6-5 802.11b/g Wireless Commands ..............6-8 TCP/IP Commands ................6-13 SNMP Commands .................. 6-15 SPECIFICATIONS 802.3 Specifications ................
-
Page 7: Getting Started
G E T T I N G S T A R T E D The Monarch 7411 Print Server lets you communicate with the Monarch 9825 printer on a wired Ethernet 802.3 network, or on an 802.11b or 802.11g wireless network. 802.11b/g refers to 802.11b and 802.11g in this manual. -
Page 8: System Requirements
S y s t e m R e q u i r e m e n t s To use the print server for printing from a wireless network, you need an 802.11b/g wireless network. The wireless network consists of either of the following: ♦... -
Page 9: Checking The Print Server Hardware
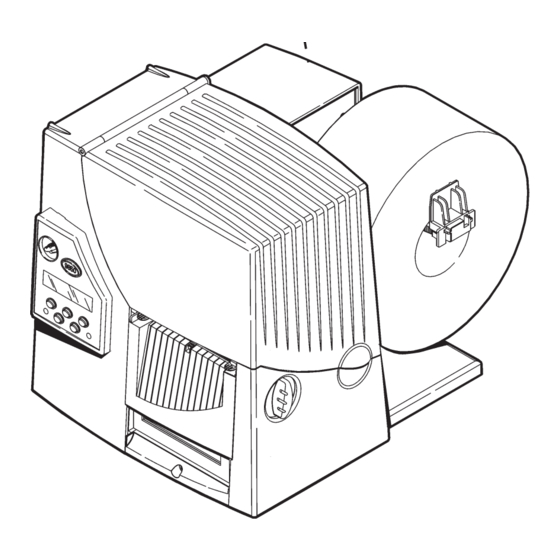
C h e c k i n g t h e P r i n t S e r v e r H a r d w a r e The print server comes preinstalled and tested in your printer. Do not plug any cables into the parallel port when using the print server. -
Page 10: Verifying Successful Installation
V e r i f y i n g S u c c e s s f u l I n s t a l l a t i o n When the print server is turned on, it goes through the following startup sequence: ♦... -
Page 11: Sample Test Page
Sample Test Page The test page is best displayed using 4” wide by 6” long labels. If the label is too small, some information may print outside the label edges. PAXAR - - - - - - - - - - - - - M on a r c h N e t P r i nt S er v e r S t a t u s - - - - - - - - - - - - - M o n a r c h N e t N e t w o r k A da pt er - P LU S Firmw are F W V er . - Page 12 1-6 Ethernet Operating Instructions...
-
Page 13: Configuring The 802.11B/G And Ip Settings
C O N F I G U R I N G T H E 8 0 2 . 1 1 b / g A N D I P S E T T I N G S C o n f i g u r i n g t h e P r i n t S e r v e r To configure the print server for a 802.11b/g wireless network, you must set the wireless mode (Ad-Hoc or infrastructure), SSID, channel (Ad-Hoc mode only), data rate and security. -
Page 14: Installing The Software
I n s t a l l i n g t h e S o f t w a r e The following operating systems are supported: Microsoft Windows NT 4, 2000, and XP. Follow these steps to install the Monarch® NetManager software and configure the print server. You can also download the utility from our Web site. - Page 15 Note: If the wireless signal is less than 50% on the Wireless Status screen, printing performance could be affected. To improve the signal strength, try moving the print server closer to the computer or access point and away from other radio devices such as Bluetooth® wireless devices, microwave ovens, or 2.4 gigahertz cordless phones.
- Page 16 2-4 Ethernet Operating Instructions...
-
Page 17: Management Methods
M A N A G E M E N T M E T H O D S There are a variety of ways to configure and monitor the print server. These methods are: Web browser, NetMgr, MonarchNet Console, HP JetAdmin, HP Web JetAdmin, or Telnet. For Telnet/console mode information, see Chapter 6, “Telnet Console Commands.”... -
Page 18: Microsoft Windows Network Configuration
M i c r o s o f t W i n d o w s N e t w o r k C o n f i g u r a t i o n The print server includes the easy-to-use NetManager software for printing from Windows computers over an 802.11b/g wireless link. -
Page 19: Berkeley Unix Host Configuration
B e r k e l e y U N I X H o s t C o n f i g u r a t i o n Berkeley UNIX host computers include Linux, Digital Equipment Corporation Digital UNIX, OSF/1, and ULTRIX; Compaq Tru64 UNIX; SunOS (not Solaris), SCO UNIX;... -
Page 20: Sun Solaris Configuration
For AT&T based UNIX systems, such as SCO, use the standard lp command: lp –dPaxarPrinter filename Sun Solaris Configuration To use a print server with Sun Solaris, first use the Host Manager in the Admintool utility to add the print server IP address and name to the /etc/hosts file. - Page 21 Use the Printer Manager in the Admintool utility under Open Windows as follows: Select Edit Select Add Select Add Access to Remote Printer At the PrinterName prompt, type any name for the print queue At the Printer Server prompt, type: name\!servicename (for example, PaxarPrinter\!BINARY_P1), where: name matches the print server name as entered in the host’s table.
-
Page 22: Hp/Ux Configuration
H P / U X C o n f i g u r a t i o n To configure a print server using HP/UX 10.x, use the same program and these steps: When you get a list of options, select Printers and Plotters. Select LP Spooler. -
Page 23: Ibm Aix Configuration
I B M A I X C o n f i g u r a t i o n To configure a print server on IBM AIX 4.x, use the SMIT program as follows: Enter smit and select Devices. Select Printer/plotter. Select Manage remote printer subsystem. -
Page 24: Web Browser
W e b B r o w s e r This utility allows the user to configure the print server with a standard web browser like Microsoft® Internet Explorer or Mozilla Firefox®. No additional software is needed on the system. It can be used on any system that supports web browser capabilities. -
Page 25: Using The Web Interface
U S I N G T H E W E B I N T E R F A C E You can configure and manage the printer and print server using your Web Browser: Microsoft Internet Explorer, version 6.0, or greater or Netscape... -
Page 26: Logging In
L o g g i n g I n Start your Web browser. Type in your printer’s IP address and press Enter. For example, 192.0.0.192. From the side menu, click Login. 4-2 Ethernet Operating Instructions... -
Page 27: Configuring The Printer
Type for the password. To change the password, see “Setting access the Network Card Access Password,” for more information. The password is case-sensitive and saved in the printer’s flash memory. Click Submit. The Printer Status page appears with information about your printer, including printer name, Ethernet address, firmware version and more. - Page 28 This screen allows you to change the name, location, and other information for your server. It also allows you to set SNMP parameters for the server, reset the server and restore server default settings. Enter your information and click Submit. Click the reset link at the bottom of the screen.
-
Page 29: Configuring The Print Port Settings
C o n f i g u r i n g t h e P r i n t P o r t S e t t i n g s This screen allows you to view available ports, change port settings, cancel print jobs, and view the job log for each available port. -
Page 30: Configuring Print Services
C o n f i g u r i n g P r i n t S e r v i c e s Only configure the settings required for your network/printer. From the side menu, click Print Services. The Configure Service screen appears. -
Page 31: Setting Netware Parameters
S e t t i n g N e t W a r e P a r a m e t e r s You can modify the NetWare parameters from your Web browser. To update NetWare settings, use Telnet console commands. See Chapter 6, “Telnet Console Commands”... -
Page 32: Changing Tcp/Ip Settings
C h a n g i n g T C P / I P S e t t i n g s Only configure the settings required for your network/printer. From the side menu, click TCP/IP. Click the name of the enabled service to modify the TCP/IP parameters for that service. -
Page 33: Configuring Printranet
C o n f i g u r i n g P r i n t r a N e t Only configure the settings required for your network/printer. From the side menu, click PrintraNet. Enter the IP address of the POP3 or SNMP server on your network where internet print jobs are located. -
Page 34: Changing Wireless Settings
C h a n g i n g W i r e l e s s S e t t i n g s This screen allows you to set your wireless parameters. You can change modes, specify your SSID, modify your channel (Ad-Hoc mode only), network speed, access point density, and more. -
Page 35: Configuring Alerts And Traps
C o n f i g u r i n g A l e r t s a n d T r a p s Alerts and SNMP are supported with the release of version 3.0 or greater printer firmware. The printer also contains the minimum set required to be compliant with MIB version 2.0 (RFC 3805). - Page 36 Click Email Alerts to setup the mail server and select users to receive messages about the printer’s status. Enter your SMTP server, email address, and the errors you want to receive notification for. You can enter up to eight email addresses. Click Submit.
-
Page 37: Receiving An Alert
Receiving An Alert When the printer goes offline, has a paper jam, or any other error that you selected notification for, a similar email appears in the specified User’s inbox: The text of the email follows: MonarchNet2 Printer Alert!!! Prn IP:192.0.0.192 Prn Name:PXR8A97CA Going Off-Line Please DO NOT REPLY to this message. -
Page 38: Snmp Ip Traps
SNMP IP Traps From the Alerts and Traps screen, click SNMP IP Traps. Enter a community name, IP address, and the errors you want to receive notification for. You can enter up to eight IP addresses. Click Submit. Click the reset link at the bottom of the screen. The Reset Server screen appears. -
Page 39: Snmp Netware Traps
SNMP Netware Traps From the Alerts and Traps screen, click SNMP Netware Traps. Enter a community name, IPX address, IPX Node address, and the errors you want to receive notification for. You can enter up to four IPX addresses. Click Submit. Click the reset link at the bottom of the screen. -
Page 40: Changing The Passwords
C h a n g i n g t h e P a s s w o r d s You can change the network access password, network update password, configure network security, IP access, or protocol, print a test page, access the console, or update firmware from the Web Admin Configuration screen. -
Page 41: Setting The Network Card Access Password
Setting the Network Card Access Password When set, the network card access password allows you to view the Web interface and the remote console. The default is access. The password is case-sensitive and stored in the printer’s flash memory. Make a note of the password if you change it. Changing the password also restricts access to Telnet sessions. -
Page 42: Setting The Network Card Update Password
Setting the Network Card Update Password When set, the network card update password allows you to change variables in the Web interface and the remote console. From the side menu, click Admin. The Web Admin Configuration screen appears. Click Configure Network Card Update Password. Enter a new network update password. -
Page 43: Configuring Network Protocols
C o n f i g u r i n g N e t w o r k P r o t o c o l s Only configure the settings required for your network/printer. To enable or disable protocols: From the side menu, click Admin. -
Page 44: Controlling Ip Access
C o n t r o l l i n g I P A c c e s s You can limit which remote hosts are able to access the printer by setting up an IP address range. From the side menu, click Admin. The Web Admin Configuration screen appears. -
Page 45: To Remove Hosts
To Remove Hosts Select a range from the drop-down menu. Click Remove. Click the reset link at the bottom of the screen. The Reset Server screen appears. Click Submit and wait five seconds for the printer to reset. Even though you submitted your changes on the previous screen, they do not take effect until you reset the printer. -
Page 46: Printing A Test Page
Assign the necessary security settings for your network. Click Submit. Click the reset link at the bottom of the screen. The Reset Server screen appears. Click Submit and wait five seconds for the printer to reset. Even though you submitted your changes on the previous screen, they do not take effect until you reset the printer. -
Page 47: Using The Console
U s i n g t h e C o n s o l e The Custom Commands menu allows you to enter Telnet console commands. From the side menu, click Admin. The Web Admin Configuration screen appears. Click Console. Enter a Telnet console command. -
Page 48: Updating Firmware
U p d a t i n g F i r m w a r e You can update the printer’s firmware. Make sure the Resident (Boot Loader) is version 2.3 or greater. From the side menu, click Admin. The Web Admin Configuration screen appears. - Page 49 B a s i c S e c u r i t y C o n f i g u r a t i o n s There are two main decisions to be made when choosing wireless security: encryption method and authentication protocol. The encryption method determines the algorithm used to encrypt the message.
- Page 50 Authentication Protocol RADIUS User ID & Private Key Type Certificate Server Password Info File Protocol Enterprise LEAP PEAP* PAP or Optional* Required* Required MSCHAPv2 TTLS EAP- PAC* FAST Personal *PEAP This is only for server-side certificates. *Optional Leaving the Certificate Root Key and the Certificate CN (common) names blank, no validation of the host certificate is performed.
- Page 51 See the following table of acceptable combinations: Encryption Authentication WPA, WPA (TKIP), WPA2 Open Static Shared LEAP PEAP Dynamic EAP-FAST TLS* TTLS Load the local key before enabling TLS. Using the Web Interface 4-27...
- Page 52 4-28 Ethernet Operating Instructions...
-
Page 53: Troubleshooting
T R O U B L E S H O O T I N G Verify that the printer is operating properly: Is the printer online and does it have supplies? If the printer is working correctly, test the connection between the printer and the print server by pushing the test button on the back of the printer for less than five seconds. - Page 54 Print a test label. See Chapter 1, “Getting Started” for more information. Press the print server test button for about a second and a label should print. Use 6-inch long supply. If you are using supply that is shorter than 6 inches long, temporarily change your supply type to “continuous”...
- Page 55 Ping the printer. If you can ping the printer, it is at least "seen" on the network. If you cannot ping the printer, then ping every device in the path to the printer - access points, routers, etc. If you can ping every device but the printer, the printer needs to be turned off and back on.
-
Page 56: Troubleshooting Wireless Configuration Problems
T r o u b l e s h o o t i n g W i r e l e s s C o n f i g u r a t i o n P r o b l e m s Your computer’s wireless adapter and/or access point should be configured to match your print server. -
Page 57: Troubleshooting Network Configuration
Early versions of the software may have menus which differ slightly from those listed below. Run the UpdateIP utility from the Monarch® Tabletops Documentation CD-ROM (TC9800SWP), or download it from our Web site. Select the update .bin file, print server, then click Update, Start. -
Page 59: Telnet Console Commands
Telnet commands. For initial setup, do not use Telnet. Use Auto-discover mode. Once you have the IP address, you can use Telnet or a Web browser. You can use Telnet if you do not have access to the Monarch® NetManager software. Note: The default port is Port 23. - Page 60 To view the current wireless settings, type sh en (show wireless settings) or sh nw (show network settings) and press Enter: WiFi Mode = INFRASTRUCTURE WiFi SSID: ABC1234 Speed = 54 International Roaming: Flexible Dynamic Frequency Selection: Unsupported Regulatory Domain = USI WiFi FW Ver = 2.13.10.0 LMAC, 2.12.18.0 UMAC AP density = LOW Authentication type= OPEN SYSTEM...
-
Page 61: Help Commands
H e l p C o m m a n d s For help at any time, type “Help” and a list of available commands appears. The Help command builds on itself, because for each command you type, more details appear for each option. Syntax: Help set DEFAULT... - Page 62 Syntax: Help set ip IP LPD/TCP Parameters ADdress aa.bb.cc.dd IP node address [EN/DI] IP set via ARP BAnner [EN/DI] LPD banner printing CHKSUM [EN/DI] IP receive checksum BOot Number of DHCP/BOOTP tries ENable/DISable Enable or Disable IP Processing FTIme [EN/DI] Fast timeout [EN/DI] FTP protocol...
-
Page 63: General Commands
G e n e r a l C o m m a n d s From the list of commands, the brackets - [] indicate to pick one of the options listed, the items inside curly braces - {} are optional and do not need to be specified. - Page 64 SET DEFAULT Sets print server to factory defaults. SET LOAD [EN/DI] Enables or disables firmware reload after exit. SET LOAD HOst <name> Sets node name of boot host (NetWare firmware load). SET LOAD IP aa.bb.cc.dd Sets IP address of load host (TCP/IP firmware load). SET LOAD SOftware <filename>...
- Page 65 SHow LOAd Shows the print server’s firmware update parameters. SHow PORt <name> STA Shows the current port status. SHow SERVEr Shows the server parameters. SHow SERVEr COunters Shows the server statistics. SHow SERVEr QUeue Shows the print server internal queue. SHow TEstpage Prints a test page.
- Page 66 8 0 2 . 1 1 b / g W i r e l e s s C o m m a n d s In the following commands, EN and NW (network settings) are interchangeable. CLear EN SSid Clears the SSID, so the server connects to any access point. SET EN Sets 802.11b/g Wireless Settings.
- Page 67 SET EN INAP [PAP/MSCHAP_V2] Sets the EAP inner authentication protocol. SET EN IROAM [DISable/STRICT/FLEXible] Controls whether the radio frequencies are set based on the radio configuration or from its access point. Disabled uses the radio defaults. When in Ad-Hoc mode, you SET EN REGDOMain must set the region of operation.
- Page 68 SET EN REGDOMain <countrycode> Sets the region of operation for the print server using the following table. The list of supported countries varies based on the radio type (802.11b or 802.11b/g). Country Country Description Description Code Code ALBANIA LATVIA ALGERIA LEBANON ARGENTINA LIECHTENSTEIN...
- Page 69 Country Description Country Description Code Code DENMARK PUERTO RICO DOMINICAN REPUBLIC QATAR ECUADOR ROMANIA EGYPT RUSSIAN FEDERATION EL SALVADOR SAUDI ARABIA ESTONIA SINGAPORE FINLAND SLOVAKIA FRANCE SLOVENIA GEORGIA SOUTH AFRICA GERMANY SPAIN GREECE SRI LANKA GUATEMALA SWEDEN HONDURAS SWITZERLAND HONG KONG SYRIAN ARAB REPUBLIC HUNGARY TAIWAN...
- Page 70 SET EN SPeed <1/2/5.5/6/9/11/12/18/24/48/54> Sets 802.11b/g wireless speed in megabits per second (Mpbs). SET EN SSID “<ssid>” Sets 802.11b/g wireless SSID. Use quotes if there is a space in SSID. This is case sensitive. SH EN STATS Shows the network I/O statistics. SET EN WEP [DI/64/128] Sets wired equivalent privacy encryption level to disabled, 64-bit, or 128-bit.
-
Page 71: Tcp/Ip Commands
T C P / I P C o m m a n d s SET IP [EN/DI] Selects whether to use IP-based protocols. SET IP ACcess [EN/DI/ALL] aa.bb.cc.dd [Mask ee.ff.gg.hh] Allows or prevents specified IP address from accessing print server. SET IP ADdress Sets IP address of print server. - Page 72 SET IP PRObe [EN/DI] Enables or disables the TCP connection probe. SET IP RArp nn 0 Both 1 no subnet 2 no router 3 neither Default (0) - IP address is set with subnet mask and router that is the same address as host.
-
Page 73: Snmp Commands
S N M P C o m m a n d s CLear SNMP CONtact <string> Removes SNMP SysContact. CLear SNMP LOCation <string> Removes SNMP SysLocation. SET SNMP GETCOMM <string> Gets SNMP community. SET SNMP SETCOMM1 <string> or SET SNMP SETCOMM2 <string> Set SNMP community 1 or community 2 name. -
Page 75: Specifications
S P E C I F I C A T I O N S Link Layer: 802.3 or optional 802.11b/g TCP/IP Protocols: Passthru BOOTP DHCP RARP LPD/LPR Telnet RSH or REMSH (remote shell) SNMP NetWare HP Jet Admin 8 0 2 . 3 S p e c i f i c a t i o n s Communication 10 Mbps or 100 Mbps Rate:... -
Page 76: Options
O p t i o n s Wireless 802.11b/g communications are available. However, check with International Sales for an approved list of countries or regions where these devices can be used. A-2 Ethernet Operating Instructions... -
Page 77: Glossary
G L O S S A R Y Absolute Pathname The full path of a file, including the computer system and any directories or subdirectories. For example, c:\program files\monarch softw are\mpcl toolbox\9855.phu Access Point An interface between a wireless network and a wired network. - Page 78 Channel or You can select which channel your network devices use to RF Channel communicate. All devices must be on the same channel to communicate in Ad-Hoc mode. Other radio devices such as Bluetooth® wireless devices, microwave ovens, or 2.4- GHz cordless phones may operate/interfere if they are on the same channel as your network.
- Page 79 LPD/LPR A printer protocol that uses TCP/IP to establish connections between printers on a network. Also known as Line Printer Daemon/Line Printer Remote. MAC Address or A hardware address (6-byte) that uniquely identifies each Media Access node of a network. The MAC address is set during Control manufacturing and does not change.
- Page 80 Authentication mode of WPA used in SOHO environments. (Pre-Shared Key) The key value (or pass-phrase) is used for network authentication only (not data encryption). It does not use a RADIUS server like the other modes, but uses a shared key to provide the initial authentication with the access point or host.
- Page 81 SSID or A unique identifier that must match for all nodes on a Service Set subnetwork to communicate with each other. It consists of Identifier up to 32 characters (any printable character, including spaces). If using the space character, it must be enclosed in quotation marks.
- Page 82 WEP or A security protocol for wireless local area networks. WEP Wired Equivalent was designed to provide the same level of security as that Privacy of a wired network, which is inherently more secure than a wireless network because wired networks are easily protected against unauthorized access.
- Page 83 I N D E X alerts EAP-FAST network ..4-13, 4-15, 4-16 authentication ....4-28 authentication encryption mode ....4-27 EAP-FAST ....4-28 WPA ......4-27 LEAP ......4-28 WPA2 ......4-27 PEAP ......4-28 PSK......4-28 firmware TLS ......4-28 update ......
- Page 84 mode security ......4-23 encryption ....4-27 settings ....... 4-23 server settings 4-3, 4-5, 4-6, 4-7, 4-10, network 4-21, 4-22 alerts ..4-13, 4-15, 4-16 setting protocols ....... 1-2 password ..4-18, 4-19, 4-20 settings page printer ........ test ....... 1-6 4-3, 4-5, 4-6, 4-7, 4-10, password ......
- Page 85 TCPIP update commands ....6-14 firmware ...... 4-26 settings ......4-8 Telnet commands 6-1, 6-3, 6-7, 6-10 settings ....... 4-27 test wireless button ......1-5 settings ....... 4-11 page ......1-6 wireless commands ..6-10 TFTP server ....4-26 encryption mode ... 4-27 authentication ....
- Page 86 iv Ethernet Operating Instructions...
- Page 88 Visit www.monarch.com for sales, service, supplies, information, and telephone numbers for our locations throughout the world. TOLL FREE: 1-800-543-6650 (In the U.S.A.) 1-800-363-7525 (In Canada)
Need help?
Do you have a question about the 7411 and is the answer not in the manual?
Questions and answers