Table of Contents
Advertisement
Quick Links
Disposal Instruction (US)
For better protection of our earth, please don't throw this electronic device into
municipal trash bin when discarding. To minimize pollution and ensure utmost
protection of the global environment, please recycle the product. For more
information about the collection and recycling of Waste Electrical and Electronic
Equipment (WEEE), you are invited to visit our homepage at www.aopen.com under
"Green Products"
廃棄上の指示
より良い地球保護のために、電子機器を廃棄処分にする時は、ゴミ箱に捨てな
いで下さい。汚染を最小限に抑え、地球環境の最大限の保護のために、製品を
リサイクルして下さい。廃電気電子機器 (WEEE) の回収とリサイクルについて
の情報は、弊社ホームページwww.aopen.com の"Green Products"(環境に優
しい製品)をご覧下さい。
廢棄及回收處理
為了保護環境,請勿將本產品當作一般廢棄物處理。為減少環境污染,維護地球
資源,本產品報廢時,請回收本產品。
Instruktion til bortskaffelse (Danish)
Af hensyn til vores miljø bedes De ikke bortskaffe denne elektroniske enhed i en
almindelig affaldsspand. For at mindske forurening og sikre beskyttelse af miljøet
bedes De genbruge produktet. For yderligere information vedrørende indsamling og
genbrug af elektronik-affald (Waste Electrical and Electronic Equipment (WEEE)) er
De velkommen til at besøge vores website www.aopen.com og læse nærmere under
"Green Products".
i
Advertisement
Table of Contents

Related Manuals for AOpen XC Cube


Summary of Contents for AOpen XC Cube
- Page 1 To minimize pollution and ensure utmost protection of the global environment, please recycle the product. For more information about the collection and recycling of Waste Electrical and Electronic Equipment (WEEE), you are invited to visit our homepage at www.aopen.com under “Green Products” 廃棄上の指示...
- Page 2 Pour plus d’informations sur la gestion des déchets d’Equipements Electriques et Electroniques (DEEE ou WEEE), vous êtes invité à visiter notre site à www.aopen.com sous “ Green Products”. Entsorgungsanleitung (German) Zum besseren Schutze unseres Planeten, schmeissen Sie elektrische Geräte bitte nicht...
- Page 3 Para más información acerca de dónde depositar y cómo reciclar Equipos Electrónicos y Desperdicios Electrónicos (WEEE), por favor, visite la página web www.aopen.com y entre en la sección Productos Ecológicos (“Green Products”).
- Page 4 Copyright Copyright of this publication belongs to AOpen Inc. AOpen reserves the right to change the content of this publication without obligation to notify any party of such changes or revisions. No part of this publication may be reproduced, transcribed, transmitted,...
-
Page 5: Safety Instructions
Safety Instructions 1. Please read these safety instructions carefully. 2. Please keep this User’s Manual for later reference. 3. Please disconnect this equipment from connecter before cleaning. Don’t use liquid or prayed detergent for cleaning. Use moisture sheet or cloth for cleaning. 4. -
Page 6: Fcc Notice
FCC notice This device has been tested and found to comply with the limits for a Class B digital device pursuant to Part 15 of the FCC Rules. These limits are designed to provide reasonable protection against harmful interference in a residential installation. This device generates, uses, and can radiate radio frequency energy and, if not installed and used in accordance with the instructions, may cause harmful interference to radio communications. -
Page 7: Table Of Contents
2.1 What’s In The Box? ................2.2 Accessory ....................Chapter 3 Start To Assemble ................3.1 Features of XC Cube ................3.2 Starting Installing ..................3.3 Cooler, Hard Disk, Floppy Drives and Optical devices ......3.3.1 Taking Cooler out ................ - Page 8 viii...
-
Page 9: Chapter 1
We regret not informing about any changes in usage standards and other related information. AOpen Company reserves the right of altering or modifying the content of this manual. In case of any mistakes or incorrect descriptions, which include those on the products, AOpen makes no guarantee or commitments. -
Page 10: The Features Of This Manual
1.2 The Features Of This Manual In this manual, you’ll be able to learn how to: set up a personal computer on your own. correctly and safely put everything together and learn something about hardware. learn some practical techniques that make doing the job easier. In addition, this manual DOES NOT offer you: any sorts of back doors, such as overclocking. -
Page 11: Preliminary Tools
1.3 Preliminary Tools “A workman must fi rst sharpen his tools if he is to do his work well”. Right before you start the assembly, there are some tools that can’t be spared. Firstly, the most frequently-used tool is cross screwdriver by which most interior components are fi... -
Page 12: Chapter 2 What's In The Box
Chapter 2 2.1 What’s In The Box? Open the XC Cube box, you will fi nd components as follow: XC Cube chassis / Drives Cage Motherboard Power Supply CPU Cooler All in One Power Supply / XC Cube Chasis Drives Cage... -
Page 13: Accessory
2.2 Accessory Beside main components, you are supposed to see the following accessories: Fixed screws: After opening the accessory parcel, you’ll see the following three different type of screws: As shown in the picture, the As shown in the picture, As shown in the picture, threads on NO.1 screw are threads on NO.2 screw are... -
Page 14: Chapter 3 Start To Assemble
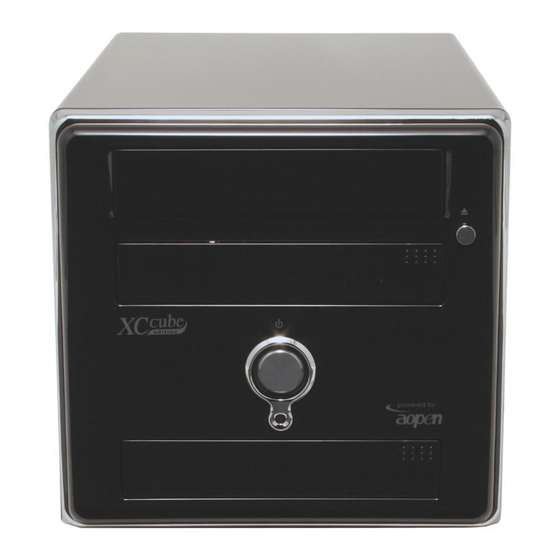
You may fi nd that it is elegant among other traditional PC design that obviously highlighted your individual style and taste with different color panel provided. In addition to it’s unique appearance, AOpen XC Cube is easy to move around in your house, suitable for decoration even in your living room. -
Page 15: Starting Installing
3.2 Starting Installing 1. Unscrew all screws on the chassis. Use your thumb to push the chassis backward to you. 2. Lift the chassis up. Here you may see the internal of the chassis. -
Page 16: Cooler, Hard Disk, Floppy Drives And Optical Devices
3.3 Cooler, Hard Disk, Floppy Drives and Optical devices 3.3.1 Taking Cooler out Before installing hard disk, fl oppy drives and optical devices into the XC Cube chassis, let’s take the cooler out from chassis fi rst. 1. Take the screws off the chassis and then take the Drives Cage out. -
Page 17: Install Hard Disk
The bottom of Cooler had been protected with a plastic cover when shipped. Please take it off when you want to put the cooler on CPU. 3.3.2 Install Hard disk After taking out Cooler, let’s focus on Installing Drives Cage. Slide hard disk into the Drives Cage, and use screw no. -
Page 18: Install Optical Drive
3.3.4 Install Optical Drive Slide in the optical drive. Use screw no.2 to screw the optical drive fi rmly. Optical device must aim at the edge of Drives Don’t mess up screws!! Generally there are special screws for hard disk in the parcel when you buy a new hard disk. - Page 19 2. Connecting fl oppy cable, hard disk and optical cable on motherboard for later use. Optical device Hard disk cable cable 3. If you happen to have Serial ATA hard disk, except EZ661L, this motherboard comes with Serial ATA connectors onboard as well. With EzColor design, you may easily fi...
-
Page 20: Install Cpu
3.5 Install CPU 3.5.1 Install CPU On Socket T 1. Remove plastic cap and erect CPU socket lever up. Plastic Cap Lever 2. Pull CPU socket plate up and install CPU onto CPU socket. Then press plate back to CPU socket. Plate 3. -
Page 21: Install Cpu On Socket 479
3.5.2 Install CPU On Socket 479 1. Remove plastic membrane from CPU socket and make sure the drop-shaped indicator on socket screw aims at open direction (the default is open). Plastic membrane Drop-shaped indicator Socket screw 2. Match socket Pin 1 and golden arrow, and gently put CPU onto CPU socket. Then lock socket screw clockwise to fi... -
Page 22: Insert Add-On Card (Agp/Pci/Pcie/Pciex1/Pciex16) On Motherboard
3.8 Insert Add-on card (AGP/PCI/PCIe/PCIeX1/PCIeX16) on motherboard 1. If you happen to have Add-on card, you may insert them onto the slot as shown. Screw the iron plate off the back panel, and use the screwdriver to pry it out. 2. -
Page 23: Putting Drives Cage Back To Chassis
3.9 Putting Drives Cage back to Chassis 1. Putting all cables aside, you may assemble the drives cage back to the chassis from top of the chassis. 2. Lift the drive cage up at 45 degree for better installing optical and fl oppy drive. -
Page 24: All Set
Connecting hard disk/power cord to Drive Cage Lock the Drives Cage with screw No. 2. 3.10 All Set 1. Put the housing on the chassis, then press it toward chassis. 2. Mount screws and then it’s down. -
Page 25: How About All External Peripheral
3.11 How about all external peripheral? 1. Connect keyboard and mouse. 2. Connect monitor and tighten screws. 3. a. Connect Microphone (speaker or earphone) and network cable. - Page 26 b. Connect HD-Audio Insert the audio connectors by matching the colors of connectors. 4. Set proper voltage and connect power supply cable. The voltage supplied by power outlet differs from countries or areas you dwell in. If the outlet is supplied by 110V, please set the switch to 115V. If the outlet is supplied by 220V, please set the switch to 230V.
-
Page 27: Chapter 4 Turn On The Power
Chapter 4 Turn On The Power! 1. Turn on the power. Ok, all cables have been properly connected. Are you getting confi dent of assembling a computer by yourself? The fi nal stage is to turn on the power to check what you have done so far. - Page 28 After pressing Delete, you’ll see the following BIOS setup: Now, you can move the cursor by using direction keys on the keyboard. Move the cursor to the option item “Load Setup defaults” and press Enter. Then, the following dialogue screen will pop up to confi rm the default BIOS values.
- Page 29 Finally, move the cursor to “Save & Exit Setup” and press Enter to save the parameters and exit BIOS setup. At the same time, type “Y” in the dialogue box and press Enter to exit. Now everything is perfectly fi nished!! The screen above may look different from the product you purchased.
-
Page 30: Postscripts
We sincerely hope every customer who wants to assemble a computer on his or her own has a wonderful beginning! To learn more about AOpen XC Cube, visit us at http://xc.aopen.com.tw... -
Page 31: Introduction To Jumper Settings And Other Connectors
Introduction To Jumper Settings and Other Connectors JP14 Clear CMOS You can clear CMOS to restore system default setting. To clear the CMOS, follow the procedure below. 1. Turn off the system and unplug the AC power. 2. Remove ATX power cable from connector PWR2. 3. -
Page 32: Cpu And System Fan Connector
CPU and System Fan Connector Plug in the CPU fan cable to the 3-pin CPUFAN1 connector. If you have chassis fan, you can also plug it into SYSFAN2. SENSOR +12V SYSFAN2 connector CPUFAN1 Please insert the 4-pin connector as illustrated in case your model requires the connection of a CPU fan ( CPUFAN ) and system fan ( SYSFAN ) connectors.
Need help?
Do you have a question about the XC Cube and is the answer not in the manual?
Questions and answers