Table of Contents
Advertisement
Quick Links
Download this manual
See also:
User Manual
Advertisement
Table of Contents

Related Manuals for Vista VK2-1080XPTZ


Summary of Contents for Vista VK2-1080XPTZ
- Page 1 VK2-1080XPTZ Installation Guide...
- Page 2 VK2-1080XPTZ Installation guide V1.0...
-
Page 3: Explanation Of Graphical Symbols
WARNING TO REDUCE THE RISK OF FIRE OR ELECTRIC SHOCK, DO NOT EXPOSE THIS PROCUCT TO RAIN OR MOISTURE. DO NOT INSERT ANY METALLIC OBJECT THROUGH THE VENTILATION GRILLS OR OTHER OPENNINGS ON THE EQUIPMENT CAUTION EXPLANATION OF GRAPHICAL SYMBOLS The lightning flash with arrowhead symbol, within an equilateral triangle, is intended to alert the user to the presence of un-insulated "dangerous voltage"... -
Page 4: Ce Compliance Statement
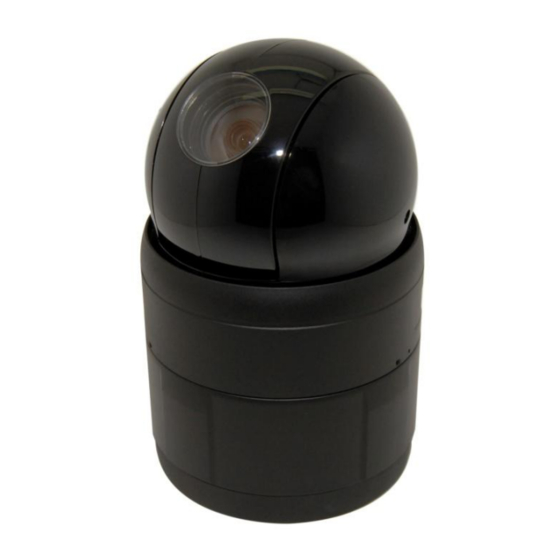
RESPONSIBLE FOR COMPLIANCE COULD VOID THE USER'S AUTHORITY TO OPERATE THE EQUIPMENT. CE COMPLIANCE STATEMENT WARNING: This is a Class A product. In a domestic environment this product may cause radio interference in which case the user may be required to take adequate measures. VK2-1080XPTZ Installation guide V1.0... - Page 5 DESCRIPTION ------------------------------------------------------------------------------------------------------------------------------------- This manual applies to the VK2-1080XPTZ fully functional PTZ network camera. These cameras are fully featured for security surveillance and remote monitoring needs. They are based on the DSP compression chip, allowing real-time, full frame rate Motion JPEG and H.264 (or MPEG-4) video streams.
-
Page 6: Before Installation
- Recommend connecting the camera to a network that uses a DHCP (Dynamic Host Configuration Protocol) server to address devices. - To ensure secure access to the IP camera, place the camera behind a firewall when it is connected to a network. Starting Installation Basic Installation . Typical System Configuration VK2-1080XPTZ Installation guide V1.0... - Page 7 push bubble ring ass'y remove camera window screw push remove window assemble bubble ring ass'y Assemble bubble ring ass’y(Optional) NOTES It is recommended that the camera window is removed when you use bubble ring assembly is used; this will improve the picture quality. The Network Dome Camera is for use in surface mounting applications and the mounting surface should be capable of supporting loads up to 10lb (4.5kg).
- Page 8 Dimensions VK2-1080XPTZ Installation guide V1.0...
- Page 9 Basic Configuration of VK2-1080XPTZ Basic installation diagram The Network Dome Camera must be installed by qualified service personnel in accordance with all local electrical and building codes.
- Page 10 To restore the camera’s factory default settings. Turn on dip switch 2 for 15s and then turn off. Please take steps as follows: 1. Power off 2. Move switch 2 to On 3. Power up the camera 4. wait for 15 seconds and move SW2 to off VK2-1080XPTZ Installation guide V1.0...
-
Page 11: Setting The Rs485 Dome Camera Address (Id)
Connecting to the RS485 The VK2-1080XPTZ can be controlled remotely by an external device or control system, such as a control keyboard, using RS485 half-duplex serial communications signals. Connect Marked Rx+, Rx- to Tx+ and Tx- of the RS485 control system. -
Page 12: Network Connection
2. Start Smart Manager utility, the main window will be displayed, after a short while any network devices connected to the network will be displayed in the list. 3. Select the camera on the list and click right button of the mouse. You will see the following menu as below: VK2-1080XPTZ Installation guide V1.0... - Page 13 4. Select Assign IP. You cam see an Assign IP window. Enter the required IP address. The description of each field for the connection status follows. : Available for connection to the camera : Loading settings information of video after connecting the camera. : Connectable to the camera but fixed security settings (password) : Unavailable for connection to the camera (PC can not access relevant IP Address) Note: For more information, refer to the Smart Manger User’s Manual.
-
Page 14: Operation
- Refer to the SmartManager utility software manual for more detail. 3. Log On to the camera - Click the Live View icon for default live image view or the Setup icon to change the configuration values. VK2-1080XPTZ Installation guide V1.0... -
Page 15: Main Menu
Main Menu Figure 1. Main Menu The dialog box will be appears. - Type User ID and Password in the dialog box. The default User ID and Password is admin. NOTE For security purposes, be sure to change the password after you log on for the first time. -
Page 16: Live View
Live Video Page Icons Hide Main Icons: Hides main icons in the live view page. Show Main Icons: Shows main icons in the live view page. Live view: Displays live video stream. Playback View: Enters playback menu. VK2-1080XPTZ Installation guide V1.0... - Page 17 Setup: Enters setup menu. Help: Shows helpful information. Source: Specify the viewable video stream source to display in live view page. View Size: Specify the viewable video size to display in live view page. Stream Type: Specify the internet protocol to display in live view page. ROI View: Specify the specially selected area to transfer using different stream feature in the primary video image.
-
Page 18: Upgrading The Firmware
→ If images are very complex, try limiting the number of clients accessing the camera. 7. Images only shown in black & white. → Check the Video & Image setting. 8. Blurred images. → Refocus the camera. VK2-1080XPTZ Installation guide V1.0... - Page 19 9. Poor image quality. → Increased lighting can often improve image quality. Check that there is sufficient lighting at the monitored location. Check all image and lighting settings. 10. Rolling dark bands or flickering in image. → Try adjusting the Exposure Control setting under AE and AWB part. 11.
- Page 20 Norbain SD Ltd 210 Wharfedale Road IQ Winnersh Wokingham RG41 5TP 0118 9125 000 VK2-1080XPTZ Installation guide V1.0...
Need help?
Do you have a question about the VK2-1080XPTZ and is the answer not in the manual?
Questions and answers