Table of Contents
Advertisement
®
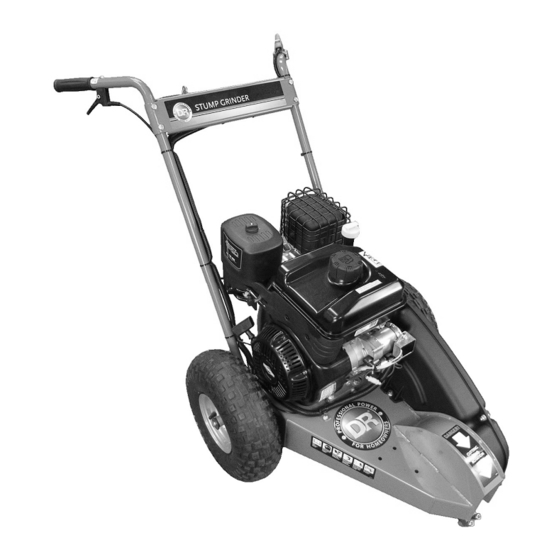
DR
STUMP GRINDER
`
SAFETY & OPERATING INSTRUCTIONS
Serial No.
Order No.
Read and understand this manual and all instructions before operating the DR STUMP GRINDER.
Original Language
DR Power Equipment
Toll-free phone: 1-800-DR-OWNER (376-9637)
Fax: 1-802-877-1213
Website: www.DRpower.com
CONTACT US AT www.DRpower.com
1
Advertisement
Table of Contents

Subscribe to Our Youtube Channel
Related Manuals for DR Stump Grinder


Summary of Contents for DR Stump Grinder
- Page 1 STUMP GRINDER SAFETY & OPERATING INSTRUCTIONS DR Power Equipment Toll-free phone: 1-800-DR-OWNER (376-9637) Serial No. Fax: 1-802-877-1213 Original Language Order No. Website: www.DRpower.com CONTACT US AT www.DRpower.com Read and understand this manual and all instructions before operating the DR STUMP GRINDER.
-
Page 2: Table Of Contents
Additional Information and Potential Changes DR Power Equipment reserves the right to discontinue, change, and improve its products at any time without notice or obligation to the purchaser. The descriptions and specifications contained in this manual were in effect at printing. Equipment described within this manual may be optional. -
Page 3: Chapter 1: General Safety Rules
Labels Your DR STUMP GRINDER carries prominent labels as reminders for its proper and safe use. Shown below are copies of all the Safety and Information labels that appear on the equipment. Take a moment to study them and make a note of their location on your STUMP GRINDER as you set up and before you operate the unit. - Page 4 Be alert and turn the machine off if children or pets enter the work area. Never allow children to operate the STUMP GRINDER. Safety with Gasoline - Powered Machines Gasoline is a highly flammable liquid. Gasoline also gives off flammable vapor that can be easily ignited and cause a fire or explosion.
- Page 5 General Safety Operating this Stump Grinder safely is necessary to prevent or minimize the risk of death or serious injury. Unsafe operation can create a number of hazards for you. Always take the following precautions when operating this Stump Grinder: ...
-
Page 6: Chapter 2: Setting Up The Dr Stump Grinder
Chapter 2: Setting Up The DR STUMP GRINDER It may be helpful to familiarize yourself with the controls and features of your DR STUMP GRINDER as shown in Figure 1 before beginning these procedures. If you have any questions at all, please feel free to contact us at www.DRpower.com. - Page 7 Specifications Premier Pro XL Engine Please refer to the Engine Please refer to the Engine Please refer to the Engine Owner’s Manual for Engine- Owner’s Manual for Engine- Owner’s Manual for Engine- specifications. specifications. specifications. Tire Size 14.5" Pneumatic 14.5" Pneumatic 14.5"...
- Page 8 NOTE: To refill the gas tank, turn the engine OFF and let the engine cool at least Figure 7 five minutes before removing the gas fill cap. Remove any blocking used to level the Engine before operating the DR Stump Grinder. ®...
- Page 9 Check the Tire Pressure Tools Needed: Tire Pressure Gauge Air Compressor Remove the Valve Stem Protective Cap (Figure 8) and check the tire pressure with a Tire Pressure Gauge. Compare the tire pressure reading from step 1 with the manufacturer's recommended tire pressure stamped on the side of the tire.
-
Page 10: Chapter 3: Operating The Dr Stump Grinder
Chapter 3: Operating The DR STUMP GRINDER It may be helpful to better familiarize yourself with the features of your Stump Operator Presence Grinder by reviewing Figure 1 in Chapter 2 before beginning the steps outlined Lever in this chapter. - Page 11 Check that the ground is free of foreign objects, such as electrical cables, barbed wire, etc. Cut the stump as close to the ground as possible using a Chainsaw before using the Stump Grinder. CONTACT US AT www.DRpower.com...
- Page 12 Side of Stump Allow engine to warm up at idle for a few minutes. Move the Stump Grinder into position with the Cutter Head at the right side Figure 13 of the stump on the edge closest to you (not touching) near the top edge (Figure 13).
-
Page 13: Chapter 4: Maintaining The Dr Stump Grinder
Chapter 4: Maintaining The DR STUMP GRINDER Regular maintenance is the way to ensure the best performance and long life of your machine. Please refer to this manual and the engine manufacturer's owner's manual for maintenance procedures. Service intervals listed in the checklist below supersede those listed in the engine manufacturer's owner's manual. - Page 14 Locknuts Two 1/2" Wrenches 9/16" Wrench Figure 18 New DR Drive Belt (see chapter 6 for part numbers) Gloves Idler Remove the three Bolts and Locknuts from the Belt Guards with two 1/2" Pulley Wrenches and remove the outer Belt Guard (Figure 18).
- Page 15 CAUTION! Wear Gloves when working near the teeth. Without Gloves your hands may get cut from the sharp edges. Block the front end of the Stump Grinder so the Cutter Head is just off the ground. Note: It may help to mark the "Dull" cutting edge prior to rotating the Teeth so you can be sure you have rotated to an unused cutting edge.
- Page 16 Gloves CAUTION! Wear Gloves when working near the teeth. Without Gloves your hands could suffer cuts from the sharp Teeth. Block the front end of the Stump Grinder so the Cutter Head is just off the ground. Locknut If you tip the machine back on the Handlebars (only recommended...
- Page 17 Hit the Wrench sharply with a Dead Blow Hammer to start the Bolt turning on the Engine Shaft. Brake Hub Remove the Bolt, Lock Washer (Premier), Flat Washer, Spacer (Pro and Pro- XL), Clutch and Key (Premier) from the Engine Shaft. Apply a never seize type grease to the Engine Shaft and install the new Clutch and Key (Premier, align the Clutch Key Slot with the Key on Engine Shaft) and secure with the hardware using a 1/2"...
- Page 18 Tighten the lower Nut up against the Bracket. Lower the Stump Grinder to the ground and test the Brake and pivoting (side to side) action. If the left-side Wheel rotates forward while the Brake Lever is locked, the Cable needs more tightening. Repeat steps above as needed.
-
Page 19: Charging The Battery
Operate the Engine for at least 45 minutes to maintain proper Battery charge. If the Battery loses its charge, you will need to use a trickle charger (like the DR Battery Charger) to recharge it. The Charger should have an output of 12 volts DC at no more than 2 amps. - Page 20 Services; or contact them at: INMETCO One INMETCO Drive Ellwood City, PA 16117 (724) 758-2800; fax (724) 758-2845 To learn more about hazardous waste recycling, visit the Web site for Battery Council International [www.batterycouncil.org] or for the Environmental Protection Agency [www.epa.gov]. ® STUMP GRINDER...
-
Page 21: Chapter 5: Troubleshooting
Most problems are easy to fix. Consult the Troubleshooting Table below for common problems and their solutions. If you continue to experience problems, contact us at www.DRpower.com or call toll-free 1-800-DR-OWNER (376-9637) for support. Set the Wheel Brake, shut down the engine, remove the spark plug wire and wait 5 minutes before performing any maintenance procedure or inspection on the Stump Grinder. - Page 22 Stump Grinder”) when the throttle is released. The Cutting Head is The teeth are dull or damaged. Replace Teeth (refer to “Chapter 4: Maintaining the DR Stump rotating but the cutting Grinder”). action is extremely slow and the stump is showing signs of excessive heat.
- Page 23 CONTACT US AT www.DRpower.com...
-
Page 24: Chapter 6: Parts Lists And Schematic Diagrams
Chapter 6: Parts Lists and Schematic Diagrams Parts List - HANDLEBAR ASSEMBLY NOTE: Part numbers listed are available through DR Power Equipment. Ref# Part# Description Ref# Part# Description 11238 Washer, Flat, 1/4" 16495 Grip, Ergonomic, 1" 11158 Bolt, HCS, 5/16-18 X 1, ZP... - Page 25 Schematic – HANDLEBAR ASSEMBLY CONTACT US AT www.DRpower.com...
- Page 26 Parts List – DRIVE ASSEMBLY NOTE: Part numbers listed are available through DR Power Equipment. Ref# Part# Description Ref# Part# Description 11243 Washer, Lock, Split, 5/16" 34140 Label, Dr Logo Silver, 4" , 4 color 16514 Washer, .385" ID, 1.39" OD, .15"T 27164 Washer, .47"...
- Page 27 Schematic – DRIVE ASSEMBLY CONTACT US AT www.DRpower.com...
- Page 28 Parts List – AXLE ASSEMBLY NOTE: Part numbers listed are available through DR Power Equipment. Ref# Part# Description Ref# Part# Description 19336 Bolt, HCS, 5/16-18 X 1" 11073 Nut, Nylon Lock, 1/4-20, ZP 11243 Washer, Lock, Split, 5/16" 11076 Nut, Nylon Lock, 5/16-18, ZP 11238 Washer, Flat, 1/4"...
- Page 29 Parts Schematic – AXLE ASSEMBLY CONTACT US AT www.DRpower.com...
- Page 30 Notes: ® STUMP GRINDER...
- Page 31 Notes: CONTACT US AT www.DRpower.com...
- Page 32 If possible, store the Stump Grinder in a dry, protected place. If it is necessary to store the Stump Grinder outside, cover it with a protective material (especially the Engine). For Electric Start Model, store the machine in a dry environment with temperatures between +40(degree symbol)F (5C) and +95F (+35C).
Need help?
Do you have a question about the Stump Grinder and is the answer not in the manual?
Questions and answers