Advertisement
®
DR
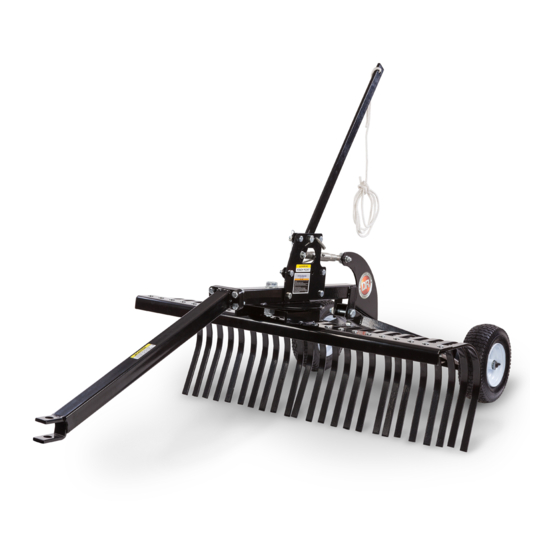
48" LANDSCAPE RAKE
`
SAFETY & OPERATING INSTRUCTIONS
Serial No.
Order No.
Read and understand this manual and all instructions before operating the DR 48" LANDSCAPE RAKE.
Original Language
DR Power Equipment
Toll-free phone: 1-800-DR-OWNER (376-9637)
Fax: 1-802-877-1213
Website: www.DRpower.com
Advertisement

Subscribe to Our Youtube Channel
Related Manuals for DR 48" LANDSCAPE RAKE


Summary of Contents for DR 48" LANDSCAPE RAKE
- Page 1 ® 48" LANDSCAPE RAKE SAFETY & OPERATING INSTRUCTIONS DR Power Equipment Toll-free phone: 1-800-DR-OWNER (376-9637) Serial No. Fax: 1-802-877-1213 Original Language Order No. Website: www.DRpower.com Read and understand this manual and all instructions before operating the DR 48" LANDSCAPE RAKE.
-
Page 2: Table Of Contents
Additional Information and Potential Changes DR Power Equipment reserves the right to discontinue, change, and improve its products at any time without notice or obligation to the purchaser. The descriptions and specifications contained in this manual were in effect at printing. Equipment described within this manual may be optional. -
Page 3: Chapter 1: General Safety Rules
Labels Your DR 48" LANDSCAPE RAKE carries prominent labels as reminders for its proper and safe use. Shown below are copies of all the Safety and Information labels that appear on the equipment. Take a moment to study them and make a note of their location on your LANDSCAPE RAKE as you set up and before you operate the unit. - Page 4 Use the DR Landscape Rake only in daylight or good artificial light. The DR Landscape Rake must be operated safely to prevent or minimize the risk of minor or moderate injury. Unsafe operation can create a number of hazards for you. Always take the following precautions when operating this Landscape Rake: ...
-
Page 5: Chapter 2: Setting Up The Dr 48" Landscape Rake
Chapter 2: Setting Up the DR 48" LANDSCAPE RAKE It may be helpful to familiarize yourself with the features of your DR 48" LANDSCAPE RAKE as shown in Figure 2 before beginning these procedures. If you have any questions at all, please feel free to contact us at www.DRpower.com. - Page 6 Tine QTY Pneumatic, 12" Diameter Wheels Working Width 48" Hitch Type Assembling the DR 48" Landscape Rake Parts Supplied in Hardware Bag (Figure 2): Item # Part # Description 1 ..... 40945 ....Bolt, Hex, M24 X 100 ......... 1 2 .....
- Page 7 M16 x 45 Bolt and Attach the Lift Handle Support to the left side of Frame using two M12 X Locknut Lift Handle 70 Bolts and Locknuts (Figure 5). Tighten the Hardware using two 19mm Wrenches. Lift Handle Insert the Lift Handle between the plates on the Lift Handle Support. Insert Support a M16 X 45 Bolt through the Lift Handle Support and the Top Hole of the Lift Handle and secure with a M16 Locknut.
-
Page 8: Chapter 3: Operating The Dr 48" Landscape Rake
The DR Landscape Rake can be used with a Garden Tractor/Lawn Tractor, ATV, UTV, or Utility Tractor. NEVER operate the DR LANDSCAPE RAKE with a Car or Truck (2WD or 4WD). Use of these vehicles can be hazardous and will void the DR LANDSCAPE RAKE Warranty. - Page 9 Attaching the DR Landscape Rake to the Tow Vehicle Stop the Tow Vehicle Engine and set the Parking Brake. Lift the Tow Bar and position the Pin Hitch opening onto the Tow Vehicles Hitch Plate (Figure 11). Hitch Align the hole in the center of the Hitch Plate with the holes in the Pin...
-
Page 10: Chapter 4: Maintaining The Dr 48" Landscape Rake
▲ Check condition of Tines Cleaning the DR Landscape Rake Use a Hose or Pressure Washer to clean the DR Landscape Rake to keep the Tines, Transport Wheels etc. clean and clear of debris. Checking the Tire Pressure Tools and Supplies Needed: ... - Page 11 CONTACT US AT www.DRpower.com...
-
Page 12: Chapter 5: Parts Lists, Schematic Diagrams And Warranty
Chapter 5: Parts Lists, Schematic Diagrams and Warranty Parts List – LANDSCAPE RAKE ASSEMBLY Note: Part numbers listed are available through DR Power Equipment. Ref# Part# Description Ref# Part# Description 40941 Tongue A 40958 Lift Handle Bracket #2 40942 Bolt, M12 x 40... - Page 13 Schematic – Landscape Rake Assembly...
- Page 14 Notes: ® 48" LANDSCAPE RAKE...
- Page 15 LANDSCAPE RAKE is fit for ordinary purposes for which a product of this type is used. DR Power Equipment however, limits the implied warranties of merchantability and fitness in duration to a period of two (2) years in consumer use, ninety (90) days for any other use.
- Page 16 Daily Checklist for the DR 48" LANDSCAPE RAKE To help maintain your DR 48" LANDSCAPE RAKE for optimum performance, we recommend you follow this checklist each time you use your LANDSCAPE RAKE Before performing any maintenance, you must first shut off the tow vehicle, remove the key and set the parking brake.
Need help?
Do you have a question about the 48" LANDSCAPE RAKE and is the answer not in the manual?
Questions and answers