Table of Contents
Advertisement
Quick Links
Advertisement
Table of Contents

Subscribe to Our Youtube Channel
Related Manuals for Ubiquiti UVP-400


Summary of Contents for Ubiquiti UVP-400
-
Page 3: Safety Precautions
SAFETY PRECAUTIONS Only use the battery and charger specified for the WiFi phone. Failure to do so can result on damage to the WiFi phone, electric shock or fire. Do not store or operate the WiFi phone or charger in hot, damp, or dusty areas, which can damage electrical and mechanical components. - Page 4 SAFETY PRECAUTIONS Use caution in handling batteries in order to not to short the battery on conductive materials such as rings, bracelets, and keys. The battery and/or conductor may overheat and cause burns. If the battery becomes too hot while recharging, it should be removed immediately from the charger.
-
Page 5: Table Of Contents
Table of Contents Phonebook Network Getting Started Search …………………...……. Safety Precautions….….…….. Configure WiFi network …….. Add Entry …………….….……. Table of Contents ………..Configure IP Address……..…. Speed Dial ……………………. Menu Functions ………..… Configure Security …….….… Add Group ……………………. Handset Description …….…… AP reconfiguration ……..…... -
Page 6: Menu Functions
Menu Functions Left Soft Key ( Menu Navigation ( 1.PhoneBook 2.SMS 3.e-mail 1.Speed Search 1.New Message 1.New e-mail 2.Search by Name/Number 2.In-Box 2.Get e-mail 3.Search by e-mail 3.Out-Box 3.In-Box 4.Add Phonebook 4.Out-Box 5.Speed Dial 5.Account 6.Edit Group 5.Network 6.Configuration 4.My Phone 1.WiFi Profile 1.SIP 1.Idle Display... -
Page 7: Handset Description
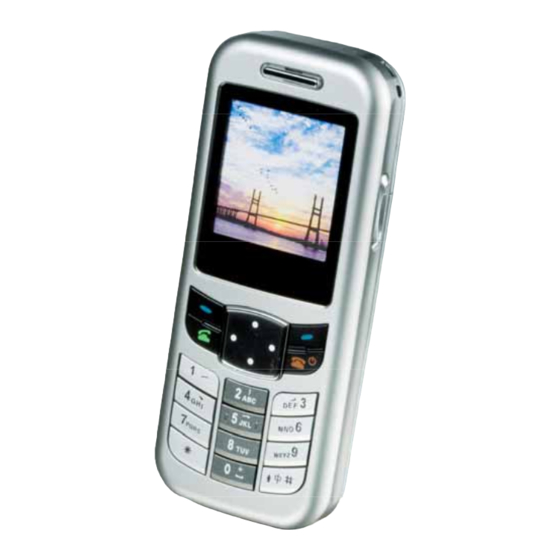
Handset Description Adjust Key/Earpiece Volume Ear Phone Socket Select Menu, Left Soft Select Phonebook, Right Soft Delete a character, Navigation [Upper] Service, Navigation [Left] Call Log, Make/Answer a Call Switch On/Off, Hangup a Call Configure WiFi Profile, Navigation [Right] Navigation [Down] Lock Key [Press and Hold the Key]... -
Page 8: Display Indicators
Display Indicators Display Indicators Signal Strength Out of Service Area Connection Status Vibration Mode Enabled LCD screen is turned off for power Call Forwarding Enabled consumption when user has no SMS Indicator interaction. E-mail Indicator If you grip the antenna part which is Battery Level Indicator located at LCD during talking, voice quality may be degraded. -
Page 9: Package Contents
Package Contents Please check the package contents by comparing them the following list. WiFi Phone Charger User Manual (Included Battery) Replace the battery Switch the WiFi phone off in stand by mode. And remove the battery cover. Remove the old battery. Disconnect the cord by firmly gripping the connector and pulling gently. Install the new battery. -
Page 10: Charge The Battery
Charge the Battery Charging LED status Your battery packaged is not charged fully. status charging fully charged When the LED is changed With your phone turned off, charge your phone GREEN, the battery is GREEN charged more than 85%. for 3 hours before its first use. To charge fully, it needs 1 hours on charger. -
Page 11: Basic Operation
Basic Operation Switch the Phone On/Off These pages give you 1. On 2. Off some tips on using the phone. For more detailed (about 2 seconds) (about 3 seconds) information, read through this User Manual. Setup the WiFi phone Before you use WiFi phone to make a call, you should make a Profile for WiFi network connection and configure SIP account. -
Page 12: Service Status
Service status WiFi phone service status Turn on the phone by pressing the END key( ) during 2 seconds. It is displayed “Booting Logo” Image on LCD. After WiFi phone is booted completely, WiFi phone displays status corresponding to the connection of WiFi network on LCD as figure [1] [2] [3]. -
Page 13: Make/Answer A Call
Make a Call Make a Call, Hangup a Call, Reject a Call Key in Phone number, Press Talk key ( (Press Upper arrow key to delete the character or digit.) The keypad lock prevents the keys from being Press the End key( ) to end the current call or to reject an incoming call. -
Page 14: Supplementary Services
Supplementary Services Call Hold/Call Transfer The WiFi phone provides several supplementary services such as Call Hold, Call Transfer, Call Waiting and Call Forwarding. These supplementary If you want to hold the current call (ex : 010-111-1111), you can hold the call by push right services may be not Soft key( ). - Page 15 Supplementary services Call Waiting If you want to pickup new receiving call(ex.010-333-3333) during talking with someone (ex: 010-111-1111), you can pickup a new call by pressing Talk key. In this case, you can talk with old call and new call one after the other by pressing Talk key. When you are talking with somesone, if you press END key, the current talking call is released and return to the waiting call.
-
Page 16: In Call Operations
In Call Operations DTMF Transfer During a call, you can deliver the numeric information to the opposite side of caller if you press numeric keys(0,..9,*,#). It is very useful for Automatic Response System. During a call, WiFi phone You can select In-band or Out-band DTMF transfer methods. (page 30) supports DTMF transfer, Earpiece volume, Mute functions. -
Page 17: Phonebook
Phonebook Search In standby mode, press right soft key for phonebook menu. Search via Group/Name/Number/e-mail Press Call on menu after you selected a desired number. Key in the first letter(s) or digit(s) of name you searching for. All names starting with these letter(s)/digit(s) will be displayed. -
Page 18: Speed Dial
Speed Dial Speed Dial In standby mode, press right soft key for phonebook menu. You can store frequently Speed Dial used phone number and names in the phonebook. The phonebook and speed dial can store up to 200 Registration Search Select entries. -
Page 19: Add Group
Add Group Edit Group In standby mode, press right soft key for phonebook menu. Edit Group Menu Add group name You can search easily Modify group name using group information Move order of group name of phonebook. Delete group name Delete all group name... -
Page 20: Send Sms
SMS (Short Message Service) New Message In standby mode, press left soft key for SMS menu or select SMS in main menu. The message consists of maximum 80 characters. New Message Key in or Search Edit Message Send number In-box/Out-box The received messages are saved in In-Box, sending messages are stored in Out-Box. -
Page 21: Input Method
Input Method You can move to left, right, upper, down position using Navigation key. If you need to insert a space in written text, you can select a space on special character mode using right soft key. To delete the last entered letter/digit, press the upper navigation key. To delete all letters/digits, press and hold the upper navigation key. -
Page 22: E-Mail
e-mail New e-mail In standby mode, select e-mail in main menu. The message consists of maximum 300 characters. New e-mail Key in or Search Subject Contents Send E-mail Get e-mail You get a new e-mail using Get e-mail function. The received messages are saved in In-Box, sending messages are stored in Out-Box. -
Page 23: Manage E-Mail Account
e-mail Set e-mail account You have to set e-mail account for e-mail service. Account user ID, password SMTP POP3 The WiFi phone only displays subject and sender address of received e-mail. You have to check e-mail by another computer for contents and attached files. You can send simple texts using e-mail of WiFi phone. -
Page 24: My Phone
My Phone Idle Display In standby mode, select My Phone in main menu. Idle Display Display items Background Picture Bell Sound The WiFi phone supports 8 various bell sounds. Bell Sound/Vibrator Mode Press and hold key for vibration mode. Press and hold key again for bell sound mode. -
Page 25: Adjust Volume
My Phone Adjust volume The WiFi phone can adjust 7 volume levels for bell, key and speech. Bell, Key, Speech Volume Language The WiFi phone supports English and Korean(Hangul) version. -
Page 26: Network
Network WiFi Profile In standby mode, press right soft key for Network menu or select Network in main menu. WiFi Profile Scan AP/ Security DHCP Save Setup AP The WiFi phone supports multiple WiFi profiles which are consisted such as SSID of W-LAN AP, DHCP/Static IP address and security (WEP, WPA-PSK) . -
Page 27: Configure Ip Address
Network Setup AP WiFi Profile Setup AP Key in Profile/SSID Static IP You have to select “Not Use” for DHCP. And you have to key in IP address, Subnetmask, Gateway and DNS. IP address Subnet mask Gateway If you key in IP address, press 125*7*130*233 then they are converted 125.7.130.233. -
Page 28: Configure Security
Network Security (WEP, WPA-PSK, 802.1X) You have to configure a Security function such as Not Use, WEP, WPA-PSK and IEEE802.1X. Please save it after configuration is completed . 64/128bit Key (Hex) Save WPA-PSK IEEE802.1X(Radius) Save Save You have to store the WiFi profile. The WiFi phone will be connected with W-LAN AP by stored WiFi profile when the WiFi phone is restarted. -
Page 29: Ap Reconfiguration
Network AP connection, Priority reconfiguration The WiFi phone displays current connected AP(ex : AP_ID_2). New AP Connection AP Selection Connection AP Priority Reconfiguration AP Selection Move... -
Page 30: Network Information
Network Information Network Network The WiFi phone displays its IP address, Server IP address and MAC address. My Number The WiFi phone displays its phone number. Version The WiFi phone displays its version. -
Page 31: Configuration
Configuration Configuration Password The WiFi phone will be requested for the password by Configuration menu. The factory setting value for configuration password is ‘0000’, and you can change the password. SIP Account The User Name, User Number, User Password have to be registered by Internet Telephony Service Provider. -
Page 32: Set Voice Codec
Configuration SIP Registrar Server/SIP Outbound Proxy and STUN Server In general, the most of VoIP service providers use single SIP proxy server which included with SIP registrar and SIP outbound proxy server function. If you need to configure separate a SIP registrar and a SIP outbound proxy server, configure SIP Registrar server and SIP Outbound proxy server. -
Page 33: Set Time Server
Configuration System Configuration Password Time Server The WiFi phone displays clock information through time server. The WiFi phone has factory setting address of Time Server. The GMT offset is adjusted by left/right navigation key. Password The WiFi phone has an configuration password which is ‘0000’ as factory setting value. You can change it for yourself. -
Page 34: Remote Setup
Remote Setup System Remote Setup Configuration Remote Setup You can configure the WiFi phone through WiFi network by its Web server. First, the WiFi phone has to perform Remote Setup function in WiFi phone to configure by Web server. Second, your notebook or PC has to connect the same W-LAN AP that connected with the WiFi phone. Third, Log in internet explorer with URL(http://192.168.10.105/usr2/WiFi_setup.cgi). - Page 35 Remote Setup WiFi Profile Press “Setting Apply” button to apply parameters. In standby mode, press right soft key for WiFi Profile menu. Also you can configure the WiFi profile by Web server.
- Page 36 Remote Setup Press “Setting Apply” button to apply parameters. You can configure SIP for Configuration/SIP menu. Also you can configure SIP by Web server.
- Page 37 Remote Setup System You can configure System for Configuration/System menu. Also you can configure System by Web server. Apply and Factory Setting Press “Setting Apply” button to apply parameters. Press “Setting Initialize” button to recover for factory setting value. It makes the configuration password and phonebook as factory setting value.
-
Page 38: Trouble Shooting
Trouble Shooting Symptom Solution The WiFi phone may be outside of service area range. If it is in service area, switch the WiFi phone Can not connect W-LAN AP ( Off and On. (page 10) Press right soft key. If the status does not change, switch the WiFi phone Off and On (page 10) Link status is Disconnected The WiFi phone is not registered with SIP proxy server. - Page 39 Trouble Shooting Symptom Solution Decrease speech volume of the WiFi phone. Enable Echo Canceller function on the CODEC/SIP/ Echo occurs Configuration menu. (page 30) Since battery power is easily consumed, if you find the battery power diminishes quickly after full Battery life is short charging, please replace your battery.
-
Page 40: Specification
G.729A, G.711 A/u Law WiFi phone : uVP-400 Battery 950mAh, Li Polymer Battery Battery 950mAh, Li Polymer Battery Congratulations on becoming an owner of a uVP-400 Wireless Access Protocol CSMA/CA Wireless Access Protocol CSMA/CA WiFi phone! You made an excellent choice and we hope you will enjoy all of its capabilities.
Need help?
Do you have a question about the UVP-400 and is the answer not in the manual?
Questions and answers