Doremi DCP-2000 User Manual
Digital cinema
Hide thumbs
Also See for DCP-2000:
- Operator's manual (28 pages) ,
- Replacement procedure (11 pages) ,
- Maintenance manual (24 pages)
Table of Contents
Advertisement
Quick Links
Download this manual
See also:
Operator's Manual
DCP-2000 and DCP-2K4
The English version of this document is the only legally binding
version. Translated versions are not legally binding and are for
convenience only.
____________________________________________________________________________________
D2K.OM.001822.DRM
Digital Cinema Servers
User Manual
Version 1.5
Page 1 of 177
Doremi Labs
Version 1.5
Advertisement
Table of Contents

Related Manuals for Doremi DCP-2000


Summary of Contents for Doremi DCP-2000
- Page 1 DCP-2000 and DCP-2K4 Digital Cinema Servers User Manual Version 1.5 The English version of this document is the only legally binding version. Translated versions are not legally binding and are for convenience only. ____________________________________________________________________________________ D2K.OM.001822.DRM Page 1 of 177 Version 1.5...
-
Page 2: Table Of Contents
OFTWARE ERSION 1.3 C .......................8 ONTACT NFORMATION 2 OVERVIEW........................... 9 2.1 F ..........................9 RONT ANEL 2.1.1 DCP-2000 Front Panel......................9 2.1.2 DCP-2K4 Front Panel.....................10 3 CINELISTER..........................11 3.1 P ..........................12 ASSWORDS 4 NETWORK CONFIGURATION....................13 4.1 D ...................13 EFAULT ETWORK ONFIGURATION 4.2 C... - Page 3 6.10.1 Creating a Live Event....................90 6.10.2 Deleting a Live CPL......................92 6.11 L ........................93 ANAGER 6.11.1 Log Manager Configuration ..................94 6.12 L .......................95 PERATOR ANAGER 6.12.1 Exporting System Logs....................100 6.13 N ....................104 ETWORKING ONFIGURATION ______________________________________________________________________________________ D2K.OM.001822.DRM Page 3 of 177 Version 1.5 Doremi Labs...
- Page 4 7.4 I /LMS............109 NGESTING ONTENT FROM A EMOTE OREMI ERVER 7.4.1 File Transfer Protocol (FTP)..................109 7.4.1.1 Ingesting Content From a Doremi Remote Server/LMS..........109 7.5 I ........................110 NGEST ROGRESS 7.6 P ..........................111 NGEST 7.6.1 How to Pngest a CPL....................111 8 SHOW MANAGEMENT USING CINELISTER................113...
- Page 5 18 CONTROL TAB........................168 18.1 D FTP..................168 OWNLOAD THE ILE FROM THE 18.2 C ....................168 ONFIGURING THE ONTROL 18.2.1 Configuration Example....................169 18.2.2 Basic Example of controlview.xml File................171 19 VIRTUAL KEYBOARD......................173 ______________________________________________________________________________________ D2K.OM.001822.DRM Page 5 of 177 Version 1.5 Doremi Labs...
- Page 6 19.1 H ................173 OW TO CCESS THE IRTUAL EYBOARD 20 TIME ADJUSTMENT....................... 174 20.1 H ..................174 OW TO DJUST THE YSTEM 21 ACRONYMS..........................176 22 DOCUMENT REVISION HISTORY..................177 ______________________________________________________________________________________ D2K.OM.001822.DRM Page 6 of 177 Version 1.5 Doremi Labs...
-
Page 7: Software License Agreement
此 为A 级 产 品 , 在 生 活 环 境 中 , 该 产 品 可 能 会 造 成 无 线 电 干 扰 。 在 这 种 情 况 下 , 可 能 需 要 用 户 对 其 干 扰 采 取 切 实 可 行 的 措 施 。 DCP-2000 KC EMC Statement 사용자안내문... -
Page 8: Introduction
1 Introduction 1.1 Purpose This manual is intended to guide the user through the use of the DCP-2000 and DCP-2K4. It also contains information on how to properly use the CineLister application. 1.2 Software Version This manual is for use with software version 2.4.x and higher. -
Page 9: Overview
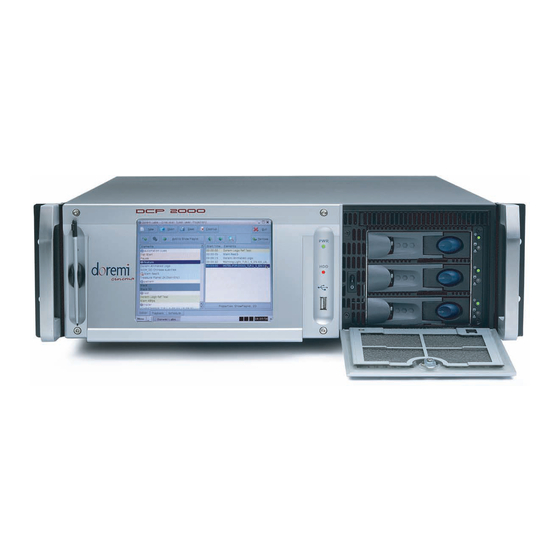
2 Overview The DCP-2000 and DCP-2K4 are high quality DCI JPEG-2000 servers capable of playing movie or trailer packages in MXF format at up to 250Mbits/sec. The DCP-2000 and DCP-2K4 also support MPEG2 Interop movies, pre-show, and alternative content playback. -
Page 10: Dcp-2K4 Front Panel
The left side of the DCP-2000 front panel contains an LCD screen. • On the DCP-2000 front panel, the LCD can be turned on or off by pressing on the LCD • power button using the stylus attached to the front panel. This button is located behind the stylus (Figure 1). -
Page 11: Cinelister
Every time the user logs out of the CineLister application and then logs back in again, a “Login Authentication” window will appear (Figure 5). The default login name is “doremi” and the Password is “doremi.” However, the administrator may have changed and or added other login usernames and passwords. -
Page 12: Passwords
Figure 7 above, depending on the level of security that your administrator has provided for you. Figure 8: Password Confirmation Window - Manager Username ______________________________________________________________________________________ D2K.OM.001822.DRM Page 12 of 177 Version 1.5 Doremi Labs... -
Page 13: Network Configuration
Select Yes to set eth0 and then press Enter. • Select No for Removable Device and then press Enter. • Select No for automatically configure device with DHCP and then press Enter. • ______________________________________________________________________________________ D2K.OM.001822.DRM Page 13 of 177 Version 1.5 Doremi Labs... -
Page 14: Network Restart
Enter the IP Address of the System's Domain Name Server (or leave empty) and then • press Enter to exit the wizard. To verify the setup, go to Menu → Doremi Apps. → Diagnostic Tool and verify the IP • Address under the Diagnostic Tool System Tab. -
Page 15: Time Zone Configuration
“Menu → System → Terminal” menu. Type: date and then press Enter. • The current date, time, and time zone will be displayed (Figure 11). • Figure 11: Terminal Window with Date Displayed ______________________________________________________________________________________ D2K.OM.001822.DRM Page 15 of 177 Version 1.5 Doremi Labs... -
Page 16: Changing The Time Zone
• • Type the "root" password to log in as "root" – consult the system administrator to receive the root password or Doremi to know the default root password. Type: rwdo tzconfig and then press Enter. • Type: Yes (to confirm the change). -
Page 17: 6Control Panel
3. Content Feed Manager: Allows the user to add an FTP ingest server. 4. Content Manager: Allows the user to browse, manage and export all the content available on the player including: ShowPlaylists, CPLs, KDMs and Doremi Licenses. 5. Device Controller: Allows the user to create/edit/register devices in a simplified manner. -
Page 18: Account Manager Gui
Control Panel window. Input the appropriate password to continue and press the Ok button. • Figure 14: Password Confirmation Window The following window will appear: • Figure 15: Account Manager GUI ______________________________________________________________________________________ D2K.OM.001822.DRM Page 18 of 177 Version 1.5 Doremi Labs... -
Page 19: Add A New User Account
“Set” button when the appropriate password is defined. Confirm the password in the “Confirm” field. The user privileges need to be defined using the list-box. Click the Set button to save the new password. • ______________________________________________________________________________________ D2K.OM.001822.DRM Page 19 of 177 Version 1.5 Doremi Labs... - Page 20 Select the proper privileges. They are listed below from the lowest level to the highest level • of privileges: 1) Projectionist: Projectionist is a standard user allowed to use the Doremi applications present on the unit without changing the configuration. 2) Show Manager: In addition to Projectionist's privileges, a Show Manager user is allowed to ingest and delete content.
-
Page 21: Edit An Existing User Account
The following dialog box will appear allowing the user to edit the user properties but not the • username or the log in type. Figure 20: Account Manager GUI – User Properties Editing ______________________________________________________________________________________ D2K.OM.001822.DRM Page 21 of 177 Version 1.5 Doremi Labs... -
Page 22: Delete An Existing User Account
Configuration (Figure 22). Figure 22: Control Panel with Audio Configuration Icon Selected An “admin” password and confirmation will be needed to perform the operation. • The Audio Configuration window will appear. • ______________________________________________________________________________________ D2K.OM.001822.DRM Page 22 of 177 Version 1.5 Doremi Labs... - Page 23 • 9 channels: This is a pre-set configuration. • ISDCF: This is a pre-set configuration. • Custom: This setting allows the user to create his/her own custom audio • configuration. ______________________________________________________________________________________ D2K.OM.001822.DRM Page 23 of 177 Version 1.5 Doremi Labs...
-
Page 24: Channel Mapping Tab
HI: Output ch.15 will be playing the CPL's Hearing Impaired (HI) audio channel. • ch.16 is VI: Output ch.16 will be playing the CPL's Narration (VI) audio channel. • ______________________________________________________________________________________ D2K.OM.001822.DRM Page 24 of 177 Version 1.5 Doremi Labs... - Page 25 Figure 25: Audio Mapping Set to 4 Channels ______________________________________________________________________________________ D2K.OM.001822.DRM Page 25 of 177 Version 1.5 Doremi Labs...
-
Page 26: Channels
HI: Output ch.15 will be playing the CPL's Hearing Impaired (HI) audio channel. • ch.16 is VI: Output ch.16 will be playing the CPL's Narration (VI) audio channel. • Figure 26: Audio Mapping Set to 6 Channels ______________________________________________________________________________________ D2K.OM.001822.DRM Page 26 of 177 Version 1.5 Doremi Labs... -
Page 27: Channels
HI: Output ch.15 will be playing the CPL's Hearing Impaired (HI) audio channel. • ch.16 is VI: Output ch.16 will be playing the CPL's Narration (VI) audio channel. • Figure 27: Audio Mapping Set to 7 Channels ______________________________________________________________________________________ D2K.OM.001822.DRM Page 27 of 177 Version 1.5 Doremi Labs... -
Page 28: Channels
HI: Output ch.15 will be playing the CPL's Hearing Impaired (HI) audio channel. • ch.16 is VI: Output ch.16 will be playing the CPL's Narration (VI) audio channel. • Figure 28: Audio Mapping Set to 8 Channels ______________________________________________________________________________________ D2K.OM.001822.DRM Page 28 of 177 Version 1.5 Doremi Labs... -
Page 29: Channels
HI: Output ch.15 will be playing the CPL's Hearing Impaired (HI) audio channel. • ch.16 is VI: Output ch.16 will be playing the CPL's Narration (VI) audio channel. • Figure 29: Audio Mapping Set to 9 Channels ______________________________________________________________________________________ D2K.OM.001822.DRM Page 29 of 177 Version 1.5 Doremi Labs... -
Page 30: Isdcf
Input: ch.15 is pass-through, meaning the output channel “X” will be playing the • CPL's audio channel “X.” ch.16 is Input: ch.16 is pass-through, meaning the output channel “X” will be playing the • CPL's audio channel “X.” ______________________________________________________________________________________ D2K.OM.001822.DRM Page 30 of 177 Version 1.5 Doremi Labs... - Page 31 Figure 30: Audio Mapping Set to ISDCF ______________________________________________________________________________________ D2K.OM.001822.DRM Page 31 of 177 Version 1.5 Doremi Labs...
-
Page 32: Custom Mapping Configuration
Click on the Browse button ("...") for each output channel (ch.01-ch.16) to select the CPL's • audio channel (using its label) that is to be routed. Figure 32: Custom Mapping Parameters ______________________________________________________________________________________ D2K.OM.001822.DRM Page 32 of 177 Version 1.5 Doremi Labs... -
Page 33: Advanced Tab
Positive Value: The audio will be heard behind the video action. • Negative Value: Indicates that the audio is ahead of the video action. • The recommended value that almost matches all setups is 80 milliseconds. • ______________________________________________________________________________________ D2K.OM.001822.DRM Page 33 of 177 Version 1.5 Doremi Labs... -
Page 34: Smpte Packages
MXF file was created according to the ISDCF audio mapping recommendations, which currently consists of: Figure 34: ISDCF – Interop Recommendations ______________________________________________________________________________________ D2K.OM.001822.DRM Page 34 of 177 Version 1.5 Doremi Labs... -
Page 35: Content Feed Manager
• allowed to use this application. Figure 36: Password Confirmation Window When the Content Feed Manager is started for the first time, it will be appear as illustrated • below: ______________________________________________________________________________________ D2K.OM.001822.DRM Page 35 of 177 Version 1.5 Doremi Labs... -
Page 36: Scan For Server
Scroll and select the server, then click the Add button (Figure 38). Once the server has • been selected the Content Feed Manager GUI will automatically be updated with the default credentials. ______________________________________________________________________________________ D2K.OM.001822.DRM Page 36 of 177 Version 1.5 Doremi Labs... - Page 37 "Scan for Server" method. Click on the Save button to save this configuration for the Content Feed Manager. The unit • is now confirmed as an ingest source for our destination unit. ______________________________________________________________________________________ D2K.OM.001822.DRM Page 37 of 177 Version 1.5 Doremi Labs...
-
Page 38: Advanced Options Button
Installation Package software, security manager, firmware packages for upgrades. • Doremi License (DLM) – Doremi License Messages, e.g., Dolby3D, RealD, 4K • Enabled, etc. Show Playlist – click this box if you want to be able to export and then import a SPL •... -
Page 39: Adding A Server Manually
Figure 41: Content Feed Manager GUI Click the Add button to add a new server. The following window will appear: • ______________________________________________________________________________________ D2K.OM.001822.DRM Page 39 of 177 Version 1.5 Doremi Labs... - Page 40 Enter the Identifier name in the Identifier field. It is recommended that a unique identifier be • used (e.g., screen 1, screen 2, etc). Enter the IP address for the server. • Figure 43: Add a New Server ______________________________________________________________________________________ D2K.OM.001822.DRM Page 40 of 177 Version 1.5 Doremi Labs...
-
Page 41: Advanced Options
Installation Package software, security manager, firmware packages for upgrades. • Doremi License (DLM) – Doremi License Messages, e.g., Dolby3D, RealD, 4K • Enabled, etc. Show Playlist – click this box if you want to be able to export and then import a SPL •... -
Page 42: Deleting A Server
In order to ingest material (restrictions are based on the Advanced Options settings) on our • destination unit, you will need to open the Ingest Manager application (Menu ->Doremi Apps.-> Ingest Manager). Select the unit that was just added (as a source/feed) in the Content Feed Manager application. - Page 43 Figure 47: Ingest Manager with Material Ready to Ingest ______________________________________________________________________________________ D2K.OM.001822.DRM Page 43 of 177 Version 1.5 Doremi Labs...
-
Page 44: Content Manager
ShowPlaylist, CPL, KDM and Doremi License. The user has an application to access content information that was not available previously. The Content Manager application is available in the Control Panel. -
Page 45: Home Page
Expired License is a license with validity date that has expired. • Not yet valid are licenses available on the unit, not valid in present, but valid only for future • use. ______________________________________________________________________________________ D2K.OM.001822.DRM Page 45 of 177 Version 1.5 Doremi Labs... - Page 46 These pages will show the user all details for the Composition Playlists, Decryption Keys, • Show Playlists, Licenses and other related fields that are on the unit (Figure 50). Drop-Down Menu Button Figure 50: Content Manager Home Page Tab ______________________________________________________________________________________ D2K.OM.001822.DRM Page 46 of 177 Version 1.5 Doremi Labs...
-
Page 47: Composition Playlists Page
Select a CPL and click on the "Actions" button to get more options (Figure 51). • The "Actions" button will allow you to (Figure 52): • Delete a CPL • Perform an Integrity Check • Perform a Sanity check • Export a CPL • ______________________________________________________________________________________ D2K.OM.001822.DRM Page 47 of 177 Version 1.5 Doremi Labs... - Page 48 A "Delete Composition Playlist" confirmation window will appear: Click Delete to confirm the • deletion or press Cancel to abort the operation (Figure 53). Check the "Delete all KDM..." check-box if you want to delete the KDMs for the selected • CPL. ______________________________________________________________________________________ D2K.OM.001822.DRM Page 48 of 177 Version 1.5 Doremi Labs...
- Page 49 • the asset map of the CPL. The word "Failed" means that the file is corrupted. • Progress check percentage operation is in progress. • Figure 54: Integrity Check Window ______________________________________________________________________________________ D2K.OM.001822.DRM Page 49 of 177 Version 1.5 Doremi Labs...
- Page 50 Export: This function will export the CPL to a desired location (e.g., a USB flash drive). • To export a CPL, select the desired CPL, and click the "Actions" button. Select the • "Export" menu item. The "Export CPL" window will appear (Figure 56): • ______________________________________________________________________________________ D2K.OM.001822.DRM Page 50 of 177 Version 1.5 Doremi Labs...
- Page 51 NTFS, then an error message will appear to indicate that the file was not exported. Currently, the supported file system formats for exporting include: FAT (limit 4GB per file), FAT 32 (limit 4GB per file), ext2, ext3, and HFS. ______________________________________________________________________________________ D2K.OM.001822.DRM Page 51 of 177 Version 1.5 Doremi Labs...
- Page 52 Once the CPL has been copied to the USB, the following window will appear: • Figure 59: "OK" Window Click the Ok button to complete the export (Figure 59). • ______________________________________________________________________________________ D2K.OM.001822.DRM Page 52 of 177 Version 1.5 Doremi Labs...
-
Page 53: Info Button
Kind (e.g., trailer, feature, etc.) • Creator • Issuer • Sound: Channel count, Quantization bits, Encoding. • Picture: Encoding and Dimension. • Figure 60: CPL Information Window - Properties Tab ______________________________________________________________________________________ D2K.OM.001822.DRM Page 53 of 177 Version 1.5 Doremi Labs... -
Page 54: Assets Tab
The Assets tab displays information on all the Reels that compose the CPL and the Assets • in each Reel (Reel number, subtitle and sound). See Figure 61 below. Figure 61: CPL Information Window - Assets Tab ______________________________________________________________________________________ D2K.OM.001822.DRM Page 54 of 177 Version 1.5 Doremi Labs... -
Page 55: Spl(S) Tab
SPL information window Properties tab that will show all the names of the CPLs inside that SPL. The second tab of the SPL information window displays the related schedules • (Figure 64). ______________________________________________________________________________________ D2K.OM.001822.DRM Page 55 of 177 Version 1.5 Doremi Labs... - Page 56 Figure 63: SPL Information Window - Properties Tab Figure 64: SPL Information Window - Related Schedules Tab ______________________________________________________________________________________ D2K.OM.001822.DRM Page 56 of 177 Version 1.5 Doremi Labs...
- Page 57 In this window you can select any CPL that is part of the SPL by clicking the Open button. • The user will be transferred to the selected CPL Information window (Figure 65). Figure 65: CPL Information Window - Properties Tab ______________________________________________________________________________________ D2K.OM.001822.DRM Page 57 of 177 Version 1.5 Doremi Labs...
-
Page 58: Kdm(S) Tab
• Message Type: MessageType field of the KDM • Annotation Text: AnnotationText field of the KDM • Ingestion Date: Date on which the KDM was ingested into the server • ______________________________________________________________________________________ D2K.OM.001822.DRM Page 58 of 177 Version 1.5 Doremi Labs... - Page 59 The Content tab contains the following information about the related CPL (Figure 68): • CPL Title: • CPL ID (CPL UUID): • Audio Forensic Info (enabled / disabled): • Video Forensic Info (enabled / disabled): • Figure 68: KDM Information Pop-Up Window ______________________________________________________________________________________ D2K.OM.001822.DRM Page 59 of 177 Version 1.5 Doremi Labs...
- Page 60 Figure 69: KDM Information Pop-Up Window The TDL tab contains the list about the trusted devices (projectors) and their certificate • thumbprints (Figure 70). Figure 70: KDM Information Pop-Up Window ______________________________________________________________________________________ D2K.OM.001822.DRM Page 60 of 177 Version 1.5 Doremi Labs...
-
Page 61: Search Tool
For example, select "Trailer" to sort the CPLs. The CPLs will be alphabetically ordered • within the Trailer category (Figure 72). Note: The black-highlighted area (Figure 71) indicates whether the content is 3D or has subtitles (ST). ______________________________________________________________________________________ D2K.OM.001822.DRM Page 61 of 177 Version 1.5 Doremi Labs... -
Page 62: Decryption Keys Page
The user can perform a Sanity Check of the KDM as well as delete the selected KDM. • Click on the Home Page tab and scroll down and select Decryption Keys. • The following window will appear: • ______________________________________________________________________________________ D2K.OM.001822.DRM Page 62 of 177 Version 1.5 Doremi Labs... - Page 63 Figure 73: Decryption Keys Tab ______________________________________________________________________________________ D2K.OM.001822.DRM Page 63 of 177 Version 1.5 Doremi Labs...
-
Page 64: Performing A Kdm Sanity Check
Once the Sanity Check is completed, click the Close button (Figure 74). • To view the properties of any KDM, select it from the list and the information will be • displayed in the bottom half of the window (Figure 75). ______________________________________________________________________________________ D2K.OM.001822.DRM Page 64 of 177 Version 1.5 Doremi Labs... - Page 65 Information Properties Field Figure 75: Decryption Keys Page: KDM Selected - Properties Shown This same information can be obtained by selecting the KDM line and clicking the • Information button. ______________________________________________________________________________________ D2K.OM.001822.DRM Page 65 of 177 Version 1.5 Doremi Labs...
-
Page 66: Show Playlists Page
Select the USB device to export the SPL to. • Click on the Export button. • When the Export is finished, click on the Ok button and remove the USB device. • ______________________________________________________________________________________ D2K.OM.001822.DRM Page 66 of 177 Version 1.5 Doremi Labs... -
Page 67: Information Button
The Licenses page contains the list of all the licenses available on the unit including the • expiration date and short description of the usage of the license. On this page, the user is allowed to delete licenses. ______________________________________________________________________________________ D2K.OM.001822.DRM Page 67 of 177 Version 1.5 Doremi Labs... -
Page 68: Delete A License
A Manager password will be needed to perform the deletion (Figure 79). • Figure 79: Password Confirmation Window Click on Yes to confirm the deletion (Figure 80). • Figure 80: Confirmation Window ______________________________________________________________________________________ D2K.OM.001822.DRM Page 68 of 177 Version 1.5 Doremi Labs... -
Page 69: Device Controller
The Device Manager is an application used to configure the connection between a unit and cinema projector(s). It also provides for the use of Ethernet commands for the control of theater automation devices. To run the Device Manager, go to Menu → Doremi Apps. → Device Manager. • The following window will appear: •... - Page 70 "Primary." Also, this could apply if the user were to use dual projector for 3D (left projector would be “Primary” and right projector would be “Secondary”). ______________________________________________________________________________________ D2K.OM.001822.DRM Page 70 of 177 Version 1.5 Doremi Labs...
-
Page 71: Removing A Device Or Projector
6.6.2 Removing a Device or Projector To remove a device or projector, click on it in the left part of the Device Manager GUI. • • Click the Delete button (Figure 83). ______________________________________________________________________________________ D2K.OM.001822.DRM Page 71 of 177 Version 1.5 Doremi Labs... -
Page 72: Automation Libraries Management
Click the Save button to record the settings. A window asking for the password will appear. • Enter the password to save the settings and proceed. Click Quit when finished with the configuration. If not, continue and add more devices. • ______________________________________________________________________________________ D2K.OM.001822.DRM Page 72 of 177 Version 1.5 Doremi Labs... -
Page 73: Removing An Ecna Device
Click the Save button to record the settings. A window will appear asking for a password. • Enter the password to proceed. Click Quit when finished with the configuration. If not, continue and add more devices. • ______________________________________________________________________________________ D2K.OM.001822.DRM Page 73 of 177 Version 1.5 Doremi Labs... -
Page 74: Removing A Jnior Device
Click the Save button to record the settings (Figure 86). A window will appear asking for a • password. Enter the password to proceed. If finished with the configuration, click the Quit button. • ______________________________________________________________________________________ D2K.OM.001822.DRM Page 74 of 177 Version 1.5 Doremi Labs... -
Page 75: Removing A Raw Device
This file is conveniently managed by the Device Manager GUI application. The generic serial device driver can manage different serial ports simultaneously. • Go to Menu → Doremi Apps. → Device Manager and follow the steps below. The following window will appear: ______________________________________________________________________________________ D2K.OM.001822.DRM Page 75 of 177 Version 1.5... - Page 76 Click the Add button (Figure 89). The following window will appear: • • It is necessary to provide some configuration parameters in the window: • Identifier is the friendly name of the new configured device. ______________________________________________________________________________________ D2K.OM.001822.DRM Page 76 of 177 Version 1.5 Doremi Labs...
- Page 77 "magic" character. Multiple character sequence is not supported (e.g., \r\n). Note that the "magic" character will NOT be part of the message sent to the playback engine. • Save the new configuration. ______________________________________________________________________________________ D2K.OM.001822.DRM Page 77 of 177 Version 1.5 Doremi Labs...
-
Page 78: Ise1 Device
Doremi Labs Technical Support (Section 1.3). 6.6.11 3D Configuration When using a DCP-2000 or DCP-2K4 configuration for 3D presentation, the projector needs to be set to the proper color space. Contact the projector vendor to configure the projector properly. 6.6.11.1 Dolby 3D Support To enable the Dolby 3D support, please contact Doremi Labs Technical Support to receive the appropriate license (Section 1.3). - Page 79 Figure 93: List of Available Devices Select the “RealD 3D EQ” device and click the Add button (Figure 93). • The device will be visible on the main Device Manager GUI as illustrated below: • ______________________________________________________________________________________ D2K.OM.001822.DRM Page 79 of 177 Version 1.5 Doremi Labs...
-
Page 80: Sensio 3D Support
To complete the configuration, click the Save button (Figure 94). Enter the appropriate • password and click Ok. 6.6.11.3 Sensio 3D Support To enable the Sensio 3D support, please contact Doremi Labs Technical Support to receive the appropriate license (Section 1.3). 6.6.12 Closed Caption Support To enable the Rear Window devices Closed Caption support, install the appropriate license. - Page 81 Figure 96: Subtitle Engine Warning Window Select the Subtitle Engine device and click the Add button. • The device will be visible on the main Device Manager GUI as illustrated below: • ______________________________________________________________________________________ D2K.OM.001822.DRM Page 81 of 177 Version 1.5 Doremi Labs...
-
Page 82: Diagnostic Tool
Enter the appropriate password and press Ok. 6.7 Diagnostic Tool To use the Diagnostic Tool application, please see document number "DTL.OM.000169.DRM," which is titled "Diagnostic Tool User Manual." Contact Doremi Labs Technical Support to receive this document (Section 1.3). ______________________________________________________________________________________ D2K.OM.001822.DRM... -
Page 83: Language Setup
Use the list-box to choose desired language, for example, “Espanol” (Figure 99). • Figure 99: Language Setup Window - Espanol The available languages include: • • German (supported) • English (supported) • Spanish (supported) • French (supported) • Norwegian (supported) ______________________________________________________________________________________ D2K.OM.001822.DRM Page 83 of 177 Version 1.5 Doremi Labs... - Page 84 Click the OK button when finished selecting the language. • The unit language will be updated as illustrated in the CineLister GUI shown below: • Figure 100: CineLister GUI – Spanish Language Used ______________________________________________________________________________________ D2K.OM.001822.DRM Page 84 of 177 Version 1.5 Doremi Labs...
- Page 85 Boxes Figure 101: Language Setup Drop-Down List Note: These boxes (Figure 101) indicate that the font file package is needed. Contact your local Doremi Technical Support to obtain the appropriate font file package. ______________________________________________________________________________________ D2K.OM.001822.DRM Page 85 of 177 Version 1.5...
-
Page 86: License Manager
To add a license have the license file on a USB flash drive and plug it into a USB port on • the unit. The Ingest Manager GUI will appear as illustrated below: • ______________________________________________________________________________________ D2K.OM.001822.DRM Page 86 of 177 Version 1.5 Doremi Labs... - Page 87 Go back to the License Manager GUI from Menu → Control Panel. The ingested license(s) • will be visible as illustrated below: Figure 104: License Manager GUI – Three Licenses Added ______________________________________________________________________________________ D2K.OM.001822.DRM Page 87 of 177 Version 1.5 Doremi Labs...
- Page 88 To view the details of an available license, select it and click the View button. • Figure 105: License View Window ______________________________________________________________________________________ D2K.OM.001822.DRM Page 88 of 177 Version 1.5 Doremi Labs...
-
Page 89: Live Manager
The user will be asked for a password. Enter the appropriate password to continue (Figure • 106). Figure 106: Password Confirmation Window The following window will appear: • Figure 107: Live Manager GUI ______________________________________________________________________________________ D2K.OM.001822.DRM Page 89 of 177 Version 1.5 Doremi Labs... -
Page 90: Creating A Live Event
• Figure 109: Live Manager – Live CPL Creation Wizard, Step 2 Click the Next button. • Click the Finish button to complete the "Live CPL" creation (Figure 110). • ______________________________________________________________________________________ D2K.OM.001822.DRM Page 90 of 177 Version 1.5 Doremi Labs... - Page 91 Note: The MPEG Streamer format is dynamically handled. This means that the 4:2:2 vs 4:2:0 parameter is automatically detected from the MPEG stream itself. There is no need to provide this information to the playback engine. ______________________________________________________________________________________ D2K.OM.001822.DRM Page 91 of 177 Version 1.5 Doremi Labs...
-
Page 92: Deleting A Live Cpl
Repeat the steps above as many times as necessary to generate another "Live CPL." • To use the "Live CPL" allowing a live event, open CineLister (go to Menu → Doremi Apps. • → CineLister). The newly created "Live CPL" will be visible under “live” in the left part of the Editor tab •... -
Page 93: Log Manager
To open the Log Manager application, go to Menu -> Control Panel and double-click on the Log Manager icon (Figure 113). Figure 113: Control Panel • The following window will appear: ______________________________________________________________________________________ D2K.OM.001822.DRM Page 93 of 177 Version 1.5 Doremi Labs... -
Page 94: Log Manager Configuration
Figure 115: Log Manager Main Window Check the Enable box to make sure that the server becomes active (logs will be sent to the • server). Select the Frequency of sending logs from options: • ______________________________________________________________________________________ D2K.OM.001822.DRM Page 94 of 177 Version 1.5 Doremi Labs... -
Page 95: Log Operator Manager
Un-check the box Security (SMPTE) logs to exclude the security logs into the log file • that will be uploaded. Un-check the box System (Doremi) logs to exclude the System logs into the log file • that will be uploaded. - Page 96 Figure 116: Control Panel • You will need to authenticate yourself as admin by inputting the correct password to be allowed to use this application. • The following window will appear: ______________________________________________________________________________________ D2K.OM.001822.DRM Page 96 of 177 Version 1.5 Doremi Labs...
- Page 97 Select a subject from the drop-down "Subject" window. The maintenance technician can • create a new subject line by typing in the Subject field (i.e., by typing over a pre-defined subject). Figure 118: Log Operator Maintenance Main Window ______________________________________________________________________________________ D2K.OM.001822.DRM Page 97 of 177 Version 1.5 Doremi Labs...
- Page 98 This will be used for future references about maintenance. The log will be recorded based on the date and time when the log was entered into the Log Operator Maintenance application. ______________________________________________________________________________________ D2K.OM.001822.DRM Page 98 of 177 Version 1.5 Doremi Labs...
- Page 99 (clicking No will take you out of the Log Operator Maintenance application). Figure 120: Information Window In order to view the logs that were added, go to Menu -> Doremi Apps.-> SM Log Viewer. • Here you can search for logs based on class, date, etc.
-
Page 100: Exporting System Logs
Figure 121: SM Log Viewer Log Retrieved 6.12.1 Exporting System Logs • To export the log, select the concerned log and click on the Export button (Figure 122). Figure 122: SM Log Viewer Log - Export ______________________________________________________________________________________ D2K.OM.001822.DRM Page 100 of 177 Version 1.5 Doremi Labs... - Page 101 The following window will appear: • Figure 123: SM Log Viewer Log – Export Select the database from which to export the log, either System (Doremi) or Security • (SMPTE). Select whether or not to export everything, selection, or “asrunlog.” This applies to System •...
- Page 102 Click the Continue button (Figure 123). The following window will appear: • Figure 125: SM Log Viewer Log – Export Select the location for where the log will be saved. Then click Continue to proceed (Figure • 125). ______________________________________________________________________________________ D2K.OM.001822.DRM Page 102 of 177 Version 1.5 Doremi Labs...
- Page 103 Once the log exportation is complete, the GUI will indicate the process was successful • (Figure 127). Click the Close button to exit the pop-up window. Figure 127: SM Log Viewer Log – Export ______________________________________________________________________________________ D2K.OM.001822.DRM Page 103 of 177 Version 1.5 Doremi Labs...
-
Page 104: Networking Configuration
(there is one dot in each screen corner). See Figure 130 below. Make sure to hold the stylus over the blinking dot for more than a second. • ______________________________________________________________________________________ D2K.OM.001822.DRM Page 104 of 177 Version 1.5 Doremi Labs... - Page 105 Anytime you want to abort without completing the calibration process press “Esc.” • Once the calibration process is complete, the Touchscreen Calibration window will • automatically close. This will indicate that the calibration process was successfully completed. ______________________________________________________________________________________ D2K.OM.001822.DRM Page 105 of 177 Version 1.5 Doremi Labs...
-
Page 106: Ingest Manager Gui
7 Ingest Manager GUI 7.1 Ingesting Content The Ingest Manager GUI will only show items that can be supported by the DCP-2000 (text, documents, pictures, power-point presentations, etc. will not appear). Note: Compositions (CPL's), Key Delivery Messages (KDM's), Doremi License File's (DLM's), and Show Playlists (SPL's) can all be ingested through the Ingest Manager GUI. - Page 107 Group of audio- visual content (CPL) Show PlayList (SPL) Figure 136: Ingest Manager GUI ______________________________________________________________________________________ D2K.OM.001822.DRM Page 107 of 177 Version 1.5 Doremi Labs...
-
Page 108: Ingesting Content
7.3.1 Ingesting content From a If the content to ingest is on a USB drive, plug the drive into the DCP-2000's USB Port and wait for the Ingest Manager window to appear ( Figure 137). Note: This assumes that the DCP-2000 has been installed according to the “Hard Disk Drive Installation”... -
Page 109: Ingesting Content From A Remote Doremi Server/Lms
GUI. Select the item to ingest and click the Ingest button. • Figure 138: Menu Example Note: To access the content from a Doremi Remote Server or LMS, use the “Local Storage” drop- down menu ( Figure 139). ______________________________________________________________________________________ D2K.OM.001822.DRM Page 109 of 177 Version 1.5... -
Page 110: Ingest Progress
Figure 139: Ingest Manager GUI 7.5 Ingest Progress The DCP-2000 allows you to ingest content while the server is ingesting previously selected content. Click on the Monitor tab to see the progress of all the ingested items ( Figure 141). -
Page 111: Pngest
7.6 Pngest The Pngest feature is available when you are ingesting content over a Doremi remote server or LMS. Note: The Pgnest feature is available only when ingesting content over a Remote Doremi Server or an LMS, not from a USB or SATA. - Page 112 Figure 141: Ingest Manager - Monitor Tab Note: The “Total Progress” bar indicates the progress of the CPL Ingest, while the “Copying Asset” bar indicates the progress of the individual components of the CPL. ______________________________________________________________________________________ D2K.OM.001822.DRM Page 112 of 177 Version 1.5 Doremi Labs...
-
Page 113: Show Management Using Cinelister
CineLister is an application that manages the DCP-2000 and will automatically appear when the DCP-2000 is connected. CineLister is based on a Graphical User Interface (GUI) that allows the creation, management, editing, and playback of SPL's and other ingested content. CineLister also has the capability to schedule playbacks. - Page 114 The left pane displays all of the content (e.g., features, trailers, advertisements) and • Automation and Trigger Cues. The right pane is used to display the content of a given Show Playlist. • ______________________________________________________________________________________ D2K.OM.001822.DRM Page 114 of 177 Version 1.5 Doremi Labs...
-
Page 115: Show Playlists
Lock Icon with Red minus sign Lock Icon with Green plus sign Timer Icon with Orange caution Figure 144: Audio-Visual Icons Note: See Section 10 on accessing KDM information associated with a CPL. ______________________________________________________________________________________ D2K.OM.001822.DRM Page 115 of 177 Version 1.5 Doremi Labs... - Page 116 Delete Button Lock Icon with Red minus sign Lock Icon with Green plus sign Timer Icon with Orange caution Figure 145: CineLister Editor Tab GUI - Audio/Video Icons ______________________________________________________________________________________ D2K.OM.001822.DRM Page 116 of 177 Version 1.5 Doremi Labs...
-
Page 117: Show Playlist Creation
To save the Show Playlist on a USB, see Section “Export SPL to USB” below. • Add to Show Playlist” button Remove Button Show Elements Playlist Window window Figure 146: CineLister GUI – Editor Tab ______________________________________________________________________________________ D2K.OM.001822.DRM Page 117 of 177 Version 1.5 Doremi Labs... -
Page 118: Element Re-Ordering
It is very important to click the Save button when you are done completing any task you wish to save, especially an SPL. If you don't click the Save button, your changes will not be reflected. ______________________________________________________________________________________ D2K.OM.001822.DRM Page 118 of 177 Version 1.5 Doremi Labs... -
Page 119: Export Show Playlist
Look in the appropriate location to locate the USB drive, and click Save (Figure 150). • Export Button Figure 149: Saving Show Playlist Window File path Save button File Name Figure 150: Browse Window ______________________________________________________________________________________ D2K.OM.001822.DRM Page 119 of 177 Version 1.5 Doremi Labs... -
Page 120: Importing A Show Playlist
Click the Import button. The “Browse Filepath” window will appear ( Figure 152). • Choose the file path to import the SPL from and click Open. • Import Button Figure 151: “SPL's Available on Server” Window Figure 152: Browse Filepath Window ______________________________________________________________________________________ D2K.OM.001822.DRM Page 120 of 177 Version 1.5 Doremi Labs... -
Page 121: Element Properties
GUI. Either double-click on the selected item or click on the Properties button ( Figure 153). The “Composition Playlist Properties” window will appear ( Figure 154). • Properties Button Delete Content Button Figure 153: CineLister GUI – Editor Tab ______________________________________________________________________________________ D2K.OM.001822.DRM Page 121 of 177 Version 1.5 Doremi Labs... -
Page 122: Unencrypted Cpl's
10.1 Unencrypted CPL's If the element you have selected is an unencrypted CPL, the following properties window will appear: CPL information Picture information Sound information Figure 154: Composition Playlist Properties Window ______________________________________________________________________________________ D2K.OM.001822.DRM Page 122 of 177 Version 1.5 Doremi Labs... -
Page 123: Encrypted Cpl With Kdm Valid (More Than 48 Hours)
KDM information. If the text in the KDM information screen is green, then the KDM is still available and is valid for more than 48 hours. CPL Information Picture Information Sound Information KDM Status Figure 155: Composition Playlist Properties Window with Encrypted Content ______________________________________________________________________________________ D2K.OM.001822.DRM Page 123 of 177 Version 1.5 Doremi Labs... -
Page 124: Encrypted Cpl With Kdm Valid (Less Than 48 Hours)
KDM information screen will be orange and the remaining time will be displayed. Note: All KDM's will automatically be removed from the server upon expiration. KDM Status Figure 156: KDM Valid for Less Than 48 Hours ______________________________________________________________________________________ D2K.OM.001822.DRM Page 124 of 177 Version 1.5 Doremi Labs... -
Page 125: Deleting Acpl From The Server
For security purposes, a password will be needed to complete this operation. • Check box if you wish to delete all KDM related to the listed CPL at the same time as the CPL itself Figure 157: Delete Composition Playlist Window ______________________________________________________________________________________ D2K.OM.001822.DRM Page 125 of 177 Version 1.5 Doremi Labs... -
Page 126: Play 2D Content In 3D Mode
• to ( Figure 160). Note: In 3D or 48fps mode, the DCP-2000 video output is in the YCxCz color space. The projector itself needs to be properly configured to the YCxCz color space in 3D or 48fps mode for proper display. Contact your projector vendor to configure the projector properly or see Section “Device Manager Setup.”... - Page 127 Mode” set to Mode” set to Figure 159: Show Playlist Properties 2D/3D Mode Window Quit Button “Show Playlist Properties” button reflects 3D mode Figure 160: CineLister GUI – Editor Tab ______________________________________________________________________________________ D2K.OM.001822.DRM Page 127 of 177 Version 1.5 Doremi Labs...
-
Page 128: Accessing A Show Playlist
Click the Open button (Figure 162). The Show Playlist will be displayed on the right side of • the GUI. Cleanup Properties Button Button Open Button Figure 161: CineLister GUI – Editor Tab ______________________________________________________________________________________ D2K.OM.001822.DRM Page 128 of 177 Version 1.5 Doremi Labs... -
Page 129: Editing An Existing Show Playlist
To edit the settings of an Automation or Trigger cue, double-click on it. • • To view the properties of a particular CPL, double-click on the CPL or select it and click on the Properties button (Figure 161). ______________________________________________________________________________________ D2K.OM.001822.DRM Page 129 of 177 Version 1.5 Doremi Labs... -
Page 130: Deleting A Show Playlist
A password will be needed to complete this operation. • The Delete window will appear ( Figure 163). • Select the SPL to delete and click Delete. • Figure 163: Delete SPL Window ______________________________________________________________________________________ D2K.OM.001822.DRM Page 130 of 177 Version 1.5 Doremi Labs... -
Page 131: Automation Cues
13 Automation Cues An Automation Cue is an action/demand that is sent from the DCP-2000 to any external device connected to the DCP-2000 for the purpose of being inserted into a Show Playlist. Upon installation of the DCP-2000, Automation Cues can be pre-defined by the operator, transferred from an “xml”... - Page 132 “New Macro” Button Delete Macro Button Macro Window Figure 164: Macro Editor Window Macro Automation Cue Name Figure 165: Macro Automation Cue Name ______________________________________________________________________________________ D2K.OM.001822.DRM Page 132 of 177 Version 1.5 Doremi Labs...
-
Page 133: Editing A Macro Automation Cue
Button re-arrange the order of the commands “Delete Macro” Button Remove Button Edit Button “Insert a new Action” Button Figure 166: Macro Editor Window Figure 167: Unsaved Changes Window ______________________________________________________________________________________ D2K.OM.001822.DRM Page 133 of 177 Version 1.5 Doremi Labs... -
Page 134: Inserting Actions Into Macro Cues
13.4 Inserting Actions into Macro Cues Go to Menu and click on Doremi Apps., then select Macro Editor. • Click the “Insert a new Action” button from the Macro Editor window (Figure 166). • The “Add a new Action” window will appear ( Figure 168). The “Add a new Action" window •... - Page 135 ______________________________________________________________________________________ D2K.OM.001822.DRM Page 135 of 177 Version 1.5 Doremi Labs...
-
Page 136: Add A Gpo Action To The Macro Automation Cue
To add a GPO action, click the “General Purpose Output” button which is located in the "Input/Output" section in the “Add a new Action” window (Figure 169). Figure 169: Add a New Action Window – GPO The following window will appear ( Figure 170): • ______________________________________________________________________________________ D2K.OM.001822.DRM Page 136 of 177 Version 1.5 Doremi Labs... -
Page 137: Playback Action Insertion
• Playback action selection button Figure 171: Playback Actions Setup Window Select the proper playback action between “Play,” “Pause,” “Toggle Play/Pause,” or “Recue • Show” and click the Ok button. ______________________________________________________________________________________ D2K.OM.001822.DRM Page 137 of 177 Version 1.5 Doremi Labs... -
Page 138: Video Output Action Insertion
Dowser option. Choose the name of the projector from the drop-down menu window that appears ( Figure 174). Choose to have it “open” or “close” and then click Ok. Figure 173: Add a New Action Window - Dowser Figure 174: Dowser Settings Window ______________________________________________________________________________________ D2K.OM.001822.DRM Page 138 of 177 Version 1.5 Doremi Labs... -
Page 139: Projector Channel Switch Insertion
(Figure 176). Use the plus/minus buttons to select the channel you would like to send the command to. Figure 175: Add a New Action Window - Channel Switch Figure 176: Projector Channel Switch ______________________________________________________________________________________ D2K.OM.001822.DRM Page 139 of 177 Version 1.5 Doremi Labs... -
Page 140: Automation Library Usage
Figure 177: Macro Editor GUI Automation Configuration Example Select one of the available devices in the right part of the window and click the Add button. • The following pop-up window will appear: • ______________________________________________________________________________________ D2K.OM.001822.DRM Page 140 of 177 Version 1.5 Doremi Labs... -
Page 141: Resulting Macro Setting
“Automation Cue” tab will display the added actions as illustrated below: Figure 179: Macro Actions Window Updated Click the Save button to save the “Test_Macro” settings. • Enter the password to save settings and proceed. • ______________________________________________________________________________________ D2K.OM.001822.DRM Page 141 of 177 Version 1.5 Doremi Labs... -
Page 142: Action List Management
The Macro Automation Cues will be available in CineLister in order to create a Show • Playlist. Note: The saving operation will not only save the Macro Automation Cues, but also the Trigger Cues that were created. ______________________________________________________________________________________ D2K.OM.001822.DRM Page 142 of 177 Version 1.5 Doremi Labs... -
Page 143: Trigger Cue Tab
You have the choice to program Trigger Cues to be available during the whole Show Playlist or only during a specific Show Playlist element. 14.1 Trigger Cue Tab Overview Figure 181: Macro Editor - Trigger Cue Tab ______________________________________________________________________________________ D2K.OM.001822.DRM Page 143 of 177 Version 1.5 Doremi Labs... -
Page 144: Trigger Cue Creation
The user will be able to edit the name of the Trigger Cue using the same window. • To remove a Trigger Cue, select it in the “Trigger” window and click the Delete button. • ______________________________________________________________________________________ D2K.OM.001822.DRM Page 144 of 177 Version 1.5 Doremi Labs... -
Page 145: Connection To An Event
The connected GPI event will then appear in the right part of the GUI. • To connect the selected Trigger Cue to another signal, click the “Signal” button of the • “Events” window ( Figure 184). The following window will appear: • ______________________________________________________________________________________ D2K.OM.001822.DRM Page 145 of 177 Version 1.5 Doremi Labs... -
Page 146: Connection To A Signal Event
“JNior Expansion Module” does not appear in the source device drop-down menu. Use the “Signal Library” button to access all possible signals. “Signal Library” button Figure 187: “Device Name” Window ______________________________________________________________________________________ D2K.OM.001822.DRM Page 146 of 177 Version 1.5 Doremi Labs... -
Page 147: Trigger Cue Saving
Repeat the Trigger Cue creation operation for all Trigger Cues that are created and click • the Save button. The user will be asked for a password to be able to perform the operation. • ______________________________________________________________________________________ D2K.OM.001822.DRM Page 147 of 177 Version 1.5 Doremi Labs... -
Page 148: Pre-Defined Macro Usage
If the user has a pre-defined "macros.xml" file containing automation and trigger cue definitions, then copy it into the "/doremi/etc/" folder and the corresponding macros will be visible in the Macro Editor GUI. The user will then be able to update the cues, if needed, from the Macro Editor GUI. -
Page 149: Add A Trigger Cue To A Show Playlist
15 Add a Trigger Cue to a Show Playlist Go to the CineLister application from the Menu on the DCP-2000 desktop. • In the Editor tab, select a Trigger Cue on the left part of the GUI and click on “Add to Show •... -
Page 150: Add A Trigger Cue For One Element Of The Show Playlist
Select the automation cue from the list and then click Ok. If you do not click Ok, you will not • have added the trigger cue to the element. Figure 193: Edit Trigger Cue Window ______________________________________________________________________________________ D2K.OM.001822.DRM Page 150 of 177 Version 1.5 Doremi Labs... -
Page 151: Cinelister Playback Tab
Next, go to the Playback tab from the CineLister GUI (Figure 195). • Click the Play button to load the Playlist. • If no Playlist is selected, a message will appear stating, “The Show Playlist is Empty” • (Figure 196). ______________________________________________________________________________________ D2K.OM.001822.DRM Page 151 of 177 Version 1.5 Doremi Labs... - Page 152 Show Playlist progress list-box Pause Button “Stop” Play button Button Figure 195: CineLister GUI Playback Tab Figure 196: Empty Show Playlist Window ______________________________________________________________________________________ D2K.OM.001822.DRM Page 152 of 177 Version 1.5 Doremi Labs...
-
Page 153: Playback Progress
Green playback “Play” flag Show Playlist Display of the progress bar Show Playlist remaining time Display of the clip remaining time Figure 198: CineLister GUI – Playback Tab ______________________________________________________________________________________ D2K.OM.001822.DRM Page 153 of 177 Version 1.5 Doremi Labs... -
Page 154: Pause Mode
Play. Clip progress “Skip to Previous Clip” button “Skip to Next Clip” button Mode list Fast Forward 3 Rewind 3 minutes minutes Figure 199: Playback Tab during Pause ______________________________________________________________________________________ D2K.OM.001822.DRM Page 154 of 177 Version 1.5 Doremi Labs... -
Page 155: Adjusting The Default Values
• Type: mount -o rw,remount / and then press Enter (note: the spaces in between the • characters must be respected). Type: xedit /doremi/etc/default/cinelister.config.sample and press Enter. • You will be prompted to the “xedit' window ( Figure 201). •... - Page 156 Save Button “180” represents 180 seconds = 3 minutes Figure 201: Xedit Window ______________________________________________________________________________________ D2K.OM.001822.DRM Page 156 of 177 Version 1.5 Doremi Labs...
-
Page 157: Playback Of A Live Event
16.5 Playback of a Live Event By connecting a Doremi MPEG Streamer to the DCP-2000 you can play a live event. You can create a Show Playlist for the live event using theater effects such as closing and opening of curtains, previews, trailers, and advertisements before the live event is scheduled to start. - Page 158 “Live Event” Live Event CPL inserted in the SPL Figure 202: CineLister Editor Tab - SPL With Live Event ______________________________________________________________________________________ D2K.OM.001822.DRM Page 158 of 177 Version 1.5 Doremi Labs...
-
Page 159: Playback Lock Mode
- “Schedule” means Locked Locked Mode: During Locked Playback mode, features such as pause, play, fast forward, rewind, and stop are NOT available Figure 204: Playback Mode Locked ______________________________________________________________________________________ D2K.OM.001822.DRM Page 159 of 177 Version 1.5 Doremi Labs... -
Page 160: Playback Alert Messages
"Storage is degraded”: This message is displayed if at least one of the available RAID • storages is degraded or faulty. For example, RAID-md0 or RAID-md1. “Projector Communication Failure” alert Message Figure 205: “Projector Communication Failure” Alert ______________________________________________________________________________________ D2K.OM.001822.DRM Page 160 of 177 Version 1.5 Doremi Labs... - Page 161 “Storage is Degraded” alert message Figure 206:“Storage Degradation” Alert ______________________________________________________________________________________ D2K.OM.001822.DRM Page 161 of 177 Version 1.5 Doremi Labs...
-
Page 162: Cinelister Schedule Tab
Select the start time for the scheduled playback by using the up and down arrows. • Click Save when finished. • The Schedule tab will be updated to reflect the recently added schedule (Figure 209). • ______________________________________________________________________________________ D2K.OM.001822.DRM Page 162 of 177 Version 1.5 Doremi Labs... - Page 163 Displays the time playback is estimated Use the up and to end down arrows to adjust the playback start time Figure 208: Edit Schedule Window Figure 209: Schedule Tab After Playlist Addition ______________________________________________________________________________________ D2K.OM.001822.DRM Page 163 of 177 Version 1.5 Doremi Labs...
-
Page 164: Schedule Playback Messages
You will also receive the conflict message if you try to schedule playback that interrupts the scheduled time of another playback. Figure 211: Schedule Conflict Message ______________________________________________________________________________________ D2K.OM.001822.DRM Page 164 of 177 Version 1.5 Doremi Labs... -
Page 165: Scheduled Show Did Not Start Error
Scheduled Show Did Not Start Error If you get an error message stating, “The scheduled Show below did not start as expected.” This can be due to several reasons. Contact Doremi Labs Inc. for assistance (Section 1.3). Figure 212: Scheduled Playback-- Error Message 17.2.3... -
Page 166: Playback Recovery Due To Power Failure
You will be prompted to a “Information Recovery” window (Figure 215). • Click Ok and CineLister will resume playback three minutes before the power failure • occurred. Figure 214: Warning Window - Invalid Shutdown Figure 215: Information Recovery Window ______________________________________________________________________________________ D2K.OM.001822.DRM Page 166 of 177 Version 1.5 Doremi Labs... -
Page 167: Shutting Down During Playback
If you select yes, the server will shut down and playback will stop (Figure 216). Note: Playback will NOT resume when you turn the unit back on. Figure 216: Shutdown Confirmation Window ______________________________________________________________________________________ D2K.OM.001822.DRM Page 167 of 177 Version 1.5 Doremi Labs... -
Page 168: Control Tab
• contact Doremi Labs Technical Support for login credentials. Once the file has been downloaded, you have to copy the file into /doremi/etc/ folder. • Example: If your file is on a USB flash drive, which mounts as /media/usb0/ when plugged •... -
Page 169: Configuration Example
<?xml version="1.0" encoding="UTF-8"?> <CinelisterControlView> <ControlViewList> <ControlView> <TitleText>House Lights</TitleText> <ControlViewButtonList> <ControlViewButton> <Text>Dark</Text> <Execute>MACRO_DARK_LIGHT</Execute> </ControlViewButton> <ControlViewButton> <Text>1/2 Lights</Text> <Execute>MACRO_HALF_LIGHT</Execute> </ControlViewButton> <ControlViewButton> <Text>Bright</Text> <Execute>MACRO_BRIGHT_LIGHT</Execute> </ControlViewButton> ______________________________________________________________________________________ D2K.OM.001822.DRM Page 169 of 177 Version 1.5 Doremi Labs... - Page 170 Dowser</TitleText> <ControlViewButtonList> <ControlViewButton> <Text>Open</Text> <Execute>MACRO_PROJECTOR_DOWSER_OPEN</Execute> </ControlViewButton> <ControlViewButton> <Text>Close</Text> <Execute>MACRO_PROJECTOR_DOWSER_CLOSE</Execute> </ControlViewButton> </ControlViewButtonList> </ControlView> <ControlView> <TitleText>Projector Lamp</TitleText> <ControlViewButtonList> <ControlViewButton> <Text>On</Text> <Execute>MACRO_PROJECTOR_DOWSER_OPEN</Execute> </ControlViewButton> <ControlViewButton> <Text>Off</Text> <Execute>MACRO_PROJECTOR_DOWSER_CLOSE</Execute> </ControlViewButton> </ControlViewButtonList> </ControlView> <ControlView> <TitleText>Automation</TitleText> <ControlViewButtonList> <ControlViewButton> ______________________________________________________________________________________ D2K.OM.001822.DRM Page 170 of 177 Version 1.5 Doremi Labs...
-
Page 171: Basic Example Of Controlview.xml File
By default, the “Control” tab does not exist. It is the job of the system administrator to create a configuration file for each player. The configuration file is stored into /doremi/etc and the file name is controlview.xml. Below is a short sample of a configuration file: <?xml... - Page 172 The button text (<Text>) and the macro to execute once the button is pushed (<Execute>). ______________________________________________________________________________________ D2K.OM.001822.DRM Page 172 of 177 Version 1.5 Doremi Labs...
-
Page 173: Virtual Keyboard
Go to the Menu on the DCP-2000 home desktop and select Virtual Keyboard. • The keyboard will appear on the GUI, as illustrated in Figure 219 below. • You can use the keyboard with a stylus pen or by connecting a mouse to the DCP-2000. • Virtual Keyboard... -
Page 174: Time Adjustment
Use the up and down arrows to change the time. • Note: You cannot adjust the time to more than 30 minutes. Click Apply when finished. • Reboot the server. • ______________________________________________________________________________________ D2K.OM.001822.DRM Page 174 of 177 Version 1.5 Doremi Labs... - Page 175 Time Setting Figure 221: Control Panel Window Figure 222: Time Setting Window ______________________________________________________________________________________ D2K.OM.001822.DRM Page 175 of 177 Version 1.5 Doremi Labs...
- Page 176 21 Acronyms Term Definition China Compulsory Certification Composition Play List Digital Cinema Initiatives Doremi License Message Frames Per Second General Purpose Input General Purpose Output Hard Disk Drive Key Delivery Message Liquid Crystal Display Light Emitting Diode RAID Redundant Array of Independent Disks...
-
Page 177: D2K.om.001822.Drm
First version. Updated for software version 2.2.2. 01/24/2012 Contact information revised. 07/20/2012 Logo updated. 06/12/2013 Added CCC required symbols. 06/24/2013 Added CCC statement. 01/19/2015 Added DCP-2000 KC EMC Statement to page 7. ______________________________________________________________________________________ D2K.OM.001822.DRM Page 177 of 177 Version 1.5 Doremi Labs...
Need help?
Do you have a question about the DCP-2000 and is the answer not in the manual?
Questions and answers