
Related Manuals for Doremi V1-HD


Summary of Contents for Doremi V1-HD
- Page 1 V 1 - H D V 1 - U H D V 1 - U H D / L E V i d e o S e r v e r s User Manual Version 5.0 V_1.OM.000160.DRM Page 1 Version 5.0 Doremi Labs, Inc.
-
Page 2: Table Of Contents
..................20 URRENT ETTINGS TO EMORY 4.13 V1 ..............20 ETTING THE IRMWARE ERSION UMBER OF THE PRODUCT DESCRIPTION......................... 21 : V1-HD V1-UHD ....................21 VERVIEW ..........................22 RONT ANEL 5.2.1 Keypad Area..........................22 5.2.2 Menu Controls and Jog/Shuttle....................23 5.2.3 Transport Controls........................ - Page 3 SPECIFIC APPLICATIONS........................ 36 ..................36 SING THE WITH ONTROLLERS ....................36 YNCHRONIZING ULTIPLE NITS ...................... 36 LAYBACK FOR RESENTATION – V1-HD O ..................36 ELAY CHANNEL : V1-HD O ................... 37 OTION EPLAY ..........................38 UDIO 7.6.1 Most Common Connection...................... 38 7.6.2...
- Page 4 The VUploader Utility ......................80 18.4 ..................81 EFINITION NCOMPRESSED HART 18.5 JPEG2000 C ..................82 OMPRESSION HART 18.6 ........................83 HASE ETTINGS 18.7 & E ..........83 ONNECTING UDIO ORKSTATIONS ONTROLLERS V_1.OM.000160.DRM Page 4 Version 5.0 Doremi Labs, Inc.
- Page 5 Connection to the Orban AUDICY VX ................86 18.7.10 Connection to the Dyaxis II ....................86 18.7.11 List of DAWs & Editors currently supported by the V1 ............. 87 DOCUMENT REVISION HISTORY ....................88 V_1.OM.000160.DRM Page 5 Version 5.0 Doremi Labs, Inc.
-
Page 6: Doremi Labs, Inc
IMPORTANT WARNING Power requirements for electrical equipment vary from area to area. Please ensure that your V1 meets the power requirements in your area. If in doubt, consult a qualified electrician or Doremi Labs, Inc. dealer. 120VAC @60Hz for USA and CANADA rating 1A 220-230/240VAC @50Hz for Europe rating 0.5A... -
Page 7: Doremi Labs, Inc
Always disconnect the V1 from the power supply by pulling on the plug, not the cord. Allow only a Doremi Labs, Inc. dealer or qualified professional engineer to repair or reassemble the V1. Apart from voiding the warranty, unqualified engineers might touch live internal parts... -
Page 8: Doremi Labs, Inc
The exclamation point within an equilateral triangle is intended to alert the user to the presence of important operating and maintenance (servicing) instructions in the literature accompanying the appliance. V_1.OM.000160.DRM Page 8 Version 5.0 Doremi Labs, Inc. -
Page 9: Doremi Labs, Inc
EN 55022 "Limits and Methods of Measurement of Radio Interface Characteristics of Information Technology Equipment." A "Declaration of Conformity" in accordance with the above standard has been made and is on file at Doremi Labs, Europe, Valbonne, France. V_1.OM.000160.DRM Page 9 Version 5.0... -
Page 10: Introduction
The value priced V1-UHD/LE supports 8bit HD video recording only. 1.2 V1 Compressed HD: JPEG2000 Doremi’s V1-HD product line uses JPEG2000 video compression. 1.3 The CBS Algorithm The V1 uses a constant block size (CBS) algorithm. With traditional compression algorithms, depending on video complexity, the size of each compression field can vary thus requiring maintaining a list to indicate the start of each field on the drive. -
Page 11: Design Of Manual
V1 manual from our tech support page “manual” section on the Doremi website www.doremilabs.com. If you will not be upgrading, you can download older manuals from the Doremi FTP page. 2.3 Menu Customs CAPITAL & BOLD text is used when referring to buttons on the front panel. -
Page 12: Installation
3.1.1 Basic Input Connections Analog Audio Channel 1 (L) Channel 2 (R) Figure 1: Audio Inputs – V1 Rear Panel SDI Video: IN-A Figure 2: Video Input – V1 Rear Panel V_1.OM.000160.DRM Page 12 Version 5.0 Doremi Labs, Inc. -
Page 13: Basic Output Connections
SDI Video: OUT-A1 Figure 4: Video Output – V1 Rear Panel 3.1.3 Power Connection Please connect the power connector as shown on the figure below: Figure 5: Power Connection – V1 Rear Panel V_1.OM.000160.DRM Page 13 Version 5.0 Doremi Labs, Inc. -
Page 14: Power On And Shut Down
– note that if your unit is fitted with an optional Gigabit Ethernet connector, that optional connector has to be used instead of the connector presented below: Default Ethernet connector Figure 7: Ethernet Connector – Rear Panel V_1.OM.000160.DRM Page 14 Version 5.0 Doremi Labs, Inc. -
Page 15: Connecting Rs422
RS-422-2 connector RS-422-1 connector Figure 8: RS-422 Connectors – Rear Panel 3.5 Connecting GPI No GPI connector is directly available on the V1. To use GPI triggers, contact Doremi Labs, Inc in order to buy a RS422/GPI converter. V_1.OM.000160.DRM Page 15 Version 5.0... -
Page 16: Quick Start Procedures
Step 1: Press “CLEAR” Step 5: Use the Jog/Shuttle wheel in order to view “JOG” is the inner wheel, “SHUTTLE” the video - is the ring and “SLO MO” is the ring. Figure 9: Navigation V_1.OM.000160.DRM Page 16 Version 5.0 Doremi Labs, Inc. -
Page 17: How To Create A Video Segment
The procedure below explains how to play a video segment – assuming that the segment exists. Step 2: Enter the segment number using the keypad numbers Step 1: Press “RECALL” Step 3: Press “ENTER” Figure 11: How to Play a Video Segment V_1.OM.000160.DRM Page 17 Version 5.0 Doremi Labs, Inc. -
Page 18: How To Make A Single Video Segment Loop
7 until all the segments you want to process are entered. Figure 13: How to Create a Playlist Note: In order to loop the playlist, have the last video segment recall the first video segment. V_1.OM.000160.DRM Page 18 Version 5.0 Doremi Labs, Inc. -
Page 19: How To Play A Playlist
OPTION and press SAVE. Press ENTER to create the file. • To load an existing file: hold OPTION and press RECALL. Turn the Jog Wheel to browse through existing files, press ENTER to load the selected file. V_1.OM.000160.DRM Page 19 Version 5.0 Doremi Labs, Inc. -
Page 20: Setup V1 For Playback
1. Go to OPTION MENU (00), 2. Press “++” key until you reach "V1 y.xx". This is your firmware number. Note that for the V1-HD, there is also a J2K version displayed as follows: “j2k vers y.xx”. V_1.OM.000160.DRM Page 20 Version 5.0... -
Page 21: Product Description
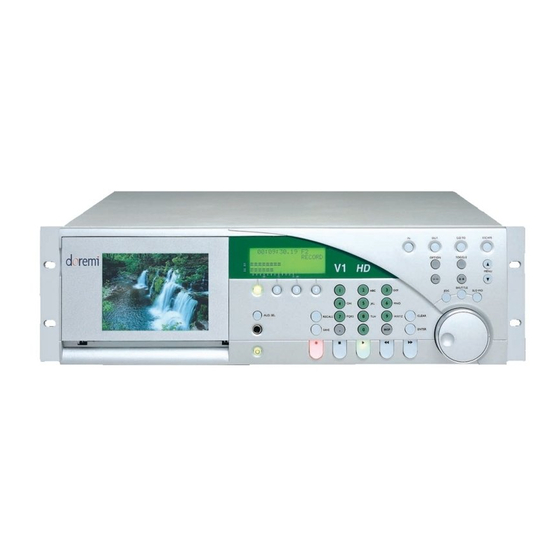
Doremi's V1-HD server sets the standard for affordable high-performance HD video recording. The V1-HD records HD-SDI and SDI video using JPEG2000 compression at up to 300Mb/s. For digital cinema applications, the V1-HD is available with dual link 4:4:4 recording and playback at 2K resolution. -
Page 22: Front Panel
Save a video segment into a memory location number or name. CLEAR: Clears the display to enter new data. ENTER: Press after selecting a segment to play. Also to answer YES to the V1’s “are you sure?” question. V_1.OM.000160.DRM Page 22 Version 5.0 Doremi Labs, Inc. -
Page 23: Menu Controls And Jog/Shuttle
Holding the OPTION button and pressing the MENU button will engage the V1 OPTION MENU (See section 10). ESCAPE + MENU Holding the ESCAPE button and pressing the MENU button will engage the V1 CONTROLLER MENU (See Section 11). V_1.OM.000160.DRM Page 23 Version 5.0 Doremi Labs, Inc. -
Page 24: Transport Controls
Pressing this button again will increase the speed. There are three speed levels REW+REW+REW. V_1.OM.000160.DRM Page 24 Version 5.0 Doremi Labs, Inc. -
Page 25: Lcd Time Code Display
If forward shuttle: ">> xx %" with xx % = 10%, 20%, 50%, 100%, 200%, 500%, 1000% If reverse shuttle: "<< xx %" with xx % = 10%, 20%, 50%, 100%, 200%, 500%, 1000% V_1.OM.000160.DRM Page 25 Version 5.0 Doremi Labs, Inc. -
Page 26: Scsi Drives
To reset the entire front panel controller (soft reset) hold the 1, 2, 3 or 4 buttons and press CLEAR. This may be necessary to reset the LCD video monitor if you switch between NTSC frame-rates & PAL frame-rates formats. V_1.OM.000160.DRM Page 26 Version 5.0 Doremi Labs, Inc. -
Page 27: Rear Panel Description
5.3 Rear Panel Description The V1 rear panel differs from one version to another. V1-HD and V1-UHD have the same rear panel even if differences can be found dues to optional connectors – e.g., audio expansions: Figure 22: Rear Panel 5.3.1 Video In/Out... -
Page 28: Audio In/Out
2 can be used to connect the optional RCV2-9p external remote control from Doremi Labs. RS-422-2 / + Biphase: If all 9 jumpers on J34 are set to the RS422 position, this connector will be used as a second RS422 port (this is the default setting when the unit is shipped). -
Page 29: Scsi
5.3.6 SCSI Standard 68-pin female connector for connection to external SCSI drives. When connecting external Raid5 storage, the raid box should be terminated. All V1 internal drives supplied by Doremi Labs, Inc. are internally terminated. V_1.OM.000160.DRM Page 29 Version 5.0... -
Page 30: Recording And Playback
If they are not, the transition between files during playback will no longer be seamless. V_1.OM.000160.DRM Page 30 Version 5.0 Doremi Labs, Inc. -
Page 31: Recording Modes
Segments are created on the loaded file (or the default file if no file has been loaded. When you recall a segment it will load the file associated with it when it was created. This means that segments can be used to create play-lists that use multiple files. V_1.OM.000160.DRM Page 31 Version 5.0 Doremi Labs, Inc. -
Page 32: Creating A Segment
♦ Press RECALL and enter the number of the segment to be inserted, press ++, the LCD will display "Next Seg:", enter the segment number that will follow in the play list and press ENTER. NOTE: You are only allowed to enter valid segments. V_1.OM.000160.DRM Page 32 Version 5.0 Doremi Labs, Inc. -
Page 33: Doremi Labs, Inc
OUT point of that segment in the following format: Segment No. : MM.SS Where No. is the segment number played from 0001 to 2000 and MM.SS is the remaining time up to the OUT point in mn:sec. V_1.OM.000160.DRM Page 33 Version 5.0 Doremi Labs, Inc. -
Page 34: Chase Command And Chase Modes
If the incoming LTC or VITC are needed, set the unit in Time Code or VITC before you start recording. For projects that might have the same time code, Doremi Labs, strongly recommends creating a file for each continuous time code section. -
Page 35: Time Code Offset
OPTION and then press the IN key. The Time Code offset will be permanently saved on the drive. This Time Code Offset function is useful to shift the time code position to a new value. V_1.OM.000160.DRM Page 35 Version 5.0 Doremi Labs, Inc. -
Page 36: Specific Applications
7.4 Time Delay, 1 channel – V1-HD Only This section describes how to set a V1-HD for broadcast time delay applications. This is only available on early model V1-HD with the independent record and play option. -
Page 37: Slow Motion Replay: V1-Hd Only
CONTROLLER MENU (04) Delay Mode and press the TOGGLE button. 7.5 Slow Motion Replay: V1-HD Only This paragraph describes how to set the V1-HD for slow motion replay applications. This is only available on early model V1-HD with the independent record and play option. -
Page 38: Audio Post
Connections: 1. Feed the HDSDI signal from the camera to the HDSDI input of the V1-HD. Operation using a SloMo controller: 1. If you want your SloMo device to control the recorder channel, connect it to RS422-1 on the back of the V1-HD 2. -
Page 39: Overdubbing Video And Audio Tracks
V1 is now in sync with the house sync), then hold down PLAY and press REC. The V1 will record the insert. Then press STOP or PLAY to end the insert segment procedure. V_1.OM.000160.DRM Page 39 Version 5.0 Doremi Labs, Inc. -
Page 40: Menu Reference Chart
Mode (ex: 1R/P) (type) VANC Hdr (no.) bit audio Clip (no.) # Aud Trks (no.) Format (ex: 1080 59.94i) 7 INFO/T-LEFT 4:(no.):(no.) video NDF/DF (no.)Mbs Compr dur xx:xx:xx (type) Video (no.)b precision V_1.OM.000160.DRM Page 40 Version 5.0 Doremi Labs, Inc. -
Page 41: Option Menu Chart
Bus: (no.), id: (no.) 5 Save Setngs No | Are you sure ? Clock: (no.) MHz SCSI ID (no.) 6 SCSI Setup Width: (no.) Bit V1 Rec/Play | Play Only Term’n: ON | OFF V_1.OM.000160.DRM Page 41 Version 5.0 Doremi Labs, Inc. -
Page 42: Doremi Labs, Inc
A(no.): OFF | ON Insert OFF | ON TC: OFF | ON Edit In: (no.) 13 EDIT PRST Video OFF | ON Edit Out: (no.) Assemble: OFF | ON 14 # Clicks/FR (no.) V_1.OM.000160.DRM Page 42 Version 5.0 Doremi Labs, Inc. -
Page 43: Doremi Labs, Inc
WIPE BOT-TOP | WIPE LEFT-RIT | WIPE RIT-LEFT | WIPE TOP-BOTT V1 (no.) Mode 1R-1P | 1R/P IP (no.) Netpos None | Master | Slave 00 INFO/MODE Mask (no.) GNet Disable | Enable S/N (no.) j2k vers (no.) (no.) Megs RAM V_1.OM.000160.DRM Page 43 Version 5.0 Doremi Labs, Inc. -
Page 44: Controller Menu Chart
OFF | HH:MM:SS:FF 05 PREROLL OFF | HH:MM:SS:FF 06 SLOMO MODE OFF | ON 07 GANG MODE OFF | ON 08 4224 CLIP MODE OFF | ON 00 Firmware RCV2 version (no.) V_1.OM.000160.DRM Page 44 Version 5.0 Doremi Labs, Inc. -
Page 45: Menu
The V1 syncs to the VIDEO IN input. TriLevel The V1 syncs to the input or to the TriLevel sync source Sync Bilevel The V1 syncs to the input or to the BiLevel sync source Sync V_1.OM.000160.DRM Page 45 Version 5.0 Doremi Labs, Inc. -
Page 46: Doremi Labs, Inc
SDI). Formats available depend on the options installed. (07) INFO/T-Left This menu selection provides information on the current V1 settings and the parameters of the currently loaded file. None of these settings can be changed in this menu. V_1.OM.000160.DRM Page 46 Version 5.0 Doremi Labs, Inc. -
Page 47: Option Menu
Wait 30 seconds and restart the V1 for the setting to take effect. The functions below provide general information about your V1. Please have this information on hand prior to contacting Doremi technical support. S/N: (no.) Displays the unique serial number of your V1. -
Page 48: Doremi Labs, Inc
30 seconds and recycle power on the Netpos None: For all units that are not sharing storage (V1-HD and V1-UHD), it should be set to None. To change the mode press the TOGGLE key and the hit ENTER. You will next need to save your settings;... -
Page 49: Transport
FastMod Select between Norm (normal) and Enhan (enhanced). Enhanced mode will provide the best video preview in Fast Forward and Fast Rewind Set to Normal for V1-HD installed with the independent record and play option. JogSpeed Sets the maximum speed in Jog mode to 100% or FULL (no limit). -
Page 50: Auto Play
For instructions on how to create a file, see paragraph 6.1.2. If you are using a single file (the default file created by the V1) you will need to reinitialize after changing a setting in this section - See section 10.7. V_1.OM.000160.DRM Page 50 Version 5.0 Doremi Labs, Inc. -
Page 51: Doremi Labs, Inc
(type) enc Select V1 or PC encoded when in 3D format. 4:(no.):(no.):(no.) Video Choose 4:4:4, 4:2:2, 4:1:1, 4:0:0 or 4:2:2:4. (no.)b precision Select the precision (8 bit, 10 bit or 12 bits). V_1.OM.000160.DRM Page 51 Version 5.0 Doremi Labs, Inc. -
Page 52: Init Disk
10.4 Init Disk The Initialize Disk settings will set the parameters and configuration of the drive(s). These settings are preconfigured at the factory (when the drives are purchased from Doremi Labs) and typically will not require change. You must initialize the drive(s) after changing any of the settings in this section. -
Page 53: Scsi Setup
10.6 SCSI Setup The SCSI Setup settings will set the parameters and configuration of the drive(s). These settings are pre-configured at the factory (when the drives are purchase from Doremi Labs) and typically will not require change. SCSI ID (no.) Sets the SCSI ID number of the V1 after restart. -
Page 54: Vid In
Enable or disable the Embedded LTC Segmented Frame This can only be changed for V1-UHD in progressive formats. Pattern This is available for V1-UHD only: when ON, you get a color bar V_1.OM.000160.DRM Page 54 Version 5.0 Doremi Labs, Inc. -
Page 55: Aud In Lvl
The settings in Edit Presets allow for the insert/overdub of audio, time code or video individually, while the non-selected track(s) are monitored at the same time. The settings are used for manual insertion. This is not a recommended practice. Doremi Labs strongly recommends using an edit controller. -
Page 56: Serial Port
This menu is presented below: YPbPr Allows to choose between Full and Limited Reset Encoder Allows to reset the encoder 10.18 VID Mixer This is an option on the V1-HD to do fade, wipe and dissolve. V_1.OM.000160.DRM Page 56 Version 5.0 Doremi Labs, Inc. -
Page 57: Controller Menu
(Always active on LCD monitor and on composite output) (04) Delay Mode Configure for single drive operation (V1-HD with independent record and play option only) This is used for broadcast delay to define the time delay between the recorder and the player(s). Ensure that the V1 is not recording. - Page 58 (06) Slomo Mode Configure for single drive operation (V1-HD with independent record and play option only) Used for sports slow motion replay applications. When ON, the RCV2 operates like a slow motion controller. Note: To use Slom Mode, ensure that MENU (2) Time Mode is set to A-Time.
-
Page 59: Video And Key
In both cases, the end result is a single file with locked Video & Key outputs. In addition to the video, and regardless of the bit-rate used: the V1-HD records 2, 4, 6 or 8 tracks of uncompressed audio (sampled at 48 KHz). -
Page 60: Recording The Video & Key
• The Key-part output is on SDI Out-B1 and SDI Out-B2. SDI Video: Out-B1 and Out-B2 Key-part SDI Video: Out-A1 and Out-A2 Video-part Figure 25: SDI Video Output A and B Connection V_1.OM.000160.DRM Page 60 Version 5.0 Doremi Labs, Inc. - Page 61 • Select “Time Code” in the Time Code Mode menu (MENU (02)). • Press the REC button only to set the V1-HD in EE mode. (Displays the video on the input). • If you see a valid video signal on your monitor, and if the displayed time-code is increasing you can press REC and PLAY at the same time to start recording.
-
Page 62: Video & Key Using The Dual-Pass Method
• Select “A Time” in the Time Code Mode menu (MENU (02)) • Press the REC button only to set the V1-HD in EE mode (Displays the video on the input). • If you see a valid video signal on your monitor, press REC and PLAY at the same time to start recording. - Page 63 Out-A2, the Key-part output is on SDI Out-B1 and SDI Out-B2. SDI Video: Out-B1 and Out-B2 Key-part SDI Video: Out-A1 and Out-A2 Video-part Figure 27: SDI Video Output A and B Connection V_1.OM.000160.DRM Page 63 Version 5.0 Doremi Labs, Inc.
-
Page 64: Recording The Video-Part
• Select “A Time” in the Time Code Mode menu (MENU (02)). • Press the REC button only to set the V1-HD in EE mode (Displays the video on the input). • If you see a valid video signal on your monitor, press REC and PLAY at the same time to start recording. -
Page 65: Merging The Video-Part And The Key-Part
Select the number of Audio Tracks (Same as the recording file) • Select Drop or Non Drop Frame (Same as the recording file) • Select V1 Encoding (Same as the recording file) • Select 16 bit Audio (Same as the recording file) V_1.OM.000160.DRM Page 65 Version 5.0 Doremi Labs, Inc. -
Page 66: Executing The Merge
In this example the Merge function will use: • The Video-part from 00:01:02:03 to 00:10:02:03. • The Key-part from 01:02:02:03 to 01:11:02:03 • The duration of the Video & Key will be 9 minutes. V_1.OM.000160.DRM Page 66 Version 5.0 Doremi Labs, Inc. - Page 67 In both cases, the end result is a single file with locked 3D outputs. In addition to the video, and regardless of the bit-rate used; the V1-HD records 2, 4, 6 or 8 tracks of uncompressed audio (sampled at 48 KHz).
-
Page 68: Using The Single-Pass Recording Method
• Use the Time Code ¼ inch balanced input for LTC time-code. SDI Video: IN-A Left-Eye, EMB-Audio, ATC SDI Video: IN-B Right-Eye only Figure 28: SDI Video Input A and B Connections V_1.OM.000160.DRM Page 68 Version 5.0 Doremi Labs, Inc. - Page 69 • Select “Time Code” in the Time Code Mode menu (MENU (2)). • Press the REC button only to set the V1-HD in EE mode. (Displays the video on the input). • If you see a valid video signal on your monitor, and if the displayed time-code is increasing you can press REC and PLAY at the same time to start recording.
-
Page 70: Using The Dual-Pass Method
• Select “A Time” in the Time Code Mode menu (MENU (2)) • Press the REC button only to set the V1-HD in EE mode (Displays the video on the input). • If you see a valid video signal on your monitor, press REC and PLAY at the same time to start recording. - Page 71 A2, the Right-Eye output is on SDI Out-B1 and SDI Out-B2. SDI Video: Out-B1 and Out-B2 Right-Eye SDI Video: Out-A1 and Out-A2 Left-Eye Figure 31: SDI Video Output A and B Connections V_1.OM.000160.DRM Page 71 Version 5.0 Doremi Labs, Inc.
-
Page 72: Recording The Left-Eye
• Select “A Time” in the Time Code Mode menu (menu 02). • Press the REC button only to set the V1-HD in EE mode. (Displays the video on the input). • If you see a valid video signal on your monitor, press REC and PLAY at the same time to start recording. -
Page 73: Merging The Left-Eye And The Right-Eye
Select Drop or Non Drop Frame (Same as the recording file) • Select V1 Encoding (Same as the recording file) • Select 16 bit Audio (Same as the recording file) • Select Standard VANC (Same as the recording file) V_1.OM.000160.DRM Page 73 Version 5.0 Doremi Labs, Inc. -
Page 74: Executing The Merge
In this example the Merge function will use: • The Left-Eye from 00:01:02:03 to 00:10:02:03. • The Right-Eye from 01:02:02:03 to 01:11:02:03 • The duration of the 3D will be 9 minutes. V_1.OM.000160.DRM Page 74 Version 5.0 Doremi Labs, Inc. -
Page 75: Troubleshooting
“always ON” operation please consult our technical support department. 14.7 No MD Found This message is valid for new drives that have not been used on a V1. You will need to initialize the drive(s). V_1.OM.000160.DRM Page 75 Version 5.0 Doremi Labs, Inc. -
Page 76: Technical Support
15 Technical Support Technical Support Contact Information: On the web: www.doremilabs.com select the “support” button Tel. 818 562-1101 Fax. 818 562-1109 Email: Support@doremilabs.com Address: Doremi Labs, Inc. 1020 Chestnut Street, Burbank, CA 91506 U.S.A. V_1.OM.000160.DRM Page 76 Version 5.0 Doremi Labs, Inc. -
Page 77: Warranty
YEAR from the date of original retail purchase. If you discover a defect, Doremi will, at its option, repair, replace, or refund the purchase price of this product at no charge to you, provided you return it during the warranty period, with transportation charges prepaid, to the authorized Doremi distributor from whom you purchased it or to any other authorized Doremi distributor within the country of original retail purchase. -
Page 78: Software License Agreement
Customer (respectively, the "Software" and the "Documentation") on a single piece of Doremi Labs equipment at one site. The Software and the piece of Doremi Labs equipment must remain at the same location for the term of this license. The number of users of the Software is not limited and the users are not required to be personally identified to Licensor. - Page 79 (d) All waivers must be in writing. Any waiver or failure to enforce any provision of this Agreement on one occasion will not be deemed a waiver of any other provision or of such provision on any other occasion. V_1.OM.000160.DRM Page 79 Version 5.0 Doremi Labs, Inc.
-
Page 80: Appendix
The V1 firmware can be upgraded from a PC or Mac using the VUploader utility posted on our support page at: http://www.doremilabs.com The latest firmware upgrades are posted on the support page of the Doremi web site: The manual for VUploader is included in PDF format with the VUploader compressed file. -
Page 81: High Definition Uncompressed Chart
The format used in the table below corresponds to the following template: “hour:minutes”. Note the chart below covers most V1-UHD and V1-UHD/LE models. For the latest chart please check the corresponding Doremi website’s product page. www.doremilabs.com V1-UHD HDTV Uncompressed Recording Time... -
Page 82: Jpeg2000 Compression / Time Chart
444:05 697:51 All durations are approximate. Recording time may vary 10% depending on the video standard being recorded. Tables are compiled for video at the indicated bit rate with 2 audio channels. V_1.OM.000160.DRM Page 82 Version 5.0 Doremi Labs, Inc. -
Page 83: Biphase Settings
9. Toggle Master/Slave and then make sure you end up in master mode 10. Hit play, both units should play in sync 11. Hit Stop, both units should stop. The DAWN should always be in master mode. V_1.OM.000160.DRM Page 83 Version 5.0 Doremi Labs, Inc. -
Page 84: Connection To The Fairlight
4. Run the Fairlight software, Hit the Machine 1 button to put the V1 on-line 5. Push buttons for setup of M1 6. Set Lace parameters to UNLACE=ON 7. And the LACE time parameter to 0 SEC The Fairlight software will control the V1 properly V_1.OM.000160.DRM Page 84 Version 5.0 Doremi Labs, Inc. -
Page 85: Connection To The Sonic Solutions
15. Under “Port”, select the serial or USD port that you connected your LTC-to-MTC converter 16. Set “Minimum sync delay” to 30 frames. 17. Select Protools -> Setups -> Preferences -> Operation. Activate “Machine Follows Selection/Scrub” V_1.OM.000160.DRM Page 85 Version 5.0 Doremi Labs, Inc. -
Page 86: Connection To The Orban Audicy Vx
3. Connect the serial cable between the V1 RS422 port 1 and the DAW, 4. From the Dyaxis II software choose the following two options: • Internal Time Code on 9 Pin • Time Code on Audio Tracks V_1.OM.000160.DRM Page 86 Version 5.0 Doremi Labs, Inc. -
Page 87: List Of Daws & Editors Currently Supported By The V1 (*)
Screensound. The offset on the Screensound must then be set to 0; if not the Screensound will operate as if a real offset is present between the V1 and the audio tracks on the Screensound. This list is not absolute, contact Doremi Labs if your product is not listed above. V_1.OM.000160.DRM Page 87 Version 5.0... -
Page 88: Document Revision History
19 Document Revision History Date Version Description 03/04/2008 Dedicated V1 user manual for V1-HD, V1-UHD and V1-UHD/LE series. V_1.OM.000160.DRM Page 88 Version 5.0 Doremi Labs, Inc.
Need help?
Do you have a question about the V1-HD and is the answer not in the manual?
Questions and answers