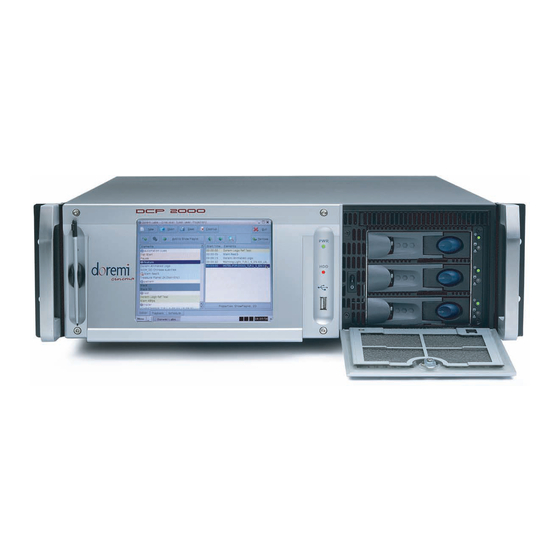
Doremi DCP-2000 Replacement Procedure
Digital cinema servers ssd flash replacement procedure for supermicro x7sbe motherboard fitted units
Hide thumbs
Also See for DCP-2000:
- User manual (177 pages) ,
- Operator's manual (28 pages) ,
- Maintenance manual (24 pages)
Advertisement
D C P - 2 0 0 0 / D C P - 2 K 4
DIGITAL CINEMA SERVERS
SSD Flash
Replacement Procedure
for SuperMicro X7SBE Motherboard fitted Units
Version 1.0
The information contained herein is confidential and may not be
divulged to any person or entity or reproduced, disseminated or
disclosed, in whole or in part. By receipt of this material including
any exhibits, attachments and spreadsheets the recipient agrees
that the information contained herein shall be kept confidential
and shall not, without the prior written consent of Doremi
Laboratories, be disclosed by the recipient in any manner.
D2K.DP.000804.DRM
Page 1
Version 1.0
Doremi Cinema LLC Confidential
Advertisement
Table of Contents

Related Manuals for Doremi DCP-2000


Summary of Contents for Doremi DCP-2000
- Page 1 By receipt of this material including any exhibits, attachments and spreadsheets the recipient agrees that the information contained herein shall be kept confidential and shall not, without the prior written consent of Doremi Laboratories, be disclosed by the recipient in any manner. D2K.DP.000804.DRM Page 1 Version 1.0...
-
Page 2: Table Of Contents
........................5 REPARATION 3.2 SSD F ........................7 LASH OCATION 3.3 SSD F ........................7 LASH EMOVAL 3.4 N SSD F ....................8 LASH NSTALLATION 4 LID CLOSING..........................9 5 BIOS SETUP..........................10 6 DOCUMENT REVISION HISTORY...................11 D2K.DP.000804.DRM Page 2 Version 1.0 Doremi Cinema LLC Confidential... -
Page 3: Introduction
ESD rules presented in ISO 9001 (2000). 1.2 Procedure Applicability The procedure presented in this document ONLY applies to DCP-2000/DCP-2K4 units fitted with the motherboard X7SBE (SuperMicro) - this motherboard usage is flagged using a “D” at the end of the unit’s serial number on the rear side of the unit (e.g S/N: 201235D). -
Page 4: Parts And Tools
CAUTION: Make sure you have the part listed below before starting to apply the upgrade procedure presented in this document. The following item, required to complete this procedure, is provided by Doremi: • SSD Flash: Figure 1: SSD Flash 2.2 Required Tool... -
Page 5: Replacement Procedure
For the upgrade procedure presented in this document, the server (DCP-2000 or DCP- 2K4) unit must be removed from its operating location and put in a clean area (far from other devices and on a surface fitted with an antistatic mat) as presented below: 1. - Page 6 ◦ Slide the lid from the front side to the rear side of the unit and lift it in order to remove it from the chassis, as shown on Figure 4: Slide the cover to the rear side of the chassis Figure 4: Lid Removal – (a) DCP-2000, (b) DCP-2K4 D2K.DP.000804.DRM Page 6 Version 1.0 Doremi Cinema LLC Confidential...
-
Page 7: Ssd Flash Location
HDDs SSD flash Figure 5: SSD Flash Location – (a) DCP-2000, (b) DCP-2K4 The SDD flash is located on top of the USB hub, secured with a screws and connected with its IDE-10 connector plugged into the USB hub header. -
Page 8: New Ssd Flash Installation
3.4 New SSD Flash Installation Take the new SSD flash provided by Doremi and note the pin hole that is blocked – it will have to match the missing pin of the holding card's connector as presented below: Pin hole... -
Page 9: Lid Closing
4 Lid Closing When the previous upgrade steps are completed, the DCP-2000 lid can be closed by sliding it from the rear panel to the front side – Make sure there are no wires caught by the lid. Slide the cover to... -
Page 10: Bios Setup
After Boot Priority is correctly set, press F10 and confirm by pressing <enter>. • When completed, check mark the tag attached to the DCP-2000 at the “BIOS Configuration” position, indicating that this configuration was performed and successful. The SDD flash replacement procedure is now completed. -
Page 11: Document Revision History
6 Document Revision History Date Version Description 05/29/2009 First version D2K.DP.000804.DRM Page 11 Version 1.0 Doremi Cinema LLC Confidential...
Need help?
Do you have a question about the DCP-2000 and is the answer not in the manual?
Questions and answers