Table of Contents
Advertisement
Quick Links
S h o w V a u l t
The information contained herein is confidential and may not be divulged
to any person or entity or reproduced, disseminated or disclosed, in whole
or in part. By receipt of this material including any exhibits, attachments
and spreadsheets the recipient agrees that the information contained
herein shall be kept confidential and shall not, without the prior written
consent of Doremi Laboratories, be disclosed by the recipient in any
manner.
_____________________________________________________________________________________________
SHV.OM.001293.DRM
Digital Cinema Server
Field Installer Manual
Version 1.3
Page 1
Doremi Cinema LLC Confidential
Version 1.3
Advertisement
Table of Contents

Subscribe to Our Youtube Channel
Related Manuals for Doremi ShowVault


Summary of Contents for Doremi ShowVault
- Page 1 By receipt of this material including any exhibits, attachments and spreadsheets the recipient agrees that the information contained herein shall be kept confidential and shall not, without the prior written consent of Doremi Laboratories, be disclosed by the recipient in any manner. _____________________________________________________________________________________________ SHV.OM.001293.DRM...
-
Page 2: Table Of Contents
3.3.2 Keyboard and Mouse PS-2 Connectors..............21 3.3.3 Serial Port.........................21 3.3.4 VGA.......................... 21 3.3.5 USB Ports.........................21 3.3.6 Ethernet........................21 4 ShowVault IP Address......................22 5 Device Manager Set Up.......................24 5.1 Projector Management....................24 5.1.1 Adding a Projector.....................24 5.1.2 Removing a Projector....................26 5.2 Automation Libraries Management..................26 5.2.1 eCNA Device...................... - Page 3 10.6 RAID (Partitions)......................67 10.6.1 RAID Failure Identification..................67 10.6.2 RAID Reinitialization ....................68 10.7 Ingest From Ethernet (FTP Server)................68 10.7.1 Uploading Files to a Remote ShowVault via FTP............68 10.8 Changing the Linux Login Password................69 10.9 Changing the Linux Display Resolution................69 _____________________________________________________________________________________ SHV.OM.001293.DRM...
- Page 4 10.9.1 External VGA......................69 10.9.2 ShowVault Front Panel LCD Screen...............70 11 Troubleshooting......................... 71 11.1 ShowVault BIOS Settings.....................71 11.1.1 BIOS Setting for SuperMicro X7SBE Motherboard..........71 11.2 Server LCD Screen Maintenance (3RU only)...............72 11.2.1 “Root” Logging......................72 11.2.2 Server LCD Screen Calibration................72 12 Appendix A: XML Structure Used by Macro Editor............73 12.1 AutomationCueMacroList Sample.................73...
- Page 5 17.1.1 IMB Certainty Set Up.....................104 17.1.2 ShowVault Server Set Up..................104 17.1.3 IMB Marriage Procedure..................109 18 IMB Certainty and Christie Series 2 Projector Set Up..........110 18.1 IMB Certainty and Christie Series 2 Projector Set Up (Revision E)......110 18.1.1 IMB Certainty Set Up....................110 18.1.2 ShowVault Server Set Up..................110...
-
Page 6: Software License Agreement
Software License Agreement The software license agreement can be found at the following location: http://www.doremicinema.com/warranties.html Hardware Warranty The hardware warranty can be found at the following location: http://www.doremicinema.com/warranties.html _____________________________________________________________________________________ SHV.OM.001293.DRM Page 6 Version 1.3 Doremi Cinema LLC Confidential... - Page 7 ShowVault meets the power requirements in the surrounding area. If in doubt, consult a qualified electrician or a Doremi Labs dealer. AVIS Le voltage peut différer d’un pays a l’autre. Il faut que le ShowVault soit ajusté au voltage du pays. LA SOURCE DE PUISSANCE DOIT AVOIR UN CONDUCTEUR CONNECTE A LA TERRE.
- Page 8 If water or any other liquid is spilled into or onto the ShowVault, disconnect the power and call a Doremi dealer. The unit must be well ventilated and away from direct sunlight. To avoid damage to internal circuitry, as well as the external finish, keep the ShowVault away from direct sources of heat (heater vents, stoves, radiators).
- Page 9 ( s e r v i c i n g ) i n s t r u c t i o n s i n t h e l i t e r a t u r e a c c o m p a n y i n g t h e a p p l i a n c e . _____________________________________________________________________________________ SHV.OM.001293.DRM Page 9 Version 1.3 Doremi Cinema LLC Confidential...
- Page 10 EN 55022 "Limits and Methods of Measurement of Radio Interface Characteristics of • Information Technology Equipment". A "Declaration of Conformity" in accordance with the above standard has been made • and is on file at Doremi. _____________________________________________________________________________________ SHV.OM.001293.DRM Page 10 Version 1.3...
-
Page 11: Introduction
1 Introduction 1.1 Purpose This manual is designed to guide the user through the set up and installation of the ShowVault. 1.2 Presentation This document is structured according to the following sections: • Section 1: Introduction - Overall presentation of the document •... -
Page 12: Drives Insertion
• Drives are preferably to be of the same make and model, and have the same capacity. • Doremi prohibits mixing SATA I drives with SATA II drives within the same RAID. • 1.4.2 HDDs Shipment Hard disk drives (HDDs) might be shipped out of the chassis. In this case, insert them in •... - Page 13 The gray handle must remain open all the way. • LCD monitor HDD Location Figure 3: ShowVault Front View Schema – HDD The drive must be inserted all the way inside the HDD cage before trying to close the • gray handle.
-
Page 14: Proper Power Off
Power cables can now be plugged safely into the ShowVault. • 1.5 Proper Power Off Follow the instruction below to power off the ShowVault safely. Any other method might damage the RAID and result in RAID failure. Select "Shut Down" from the "Logout" menu: "Menu → Logout... → Shutdown". -
Page 15: Showvault Presentation
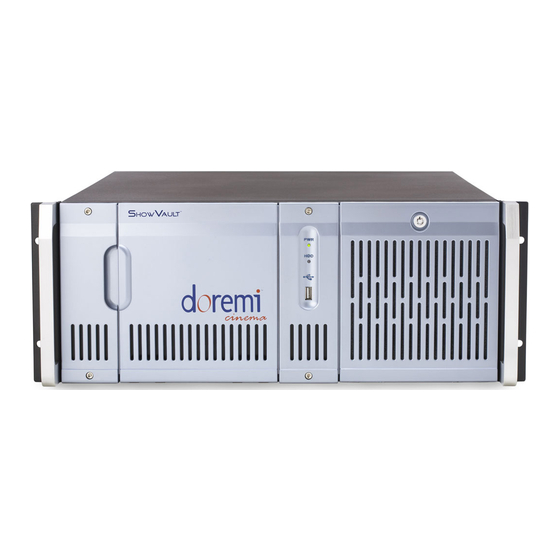
2 ShowVault Presentation Thank you for choosing the Doremi ShowVault. The ShowVault is a high quality DCI JPEG- 2000 server capable of playing movie or trailer packages in MXF format at up to 250Mbits/sec. The unit features a PCI-Express cable to interface with the IMB unit installed in the projector. - Page 16 Each hard disk drive has a blue button that allows removal of the drive from the chassis. • Be careful not to remove the hard disk drive when the ShowVault is running. • There is one USB 2.0 connector on the center of the front panel that can accommodate •...
-
Page 17: Showvault Rear Panel
(see Figure 9 above). Note: The use of the LCD screen requires that the two rear panel VGA connectors are linked using the VGA cable provided with the ShowVault. See paragraph 3.1 for details about the VGA cable connections. - Page 18 To temporarily disable the audible alarm press the red button next to the AC power • connectors Note: Insert drives before connecting power cables. Powering the ShowVault with only one AC cable is not recommended. On the left side on the rear panel are the motherboard connections The motherboard •...
-
Page 19: Rear Panel Connectors
If the front panel LCD screen needs to be used (3RU only), the server LCD screen VGA connector has to be linked to the motherboard VGA connector using the VGA cable. It is provided with the ShowVault. The VGA cable has to be secured to the ShowVault VGA connectors using the integrated screws. -
Page 20: Pci Express Card On Rear Panel
3.2 PCI Express Card On Rear Panel 3.2.1 PCI Express Card Overview On the center of the rear panel are the various card slot connectors. The PCI Express card is used to connect the ShowVault to the IMB in the projector. Express Card Slot... -
Page 21: Showvault Motherboard Connections
Connect a standard VGA monitor to display the ShowVault software interface. This connector can also be linked to the center rear panel VGA connector to facilitate use of the front panel LCD screen. The VGA cable is provided with the Showvault and is further explained in section 3.1. -
Page 22: Showvault Ip Address
4 ShowVault IP Address All ShowVault servers are shipped with a default IP address of 192.168.100.50 on the Ethernet port (Eth1) and a DHCP assigned dynamic IP address on the Ethernet port (Eth0) – see section 3.3 to locate each Ethernet connector. - Page 23 • Exit the set up utility. • To verify the setup go to “Menu → Doremi Apps. → Diagnostic Tool” and verify the IP • Address under the Diagnostic Tool “System” Tab. Note: The configuration for Ethernet 2 that might be asked by the Ethernet configuration wizard is not needed at this point.
-
Page 24: Device Manager Set Up
Figure 19: Device Manager Graphical User Interface (GUI) 5.1 Projector Management 5.1.1 Adding a Projector To connect a projector to the ShowVault click the “Add” button (see Figure 19 above) • The following window will appear: • Figure 20: Device Manager GUI – Device Selection Window _____________________________________________________________________________________ SHV.OM.001293.DRM... - Page 25 Specify a projector identifier (projector name, screen #, 3D-left, and 3D-right) in the first • field Choose the correct projector model to connect to the ShowVault using the “Projector • model” field(s) Select "Series 2" for the projector from the drop-down menu on the right •...
-
Page 26: Removing A Projector
Enter the "DLP Head IP" address and then click the “test” button • Note: If user enables subtitles without the ShowVault being connected to a projector the server will not operate properly. Specify if this is the primary projector or not using the corresponding radio button •... -
Page 27: Jnior Device
5.2.2.1 JNior Device Addition To use the JNior device click the “Add” button and select “JNior” • The "JNior" device setting window will be displayed within the "Device Manager" as • presented below: _____________________________________________________________________________________ SHV.OM.001293.DRM Page 27 Version 1.3 Doremi Cinema LLC Confidential... -
Page 28: Raw Device
"Raw" data formatted as text or binary strings. To use a "Raw" device click the “Add” button and select “Raw” • The "Raw" device setting window will be displayed within the "Device Manager" as • presented below: _____________________________________________________________________________________ SHV.OM.001293.DRM Page 28 Version 1.3 Doremi Cinema LLC Confidential... -
Page 29: Raw Device Removal
5.6 3D Set Up 5.6.1 Projector Configuration for 3D or 48fps When using a ShowVault/IMB configuration for 3D presentation the projector needs to be set to the proper color space. Contact the projector vendor to know how to configure the projector properly. -
Page 30: Dolby 3D Support
To enable the Dolby 3D support please contact Doremi to purchase the appropriate license. Then go to Section 8.3 to install the license in the ShowVault and to Section 14.1 to know how to configure the Dolby DFC100 device through "Device Manager". -
Page 31: Automation Set Up: Macro Editor Usage
The paragraphs below detail how to generate and manage automation events as part of Macro Automation Cues and/or Trigger Cues. 6.1 Macro Editor Interface Overview To run the Macro Editor go to the “Start Menu” of the server and then to “Doremi Apps”. • Click the item “Macro Editor”. -
Page 32: Automation Cue Tab
• “Remove” button (see Figure 28 above). To edit the name of an existing Macro Automation Cue click the “Edit” button and do the • change (see Figure 28 above). _____________________________________________________________________________________ SHV.OM.001293.DRM Page 32 Version 1.3 Doremi Cinema LLC Confidential... -
Page 33: Action Insertion
◦ Playback Actions: select an action between Play, Pause or Toggle Play/Pause ◦ Video Output Actions: choose between “Default Video Output” and “Play all clips at 48fps” ◦ Sensio3D: allows live streaming into the server _____________________________________________________________________________________ SHV.OM.001293.DRM Page 33 Version 1.3 Doremi Cinema LLC Confidential... -
Page 34: Add Delay To The Macro Automation Cue
To add a GPO action click the “General Purpose Output” button which is located in the • "Input/Output" section in the “Add a new Action” window (see Figure 29 above) The following window will appear: • _____________________________________________________________________________________ SHV.OM.001293.DRM Page 34 Version 1.3 Doremi Cinema LLC Confidential... -
Page 35: Imb Input Macro Creation
This section provides instructions on how to create macros to change video source on the IMB. First, create a "Raw" device: • Click on "Menu" and scroll to "Doremi Apps." Then select "Device Manager." • The following window will appear: •... - Page 36 Figure 33: "Add Device" Pop-Up Window Select "Raw" and then click the "Add" button. • Figure 34: "Add Device" Window _____________________________________________________________________________________ SHV.OM.001293.DRM Page 36 Version 1.3 Doremi Cinema LLC Confidential...
- Page 37 Figure 35: IMB Device Added Click the "Quit" button to exit the "Device Manager" GUI. • Creating the Macros: • Click on "Menu" and scroll to "Doremi Apps." Then select "Macro Editor". • The following window will appear: • _____________________________________________________________________________________ SHV.OM.001293.DRM...
- Page 38 Name the macro, either HDMI Input, HDSDI Input, or Internal Input. Click "Ok" when • finished naming the macro. Click the "Insert a new Action button". The following window will appear: • _____________________________________________________________________________________ SHV.OM.001293.DRM Page 38 Version 1.3 Doremi Cinema LLC Confidential...
- Page 39 • A list should appear with many different actions, select "SET_INPUT_HDMI" (or • whichever input is being set up) and click "Ok" (see Figure 39 below). Figure 39: Library Window _____________________________________________________________________________________ SHV.OM.001293.DRM Page 39 Version 1.3 Doremi Cinema LLC Confidential...
- Page 40 Now each macro can be used to change the video source. • Click on "Menu" and scroll to "Doremi Apps." Then select "Macro Execution." • Each macro should be available in the drop-down list. Select the input desired and click •...
-
Page 41: Playback Action Insertion
(belonging to the selected device) in its right part: Figure 43: Macro Editor GUI Automation Setup Example Click the “Ok” button to validate or “Cancel” to cancel the command addition • _____________________________________________________________________________________ SHV.OM.001293.DRM Page 41 Version 1.3 Doremi Cinema LLC Confidential... -
Page 42: Resulting Macro Setting
The user can also click on the “Edit Action” button presented in Figure 44. The user will be able to edit the properties and set the action when added to the Macro Automation Cue. _____________________________________________________________________________________ SHV.OM.001293.DRM Page 42 Version 1.3 Doremi Cinema LLC Confidential... -
Page 43: Macro Saving
• Playlist Note: The saving operation will not only save the Macro Automation Cues, but also the Trigger Cues that are created according to the procedure described in Section 6.3. _____________________________________________________________________________________ SHV.OM.001293.DRM Page 43 Version 1.3 Doremi Cinema LLC Confidential... -
Page 44: Trigger Cue Tab
Trigger Cue in a Show Playlist The newly created Trigger Cue will appear in the “Trigger” window and it will be ready to • connect to a GPI event _____________________________________________________________________________________ SHV.OM.001293.DRM Page 44 Version 1.3 Doremi Cinema LLC Confidential... -
Page 45: Connection To An Event
To connect the selected Trigger Cue to a GPI event click the “General Purpose Input” • button of the “Choose the event to add” window (see Figure 49 above) The following window will appear: • _____________________________________________________________________________________ SHV.OM.001293.DRM Page 45 Version 1.3 Doremi Cinema LLC Confidential... -
Page 46: Trigger Cue Saving
Repeat the Trigger Cue creation operations for all the Trigger Cues are created and click • the “Save” button User will be asked for a password to be able to perform the operation • Figure 52: Authentication Window _____________________________________________________________________________________ SHV.OM.001293.DRM Page 46 Version 1.3 Doremi Cinema LLC Confidential... -
Page 47: Pre-Defined Macro Usage
If the user has a pre-defined "macros.xml" file containing automation and trigger cue definitions, then copy it into the "/doremi/etc/" folder and the corresponding macros will be visible in the Macro Editor GUI. The user will then be able to update the cues if needed from the Macro Editor GUI as presented in the previous paragraphs. -
Page 48: Time Zone Set Up
7.1 Checking the Time Zone To confirm that the time zone of the ShowVault is set correctly open a terminal window by • going to the “Menu → System → Terminal” menu of the ShowVault. -
Page 49: Control Panel
8) Network Configuration: opens the Network Configuration set-up windows. 9) Time Setting: allows the user to set the local time. 10) Touch Screen Calibration: initiates the touch screen calibration process (only applicable to the 3RU). _____________________________________________________________________________________ SHV.OM.001293.DRM Page 49 Version 1.3 Doremi Cinema LLC Confidential... -
Page 50: Account Manager Gui
The "Account Manager" GUI allows the user to Edit/Add/Delete user accounts (see • Figure 55 above) To add a new user account click the “Add” button (see Figure 55 above) • The following window will appear: • _____________________________________________________________________________________ SHV.OM.001293.DRM Page 50 Version 1.3 Doremi Cinema LLC Confidential... - Page 51 Select the proper privileges. They are listed below from the lowest level to the highest • level of privileges: 1) Projectionist: is a standard user allowed to use the Doremi applications present on the ShowVault without changing the configuration. 2) Show Manager: in addition to a Projectionist's privileges, a ShowManager user is allowed to ingest and delete content.
- Page 52 Furthermore, two different login types are available for a user: • 1) “application” user: virtual user account only works with Doremi applications 2) “system” user: regular Unix user account that can be used anywhere on the system. For example, on Linux terminal windows.
- Page 53 To delete an existing user account select it within the main "Account Manager" GUI and • click the “Delete” button User will be asked for a confirmation, clicking “Yes” will delete the user account • Figure 61: User Account Deletion Confirmation _____________________________________________________________________________________ SHV.OM.001293.DRM Page 53 Version 1.3 Doremi Cinema LLC Confidential...
-
Page 54: Language Set Up
8.2 Language Set Up To change the language used on the ShowVault double-click the “Language Setup” icon • within the Control Panel window User will be asked for a password • The following “Language Set up” window will appear: •... -
Page 55: License Manager
8.3 License Manager To access the License Manager GUI double-click the “License Manager” icon available • in the Control Panel The following window will appear: • Figure 65: License Manager GUI _____________________________________________________________________________________ SHV.OM.001293.DRM Page 55 Version 1.3 Doremi Cinema LLC Confidential... - Page 56 When the ingest process is complete reboot the unit by clicking on “Menu → Logout → • Reboot” Go back to the “License Manager” GUI from the “Menu → Control Panel”, the ingested • license(s) will be visible as illustrated below: _____________________________________________________________________________________ SHV.OM.001293.DRM Page 56 Version 1.3 Doremi Cinema LLC Confidential...
- Page 57 • The "License Information" window will appear providing the validity window of the license • To delete a license from the ShowVault select it within the "License Manager" GUI and • click the “Delete” button After ingesting a license, the associated device (e.g. “Subtitle Engine”, “Dolby DFC 100”) •...
-
Page 58: Live Manager
The following window will appear: • "Add" Button Figure 69: Live Manager GUI To create a CPL allowing a live event click the “Add” button • The following wizard window will appear: • _____________________________________________________________________________________ SHV.OM.001293.DRM Page 58 Version 1.3 Doremi Cinema LLC Confidential... - Page 59 Live Event IP Address Box Figure 71: Live Manager – Live CPL Creation Wizard, Step 2 Click the “Next” button • Click the “Finish” button to complete the live CPL creation • _____________________________________________________________________________________ SHV.OM.001293.DRM Page 59 Version 1.3 Doremi Cinema LLC Confidential...
- Page 60 To delete an existing “live CPL” select it in the "Live Manager" window and click the • “Delete” button To use the CPL allowing a live event open CineLister (go to “Menu → Doremi Labs, • Inc. → CineLister”) The previously created CPL will be visible under “live” on the left part of the "Editor" tab •...
- Page 61 Figure 74: CineLister – “Live” CPL Inserted in a Show Playlist Note: At this point in the manual the installation should be completed and the user should be able to use the ShowVault within the system. The information provided in the following sections is for reference.
-
Page 62: Showvault Software And Firmware Usb Upgrade Instructions
9 ShowVault Software and Firmware USB Upgrade Instructions 9.1 Displaying the Software and Firmware Versions To display the software version of the ShowVault go to the “Menu → Doremi Labs, Inc. • → About” menu of the ShowVault. The following window will appear on the screen: •... - Page 63 Figure 77: Authentication Window Enter the appropriate password and select “Ok”. • When the ingest process is complete reboot the Showvault by clicking on “Menu → • Logout”. Click the “Reboot” button – the update can not be applied without rebooting the unit.
-
Page 64: Showvault Linux Terminal Commands
Doremi Technical Service to know the default root password This is the default login name & password for the ShowVault. Use this login for basic set up and configuration of the ShowVault. To change the login password, see Section 10.8. If the password has already been changed, contact the system administrator for the new password. -
Page 65: Remote Login From A Windows Pc
• This command will generate a report file in the "/doremi/tmp" folder • User can then connect via FTP and bring this file in to send (via email or FTP) to Doremi • engineering for analysis To write the report file to a USB drive do the following: •... -
Page 66: Performing The Software Upgrade
• 10.4.3 Sending the Firmware File to the ShowVault To send a new firmware file to the ShowVault JPEG-2000 decoder use a FTP client and • log in as follows: Type: ftp 192.168.100.50 and then press "Enter" (IP address of the ShowVault) •... -
Page 67: Network Restarting
• 10.6 RAID (Partitions) Two partitions are present in the ShowVault. One partition is “/dev/md0” which is mounted on “/data” and another partition is ‘/dev/md1” which is mounted on “/opt”. The following sections explain how to check the health of the RAID (see Section 10.6.1) and how to reinitialize the RAID (see Section 10.6.2). -
Page 68: Raid Reinitialization
"dcp_package". In practice, the folder name can be whatever the user decides to name it. Type: ftp (IP address) and then press "Enter" • The descriptor is the IP address of the ShowVault to send the package files to • An example would be to type: ftp 192.168.100.50 and then press "Enter"... -
Page 69: Changing The Linux Login Password
"root" privileges or have "root" rights. 10.9 Changing the Linux Display Resolution To set up the ShowVault display resolution for an external VGA or front panel server • LCD screen do the following: 10.9.1 External VGA... -
Page 70: Showvault Front Panel Lcd Screen
• User will now be at the new resolution • 10.9.2 ShowVault Front Panel LCD Screen Type: mount -o rw,remount / and then press "Enter" - allows writing to flash card • Type: cd /etc/X11/ and then press "Enter" •... -
Page 71: Troubleshooting
Check the motherboard I/Os on the rear panel to know which motherboard is used on the unit. To access the BIOS settings of the ShowVault fitted with the SuperMicro X7SBE • motherboard press the “Delete” key after powering on the unit when the SuperMicro load (splash) screen appears to enter the BIOS configuration. -
Page 72: Server Lcd Screen Maintenance (3Ru Only)
“Root” Logging To perform the screen recalibration user has to be logged in as “root” as presented in the procedure below: Go to the “Menu → System” menu of the ShowVault and select “Terminal” to launch a • terminal window In the terminal window do the following: •... -
Page 73: Appendix A: Xml Structure Used By Macro Editor
Section 6.3.1, is saved in one “Trigger Cue” element. <?xml version=”1.0”?> <AutomationCueMacroList> <IssueDate>2007-01-31T10:25:11-08:00</IssueDate> <Issuer>Doremi Cinema LLC</Issuer> <Creator>CineLister Macro Editor v0.4</Creator> <AnnotationText>Generated by Doremi Labs Macro Editor version 0.4</AnnotationText> <AutomationCueMacro> <Name>FEATURE_START_FLAT</Name> <Id>urn:uuid:f9bd304e-8c81-4a62-8de5-0805fd91f160</Id> <AnnotationText>start a FLAT feature</AnnotationText> <CommandList> <Command>... -
Page 74: Automationcuemacrolist Structure
<Value>0</Value> </CueTypeParameters> </TriggerCue> </AutomationCueMacroList> 12.2 AutomationCueMacroList Structure The AutomationCueMacroList element is illustrated in Figure 79 and the individual elements that comprise the AutomationCueMacroList element are defined in the remaining subsections. _____________________________________________________________________________________ SHV.OM.001293.DRM Page 74 Version 1.3 Doremi Cinema LLC Confidential... -
Page 75: Issuedate Node
AutomationCueMacroList XML file. It is meant as a display hint for the user. The default value generated by the Macro Editor GUI is “Generated by Doremi Labs Macro Editor version x.y”, where x.y corresponds to the Macro Editor application version number used to create the file. -
Page 76: Automationcuemacro Nodes
A Command node contains the parameters associated to a specific command to be used as part of the overall AutomationCueMacro element. These parameters depend on the type of command defined by the Type node below. _____________________________________________________________________________________ SHV.OM.001293.DRM Page 76 Version 1.3 Doremi Cinema LLC Confidential... - Page 77 Command will set the video output mode ProjectorMacro Command will specify a DLP projector macro DeviceRawSendMessage Command will send a message to a device PurgePendingMacro Command will purge pending macros _____________________________________________________________________________________ SHV.OM.001293.DRM Page 77 Version 1.3 Doremi Cinema LLC Confidential...
- Page 78 2 (Pulse Mode). Its value is the duration, in milliseconds, during which the associated GPO will remain "ON" level before going to "OFF" (see Table 2 above). _____________________________________________________________________________________ SHV.OM.001293.DRM Page 78 Version 1.3 Doremi Cinema LLC Confidential...
-
Page 79: Triggercue Node (Optional)
TriggerCue when it was created. It is the name chosen by the user in Figure 47 for the field “Name of the Trigger”. 12.2.7.2 Id Node The "ID" element uniquely identifies the TriggerCue for asset management purposes. It is encoded as a urn:uuid per [RFC 4122]. _____________________________________________________________________________________ SHV.OM.001293.DRM Page 79 Version 1.3 Doremi Cinema LLC Confidential... - Page 80 The "Value" element indicates the state of the GPI: ON (Value = 1) or OFF (Value = 2). • For Signal Cue Type the following parameter has to be used: "Name". • The "Name" element specifies the signal name. • _____________________________________________________________________________________ SHV.OM.001293.DRM Page 80 Version 1.3 Doremi Cinema LLC Confidential...
-
Page 81: Schema
</xs:complexType> </xs:element> </xs:sequence> </xs:complexType> <!-- TriggerCue --> <xs:complexType name="TriggerCueType"> <xs:sequence> <xs:element name="Name" type="aml:UserText"/> <xs:element name="Id" type="aml:UUID"/> <xs:element name="AnnotationText" type="aml:UserText" minOccurs="0"/> <xs:element name="CueType" type="aml:UserText" minOccurs="0"/> <xs:element name="CueTypeParameters" type="aml:CueTypeParametersType" minOccurs="0"/> </xs:sequence> </xs:complexType> _____________________________________________________________________________________ SHV.OM.001293.DRM Page 81 Version 1.3 Doremi Cinema LLC Confidential... - Page 82 </xs:complexType> <!-- UUID --> <xs:simpleType name="UUID"> <xs:restriction base="xs:anyURI"> <xs:pattern value="urn:uuid:[0-9a-fA-F]{8}-[0-9a-fA-F]{4}-[0-9a-fA-F]{4}-[0-9a-fA-F]{4}- [0-9a-fA-F]{12}"/> </xs:restriction> </xs:simpleType> <!-- UserText --> <xs:complexType name="UserText"> <xs:simpleContent> <xs:extension base="xs:string"> <xs:attribute name="language" type="xs:language" use="optional" default="en"/> </xs:extension> </xs:simpleContent> </xs:complexType> </xs:schema> _____________________________________________________________________________________ SHV.OM.001293.DRM Page 82 Version 1.3 Doremi Cinema LLC Confidential...
-
Page 83: Xml Diagram Legend
Mandatory single element. Minimum Occurrence = 1, Maximum Occurrence = 1, content • = complex, no child elements (i.e. this denotes an empty element). The gray or green text below the element displays the xml-schema annotation associated with the element. _____________________________________________________________________________________ SHV.OM.001293.DRM Page 83 Version 1.3 Doremi Cinema LLC Confidential... -
Page 84: Model Symbols ("Compositors")
User can click on the gray type name shown at the top to jump to the type definition itself. Depending on the settings in xml spy when generating the schema diagrams, the type • name may be shown in the line below the element name: _____________________________________________________________________________________ SHV.OM.001293.DRM Page 84 Version 1.3 Doremi Cinema LLC Confidential... -
Page 85: Model Groups And References
The global element can then be reused in multiple places. _____________________________________________________________________________________ SHV.OM.001293.DRM Page 85 Version 1.3 Doremi Cinema LLC Confidential... -
Page 86: Annex A: Netmap Configuration File
The Auditorium element's value is an index number used to identify the screen in a • complex. It is ignored by a ShowVault engine but is used in TMS software to tag a number in front of a given server. - Page 87 ManagementServer element's value is the optional IP address of the management ingest • server. It is ignored in ShowVault software but is used in TMS software. The purpose is to separate the management stream from the data stream. File browsing and management communication uses the Management server, but all actual data is transferred using the Server IP address.
-
Page 88: Sample Netmap File
Passwords are stored in clear text. They may become a security issue if the file is not • protected correctly in file system. This file is replaced with the Doremi TMS software when the screen is part of the unit • managed by the TMS software. All local modifications are lost. -
Page 89: Annex B: Device Manager Configuration For Licensed Features
License” has been installed on the ShowVault, as explained in Section 8.3. 14.1 Dolby 3D Configuration To configure the Dolby 3D feature on the ShowVault, please refer to the procedure provided in the document “DCP-2000 – Dolby 3D Calibration” or contact Doremi Technical Support to get the document. - Page 90 Select the “RealD 3D EQ” device and click the “Add” button (see Figure 85 above). • The device will be visible on the main "Device Manager" GUI as presented below: • "Save" button Figure 86: “RealD 3D EQ” Device Added _____________________________________________________________________________________ SHV.OM.001293.DRM Page 90 Version 1.3 Doremi Cinema LLC Confidential...
-
Page 91: Subtitle Engine Configuration
This paragraph provides instructions on how to set up the "Device Manager" for Subtitle Engine support. It will allow the user to burn subtitles into the picture before being exported to the projector. Follow the steps below: Open the "Device Manager" GUI by going to “Menu → Doremi Labs, Inc. → Device • Manager”. - Page 92 Figure 89: Subtitle Engine Warning Window Select the “Subtitle Engine” device and click the “Add” button. • The device will be visible on the main "Device Manager" GUI as presented below: • _____________________________________________________________________________________ SHV.OM.001293.DRM Page 92 Version 1.3 Doremi Cinema LLC Confidential...
- Page 93 Figure 90: “Subtitle Engine” Added To complete the set up click the “Save” button (see Figure 90 above). • User will be asked for a password. • _____________________________________________________________________________________ SHV.OM.001293.DRM Page 93 Version 1.3 Doremi Cinema LLC Confidential...
-
Page 94: Imb Certainty Presentation
15 IMB Certainty Presentation 15.1 Revision E Figure 91: IMB Certainty Board with Barco Front Panel (Revision E) _____________________________________________________________________________________ SHV.OM.001293.DRM Page 94 Version 1.3 Doremi Cinema LLC Confidential... -
Page 95: Imb Certainty And Barco Series 2 Projector Set Up
16 IMB Certainty and Barco Series 2 Projector Set Up The IMB Certainty boards are currently only produced and shipped with Revision E configuration (see Figure 92 below). Figure 92: IMB Certainty Board with Barco Front Panel (Revision E) _____________________________________________________________________________________ SHV.OM.001293.DRM Page 95 Version 1.3 Doremi Cinema LLC Confidential... -
Page 96: Imb Certainty And Barco Series 2 Projector Set Up (Revision E)
Audio and GPIO cables. In Revision E, the Audio and GPIO cables are replaced with Ethernet cables. Follow the steps below to install the Audio and GPIO cables: 16.1.1 ShowVault Hardware Components Verify that the following parts are available: •... -
Page 97: Imb Certainty Installation
Take another CAT5 cable end and plug it into the bottom AES slot (RJ-45 connector) for • audio channels 9-16. Plug the other end of the CAT5 cable adapter in the audio processor. • Figure 96: Adapter _____________________________________________________________________________________ SHV.OM.001293.DRM Page 97 Version 1.3 Doremi Cinema LLC Confidential... -
Page 98: Gpio Cat5 Cable Installation
• available or required. 16.1.5 ShowVault Server Set Up Connect one end of the Ethernet cable into the ShowVault and the other end into the • Barco projector (see below). Figure 97: Ethernet Cable Plugged Into ShowVault Connect one end of the PCI-Express cable into the ShowVault and the other end into the •... - Page 99 Power on the ShowVault by pressing the power button (see below) • Figure 100: Power Button on the ShowVault Once the ShowVault is properly booted up click on "Diagnostic Tool" by clicking "Menu • → Doremi Apps. → Diagnostic Tool".
- Page 100 Figure 101: Diagnostic Tool Menu Run the "Device Manager" program to set up the Barco Series 2 Projector. • Click on "Menu" → "Doremi Apps."→ "Device Manager". • _____________________________________________________________________________________ SHV.OM.001293.DRM Page 100 Version 1.3 Doremi Cinema LLC Confidential...
- Page 101 Figure 102: Device Manager Menu Window Click on the "Add" button. • The following window will appear, allowing for selection of the intended device. • Figure 103: Device Manager GUI - Device Addition Window _____________________________________________________________________________________ SHV.OM.001293.DRM Page 101 Version 1.3 Doremi Cinema LLC Confidential...
-
Page 102: Imb Marriage Procedure
Dallas key next to the security socket once the channel button backlight turns yellow. You only have five seconds to enter the key sequence. The key sequence is as follows: 1-2-3-4-5-6-1-2. _____________________________________________________________________________________ SHV.OM.001293.DRM Page 102 Version 1.3 Doremi Cinema LLC Confidential... - Page 103 The system is now married and secured. Test the marriage by playing some encrypted content. Figure 106: Barco Control Panel Note: The Barco Series 2 projector set up should now be complete. _____________________________________________________________________________________ SHV.OM.001293.DRM Page 103 Version 1.3 Doremi Cinema LLC Confidential...
-
Page 104: Imb Certainty And Nec Series 2 Projector Set Up
• Figure 107: Power Cables Connected to ShowVault Connect one end of the Ethernet cable into the ShowVault "Eth0" port and the other end • into the IMB board in the NEC projector. Plug one Ethernet cable end into the top AES slot (RJ-45 connector) for audio channels 1-8. - Page 105 Take another CAT5 cable and plug it from the GPO slot into which ever automator is • available or required. Power on the NEC projector. • Note: The IMB board will boot up completely Power on the ShowVault. • _____________________________________________________________________________________ SHV.OM.001293.DRM Page 105 Version 1.3...
- Page 106 Figure 110: Power Button on the ShowVault Once the ShowVault is properly booted up click on "Diagnostic Tool" by clicking "Menu • → Doremi Apps. → Diagnostic Tool". Confirm that the following parameters are present: Serial Number, Firmware Version, •...
- Page 107 Run the "Device Manager" program to set up the NEC Series 2 Projector. • Click on "Menu" → "Doremi Apps."→ "Device Manager". • The following window will appear: • Figure 112: Device Manager GUI Click on the "Add" button. The following pop-up window will appear.
- Page 108 Figure 114: Device Manager Menu With Device Added Select the "Projector model" and click on "NEC" and then select "Series-2". • Select the "DLP Head IP" address for the projector. • _____________________________________________________________________________________ SHV.OM.001293.DRM Page 108 Version 1.3 Doremi Cinema LLC Confidential...
-
Page 109: Imb Marriage Procedure
Currently NEC software does not support IMB marriage. Please contact Doremi Technical Support to receive a black-out dlm to perform the marriage with the IMB. The dlm will last for 6 months, if 6 months have passed without the proper NEC software then contact Doremi again to renew the black-out dlm. -
Page 110: Imb Certainty And Christie Series 2 Projector Set Up
Re-install the access panel. • 18.1.2 ShowVault Server Set Up Connect one end of the Ethernet cable into the ShowVault and the other end into the • Christie Series 2 Projector. Figure 116: Ethernet Cable Plugged into Eth0 on ShowVault Connect one end of the PCI-Express cable into the ShowVault and the other end into the •... - Page 111 Take another CAT5 cable and plug it from the GPO slot into which ever automator is • available or required. Connect both power cables into the ShowVault. • Figure 118: Power Cables Connected to the ShowVault _____________________________________________________________________________________ SHV.OM.001293.DRM Page 111 Version 1.3...
- Page 112 Power on the ShowVault by pressing the power button. • Figure 119: Power Button on the ShowVault Once the ShowVault is properly booted up go to "Diagnostic Tool" by clicking "Menu → • Doremi Apps. → Diagnostic Tool". Confirm that the following parameters are present: Serial Number, Firmware Version, •...
- Page 113 Click on "Menu" → "Doremi Apps."→ "Device Manager". • The following window will appear: • "Add" Button Figure 121: Device Manager GUI Click on the "Add" button. The following pop-up window will appear. • Figure 122: Device Manager Menu and "Add Device" Window _____________________________________________________________________________________ SHV.OM.001293.DRM...
-
Page 114: Imb Marriage Procedure
Note: Currently Christie does not have software that will support the marriage with an IMB. To continue using the IMB, contact Doremi to receive a black-out dlm for six months. If after six months there is still no software to support the IMB marriage then contact Doremi to renew the black-out dlm. -
Page 115: Gpio And Audio Pin-Out Schema
This section provides information on the IMB Certainty revision E boards and their GPIO • and Audio pin-outs. To view a full list of technical specifications for the IMB Certainty, please see document # CRT.OM.001118.DRM (contact Doremi Tech Support to receive it). 19.1 GPIO Pin-Out 19.1.1... -
Page 116: Audio Aes Pin-Out Information
Channel 7 & 8 minus 20 HD-SDI Input The following are 2D formats that are currently supported on the HD-SDI input of the IMB: Format\fps 23.98 29.97 47.95 59.94 720p 1080i 1080p _____________________________________________________________________________________ SHV.OM.001293.DRM Page 116 Version 1.3 Doremi Cinema LLC Confidential... -
Page 117: Acronyms
Hard Disk Drive Key Delivery Message Liquid Crystal Display Light Emitting Diode RAID Redundant Array of Independent Disks Serial Digital Interface Secured Shell Show Play List Video Graphics Array Extensible Markup Language _____________________________________________________________________________________ SHV.OM.001293.DRM Page 117 Version 1.3 Doremi Cinema LLC Confidential... -
Page 118: Document Revision History
Updated to comply with IMB Certainty Revision E and software version 2.0.10. GPIO and Audio pin-out section added. IMB Input Macro section added. 01/24/2012 Contact information added. 07/13/2012 HD-SDI Input (Section 20) added. _____________________________________________________________________________________ SHV.OM.001293.DRM Page 118 Version 1.3 Doremi Cinema LLC Confidential...
Need help?
Do you have a question about the ShowVault and is the answer not in the manual?
Questions and answers