Table of Contents
Advertisement
Quick Links
Advertisement
Table of Contents

Subscribe to Our Youtube Channel
Related Manuals for OWC Mercury Helios


Summary of Contents for OWC Mercury Helios
- Page 1 ® OWC Digital Mercury Helios ® ASSEMBLY MANUAL & USER GUIDE...
-
Page 2: Table Of Contents
Macs running Windows through Boot Camp. 1.2 PACKAGE CONTENTS 1.3 ABOUT THIS MANUAL 1.4 FRONT VIEW 1.5 REAR VIEW 1.6 SPECIFICATIONS DEVICE SETUP ....................3 2.1 ASSEMBLY 2.2 CONNECTION APPENDIX ......................9 3.1 TROUBLESHOOTING 3.2 TECHNICAL SUPPORT INFORMATION OWC DIGITAL - MERCURY HELIOS TABLE OF CONTENTS... -
Page 3: Introduction
Helios and the computer. If the Helios is unplugged from power or if the Thunderbolt cable is unplugged, the Helios will power off and the LED power indicator will also turn off. OWC DIGITAL - MERCURY HELIOS INTRODUCTION... -
Page 4: Rear View
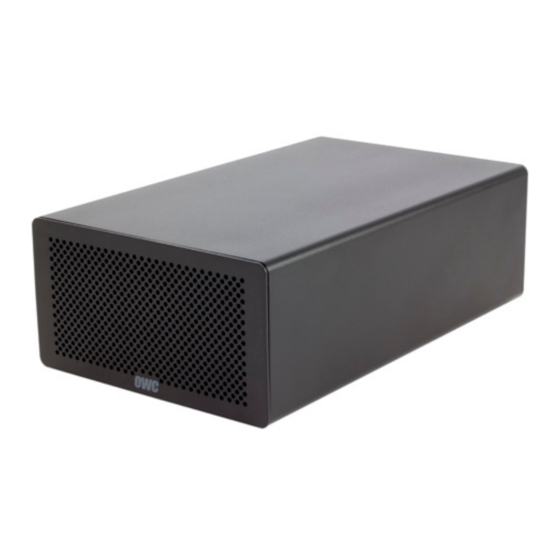
9.17 in. x 5.87 in. x 2.99 in. (23.3 cm x 14.9 cm x 7.6 cm) Weight (Without PCIe Card) 3.85 lbs. (1.75 kg) Fan Noise Level 23 dB(A) Operating Temperatures 41° F to 95° F (5° C to 35° C) Compliances CE, FCC OWC DIGITAL - MERCURY HELIOS INTRODUCTION... -
Page 5: Device Setup
2.1 ASSEMBLY 1. Remove the OWC Digital Mecury Helios® from its packaging and place it on a soft surface. 2. Loosen the two thumscrews on the rear panel of the Helios, circled below in red. You can use your hands or a Phillips screwdriver. - Page 6 If you are installing a double-width PCIe card, remove the second screw and lift out the PCIe slot cover. If you are not installing a double-width card, leave the PCIe slot cover in place and proceed to the next step. OWC DIGITAL - MERCURY HELIOS DEVICE SETUP...
- Page 7 Press staight down; do not twist or rock the card. If the card does not seat fully, do not force it in. Remove the card, check to make sure that there is no damage to the card or the slot and that the bracket is not bent, then try again. OWC DIGITAL - MERCURY HELIOS DEVICE SETUP...
- Page 8 7. Use the screw(s) that you removed earlier to secure the PCIe card to the inner chassis, as circled below. Do not overtighten the screw(s). 8. Slide the inner chassis back into the outer enclosure as shown below, then turn the Helios so that it is standing on its feet. OWC DIGITAL - MERCURY HELIOS DEVICE SETUP...
- Page 9 Keep twisting until you feel increased resistance. Assembly is now complete. Proceed to Section 2.2 for information on connecting the Helios to a computer and to other Thunderbolt devices. OWC DIGITAL - MERCURY HELIOS DEVICE SETUP...
-
Page 10: Connection
• Never install a PCIe card while the Helios is connected to power or to a computer. Doing so carries a risk of injury as well as damage to the PCIe card, the Helios, and the computer. OWC DIGITAL - MERCURY HELIOS DEVICE SETUP... -
Page 11: Appendix
Helios. Try using a different Thunderbolt cable. If your computer does not have Thunderbolt 2 ports, hot-swapping may not be reliable in Windows. If problems persist, consult Section 3.2 for OWC technical support information. 3.2 TECHNICAL SUPPORT INFORMATION... - Page 12 Copyrights and Trademarks: © 2015 OWC Digital. All rights reserved. No part of this publication may be reproduced, stored in a retrieval system, or trans- mitted in any form or by any means, electronic, mechanical, photocopying, recording or otherwise, without the prior written consent of OWC Digital.
Need help?
Do you have a question about the Mercury Helios and is the answer not in the manual?
Questions and answers