Table of Contents

Related Manuals for Solas VF-16NG


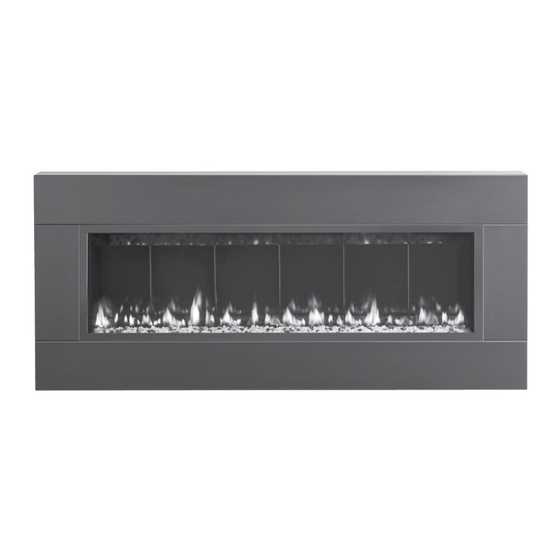
Summary of Contents for Solas VF-16NG
- Page 1 WALL WALL WALL WALL MOUNT MOUNT MOUNT MOUNT VENT VENT FREE FREE VENT VENT FREE FREE GAS FIREPLACES FIREPLACES FIREPLACES FIREPLACES MODELS: MODELS: VF-16NG, VF-16LP, VF-26NG, VF-26LP, VF-46NG, VF-46LP MODELS: MODELS: Report #0361GF005S...
-
Page 2: Table Of Contents
TABLE OF CONTENTS Important Safety Information Room Volume for Vent Free Specifications Assembly & Installation Lighting & Operation Remote Handset Operation Maintenance Maintenance Log Replacement Parts List Control Schematic Installation Record Warranty Information... -
Page 3: Important Safety Information
IMPORTANT SAFETY INFORMATION WARNING: Any change to this heater or its controls can be dangerous. Improper installation or use of the heater can cause serious injury or death from fire, burns, explosion or carbon monoxide poisoning. Do not allow fans to blow directly into the fireplace. Avoid any drafts that alter burner flame patterns. - Page 4 IMPORTANT SAFETY INFORMATION Correct installation of the fire media, proper location of the heater, and annual cleaning are necessary to avoid potential problems with sooting. Sooting, resulting from improper installation or operation, can settle on surfaces outside the fireplace. See media placement instructions for proper installation.
-
Page 5: Room Volume For Vent Free
ROOM VOLUME FOR VENT FREE CODE E E E S S S S Adhere to all local codes or, in their absence, the latest edition of THE NATIONAL FUEL GAS CODE ANSI Z223.1 or NFPA54 which can be obtained from… American National Standards Institute, Inc. - Page 6 ROOM VOLUME FOR VENT FREE The following formula can be used to determine the maximum heater rating (per the definition of unconfined space) that is allowed in your space: 1000 Example A: Consider a room with the following dimensions: L=16ft, W=14ft, H=8ft 1000 = 35,840 Example B: Consider a room with the following dimensions: L1=16ft, W1=14ft, H1=8 which is communicating directly with the space in a second room through openings not furnished with doors...
-
Page 7: Specifications
SPECIFICATIONS NATURAL GAS SPECIFIC NATURAL GAS SPECIFICATION CHART ATION CHART NATURAL GAS SPECIFIC NATURAL GAS SPECIFIC ATION CHART ATION CHART INPUT ONE6 TWENTY6 FORTY6 Input Rating BTU/Hr. 16,000 26,000 37,000 Min. Input BTU/Hr. 12,500 16,000 23,000 Orifice Size - DMS GAS SUPPLY ONE6 TWENTY6... - Page 8 SPECIFICATIONS ONE6 TWENTY6 FORTY6 Dimension “A” 23 1/2” 38 1/4” 58 3/8” Dimension “B” 30” 27 1/4” 25 1/4” Dimension “C” 7 5/8” 7 5/8” 8” OTHER CONSIDERATIONS OTHER CONSIDERATIONS: : : : OTHER CONSIDERATIONS OTHER CONSIDERATIONS Several issues must be addressed when selecting a suitable location for your SÓLAS Wall Mount Vent Free Gas Fireplace.
- Page 9 SPECIFICATIONS MINIMUM CLEARANCES T MINIMUM CLEARANCES T MINIMUM CLEARANCES T MINIMUM CLEARANCES TO COMBUSTIBLE CONSTR O COMBUSTIBLE CONSTR O COMBUSTIBLE CONSTR O COMBUSTIBLE CONSTRUCTION UCTION UCTION UCTION ONE6 TWENTY6 FORTY6 Fireplace to Left Side Wall - (Dimension “A”) 6” 6” 6”...
- Page 10 SPECIFICATIONS SPECIFICATIONS SPECIFICATIONS SPECIFICATIONS CERTIFICATION CERTIFICATION CERTIFICATION CERTIFICATION OMNI-Test Laboratories, Inc. has certified that the SÓLAS Wall Mount Vent Free Gas Fireplaces meet the ANSI Z21.11.2-2011 standard. These appliances are approved for installation in the Commonwealth of Massachusetts. The Board of State Examiners of Plumbers and Gas Fitters has issued approved these appliances.
-
Page 11: Assembly & Installation
ASSEMBLY & INSTALLATION UNPACKING AND INSTAL UNPACKING AND INSTALLING THE S UNPACKING AND INSTAL UNPACKING AND INSTAL LING THE S LING THE SÓLAS VENT FREE GAS FI LING THE S LAS VENT FREE GAS FI LAS VENT FREE GAS FI LAS VENT FREE GAS FIREPLACE REPLACE REPLACE... - Page 12 ASSEMBLY & INSTALLATION INSTALLATION INSTALLATION INSTALLATION Before you begin the fireplace mounting process there are several important installation requirements that must be met. Careful planning will make the installation easier to accomplish and will reduce the chances of encountering problems during installation. The fireplace is designed to be wall-mounted using four lag bolts to secure the fireplace mounting plate to the wall structure.
- Page 13 ASSEMBLY & INSTALLATION GAS SUPPLY LINE GAS SUPPLY LINE GAS SUPPLY LINE GAS SUPPLY LINE The supply line should exit the wall that the fireplace will be installed on at the location specified on the installation template we suggest the installation of a shut-off valve in the supply line between the wall and the connection to the fireplace.
- Page 14 ASSEMBLY & INSTALLATION You are now ready to install the fireplace on the mounting plate, this will require a helper as the fireplace is quite heavy. While looking in from the sides, guide the upper and lower mounting tabs on the back of the fire-place into the corresponding brackets on the mounting plate.
- Page 15 ASSEMBLY & INSTALLATION GAS CONNECTION GAS CONNECTION GAS CONNECTION GAS CONNECTION Verify that the gas type is correct for the fireplace by looking at the rating plate that is attached to the right side of the fire-place, adjacent to the control battery pack. Note: The fireplace is shipped from the factory equipped to burn the fuel listed on the rating plate.
- Page 16 ASSEMBLY & INSTALLATION INSTALLING OR REPLAC INSTALLING OR REPLAC INSTALLING OR REPLAC INSTALLING OR REPLACING THE BATTERIES ING THE BATTERIES ING THE BATTERIES ING THE BATTERIES The valve control module is powered by four “AA” batteries. The batteries are mounted within the Valve Receiver Module located on the right side of the fireplace attached to a drop-down mounting bracket for easy accessibility.
- Page 17 ASSEMBLY & INSTALLATION PLACING THE BURNER G PLACING THE BURNER G PLACING THE BURNER G PLACING THE BURNER GLASS MEDIA LASS MEDIA LASS MEDIA LASS MEDIA The burner glass media poly-bag that you set aside when you unpacked the fireplace contains the correct amount of glass material to cover the burner.
- Page 18 ASSEMBLY & INSTALLATION INSTALLING OUTER PAN INSTALLING OUTER PAN INSTALLING OUTER PAN INSTALLING OUTER PANELS The four outer decorative panels are secured to the fire-place with Philips head screws. The top and bottom panels are secured to the fireplace mounting plate with sheet metal screws.
- Page 19 ASSEMBLY & INSTALLATION INSTALLING THE FIREP INSTALLING THE FIREP INSTALLING THE FIREP INSTALLING THE FIREPLACE SURROUND WITH I LACE SURROUND WITH I LACE SURROUND WITH I LACE SURROUND WITH INTEGRATED SCREEN NTEGRATED SCREEN NTEGRATED SCREEN NTEGRATED SCREEN The decorative surround with integrated screen for the fireplace is held in place by four brackets. Two are located on the top of the fireplace and two on the bottom.
-
Page 20: Lighting & Operation
LIGHTING & OPERATION WARNING: If you do not follow these instructions exactly, a fire or explosion may result causing property damage, personal injury or loss of life. When lighting this appliance, follow these instructions exactly. A. This appliance is equipped with an ignition device that automatically lights the pilot. Do not try to light the pilot by hand. - Page 21 LIGHTING & OPERATION OPERATING YOUR FIREP OPERATING YOUR FIREP OPERATING YOUR FIREP OPERATING YOUR FIREPLACE FOR THE FIRST T LACE FOR THE FIRST T LACE FOR THE FIRST TIME LACE FOR THE FIRST T When operating your new fireplace for the first time, some vapors may be released due to the curing compounds used in the manufacture of the appliance.
-
Page 22: Remote Handset Operation
REMOTE HANDSET OPERATION S S S S ÓLAS REMOTE HANDSET LAS REMOTE HANDSET LAS REMOTE HANDSET LAS REMOTE HANDSET Please note the images of the remote handset on pages 22-27 of this manual depict the Maxitrol GV60 Remote Control, although the profile of the remote depicted is different from the one included with your fireplace, the buttons and operation of the remote is the same. - Page 23 REMOTE HANDSET OPERATION HOW TO TURN YOUR FIR HOW TO TURN YOUR FIR HOW TO TURN YOUR FIR HOW TO TURN YOUR FIREPLACE OFF EPLACE OFF EPLACE OFF EPLACE OFF (INCLUDING PILOT) Familiarize yourself with each of these methods before operating your fireplace. Handset and Wall Switch: Press and hold the OFF button for a second (either on the handset or the wall switch).
- Page 24 REMOTE HANDSET OPERATION...
- Page 25 REMOTE HANDSET OPERATION...
- Page 26 REMOTE HANDSET OPERATION...
- Page 27 REMOTE HANDSET OPERATION...
- Page 28 REMOTE HANDSET OPERATION...
-
Page 29: Maintenance
MAINTENANCE ANNUAL MAINTENANCE ANNUAL MAINTENANCE ANNUAL MAINTENANCE ANNUAL MAINTENANCE A qualified service agency should conduct an annual inspection and maintenance of your SÓLAS Wall Mount Vent Free Gas Fireplace including the overall installation and venting to keep it running safely. The following procedures should be per-formed only by a qualified service person. -
Page 30: Maintenance Log
MAINTENANCE LOG We strongly recommend that you keep a log of the regular maintenance that is performed on your fireplace. We have provided the forms below to make it easy. Simply ask your qualified service per-son to fill out one of the maintenance record forms below, each time the fireplace is serviced. This will help insure that all of the required maintenance procedures have been completed, at least annually. -
Page 31: Replacement Parts List
REPLACEMENT PARTS LIST GENERAL REPLACEMENT GENERAL REPLACEMENT GENERAL REPLACEMENT GENERAL REPLACEMENT PARTS PARTS PARTS PARTS PART NAME PART NAME Natural Gas (NG) Pilot Assembly VF-401 TC Line Red M46-701 Propane (LP) Pilot Assembly VF-402 TC Line Yellow M46-702 Receiver Module (Maxitrol) M46-504 Thermocouple Interrupter Block M46-703... -
Page 32: Control Schematic
CONTROL SCHEMATIC Caution: Label all wires prior to disconnection when servicing the controls. Wiring errors can cause improper and dangerous operation. Verify proper operation after servicing. -
Page 33: Installation Record
INSTALLATION RECORD The installer should complete the form below that describes the details of the installation. Having this written record of installation information available will greatly expedite trouble-shooting should any problem arise with your stove. The installer should keep a duplicate of this form for their records. Date Purchased: _____________________________________________ Dealer:... -
Page 34: Warranty Information
WARRANTY INFORMATION THE WARRANTY Damage to stainless steel, gold, nickel or porcelain enameled surfaces caused by fingerprints, scratches, melted items, or other external sources left on these surfaces from the use of cleaners is not covered in this warranty. SÓLAS, LLC, a division of Progressive Manufacturing, Inc. (“SÓLAS”), Limited Lifetime Warranty warrants your SÓLAS brand gas fireplace (“Product”) to be free from defects in materials and workmanship at the time of manufacture. - Page 35 V1 / 5-20-15...
Need help?
Do you have a question about the VF-16NG and is the answer not in the manual?
Questions and answers