
Related Manuals for Glow-worm SUSTAIN 25c -A


Summary of Contents for Glow-worm SUSTAIN 25c -A
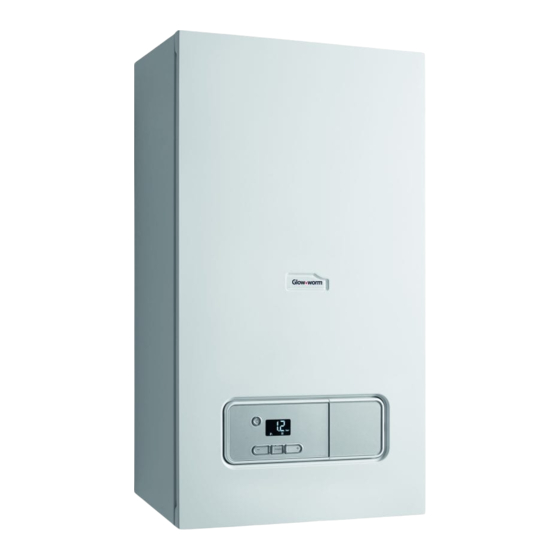
- Page 1 The energy you need Installation and main- tenance instructions SUSTAIN ..c SUSTAIN 25c -A (H-GB) SUSTAIN 30c -A (H-GB) SUSTAIN 35c -A (H-GB)
-
Page 2: Table Of Contents
Contents Contents 7.12 Checking the leak-tightness of the flue gas system and for flue gas recirculation ....20 7.13 Checking the gas connection pressure (gas Safety ..............4 flow pressure) ............20 Action-related warnings ......... 4 7.14 Checking the CO₂ content ........20 Risk caused by inadequate qualifications.... -
Page 3: Sustain ..C Installation And Maintenance Instructions
Contents Commissioning Checklist......... 40 Combustion chart ..........43 Technical data............ 44 Index ................... 47 0020200954_00 SUSTAIN ..c Installation and maintenance instructions... -
Page 4: Safety
1 Safety – observance of accompanying operating, Safety installation and servicing instructions for Action-related warnings the product and any other system compon- ents Classification of action-related warnings – installing and fitting the product in accord- The action-related warnings are classified in ance with the product and system approval accordance with the severity of the possible –... - Page 5 Safety 1 ▶ In order to operate the product, ensure that 1.4.7 Risk of death due to lack of safety devices the condensate siphon is always full. The schematic drawings included in this doc- 1.4.3 Risk of death due to blocked or ument do not show all safety devices re- leaking flue gas routes quired for correct installation.
-
Page 6: Regulations (Directives, Laws, Standards)
1 Safety ▶ Ensure that no chemical substances are fully mounted on the wall in its final installed stored at the installation site. location must exercise full duty of care for ▶ Ensure that the combustion air is not themselves and others with regard to safety. When lifting and handling this appliance, op- routed through an old floor-standing oil- eratives should employ assistance. - Page 7 Safety 1 – BS 6891 Installation of low pressure gas – IGE/UP/1A (Edition 2) Strength testing, pipe work of up to 35mm in domestic tightness testing and direct purging of premises. small, low pressure industrial and com- – BS 4814 Specification for: Expansion mercial natural gas installations.
-
Page 8: Notes On The Documentation
Nominal heat output range in heating Product article number mode (condensing technology) Article number Gas Council Nominal heat output range in hot water Number handling mode SUSTAIN 25c -A (H- 0010015885 47-019-32 Nominal heating load range in heating mode SUSTAIN 30c -A (H- 0010015886 47-019-33... -
Page 9: Functional Elements
Installation 4 ▶ Functional elements If required, get somebody to assist you in this. 4.1.2 Unloading the box from the delivery van ▶ It is recommended that two people lift the unit together. ▶ Lift the box using the straps provided. ▶... -
Page 10: Dimensions
4 Installation Dimensions Minimum clearances Minimum clearance 150 mm 150 mm 5 mm 600 mm Clearance from combustible components It is not necessary to maintain a clearance between the product and components made of combustible materials. Using the installation template ▶... -
Page 11: Removing/Installing The Front Casing
Installation 4 4.10 Removing/installing the side section Conditions: The load-bearing capacity of the wall is not sufficient ▶ 4.10.1 Removing the side section Ensure that wall-mounting apparatus on-site has a suf- ficient load-bearing capacity. Use individual stands or Caution. primary walling, for example. ▶... -
Page 12: Installation
5 Installation – Installation A hot water safety group and a stop cock on the cold water connection – Preparing for installation A filling device between the cold water connection and the heating return Danger! – A stop cock in the gas line Risk of scalding and/or damage due to incorrect installation leading to escaping Gas and water connections... -
Page 13: Connecting The Condensate Drain Pipework
≤ 10 m ≤ 25 m SUSTAIN 25c -A pockets of water close to the pipe wall which can freeze (H-GB) and build into a larger ice plug. ≤ 10 m ≤... - Page 14 Length of the C43 type flue pipe Diameter of the air/flue pipe Dia. 60/100 (L) C43 type air/flue pipe ≤ 5 m SUSTAIN 25c -A (H-GB) ≤ 5 m SUSTAIN 30c -A (H-GB) ≤ 5 m SUSTAIN 35c -A (H-GB) The openings in an attachment for separate lines must lead to a 50 cm-sided square.
-
Page 15: Electrical Installation
Installation 5 Electrical installation 5.6.4 Carrying out the wiring Danger! Risk of death from electric shock! 30 mm max. The mains connection terminals L and N re- main live even if the product is switched off: Shorten the connection cables to the appropriate ▶... -
Page 16: Operation
6 Operation Conditions: If installing a multi-circuit controller. ▶ Change the pump operating mode (d.18) from Eco (in- termittent pump operating mode) to Comfort (continuous pump operating mode). Conditions: If you are connecting a controller (230 V). 230V~ 230V~ ▶ Connect the controller to the main plug. -
Page 17: Displaying The Status Codes
Start-up 7 Proceed accordingly for all parameters that need to be Note changed. If you do not press any button for 15 minutes, Press and hold the button for 3 seconds to finish the current programme is automatically can- configuring the diagnostics codes. celled and the basic display is shown. -
Page 18: Checking And Treating The Heating Water/Filling And Supplementary Water
7 Start-up Checking and treating the heating Caution. water/filling and supplementary water The use of unsuitable heating water may cause aluminium corrosion and a result- Caution. ing lack of leak-tightness. Risk of material damage due to poor-qual- In contrast to steel, grey cast iron or copper, ity heating water for example, aluminium reacts with alkaline ▶... -
Page 19: Preventing Low Water Pressure
Start-up 7 Preventing low water pressure Purging the product The filling pressure should be between 0.03 and 0.3 MPa Select check programme P.07. (0.3 and 3 bar). ◁ The product does not start up, the internal pump If the heating installation extends over several storeys, operates intermittently and purges the heating circuit higher filling pressures may be required to avoid air entering and the small hot water circuit. -
Page 20: Checking The Leak-Tightness Of The Flue Gas System And For Flue Gas Recirculation
7 Start-up 7.12 Checking the leak-tightness of the flue gas 10. Tighten the screw on the measuring nipple (1). system and for flue gas recirculation 11. Open the gas isolator cock. 12. Check the measuring nipple for gas tightness. Check that the flue gas system is intact, in accordance with British Gas TB 200. -
Page 21: Checking Function And Leak-Tightness
Adapting the unit to the heating installation 8 8.1.1 Setting the burner anti-cycling time Only carry out the adjustment in increments of 1/8 turn and wait approximately 1 minute after each adjustment ▶ Set the diagnostics code. (→ Page 16) until the value stabilises. -
Page 22: Setting The Bypass Valve
The original components of the product were also certified If the radiators do not as part of the declaration of conformity. If you do not use heat up sufficiently at the certified Glow-worm original spare parts for maintenance Right-hand stop 0.035 default setting. In this or repair work, this voids the conformity of the product. -
Page 23: Cleaning The Heat Exchanger
Inspection and maintenance 10 Remove the plugs from the gas valve. Remove the gas-air mixture unit. Remove the air intake pipe (1). Remove both burner seals from the burner cover. 10. Remove the burner (4). 10.4 Cleaning the heat exchanger Check the heat exchanger for damage and dirt. -
Page 24: Checking The Burner
11 Troubleshooting 10.5 Checking the burner 10.8 Cleaning the filter in the cold water inlet ▶ Check the surface of the burner for damage. If you see Close the main cold water supply line. any damage, replace the burner. Drain the product on the hot water side. Remove the connection piece from the connection for 10.6 Installing the gas-air mixture unit... -
Page 25: Calling Up The Fault Memory
Troubleshooting 11 11.2 Calling up the fault memory The last 10 fault codes are stored in the fault memory (to- gether with the time at which the respective fault occurred and, after 24 hours, with the number of days). ▶ Hold the button down for more than 7 seconds. - Page 26 11 Troubleshooting 11.6.5 Replacing the main PCB Lift the heat exchanger up slightly and remove it to- gether with the condensate tray. Remove the ignition transformer (6). 10. Replace all the seals. 11. Install the new heat exchanger in reverse order. 11.6.4 Replacing the expansion vessel Open the electronics box.
-
Page 27: Completing Repair Work
For contact details for our customer service department, you can write to the address that is provided on the back page, 11.6.8 Replacing the flow sensor or you can visit www.glow-worm.co.uk. Pull out the plug. Remove the flow sensor (1). -
Page 28: Appendix
Appendix Appendix Check programmes – Overview Note Since the programme table is used for various products, some programmes may not be visible for the product in question. Display Meaning P.01 Start up the burner at the adjustable heat input: The product is operated after a successful ignition with the set heat input between "0" (0% = Pmin) and "100"... - Page 29 Appendix Setting level Values Default set- Unit Increment, select, explanation Own setting ting Min. Max. ℃ – – d.04 Water temperature in the Current value cylinder adjustable ℃ – – d.05 Determined heating flow Current value set target temperature adjustable ℃...
- Page 30 Appendix Setting level Values Default set- Unit Increment, select, explanation Own setting ting Min. Max. – – d.24 Status of the pressure off = Not switched monitor adjustable on = Switched – – d.25 Status of the requirement Current value off = Function deactivated to reheat the cylinder or for adjustable...
- Page 31 Appendix Setting level Values Default set- Unit Increment, select, explanation Own setting ting Min. Max. – – – d.60 Number of blocks by the Current value temperature sensor adjustable – – – d.61 Number of successful Current value ignitions adjustable –...
-
Page 32: Status Codes - Overview
Appendix Setting level Values Default set- Unit Increment, select, explanation Own setting ting Min. Max. – – – – d.96 Reset to factory setting 0 = No Adjustable 1 = Yes ℃ d.128 Heating minimum target Adjustable value ℃ d.129 Hot water minimum tar- Adjustable get value (com-... -
Page 33: D Overview Of Fault Codes
Appendix Status code Meaning S.32 Fan waiting time: Fan speed outside of the tolerance values S.33 Forced fan operation until the pressure monitor is switched S.34 Frost protection active S.39 Underfloor heating contact open S.41 Water pressure too high S.42 Flue non-return flap closed S.46 Frost protection mode (Comfort): Minimum load... - Page 34 Appendix Fault code Meaning Possible cause F.28 Fault: Ignition unsuccessful when starting Gas meter defective or gas pressure monitor has triggered, air in gas, gas flow pressure too low, thermal isolator device (TAE) has triggered, incorrect gas restrictor, incorrect spare gas valve, fault on the gas valve, multiple plug on PCB incorrectly plugged in, break in cable harness, ignition system (ig- nition transformer, ignition cable, ignition plug, ignition electrode) defective, ionisation current interrupted (cable, electrode), incorrect earthing of product,...
-
Page 35: E Connection Diagram: Combination Unit
Appendix Fault code Meaning Possible cause F.85 Fault: Temperature sensor The flow and/or return temperature sensors have been installed on the same pipe/incorrect pipe Temperature sensor not connected or is connected incorrectly F.86 Fault: Underfloor heating contact Underfloor heating contact open, sensor disconnected or defective F.87 Fault: Electrodes Electrodes not connected or they are connected incorrectly, short circuit in... -
Page 36: F Connection Diagram: Combination Unit (35 Kw)
Appendix Timer Pressure sensor Control system Volume flow sensor Temperature sensor in the heating flow Ionisation electrode Temperature sensor in the heating return Heating pump Ignition electrode Gas valve Main power supply 3-way valve Connection diagram: Combination unit (35 kW) Burner off X106 eBUS... -
Page 37: G Inspection And Maintenance Work - Overview
Appendix Heating pump Main power supply Ignition electrode Inspection and maintenance work – Overview The table below lists the manufacturer requirements with respect to minimum inspection and maintenance intervals. If na- tional regulations and directives require shorter inspection and maintenance intervals, you should observe these instead of the intervals listed in the table. -
Page 38: H Opening In The Air/Flue Pipe
Appendix Opening in the air/flue pipe D, E Positioning of the opening of a fan-supported flue gas pipe Minimum dimen- Installation site sions Directly below an opening, air bricks, opening windows, etc., that can be opened. 300 mm Above an opening, air bricks, opening windows, etc., that can be opened. 300 mm Horizontally to an opening, air bricks, opening windows, etc., that can be opened. -
Page 39: Text From Bs 5440-1 On Fan-Supported Flue Gas Pipes
Appendix Text from BS 5440-1 on fan-supported flue gas pipes BS 5440–1: It is recommended that the fanned flue gas system terminal is positioned as follows: – At least 2 m from an opening in the building directly opposite, and –... -
Page 40: I Commissioning Checklist
Appendix Commissioning Checklist Benchmark Commissioning and Servicing Section It is a requirement that the boiler is installed and commissioned to the completed in full. www.centralheating.co.uk © Heating and Hotwater Industry Council (HHIC) Installation and maintenance instructions SUSTAIN ..c 0020200954_00... - Page 41 Appendix GAS BOILER SYSTEM COMMISSIONING CHECKLIST This Commissioning Checklist is to be completed in full by the competent person who commissioned the boiler as a means of demonstrating compliance with the appropriate Building Regulations and then handed to the customer to keep for future reference. CONTROLS Optimum start control Fitted...
- Page 42 Appendix SERVICE RECORD It is recommended that your heating system is serviced regularly and that the appropriate Service Interval Record is completed. Service Provider SERVICE 01 SERVICE 02 ² % ² % ² % ² % SERVICE 03 SERVICE 04 ²...
-
Page 43: J Combustion Chart
Appendix Combustion chart PRIOR TO CO AND COMBUSTION RATIO CHECK NOTE The boiler manufacturer’s installation instructions should have been followed, gas type verified and gas THE AIR GAS RATIO VALVE IS FACTORY supply pressure/rate checked as required prior to commissioning. SET AND MUST NOT BE ADJUSTED As part of the installation process, especially where a flue has been fitted by persons other than the DURING COMMISSIONING UNLESS THIS... -
Page 44: K Technical Data
Appendix Technical data Technical data – Heating SUSTAIN 25c -A (H- SUSTAIN 30c -A (H- SUSTAIN 35c -A (H- 10 … 80 ℃ 10 … 80 ℃ 10 … 80 ℃ Max. flow temperature adjustment range (default setting: 75 °C) Maximum permissible pressure 0.3 MPa... - Page 45 Appendix Technical data – General SUSTAIN 25c -A (H- SUSTAIN 30c -A (H- SUSTAIN 35c -A (H- Gas category Diameter of the gas pipe 1/2 inch 1/2 inch 1/2 inch Diameter of the heating connec- 3/4 inch 3/4 inch 3/4 inch...
- Page 46 Appendix SUSTAIN 25c -A (H- SUSTAIN 30c -A (H- SUSTAIN 35c -A (H- Standby electrical power con- sumption Level of protection IPX4D IPX4D IPX4D Installation and maintenance instructions SUSTAIN ..c 0020200954_00...
-
Page 47: Index
Index Index Installing the side section ............ 11 Intended use................4 Air index setting..............20 Mains connection ..............15 Maintenance work ............22, 37 Air/flue pipe ................. 13 Air/flue pipe, installed ............5 Minimum clearance ............. 10 Article number ............... 8 Automatic air vent.............. - Page 48 Publisher/manufacturer Glow-worm Nottingham Road ‒ Belper ‒ Derbyshire DE56 1JQ Telephone 016 34 29 23 00 ‒ Fax 016 34 29 01 66 Technical helpline 084 4 736 00 59 ‒ After sales service 017 73 82 81 00 www.glow-worm.co.uk 0020200954 The energy you need We reserve the right to make technical changes.
Need help?
Do you have a question about the SUSTAIN 25c -A and is the answer not in the manual?
Questions and answers