Table of Contents
Advertisement
Quick Links
Advertisement
Table of Contents

Related Manuals for TransAct RESPONDER MP2


Summary of Contents for TransAct RESPONDER MP2
-
Page 1: Mobile Printer
Mobile Printer Quick Start Guide Page i 100-13809 - Rev B... -
Page 2: Change History
Change History: Description of Change RFC # Date Initial Release R11321 March 2015 Add picture for loading paper rolls. R11339 June 2015 Updated pictures; added accessories list; added instructions for running the Printer Self Test, for cleaning the Print Head and for Running DFU Mode. Page ii 100-13809 - Rev B... -
Page 3: Fcc Wireless Notice
Federal Communications Commission Radio Frequency Interference Statement This equipment, when not transmitting, has been tested and found to comply with the limits for a Class A digital device, pursuant to part 15 of the FCC Rules. These limits are designed to provide reasonable protection against harmful interference when the equipment is operated in a commercial environment. -
Page 4: Canadian Department Of Communications Radio Interference Statement
The highest Pout was taken from the original certification report under FCC ID: VPYLBTN Highest Pout is 264.24mW, highest antenna gain (in linear scale) is 0.87, and R is 20cm. Pd = (264.24*0.87) / (4*π*20 ) = 0.045 mW/cm , which is 0.955 mW/cm below to the limit. -
Page 5: Disclaimer
TransAct Technologies, Inc. ("TransAct"). This document is the property of and contains information that is both confidential and proprietary to TransAct. Recipient shall not disclose any portion of this document to any third party. TRANSACT DOES NOT ASSUME ANY LIABILITY FOR DAMAGES... -
Page 6: Table Of Contents
Canadian Department of Communications Radio Interference Statement ..iv Disclaimer ....................... v Copyright ......................v Trademarks ..................... v Table of Contents ................... vi Introducing your Responder MP2 Printer ..1 About your Responder MP2 Printer ............. 2 Who Should Read This Guide? ............... 2 What Is Included in This Guide? .............. - Page 7 Mounting and Assembly Instructions ..- 21 - Mounting and Assembly Instructions ............- 23 - Installing Quick Release Plate ..............- 23 - Assembly of Optional Battery Pack ............- 26 - Appendix A: Ordering Supplies ....- 28 - Index ..........- 31 - Page vii 100-13809 - Rev B...
- Page 8 This page intentionally left blank Page viii 100-13809 - Rev B...
-
Page 9: Introducing Your Responder Mp2 Printer
Chapter 1 Introducing your Responder MP2 Printer Page 1 100-13809 - Rev B... -
Page 10: About Your Responder Mp2 Tm Printer
EMS, insurance, public utilities, ® delivery vehicles and others. It builds upon the experience of TransAct printers with a host of features specifically designed for mobile printing: No paper feeding required – just drop in paper roll and print ... -
Page 11: Technical And Sales Support
Return Materials Authorization and Return Policies If a support technician determines that the printer should be serviced at a TransAct facility, and you want to return the printer for repair, we will issue you the Returned Materials Authorization (RMA) number that is required before returning the printer. -
Page 12: Shipping Printers
Shipping Printers Be sure to save the packing materials in the event that you need to send the printer in for servicing. TransAct is not responsible for damaged return items that are not packaged in original shipping material. Sales Support... -
Page 13: Safety Precautions
Chapter 2 Safety Precautions Page - 5 - 100-13809 - Rev B... -
Page 14: General Precautions
Important Safety Precautions General Precautions Never place the printer on a slanted or unstable location. If the printer is dropped or slides off, this could cause personal injury. Place the printer in a location that meets the specified ranges of temperature and humidity. -
Page 15: Tm Specifications And Requirements
Chapter 3 Responder MP2 Specifications and Requirements Page - 7 - 100-13809 - Rev B... -
Page 16: Responder Mp2 Tm Specifications And Requirements
Responder MP2 Specifications and Requirements Standard Features The following features are standard for Responder MP2 printers: Designed for mounting on a vertical surface Is a mere 2.6 inches deep, 4.3 inches high, and 12.1 inches wide to fit into the confined space of smaller vehicles ... -
Page 17: Physical Printer Specifications
Physical Printer Specifications Max Dimensions Dimensions in 12.3 2.6/2.812* inches Dimensions in mm 312.42 66.04/71.43* 109.22 *With Quick Release Plate installed Weight: approx. 3 lbs. (2.3 kg) without paper Interfaces: USB 2.0 Type A, Wi-Fi, Bluetooth v4.0 Printing Characteristics Printing method: Thermal monochrome Resolution: 8 dots/mm (203 DPI) -
Page 18: Environmental Conditions
Be aware that the environmental conditions of the location where you place the printer will have an effect on the printer’s performance and longevity. The Responder MP2 printer will run its best when stored and operated in an environment that meets the temperature and environmental conditions described below. -
Page 19: Installation And Setup
Chapter 4 Installation and Setup Page - 11 - 100-13809 - Rev B... -
Page 20: Unpack The Printer
Unpack the Printer Be sure to save the box and packing materials in case you need to send the printer in for service. TransAct Technologies is not responsible for damaged return items that are not packaged in original shipping material. Refer to “Return Materials Authorization and Return Policies”, on page 3 for information... - Page 21 If you are interfacing the printer to your computer using a USB connection, connect the cable to the USB port as shown in the figure. Then snap the USB port cover onto the back of the printer, covering any wires as shown.
-
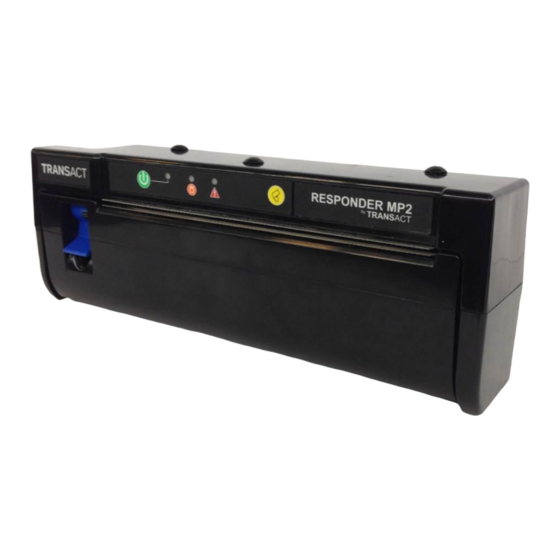
Page 22: Printer Features
Printer Features The diagram below shows the main external features of your Responder printer. [1] Control panel - touch panel containing power and paper feed buttons as well as indicator lights for battery power, trouble indicator and WiFi signal. [2] Cover open lever - flips upward to open paper loading door. [3] Paper loading door - swings outward to provide loading of or access to thermal paper roll. -
Page 23: Control Panel Operations
Control Panel Operations The Responder MP2 features a simple touch panel for operations and alerts, as shown in the figure. Functions are as follows: Indicator Symbol Type Function Power Button Turns printer power on or off. An indicator light will light when power is on. -
Page 24: Loading Paper Rolls
Loading Paper Rolls The Responder MP2 printer features easy, drop-in loading of thermal paper rolls. This section discusses how to load thermal paper media. 1. Grasp the top of the unit and flip the Cover Open Lever upward to the Open position. - Page 25 2. The Paper Door Assembly will rotate outward from the bottom to open. Slide a roll of thermal paper into the opening as shown. Note: Orient the paper roll so that it feeds from the top, as shown in the subsequent figure.
- Page 26 4. Close the Paper Assembly Door by rotating upward and pressing in the center until it clicks into place, leaving a length of paper on the outside of the printer as shown. Paper will automatically advance to the top of the form. 5.
-
Page 27: Running Self Test
IPA). Firmware Update Newer Firmware may be available for your printer. You must have the MP2DFUDownloader.exe program installed. This is available from Transact- tech.com Locate the firmware file to download, for example PE8100_000_010.hex. In order to download the printer you will need to have power to the printer and have the USB cable plugged into the printer and connected to the computer. -
Page 29: Mounting And Assembly Instructions
Chapter 5 Mounting and Assembly Instructions Page - 21 - 100-13809 - Rev B... -
Page 31: Installing Quick Release Plate
This section discusses instructions for mounting of the Quick Release Plate and assembly of the optional battery pack. Installing Quick Release Plate The Responder MP2 printer can be optionally mounted to a Quick Release Plate for easy installation and removal in vehicle and other applications. - Page 32 Plate as a template for the hole locations as shown. The dimensions of the pattern are outlined in the figure below. Attach the Quick Release Plate to the mounting surface using these screws, remove the rubber feet from the printer by unscrewing the Philips screws holding them in place, fasten the wall mount studs to these same mounting hole locations on the printer, and slide the printer into place onto the Quick Release Plate.
- Page 33 Locations for mounting Wall mount hole pattern: Page - 25 - 100-13809 - Rev B...
-
Page 34: Assembly Of Optional Battery Pack
Assembly of Optional Battery Pack The Responder MP2 printer offers an optional battery pack that can be charged via the printer's USB port using a standard USB Micro-B charger, with an approximate battery life of 100 pages. This section describes the instructions for assembling the optional battery pack. - Page 35 3. Attach the power connection from a battery pack assembly to the corresponding receptacle on the printed circuit board as shown. Page - 27 - 100-13809 - Rev B...
-
Page 36: Appendix A: Ordering Supplies
Mounting pins Appendix A: Ordering Supplies Responder MP2 supplies can be ordered easily direct from TransAct. We offer convenient one-stop shopping for all your printer needs, including paper, spare parts, manuals, printer servicing/refurbishment and more. For more information, call us at 1-800-243-8941 or visit www.TRANSACTsupplies.com. - Page 37 Page - 29 - 100-13809 - Rev B...
- Page 38 Page - 30 - 100-13809 - Rev B...
-
Page 39: Index
Index Battery pack assembly, 26 Shipping printers, 4 Canadian Department of Warranty information, 3 Communications Radio Interference Regulatory compliance, 10 Statement, iv Return Materials Authorization, 3 Contact information, 4 Safety precautions, 5 Control panel, 15 Sales Support, 4 Copyright, v Specifications Disclaimer, v Electrical, 10...
Need help?
Do you have a question about the RESPONDER MP2 and is the answer not in the manual?
Questions and answers