Table of Contents
Advertisement
Advertisement
Table of Contents

Related Manuals for ClearOne UNITE 100


Summary of Contents for ClearOne UNITE 100
- Page 1 UNITE™ 100 - PTZ Camera anUal...
-
Page 2: Table Of Contents
Table of Contents INTRODUCTION Preface ..................................1 Warning Notes ................................. 1 Features ................................... 2 Parts Included ................................. 2 INSTALLATION Connections ................................3 Setup ....................................3 CAMERA PHYSICAL DESCRIPTION Camera Specifications ............................6 Dimensions ................................7 RS232/DB9 Interface ............................... 7 CAMERA OPERATION USING THE REMOTE Remote Controller Explanation .......................... -
Page 3: Introduction Preface
Moisture - Do not expose the camera to rain or moisture. Shock Hazard - Do not perform any unauthorized modification or dismantling. To reduce the risk of electric shock, do not remove the cover. Refer servicing to qualified personnel. ClearOne is not responsible for any unauthorized modification or dismantling. -
Page 4: Features
• Power cable • User manual • USB 3.0 data cable or DVI Cable • Four double-side adhesive strips Please check if your order is complete. Contact ClearOne if there is any question about your shipment. : 800.283.5936 EchNIcal UpporT... -
Page 5: Installation
Note: You will connect the USB or DVI cable depending on which is sent with your equipment. ETUp Perform the following: 1. Make the power connection, but don’t plug in the supply to turn the camera power on. UNITE 100 U aNUal... - Page 6 2. Set the Working Mode switch setting at the bottom of the camera as shown in the following illustration: Switch Position 3. Plug in the power supply to turn the supply on, the camera indicator light illuminates red. Dial Position Video Setting 1080P60 1080P50...
- Page 7 6. Test the remote functionality with the camera by resetting the camera to it’s factory settings through the On-Screen-Display (OSD) with the menu key of remote controller, [MENU] -><RESET> -> <ALL RESET>, moving the left/right keys to select <Yes>, then confirm by [HOME] key as the following: UNITE 100 U aNUal...
-
Page 8: Camera Physical Description
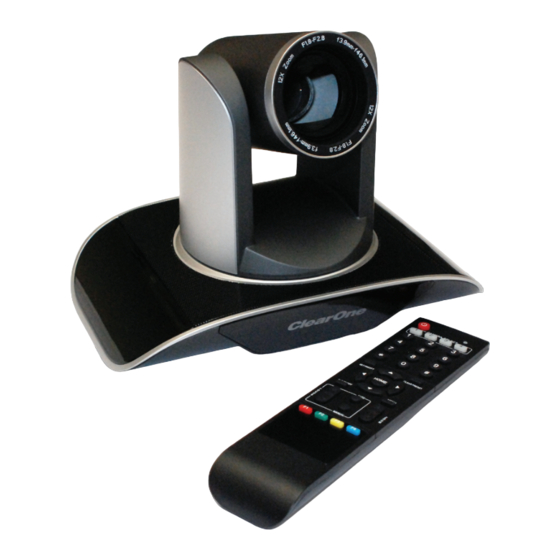
Camera Physical Description The following illustration shows the various features, controls, and connections: 1. Camera Lens 7. Video Output Format Selection Switch 2. Camera Base 8. RS232 Control Interface 3. Power Indicator Light 9. USB3.0 B Male Interface 4. Working Mode Selection Switch 10. -
Page 9: Dimensions
4. GND 4. GND 4. DTR 5. RXD 5. RXD 5. RXD 5. GND 6. RS485-A 6. GND 6. RS485-A 6. DSR 7. IR OUT 7. IR OUT 7. RTS 8. RS485-B 8. RS485-B 8. CTS UNITE 100 U aNUal... -
Page 10: Camera Operation Using The Remote
Camera Operation Using the Remote This section describes the IR Remote Controller and its use with the Unite Camera. REMOTE CONTROLLER EXPLANATION Control Description Standby Key After pressing the Standby Key, the camera will go into standby mode. The front indicator light is off, but blinks every 20 sec. - Page 11 Example: Pressing * + # + F2 will assign address 2 to the camera. Afterwards, select Camera Address 2 with the Camera Select keys on the remote (see control 6 above) before the remote can be further used to control the camera. UNITE 100 U aNUal...
-
Page 12: Menu Control Of The Camera
Menu Control of the Camera The UNITE camera settings can be controlled via the remote controller using the On-Screen-Display menus. This section describes the menu options and the settings they control. In normal working mode, press the [MENU] key to display the menu. MAIN SCREEN Use the remote control position keys to navigate to the menu item. -
Page 13: Camera Option
GAIN: Electronic amplification of the video signal. 0-15 BRIGHT: Brightness control. Reset condition 3, 0-9 EV MODE: Reset Condition: off, Available: On/Off (only available in Auto mode) WDR: Wide Dynamic Range BACK/MENU: The [MENU] key returns to the previous menu UNITE 100 U aNUal... - Page 14 Color Submenu From the CAMERA SET screen, move the pointer to the <COLOR>, and then click the [HOME] key to enter the COLOR screen as shown: WB MODE: Reset Condition: ATW White balance mode setting: Auto, Indoor, Outdoor, OnePush, ATW, Manual R.GAIN: Reset condition Default.
-
Page 15: Pt Option
From the MAIN MENU, move the pointer to the <V. FORMAT OPTION>, and then click the [HOME] key to enter the VIDEO FORMAT screen as shown: Video Formats: Select from the available formats: 1080P60, 1080P50, 1080P30, 1080P25, 720P60, 720P50, 720P30, 720P25 BACK/MENU: The [MENU] key returns to the previous menu UNITE 100 U aNUal... -
Page 16: Reset Option
EsET pTIoN From the MAIN MENU, move the pointer to the <RESET OPTION>, and then click the [HOME] key to enter the RESET screen as shown: SYS. RESET: System reset: Protocol: VISCA; Address: 1; baud rate:9600; RS485:Off CAM. RESET: Camera parameter reset PT. -
Page 17: Com Control Of The Camera
Command Not z0 61 41 FF Returned when a command cannot be executed due to current Executable conditions. For example, when commands controlling the focus manually are received during auto focus. UNITE 100 U aNUal... -
Page 18: Part 2: Camera Control Command
2: c aMEra oNTrol oMMaNd y=x+ 8, where x = the camera address you want to control. Command Function Command Packet Note AddressSet Broadcast 88 30 01 FF Address setting IF_Clear Broadcast 88 01 00 01 FF I/F Clear CommandCancel 8x 21 FF 8x 01 04 00 02 FF CAM_Power... - Page 19 8x 01 04 3F 02 0p FF Remote 8x 01 04 61 02 FF Image Flip CAM_LR_Reverse Horizontal ON/OFF 8x 01 04 61 03 FF 8x 01 04 66 02 FF CAM_PictureFlip Image Flip Vertical ON/OFF 8x 01 04 66 03 FF UNITE 100 U aNUal...
- Page 20 Part 2: c - Continued aMEra oNTrol oMMaNd Command Function Command Packet Note P: Video format 1:1080P60 2:1080P50 4:720P60 VideoSystem Set 8x 01 06 35 00 0p FF 5:720P50 6:1080P30 7:1080P25 8:720P30 9:720P25 pqrs: Camera ID (=0000 to CAM_IDWrite 8x 01 04 22 0p 0q 0r 0s FF FFFF) SYS_Menu 8x 01 06 06 03 FF...
-
Page 21: Part 3: Inquiry Command
50 03 FF CAM_IDInq 8x 09 04 22 FF y0 50 0p 0q 0r 0s FF pqrs: Camera ID y0 50 ab cd CAM_VersionInq 8x 09 00 02 FF mn pq rs tu vw FF UNITE 100 U aNUal... -
Page 22: Pelco-D: Protocol Command List
Part 3: I - Continued NqUIry oMMaNd Command Command Packet Return Packet Note P: Video format 1:1080P60 2:1080P50 4:720P60 VideoSystemInq 8x 09 06 23 FF y0 50 0p FF 5:720P50 6:1080P30 7:1080P25 8:720P30 9:720P25 y0 50 02 FF IR_Receive 8x 09 06 08 FF y0 50 03 FF y0 07 7D 01 04 00 FF Power ON/OFF... -
Page 23: Pelco-P: Protocol Command List
Address 0x00 0x59 Value Value Low 0xAF Response High Byte Byte Query Tilt Position 0xA0 Address 0x00 0x53 0x00 0x00 0xAF Query Tilt Position 0xA0 Address 0x00 0x5B Value Value Low 0xAF Response High Byte Byte UNITE 100 U aNUal... - Page 24 -p: p Elco roTocol oMMaNd oNTINUEd Function Byte1 Byte2 Byte3 Byte4 Byte5 Byte6 Byte7 Byte8 Query Zoom 0xA0 Address 0x00 0x55 0x00 0x00 0xAF Position Query Zoom 0xA0 Address 0x00 0x5D Value Value Low 0xAF Position Response High Byte Byte : 800.283.5936 EchNIcal UpporT...
-
Page 25: Camera Maintenance
Check whether the camera is on a fixed, solid surface, or if there is a vibrating mechanical object nearby that is shaking the camera. Remote Controller 1. Make sure the batteries are fresh and correctly installed. 2. Check the camera operation mode is correct. UNITE 100 U aNUal... -
Page 26: Compliance
To reduce the risk of this equipment becoming damaged it is suggested that the customer consider installing a surge arrestor. Any modifications to the device without express authorization from ClearOne is prohibited as per 47CFR15.21 and could void the users authority to operate the device. -
Page 27: Service And Support
© 2015 ClearOne Inc. All rights reserved. No part of this document may be reproduced in any form or by any means without written permission from ClearOne. ClearOne reserves specific privileges. Information in this document is subject to change without notice. - ClearOne Document DOC-0207-001 - April, 2015 (Rev. 1.0)
Need help?
Do you have a question about the UNITE 100 and is the answer not in the manual?
Questions and answers