Table of Contents
Advertisement
Quick Links
Advertisement
Table of Contents
Troubleshooting

Related Manuals for Memjet SFP


Summary of Contents for Memjet SFP
- Page 1 Memjet SFP Windows User Guide 23-9-1-5-4-4_Win v4.2 28 July 2011...
- Page 2 Read this before you go any further The following symbols are used in this document to highlight warnings, potential hazards, or best practice procedures, and have the following meanings: Danger – potential risk of personal injury, including electrical shock, burns etc. Warning –...
- Page 3 Use of any other power supplies or cords may damage your printer and void your warranty. Use only authorised consumables Use of any printhead other than those authorised Memjet technology printheads will damage your printer and void your warranty. Use of unauthorised inks or ink tanks may damage your printer and will void your warranty.
- Page 4 Safety • paper with any staples or pins in it. Clear paper jams promptly To avoid further problems, attend to all paper jams and any other cause of printer failure promptly. Avoid large temperature variations Install your printer in a protected location away from direct sunlight, open windows or any other places subject to temperature extremes.
- Page 5 Getting the best out of your printer Getting the best out of your printer Turning off power to your printer Your printer is best left powered on when you are not using it. However, if the printer will not be used over an extended period of time (e.g. a couple of weeks), it should be turned off using the Power On/Off button.
-
Page 6: Table Of Contents
Table of Contents • Contents Getting to know your Memjet printer What is in the Box Main components Printer Printhead cartridge Ink tanks Features Control Panel Connector bay Setting up your printer Unpacking your new printer Locating the printer Installing the ink tanks... - Page 7 Table of Contents Uninstalling older printer drivers Printing with Memjet Getting ready to print Choosing your paper Print options dialog box Printing a test page Cancelling a print job Using print properties Printer properties Help Print settings profiles Borderless prints...
- Page 8 Table of Contents Network Settings IP Configuration settings Toolbox Troubleshooting screens Event Log Maintenance Memjet maintenance Extended maintenance activity Restoring print quality Printhead cleaning via the User Maintenance button Printhead cleaning using Printer Properties Services tab Printhead cleaning using the Toolbox...
- Page 9 Printer slows down between pages Error/operational status messages Control Panel status messages Alert windows status messages Specifications Appendices Relocating your Memjet printer Local relocation Remote relocation Unpacking your printer Repackaging your printer Notices and Regulatory statements 28 July 2011 - v4.2 Confidential.
-
Page 10: Getting To Know Your Memjet Printer
Getting to know your Memjet printer • Getting to know your Memjet printer • What is in the Box When you open the box containing your new Memjet printer, you will find the following: A software and documentation CD The Memjet printer... -
Page 11: Main Components
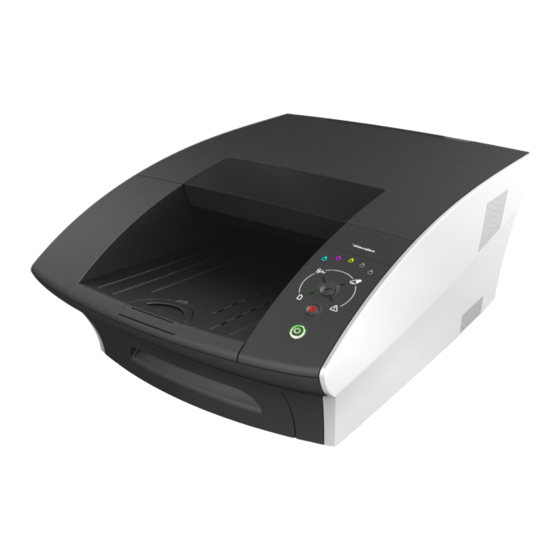
Getting to know your Memjet printer • Main components Use this section as a reference when reading this document. It identifies and locates the components that will be mentioned throughout the rest of this document. • Printer Front view Printer cover... - Page 12 Getting to know your Memjet printer Rear views Manual feed tray closed Recessed connector bay Rear access door latch Manual paper feed tray Rear access door Paper feed Open tab Manual feed tray open Manual paper feed tray Paper guide...
-
Page 13: Internal View
Getting to know your Memjet printer Internal view Printer cover Printhead Ink tank (in slot) Printhead latch Ink tank slot lid (open) Ink tank slot (showing coupling) Fluidic couplings Ink tank slot lid (closed) 28 July 2011 - v4.2 Confidential. -
Page 14: Printhead Cartridge
Getting to know your Memjet printer • Printhead cartridge 1 & 10 Handles Foil vacuum bag Nozzles protective tape Cardboard packing box 3 & 8 Protective cover Flaps Cover retaining clip Protective cover Electrical contacts tape 28 July 2011 - v4.2 Confidential. -
Page 15: Ink Tanks
Getting to know your Memjet printer • Ink tanks Ink tank blister pack Pull tab 28 July 2011 - v4.2 Confidential. Page 15 of 110... -
Page 16: Features
Getting to know your Memjet printer • Features The features of the printer that you will use most frequently are highlighted in this section. • Control Panel The Control Panel has three control buttons along with nine indicator lamps to communicate printer status information. -
Page 17: Connector Bay
Getting to know your Memjet printer • Connector bay Recessed connector bay Ethernet port Power socket and cable USB port and cable 28 July 2011 - v4.2 Confidential. Page 17 of 110... -
Page 18: Setting Up Your Printer
Setting up your printer • Setting up your printer Printer installation consists of : • Removing your printer from its packaging. • Installing it on a desktop (see page 20). • Powering up your printer (see page 20). • Installing the ink tanks (see page 20). - Page 19 Setting up your printer Removing the paper picker stay Before loading any paper into the paper tray for the first time, remove the packing material used to lock the paper picker during transport. DO NOT dispose of this packing material. Should you need to repackage the printer for transportation to a remote site you will need to re-use this to avoid damage to the paper picker.
-
Page 20: Locating The Printer
Original ink tanks are supplied in a blister pack as shown in the Ink tanks section on page 15. When installing a new Memjet printer, use ONLY the ink tanks provided in the packaging. Specifically, DO NOT install a USED ink tank. To install the ink tanks in your printer:... - Page 21 Setting up your printer Carefully remove the ink tanks from the blister pack, ensuring you do not drop or otherwise damage them. Remove the upper and lower pull tabs attached to each ink tank (see the Ink tanks section on page 15) before inserting it into its slot on the printer. Save the upper pull tab by sticking it on the front of the corresponding ink tank as shown.
- Page 22 Setting up your printer Close the printer cover and allow at least two minutes for the ink to fill the ink channels in the printer. The color ink supply lamps on the control panel will continue to blink throughout this process. This is normal.
-
Page 23: Installing The Printhead
Setting up your printer • Installing the printhead cartridge Your Memjet printer cartridge is a delicate micro-electrical-mechanical device and should be treated with due care to avoid degradation of print quality. DO NOT touch the printhead cartridge ink couplings, nozzle surface or the electrical contacts when installing the printhead cartridge. - Page 24 Setting up your printer Remove the fluidic cap protectors from the two fluidic couplings. Open the end of the printhead package outer box and slide out the foil bag. Inspect the integrity of the foil vacuum sealing. The foil bag should be formed tightly to the contours of the printhead cartridge as shown above.
- Page 25 Setting up your printer • Release the clip retaining the cover near the centre of the printhead cartridge (3). • Carefully remove the protective cover (4). Remove the protective strip from the electrical contacts. While holding the printhead cartridge by the handle with one hand, grasp the pull tab with the other hand and, slowly and carefully, peel back the plastic strip covering the electrical contacts.
- Page 26 Setting up your printer Remove the protective strip from the printhead nozzles. While holding the printhead cartridge by the handle with one hand, grasp the pull tab with the other hand and slowly and carefully peel back the plastic strip covering the printhead nozzles.
- Page 27 Setting up your printer When the printhead cartridge is fully inserted into the printer rotate it to a vertical position as shown. Slowly close the printhead latch. The fluidic couplings should advance and seal to the printhead cartridge. Close the printhead latch. When the printhead latch is closed, the printer will prime, clean and cap the printhead automatically.
-
Page 28: Loading Paper
Setting up your printer • Loading paper Your Memjet printer has one paper tray, which may be removed from the main body of the printer as shown in Paper tray on page 11Figure 1. The paper tray is designed to hold only the following paper sizes: •... -
Page 29: Loading Us Legal Size Paper
Setting up your printer Ensure the maximum number of sheets in the paper tray does not reach any higher than the protruding lip on the Paper Width guide as shown here. Figure 2 Paper tray loaded to its maximum capacity Grip the top of the Paper Length guide with thumb and forefinger and squeeze the two tabs together to unlock it. -
Page 30: Using Intermediate Paper Sizes
Setting up your printer Select your paper from one of the recommended paper types (See Recommended paper on page 90). Remove the paper tray from the printer ensuring that any packing material has been removed (see Figure 1). Extend the length of the paper tray by pinching the release clips (see Figure 3) and pulling out the paper tray extender section. - Page 31 Setting up your printer have chosen does not feed well from the paper tray use the manual feed tray, at the rear of the printer. Intermediate size paper up to US Legal size that cannot be loaded in the paper tray should be printed via the manual feed at the rear of the printer.
-
Page 32: Installing Printer Drivers
PC. Where another version of Windows differs significantly from the behaviour described, specific reference will be made to such differences. To install the latest printer drivers for your Memjet printer use the latest Memjet printer drivers CD and ensure you have an active connection to the Internet. -
Page 33: Installing A Usb Driver
(see page 20) and that you have obtained a CD containing the latest printer driver for your Memjet printer. If you have an older USB printer driver installed, you will not need to uninstall it as this installation utility will give you the option of upgrading its software. - Page 34 Setting up your printer Click Install Printer Software. If your PC is connected to the Internet, a check will now be made that the Memjet SFP printer drivers on your CD are the latest available. If a later version of driver is available on your supplier Web site, you will see the following dialog box.
- Page 35 To add another printer select Add another printer. For further information see Installing additional printers on page 47. IF you have a current versions of Memjet printer drivers already installed, the following selection dialog box will appear. For further information on: •...
- Page 36 Setting up your printer In Windows XP another window may pop up at this point: If the above windows is displayed follow the instructions and click Next to continue. The Pre-installing Drivers window opens: Depending on the exact version of software you are installing, you may see a number of warning windows as shown here.
- Page 37 Setting up your printer A dialog box also opens asking you to power on the device and connect the USB cable. Follow the directions and the window will close automatically. IF you are upgrading a local printer driver and the printer is attached, this window will not be displayed.
- Page 38 As you can see, both contain two check boxes. It is suggested you leave the Print Test Page check box as is. If the Test page is printed, you have successfully installed a USB driver for your Memjet printer. If you have chosen to print a Test page and one is not printed, inform support personnel.
- Page 39 Setting up your printer If you are asked to reboot, save all work, close all applications and reboot. 28 July 2011 - v4.2 Confidential. Page 39 of 110...
-
Page 40: Installing A Network Driver
(see page 53). DO NOT use the Windows ‘Add Printer’ Wizard to install your Memjet printer driver. Doing so will result in an incomplete software installation and limited printer functionality. To experience all the documented features use ONLY the procedure set out here. - Page 41 Setting up your printer Click Install Printer Software. If your PC is connected to the Internet, a check will now be made that the Memjet SFP printer drivers on your CD are the latest available. If a later version of driver is available on your supplier Web site, you will see the following dialog box.
- Page 42 Setting up your printer The installation utility pre-installs some software and searches for compatible printers on your network. A dialog box appears displaying a list of networked printers. Select the printer you wish to use and click Next. IF your printer is not listed: Click Back Check that: your printer is connected to the network...
- Page 43 Setting up your printer Enter the IP address in the appropriate field and click Next. If you don’t know the IP address but know the printer name, type that in the Host name: field and click Lookup. If the printer is found its IP address will appear in the IP address field. Click Next to continue.
- Page 44 Setting up your printer The installer will then load the drivers into your PC, then check and update the printer firmware if necessary. The firmware in the selected printer is now checked. If the firmware is older than the one that came with your driver software, you will be given the option to update it.
-
Page 45: Installing A Network Driver On A Server
For information on setting up your printer driver as a service on a server PC, see your network support personnel. Not all Memjet printer driver options may be available to you when using a networked printer connected to a Server. See Print options greyed out on page 100. - Page 46 Setting up your printer Clear the Enable DHCP, Enable AutoIP and Enable BOOTP check boxes, as shown. All available fields in that Toolbox page may now be altered. Make the required changes in the appropriate fields. You will need to assign at least the IP address and the Subnet mask fields and, most likely, the Default gateway field as well.
-
Page 47: Installing Additional Printers
CD containing the latest printer drivers for your Memjet printer. DO NOT use the Windows ‘Add Printer’ Wizard to install your Memjet printer driver. Doing so will result in an incomplete software installation and limited printer functionality. To experience all the documented features use ONLY the procedure set out here. -
Page 48: Updating Your Printer Drivers
35. • Updating your printer drivers Where an older version of Memjet drivers is found on your PC, the installer sequence will offer an option to update such a driver. Updating your Memjet printer driver follows similar sequences as found in:... -
Page 49: Updating Printer Firmware
All other steps will remain the same. • Updating printer firmware Memjet printer firmware resides in each printer and not all networked printers may need to have their firmware updated each time you load a new printer driver on your PC. In such cases you may need to update the firmware of a particular printer at a later date. - Page 50 Setting up your printer Double click on WinSetup to bring up the required window. If a current driver is found on your PC, the following dialog box will be displayed: Select Firmware and click Next. The installation software will search for printers that have older firmware.
-
Page 51: Repairing Printer Drivers
Setting up your printer If some printers are found to have older firmware you will be asked to select which one(s) to update. Select the printer and click Next. Your printer firmware will now be updated. Firmware updating is indicated by a progress bar and a warning window being displayed, as shown here. - Page 52 Setting up your printer If the above window is not displayed: Launch a copy of Windows Explorer and navigate to the CDROM/DVD drive where you inserted the installation CD. You should see something similar to the following in your Windows Explorer window: Double click on WinSetup to bring up the required window.
-
Page 53: Uninstalling Older Printer Drivers
You must reboot before printing on your Memjet printer again. • Uninstalling older printer drivers You will generally not need to uninstall older Memjet printer drivers on your PC, as you are given the option to update them (see Updating your printer drivers on page 48). - Page 54 Setting up your printer Previously installed drivers will be displayed in the dialog box, as shown here: Select the appropriate one and click Remove One or, if more than one printer driver is listed you may use the Remove All button. If you select Remove All a confirmation window will be displayed.
- Page 55 When the Successful uninstall dialog is displayed, click Finish. You may be asked to reboot your computer to complete the uninstall procedure. You need not reboot at this point, but you must do so before installing a new version of Memjet printer driver.
-
Page 56: Printing With Memjet
• Getting ready to print Before you start to print with your Memjet printer check that only the Power (On/Off) button is lit on the Control Panel, shown here ([1] below). -
Page 57: Choosing Your Paper
Figure 4 shows the Print options dialog box associated with Word for Windows 2003, and is typical of Print dialog boxes for Microsoft applications. Figure 4 Typical Windows Print options dialog box From this dialog box you may select your Memjet printer and bring up the Properties dialog box as shown in Using print properties below. -
Page 58: On The Printer
Printing with a Memjet printer On the printer You can print a test page without installing a printer driver by using the buttons on your printer Control Panel. This is useful in case you suspect your connection to the PC is not working. -
Page 59: Cancelling A Print Job
85). Click the Print Demonstration button. • Cancelling a print job You can cancel one or more print jobs that you have sent to your Memjet printer by any of the following methods: On the printer Press the Stop/Cancel button on the printer Control Panel. This will cancel only the job currently being processed. -
Page 60: Using Print Properties
• Using print properties To select a Memjet printer, click the Name arrow in the Printer pane of your print options in Figure 4 and select the Memjet printer you wish to print on. -
Page 61: Print Settings Profiles
If these do not meet your requirements, you can change any or all configurable print settings in the Memjet printer driver and save them to a profile which you can name. You can then quickly restore any saved profile, to avoid needless repetition in printer driver setup. -
Page 62: Borderless Prints
Printing with a Memjet printer • Borderless prints Your Memjet printer uses a page wide printhead that allows you to print borderless prints. To accomplish borderless printing: In the General tab of the Properties dialog box (see Figure 5 on page 60) select Borderless Print. - Page 63 Options scaling field. Click OK to save this size and exit the Custom Media Size dialog box. In the Media pane of the General tab in the Memjet Printer Properties dialog box, ensure that you have selected Manual Feed Tray.
-
Page 64: Multi-Page (N-Up)
Using the manual feed tray • Multi-page (N-up) You can print up to 16 pages of your document on one sheet on your Memjet printer. This option is sometimes called N-up printing and can be accessed as follows: In the Properties dialog box (see Figure 5), click Layout to display the Layout tab, as shown here. -
Page 65: Manual Duplex
This is called Manual duplexing and your Memjet printer driver provides an option to allow for manual duplexing. -
Page 66: Booklets
Printing with a Memjet printer • Two sheets will be printed. • The OK/Resume button will flash. • The Manual Duplex lamp will be lit. Figure 6 Double-sided printing instructions Follow the instructions in the message window (Figure 6). •... - Page 67 Open a Word document of at least eight pages. Select File > Print from the Word menu (or press [Ctrl] [P]). Select your Memjet printer and click Properties to open up the Memjet printer Properties dialog box. In the Layout tab, as shown below, click the Booklet arrow and select Booklet Left Binding or Booklet Right Binding.
-
Page 68: About Resizing
For example in Word for Windows (2003) print options dialog box: Set the Scale to paper size option to the size of the paper in your Memjet printer. Each application will have a different way of setting this option. Refer to your application Help documentation for further information. - Page 69 Printing with a Memjet printer Issue a print command from your application. When the Print dialog box appears, fill out the Page range and other information required to print your selection and click Properties. Click the Source arrow and select Manual Feed in the Media pane.
- Page 70 Printing with a Memjet printer The printer will accept paper from the manual feed tray for a limited period of time. If the Manual Feed lamp stops flashing you will need to re-send the document to the printer. Follow the instructions outlined in that message. Raise the manual feed tray into position...
- Page 71 Printing with a Memjet printer Slide the the Width Adjustment guide until it rests against the right side of the sheet. Feed the sheet all the way into the printer and press the OK/Resume button. Release the sheet when the paper feed picks the sheet and drags it forward.
-
Page 72: Common Printer Messages And Alerts
Alert window Control Panel On the Control Panel the Paper Out lamp will flash. Your Memjet printer will not signal an empty paper tray until it is asked to print. 28 July 2011 - v4.2 Confidential. Page 72 of 110... -
Page 73: Ink Low
Toolbox application. See page 80. Action Required: On a Memjet printer this message is only issued when an ink tank is completely empty. Whenever you see an Ink Low message you should replace ink tanks as needed (see Installing the ink tanks on page 20). -
Page 74: Out Of Ink
Printing with a Memjet printer Out of ink If you continue to print after an Ink low message, you will eventually run out of ink altogether, whereupon an Alert message similar to the following will be displayed, and your printer will stop printing. - Page 75 Printing with a Memjet printer Alert window Control Panel On the Control Panel: • the Paper Jam lamp will be lit • the OK/Resume button will be blinking. Action Required: Look in the output tray, for a jammed sheet of paper.
- Page 76 Printing with a Memjet printer Open the paper tray. DO NOT re-insert the paper tray until you have finished. Re-inserting the paper tray beforehand may cause the jammed paper to rip and leave paper scraps in the printer. From the rear opening, grab the paper with both hands and slowly remove it from the printer, taking care not to tear it.
- Page 77 Prolonged excessive tilt can cause the printhead to deprime, giving rise to print quality problems. Your Memjet printer must be located on a level surface. Should this not be the case you will be notified and the printer will stop printing until the error is cleared. The Attention lamp will flash and the next time you issue a print command an Alert window will be displayed as shown below.
- Page 78 Printing with a Memjet printer Alert window Control Panel On the Control Panel the Attention lamp will blink. Action Required: Your printout will not proceed until the printer is sitting level. Once you have corrected the tilt of your printer, it will undergo a quick printhead flush and clean, displaying another alert window as shown here: Any print command sent when the printer was not level will be ignored.
-
Page 79: Managing Your Printer
Managing your Memjet printer • Managing your Memjet printer Your Memjet printer comes with an embedded Web Server application, which will allow you to use your Web browser to query the printer for information and to change some printer settings. -
Page 80: Toolbox Information Screens
Select your printer from the set of attached devices listed on that page and click it. In the above screen the Memjet printer is listed as Memjet Office Printer as shown above. The Home Page will be displayed, similar to that shown below. -
Page 81: Printhead Details
Managing your Memjet printer The percentages displayed on this page are accurate to the nearest five percent. Printhead details The Printhead Details information page shows usage and identification details as well as a link to your printhead supplier’s Web page, as shown below. -
Page 82: Usage Information
Managing your Memjet printer Information displayed on this page may vary depending on your supplier. Usage information Information on the number and type of pages printed is displayed in the Usage Information page. To access the Usage Information page from the Home Page select Usage Info. -
Page 83: Network Settings
Managing your Memjet printer Using this screen you may also change the language used in all Toolbox screens. To do this click the Language arrow and select your language, then click Save. Your printer driver language will not be affected by this change. -
Page 84: Toolbox Troubleshooting Screens
The following screens may help in troubleshooting problems with your Memjet printer. Event Log Your Memjet printer logs errors into a special buffer in printer memory. The Event Log screen displays any errors that have beeen logged by the printer as it responds to your commands, or performs maintenance functions. -
Page 85: Maintenance
Managing your Memjet printer To access the Event Log page from the Home Page, select Event Log. Maintenance The Maintenance page allows you to clean the printhead and print various diagnostic pages that can be useful in determining printer problems and helping to solve them. -
Page 86: Memjet Maintenance
Routine Memjet maintenance • Memjet maintenance Your Memjet printer does not require any user intervention for routine maintenance. Maintenance is generally carried out in the background and is interrupted when printing. There is only one exception to this, when the printer enters an extended cleaning function. See Extended maintenance activity below. -
Page 87: Printhead Cleaning Using Printer Properties Services Tab
Routine Memjet maintenance The printer will execute an initial printhead wipe sequence which should remove the cause of any streaking. Wait until the Power On/Off button stops blinking. All cleaning operations consume ink. The more thorough the cleaning operation, the more ink is consumed. -
Page 88: Printhead Cleaning Using The Toolbox
Routine Memjet maintenance These cleaning operations are analogous to those carried out by pressing the User Maintenance button on the printer, as explained in Printhead cleaning via the User Maintenance button on page 86. The Clean Printhead – Quick button corresponds to a single depression of the User Maintenance button on the printer, The Clean Printhead –... -
Page 89: Factory Default Printer Driver Settings
Click Windows Start on your toolbar. Select Devices and Printers. Right click the Memjet Office Printer in the Printers and Faxes pane and select Printer Properties. Click Preferences. In the General tab, click the arrow in the My Print Settings pane and select Defaults. -
Page 90: Supplies And Accessories
• has staples in it. Some types of paper must not be used on your Memjet printer, as their use may damage the printhead and render your printer unusable. See Choosing the right paper on page 91. -
Page 91: Choosing The Right Paper
• • transparencies. If in doubt, contact the supplier of your Memjet printer. Paper for two-sided printing and Booklets Manual duplexing or Booklet printing is best used with text and light color applications. Not all paper can be used for double-sided printing. Specifically, paper that has a preferred or specially prepared side will generally be unsuitable. -
Page 92: Ink
Supplies and accessories • Ink You must use only Memjet-compatible ink in your Memjet printer. Memjet ink cartridges carry information about the ink they hold. This information is used by the printer to optimise printing on various paper types. • Sourcing new ink Contact your supplier to source new ink tanks. -
Page 93: Printhead Cartridge Storage And Handling
Supplies and accessories • Printhead cartridge storage and handling Once installed, your printhead cartridge should remain in the printer. Removing the printhead cartridge is not recommended, even while transporting the printer. If you need to remove the printhead cartridge and store it for any specific reason, protect the printhead cartridge at all times from contamination by air-borne or surface contaminants such as dust or fibres. - Page 94 Supplies and accessories Always lift the printhead latch as far as possible. It should be vertical when fully opened. Grasp the printhead cartridge by the handles and rotate the printhead cartridge towards the latch to disengage it, as shown. Gently lift the printhead cartridge away from the printer as shown. Lift until the old printhead cartridge is clear of the printer.
- Page 95 Always consider the environment when disposing of printhead cartridges. Follow your supplier instructions to ensure you are conforming to local regulations. • Accessories There are currently no accessories for the Memjet printer. 28 July 2011 - v4.2 Confidential. Page 95 of 110...
-
Page 96: Troubleshooting
There is paper in the paper tray; it is clean and inserted with the print side facing down. If the above checks did not solve your problem see below. • Printer installation problems Installation of your Memjet printer should be trouble-free and simple if you follow the directions given in section Setting up your printer on page 18. -
Page 97: Cannot Install Usb Printer
Check that your Test Page prints correctly. Installing older software Installing an earlier version of the Memjet printer driver on your PC is not recommended. If you need to install an olderversion of the Memjet printer driver contact support personnel. -
Page 98: Printing Problems
The most common printer problems are covered in the Common printer messages and alerts section on page 72. This section covers other issues that may arise in the course of operating your Memjet printer. Paper picking problems The most common causes of paper picking problems are: •... -
Page 99: Paper Jams Due To Paper Curl
Paper jams due to paper curl When printing heavy graphics, the speed of your Memjet printer may cause the paper to curl in the output tray of your printer. This curl may cause a paper jam in the output tray. To minimise the chance of this occurring: •... -
Page 100: Can No Longer Print To A Networked Printer
Generally most Web browsers are set up with Javascript enabled. If you have linked to a Memjet printer as a service from a Windows 2003 or 2008 Server, and you find you cannot jump to other Toolbox pages other than the Home page, a likely cause is that the Server has restricted access to Javascript. - Page 101 Troubleshooting If you are printing to a local Memjet printer, make sure it is connected via a USB 2.0 (Hi-speed) connection. 28 July 2011 - v4.2 Confidential. Page 101 of 110...
-
Page 102: Error/Operational Status Messages
Troubleshooting • Error/operational status messages This section lists all the status messages that you can encounter when using your Memjet printer. Status messages can be conveyed both on your Memjet printer Control Panel and in Alert windows on your computer screen. In some situations both avenues are used together. See Common printer messages and alerts on page 72 for some examples. -
Page 103: Alert Windows Status Messages
• Alert windows status messages Messages listed in the following table are displayed by the Memjet printer driver on your PC screen as a small popup window, called an Alert window. Such messages are intended to help you understand the nature of the problem. This table lists all Alert window messages and suggests what action you can or should take. - Page 104 Troubleshooting Message text Suggested action Yellow Ink Out Replace with full ink tank. Multiple Ink Tanks Out Replace with full ink tanks. Incorrect Cyan Ink Tank Remove ink tank, clean electrical contacts and re-seat it. Incorrect Yellow Ink Tank Remove ink tank, clean electrical contacts and re-seat it. Incorrect Magenta Ink Tank Remove ink tank, clean electrical contacts and re-seat it.
-
Page 105: Specifications
Speed printer and driver Best - 30 ppm (1600 dpi x 1600 dpi) Paper tray - A4, US Letter and US Legal Single Memjet printhead Paper sizes Printhead Cartridge Manual feed tray - 6” x 4” to US Legal (user replaceable) -
Page 106: Appendices
When re-installing it in the new location, select the location as set out in the Locating your printer section on page 20. Remote relocation When transporting your Memjet printer to a remote location, your printer will need to be re- packaged. 28 July 2011 - v4.2 Confidential. Page 106 of 110... - Page 107 Appendix Relocating To minimise the chance of ink leakage due to incorrect handling, your printer must be placed in ‘transport mode’ before repackaging. This requires you to switch off the printer as set out below: To place your printer in ‘transport mode’: Press the Power On/Off and Stop/Cancel buttons simultaneously for at least five seconds or until all the Control Console lamps begin to flash.
-
Page 108: Unpacking Your Printer
Appendix- Unpacking • Unpacking your printer This section provides a simple visual guide to unpacking your new Memjet printer. Setting up your printer on page 18 for detailed information on how to proceed after unpacking. 28 July 2011 - v4.2 Confidential. -
Page 109: Repackaging Your Printer
Appendix- Repacking • Repackaging your printer This section provides a simple visual guide to repackaging your printer for transport, as discussed in Remote_relocation on page 106. 28 July 2011 - v4.2 Confidential. Page 109 of 110... -
Page 110: Notices And Regulatory Statements
Appendix- Notices and Regulatory statements • Notices and Regulatory statements This is a place-holder for Certificates and Statements to be inserted (as appropriate) by Brand Partner(s). • Edition Notice • FCC Compliance • European Community • WEEE directive • Industry Canada •...
Need help?
Do you have a question about the SFP and is the answer not in the manual?
Questions and answers