Table of Contents
Advertisement
Quick Links
3
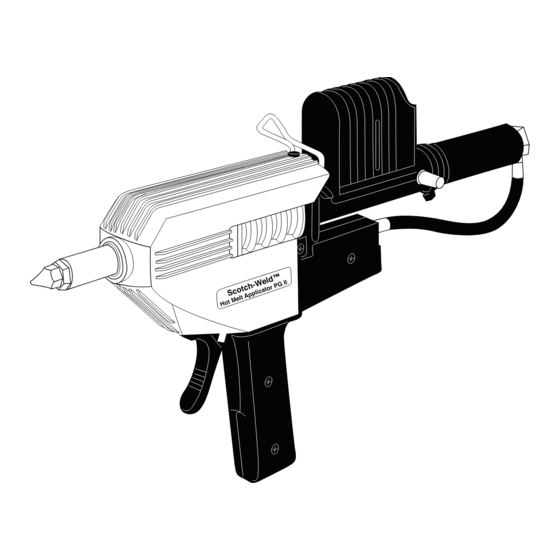
Scotch-Weld
Hot Melt Applicator PG II Owner's
™
Manual
Manuel de l'utilisateur – Applicateur d'adhésif
thermo-fusible PG II 3M
Scotch-Weld
™
™
Aplicador por fusión al calor de Scotch-Weld
PG
™
II de 3M
Manual del usuario
™
Use with 3M™ Scotch-Weld™ Hot Melt Adhesives
À utiliser avec les adhésifs thermo-fusibles 3M™ Scotch-Weld™
Úselo con adhesivos de fusión al calor Scotch-Weld™ de 3M™
Advertisement
Table of Contents

Subscribe to Our Youtube Channel
Related Manuals for 3M Scotch-Weld


Summary of Contents for 3M Scotch-Weld
- Page 1 Aplicador por fusión al calor de Scotch-Weld ™ II de 3M Manual del usuario ™ Use with 3M™ Scotch-Weld™ Hot Melt Adhesives À utiliser avec les adhésifs thermo-fusibles 3M™ Scotch-Weld™ Úselo con adhesivos de fusión al calor Scotch-Weld™ de 3M™...
-
Page 2: Table Of Contents
Contents General Information ................Page 3 Set Up and Installation................Page 4 Operation....................Page 5 Preventive Maintenance ..............Page 6 & 7 Troubleshooting..................Page 8 Repair Part Kits ..................Page 9 Repair Procedures ................Page 11-14 General Assembly (Schematic) ............Page 15 Electrical Control/Wiring Arrangement ..........Page 16 Flow Control ..................Page 17 Accessories .................Page 17 &... -
Page 3: General Information
Pressure on the molten adhesive in the front of the applicator is then The 3M Scotch-Weld Hot Melt Applicator PG II uses also relieved. Spring tension in the nozzle valve electric heat to melt the adhesive, and air pressure to retracts the valve, neatly cutting off the adhesive deliver the adhesive. -
Page 4: Set Up And Installation
Set Up and Installation Remove the 3M™ Scotch-Weld ™ Hot Melt Applicator PG II from its shipper and inspect for obvious damage. 1. Connect Air and Electrical Service 3. Install Bench Stand Select a work station where 120 VAC grounded Prior to start up in operation, set the bench stand on receptacle and compressed air service are available. -
Page 5: Operation
3M Application Scotch-Weld Hot Melt Applicator PG II in the Get a feel for your new 3M Scotch-Weld Hot Melt bench stand for 15 minutes. During this warm-up Applicator PG II. Start by applying small amounts of period you may note a slight dripping from the adhesive in puddles on a piece of scrap or paper. - Page 6 5. Under normal conditions, allow at least 15 minutes for the applicator to warm up. 2. Make sure that the 3M Scotch-Weld Hot Melt Applicator PG II is plugged into 120 VAC and that the switch is in the “on” position. Switch should light up.
-
Page 7: Preventive Maintenance
Open adhesive stick container only when necessary. Always use the bench stand provided when 3M™ Keep sticks clean and free from airborne Scotch-Weld™ Hot Melt Applicator PG II is not in contaminants. use. Do not lay the applicator on its side. This impedes cooling process and may cause plugging problems. -
Page 8: Troubleshooting
(In order of priority) Low or no adhesive flow 1. Hung adhesive stick Turn on the 3M™ Scotch-Weld™ Hot Melt Applicator PG II and allow it to heat for at least 60 minutes. With incoming air at 80 psi extrude adhesive. If unsuccessful remove nozzle assembly and extrude one stick of adhesive. -
Page 9: Repair Part Kits
If necessary, part kits can also be ordered direct from the nearest 3M Sales Branch listed on the back cover. # of # of # of... - Page 10 Scotch-Weld Hot Melt Adhesive distributor or from However, as with any electrical-mechanical device, the nearest 3M Sales Branch location listed on back cover of this manual. Please note the serial number parts will wear with use and require replacement for of your 3M Scotch-Weld Hot Melt Applicator PG maximum performance.
-
Page 11: Repair Procedures
Without removing the wires from the wire terminals, lift the handle up and to the front of the applicator. This operation will allow for subsequent repair steps. © 3M 2006... - Page 12 The black and white wires are removed 3M™ Scotch-Weld™ Hot Melt Applicator PG II from their respective terminals. Remember which wire must be heated prior to repairing nozzle valve.
- Page 13 They should not stick out above the block more than 1/4’’. It may be necessary to gently tap the heaters into place, but be careful not to crack the ceramic. To insure that heaters remain in place, gather all the © 3M 2006...
- Page 14 Phillips head screw on the heat shield If the original heat block is broken or needs immediately above the loading chamber. replacement, you may use the 3M factory refurbish The thermostat and TCO are assembled as a unit and program. Please contact your distributor for are replaced as such no matter which component has information on our PG II equipment refurbish program.
-
Page 15: General Assembly (Schematic)
M. 9226 Dump Valve Kit D. 9220 Hose Kit I. 9222 Heater Kit N. 9987 Speedloader Chamber Assembly E. 9207 Power Cord Kit J. 9209 Thermostat/TCO Kit O. 9938 Hanger Kit 9214 Low Temperature -350ºF Thermostat/TCO Kit © 3M 2006... -
Page 16: Electrical Control/Wiring Arrangement
General Assembly Electrical Control Wiring Arrangement © 3M 2006... -
Page 17: Flow Control
9916 3 Hole Spreader 9917 3 Hole 1’’ Spreader The four control devices are: 9921 .093’’ Fluted 1. Speed of 3M Scotch-Weld Hot Melt Applicator PG 9922 .063’’ Fluted II movement. 9726 “T” Tip 2. The trigger. 9940 .125’’... -
Page 18: Accessories
Speedloader Magazine Feed for 3M Scotch-Weld Hot Melt Applicator PG II The 3M Scotch-Weld Hot Melt Applicator PG II can be modified into a semi-automatic loading mode by the addition of the Speedloader Magazine Feed. By simply pushing a lever to the rear, the magazine feeds a new stick of adhesive into the melt chamber. -
Page 19: Repair Options
After warranty period Warranty: 3M warrants for a period of 12 months from the date of use or purchase, The 3M™ Scotch-Weld™ Hot Melt Applicator PG II whichever occurs first, that the 3M Scotch-Weld has been engineered to be durable and reliable.
Need help?
Do you have a question about the Scotch-Weld and is the answer not in the manual?
Questions and answers