Advertisement
Quick Links
For Industrial use only.
Not intended for consumer sale or use.
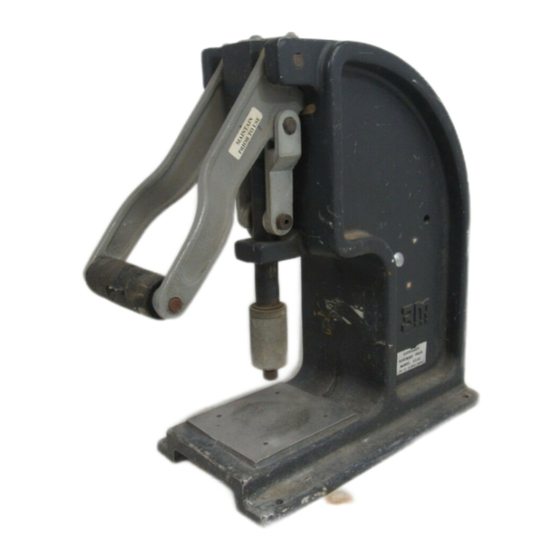
3M™ Heavy-Duty Assembly Press, 3335
Instructions
Instructions for the use and adjustment of the 3M Assembly Press 3335
Please Note:
The 3M Assembly Press 3335 has been designed specifically for the assembly of 3M electronic
connectors to flat cable. When used for this purpose they will provide excellent service and require a minimum of
maintenance. The presses should never be used to perform other shop functions. All assembly presses have four
mounting holes in the base plate for securing to a bench.
CAUTION: Some connectors are assembled using a Crimp Bar equipped with a sharp cut off blade instead of a
Platen. Please use care in handling. The Crimp Bar is simply pressed onto the press shaft. To facilitate wire
preparation, it is a good idea to turn the Crimp Bar perpendicular to the connector length such that the blade faces
away from you.
CAUTION: Be sure the press head is in its upright and secured position when the machine is being transported.
Remove all accessories before moving the press. Only lift the press by the base, do not lift or carry it by the handle.
General:
The recommended platen and its position is included on
the instruction sheet, The standard platen, #3442-1A, is
provided with the assembly press and is used for the
assembly of most 3M electronic connectors. Other platens
necessary for certain 3M connectors are available
through your 3M representative.
3M
Electronics Materials Solutions Division
Interconnect Solutions
http://www.3m.com/interconnect/
Procedure for Adjusting Shut Height 3M
Assembly Press 3335
Note: The shut height must always be made with the
specific locator plate in position.
1.
Pull back the slide latch and remove pressure
platen. (see figure 1)
2.
Loosen the knurled locking collar of the
adjustment shaft assembly.
3.
Lower the handle fully. The arms will stop
against the casting.
4.
Place the #3436-1A shut height gauge supplied
with the assembly press across the locator plate
and rotate the knurled adjustment collar until
the adjustment shaft contacts the desired position
on the gauge. The shut height gauge should be
able to slip with slight resistance. (see figure 2)
For technical, sales or ordering information call
800–225–5373
Advertisement

Related Manuals for 3M 3335


Summary of Contents for 3M 3335
- Page 1 Instructions for the use and adjustment of the 3M Assembly Press 3335 Please Note: The 3M Assembly Press 3335 has been designed specifically for the assembly of 3M electronic connectors to flat cable. When used for this purpose they will provide excellent service and require a minimum of maintenance.
- Page 2 3M™ Heavy-Duty Assembly Press, 3335 Instructions Rotate the locking collar firmly against the adjustment collar, securing the adjustment setting. (see figure 3) Replace the pressure platen in either of two positions, referring to the adjustment setting sheet for the correct position. Most positions are parallel to the length of the connector.
- Page 3 Product Use: Many factors beyond 3M’s control and uniquely within user’s control can affect the use and performance of a 3M product in a particular application. Given the variety of factors that can affect the use and performance of a 3M product, user is solely responsible for evaluating the 3M product and determining whether it is fit for a particular purpose and suitable for user’s method of application.