Table of Contents
Advertisement
Quick Links
Advertisement
Table of Contents

Related Manuals for BenQ T71W ET-0004-L


Summary of Contents for BenQ T71W ET-0004-L
- Page 1 T71W (ET-0004-L) 17” Wide-Screen LCD Monitor User Manual Welcome...
-
Page 2: Table Of Contents
Cleaning your monitor ................... 4 Installation ...................... 5 Preset modes ....................6 Getting the most from your BenQ monitor ..........7 How to install the monitor on a new computer ......... 8 How to upgrade the monitor on an existing computer ......9 How to install on Windows XP system ............. -
Page 3: Introduction
T71W INTRODUCTION Congratulations for purchasing model T71W , a high performance 17-inch color TFT LCD monitor. The T71W monitor provides flicker-free and color images at optional resolutions. Through this user guide, we will introduce you step-by-step all the features, functions and technical specifications of the LCD monitor. Surely you will have a refreshing experience working with the monitor. -
Page 4: Unpacking
T71W UNPACKING Please check the following items are present when you unpack the box, and save the packing materials in case you will need to ship or transport the monitor in future. · · LCD Monitor AC Power Cord · ·... -
Page 5: Attaching/Removing The Base
T71W ATTACHING / REMOVING THE BASE Install: Remove: Tighten the thumbscrew as indicated. Release the thumbscrew on the bottom of the base as indicated. SCREEN POSITION ADJUSTMENT In oder to optimize the best viewing position, you can adjust the tilt of the monitor by using both of your hands to hold the edges of the monitor as shown in the figure below. -
Page 6: Connecting The Power Cord
T71W CONNECTING THE POWER CORD · Check first to make sure that the power cord you use is the correct type required for your area. · This monitor has a universal power supply that allows operation in either 100/120V AC or 220/240 V AC voltage area. No user-adjustment is required. Plug one end of the power cord to the AC Inlet, plug another end to a proper AC ·... -
Page 7: Installation
T71W INSTALLATION To install the monitor to your host system, please follow the steps as given below: Steps 1. Connect Video Cable a. Make sure both the monitor and computer are powered-OFF. b. Connect the video cable to the computer. 2. -
Page 8: Preset Modes
T71W PRESET MODES To reduce the need for adjustment for different modes, the monitor has default setting modes that are most commonly used as given in the table below. For optimum adjustment, the user is suggested to perform the Auto Setup under Windows “Full Screen” pattern. If the mode in use does not match one of the defaults, the user can store their preferred modes in the user modes. -
Page 9: Getting The Most From Your Benq Monitor
T71W GETTING THE MOST FROM YOUR BenQ MONITOR To gain the most benefit from your new BenQ color LCD flat screen monitor, you should install the custom BenQ LCD Monitor driver software as provided on the BenQ LCD Monitor CD-ROM. -
Page 10: How To Install The Monitor On A New Computer
Monitor driver software on a new computer which has never had a monitor driver installed before. This instruction is only suitable for a computer which has never been used before, and for which the BenQ LCD Monitor is the first ever monitor to be connected to it. -
Page 11: How To Upgrade The Monitor On An Existing Computer
The BenQ LCD Monitor driver for your model may well function perfectly with other versions of Windows, however, as at the time of writing, BenQ has done no testing of this driver on other versions of Windows and cannot guarantee its operation on those systems. -
Page 12: How To Install On Windows Xp System
4. Click the Properties button. The Monitor Properties window will display. If the driver provider is listed as BenQ, and the model matches that of your new monitor, the proper drivers are already installed, and you need do nothing further. -
Page 13: How To Install On Windows 2000 System
The drive letter for your CD drive may differ from the example above depending upon your system ? it may be “D” or “E” or “F” etc. 9. Select (single-click) the file named “BenQ T71W” on the CD, and click the Next button. -
Page 14: How To Complete The Windows Upgrade Device Driver Wizard
7. Click the Open button. This will return you to the Install from Disk window, and it will have entered the address to the BenQ LCD Monitor CD “ Driver” folder into the field titled ‘ Copy manufacturer’ s files from:’ . - Page 15 See How to adjust the screen refresh rate on page 6 for details. 12. In Windows 2000, click Close. This will close the BenQ T71W Properties window and return you to the Advanced Display Properties window. 13. In Windows 2000, click OK.
-
Page 16: Power Saving
T71W POWER SAVING “ Power Saving ” mode by the control signal The monitor will be driven into from the display controller, as indicated by the amber-color power LED. Power State LED Lig ht Consumption Normal Green Active < 2 W Amber The power saving states will be kept until a control signal has been detected or the keyboard or mouse is activated. -
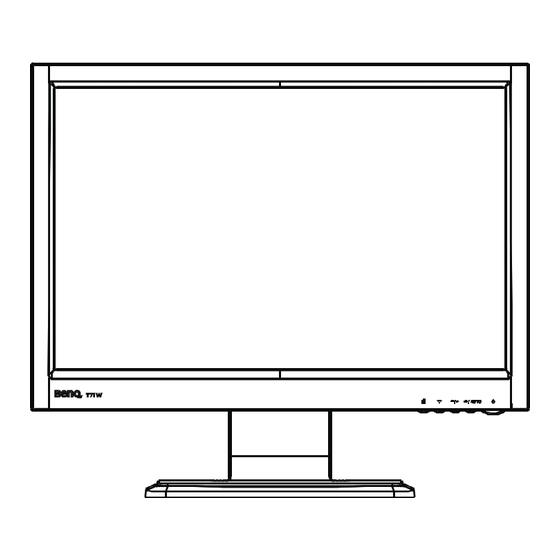
Page 17: User Controls
T71W USER CONTROLS Front Panel Controls 1. Power Switch: To turn ON or OFF the power. 2. Power LED: Lights up to indicate the power is turned ON. 3. Select MENU: To exit and enter OSD menu. 4. Select : To move downward in the OSD Item. 5. - Page 18 T71W Standard OSD Operation 1. Press MENU key to activate the OSD menu, when OSD is not displayed. 2. Use Select key to move down through the menu cyclically. The parameter will be e highlighted when selected. 3. Then use + or - to increase or decrease the value of the parameter, or make selection between different options.
- Page 19 T71W --------------------------------------------------------------------------------------- · Language Select among English, French,German, Spanish, Japanese, Simplifed Chinese, Traditional Chinese, Korean, Portuguese, Russian, Turkish. · Factory Reset To return the monitor to its default settings. · OSD TimeOut To adjust the period of OSD auto turn-off time. ·...
-
Page 20: Troubleshooting
T71W TROUBLESHOOTING Before sending your LCD monitor for servicing, please check the troubleshooting list below to see if you can self-diagnose the problem. Problems Current Status Remedy LED ON · Using OSD, adjust brightness and contrast to maximum or reset to their default settings. LED OFF ·... -
Page 21: Specification
T71W SPECIFICATION LC D D isplay Display Type 17" T FT LCD Display Area (H x V) 367.2 x 229.5 mm Contrast Ratio 500:1 (Typ.) Viewing Angle H 130 V (Typ.) Power Input Voltage 100-240Vac Frequency 50/60Hz Current Rating 0.9A Ope rational F e atu res Display Colors 16.2M...
Need help?
Do you have a question about the T71W ET-0004-L and is the answer not in the manual?
Questions and answers