Table of Contents
Advertisement
Advertisement
Table of Contents

Related Manuals for TDS Ranger


Summary of Contents for TDS Ranger
- Page 1 TDS RANGER G E T T I N G S T A R T E D G U I D E...
-
Page 2: Reference Materials
CF-Cap is not covered by warranty. Removal of the back case voids the limited warranty. There are important seals that will break and the Ranger will no longer be waterproof. To the extent allowed by local law, the above limited warranties are exclusive and no other warranty or condition, whether written or oral, is expressed or implied, specifically disclaiming... -
Page 3: Table Of Contents
Contents Welcome Device Hardware Unit Setup Working with the Unit and PowerBoot Module Settings on Your Unit Connecting to Your PC Communication Caring for the Unit and PowerBoot Module Environmental Considerations Hardware Specifications Environmental Specifications Safe Use of Your Unit Troubleshooting Regulatory Information Declaration of Conformity... -
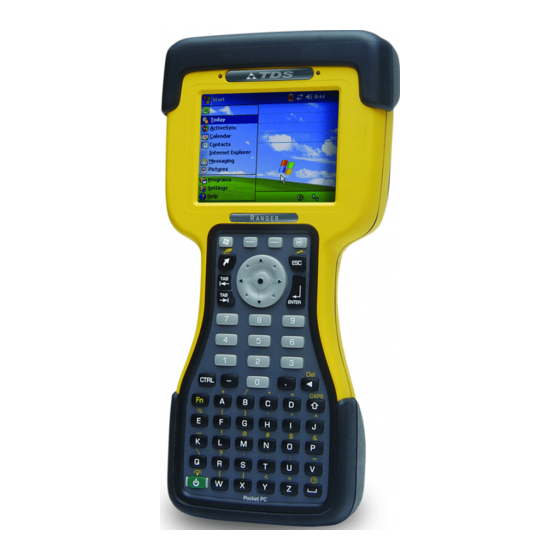
Page 4: Device Hardware
Device Hardware Front Panel Back Panel Removable CF-Cap CF-Cap Stylus holder Notification Hand strap PowerBoot Module PowerBoot coin screws Power Top View- without Cap Bottom View CompactFlash and SDIO slots Some units do not have these slots CF slot #1 CF slot #2 Serial External... -
Page 5: Unit Setup
Unit Setup 1. Charge your PowerBoot Module The PowerBoot Module that contains the batteries is shipped detached from the unit. Before you insert the PowerBoot into the unit, you should charge it. The AC charger that ships with your unit has adapters to fit almost every electrical outlet. - Page 6 4. Turning your unit on and off To turn your unit on, press and release the green Power key on the lower left hand corner of the keypad. To turn your unit off, press and release the Power key again. One of the most convenient features of the unit is “instant on”...
- Page 7 8. Using the CF and SDIO expansion slots Your unit may contain two CompactFlash (CF) slots and one Secure Digital Input Output (SDIO) expansion slot. The SDIO slot is located within the walls of one of the CF slots. To access the CF and SDIO expansion slots, remove the CF-Cap Unscrew the screw on the top of the CF-Cap using a coin or a screwdriver and slide the cap off the main unit.
-
Page 8: Working With The Unit And Powerboot Module
Working with the Unit and PowerBoot Module PowerBoot Module The PowerBoot includes the batteries to power the unit, the power port used to charge the unit, and the I/O ports that are used to communicate with other devices using a USB or serial cable. Battery life: Battery life is dependent upon the application and operating environment. - Page 9 The PowerBoot Module also has an LED that provides an indication of charging status. The LED states are shown in the following table. Normal usage: No charger present or it is unplugged Fast blink Fast charge Slow blink Topoff charge Charging complete Error conditions: 1 - 2 short flashes *...
-
Page 10: Using The Stylus
4. Remove the PowerBoot Module by taking it out of the unit. Be careful to not press the Power key while the PowerBoot is detached. 5. Quickly insert the new PowerBoot onto the unit. 6. Fasten the PowerBoot securely into place by turning the two screws clockwise. -
Page 11: The Start Menu
Accessing Storage Memory using File Explorer File Explorer (Start / Programs / File Explorer) lets you browse the contents of folders on your unit. To easily delete, rename, or copy an item, touch and hold the item. ® NOTE: Unlike desktop PCs, Windows Mobile 5.0 does not support a Recycle Bin. -
Page 12: The Today Screen
The Today screen You can view the Today screen by tapping Start / Today. It will also display when you turn on your unit for the first time each day or after a configurable time of inactivity. (When some external applications are running, the Today screen will not automatically be redisplayed.) At the top of the screen are status icons. - Page 13 Power key features The Power key turns the unit on and off and performs a number of additional functions. Turn backlight on/off: To toggle the backlight on or off, press Fn and then the Power key. Once toggled off, the backlight will stay off until it is toggled back on.
- Page 14 Speaker and microphone Your unit comes with an integrated speaker and a microphone. The speaker will allow you to hear a variety of media. To use the microphone, press and hold the Fn key and then press and hold the ESC key. The unit will record until Stop is pressed. The ideal speaking distance for recording from the microphone is from 20 to 30 cm (8 to 12 inches).
-
Page 15: Settings On Your Unit
Settings on Your Unit Tap Start / Settings. Tap any of the icons on the Personal, System or Connections tabs to customize the unit settings to your own preferences. Tap X on the touchscreen or press OK on the keypad to exit the settings. -
Page 16: System Information
To change the volume, tap the speaker icon in the status bar of the Today screen. You can either change the volume or mute all sounds coming from the unit. Screen Tap System / Screen. The orientation can be changed to portrait for some programs that are not screen aware. -
Page 17: Connecting To Your Pc
Connecting to Your PC Serial External host port client power I/O ports The unit has a USB host port, a USB client port, and a 9-pin serial port. Connections via the USB Pin 1 Pin 5 client port to a PC require an A-B Pin 6 Pin 9 USB cable (included with the unit). -
Page 18: Communication
Communication The unit is equipped with multiple ways to communicate with other devices. Many of these are described in the following sections. Where noted, your unit may not have that particular feature. Connecting to a Desktop Connecting your unit to a PC is done using Microsoft ActiveSync 4.1 or higher. - Page 19 Once your unit connects with your PC, you will be presented with the Synchronization Setup Wizard window. If you are simply interested in installing software on your unit, or in transferring files between your unit and your PC, click Cancel. If you want to synchronize the information in Microsoft Outlook (such as e-mail, contacts, calendar, and time) between your computer and your PC or/and Exchange server, click Next.
- Page 20 Troubleshooting ActiveSync connection problems 1. Confirm the unit is configured to communicate with the PC. Tap Start / Programs / ActiveSync / Menu / Connections. Confirm the box Synchronize all PCs using this connection is checked and USB is selected from the dropdown list. 2.
- Page 21 802.11 (Wireless LAN) If your unit comes with embedded Wireless LAN (wLAN) capability, also known as 802.11 or Wi-Fi, your unit has the ability to wirelessly connect to the Internet and other data networks by connecting to available access points or hot spots. Once connected, you can browse the Internet or file shares on the local network.
- Page 22 If you choose to create an Internet connection, open Internet Explorer Mobile on the unit (Start / Internet Explorer) to browse the Internet. Some features supported by desktop PC browsers are not supported by Internet Explorer Mobile. For instance, there are no pop-up windows, some sites may not be accessible and you may be unable to send e-mail with file attachments.
- Page 23 Troubleshooting 802.11 connection problems 1. Confirm that the unit has an appropriate IP address. To view the unit’s IP address, tap Start / Settings / Connections / Network Cards / Network Adapters. For units equipped with Agere wireless modules, tap Wireless B Network Driver. For units equipped with Marvell wireless modules, tap Marvel CF8385N Wireless Card.
- Page 24 Bluetooth If your unit comes with embedded Bluetooth capability—a short- range radio technology—your unit can communicate with other Bluetooth-enabled devices without using cables. To find out if you have built-in Bluetooth available in your unit, tap Start / Settings / System / System Information / Wireless.
- Page 25 ActiveSync over Bluetooth If your PC is Bluetooth-enabled, it is possible to establish a Bluetooth ActiveSync connection between your unit and the PC. Confirm that ActiveSync 4.1 or higher is installed on the PC, and that Bluetooth on the PC is enabled and configured to be discoverable.
- Page 26 Additional connectivity If your unit has CF and SDIO slots, it can support several additional kinds of connections. If your unit does not have embedded Bluetooth or 802.11, CF or SDIO cards can be purchased to add the functionality. The following connectivity options are also possible: Modem: The unit supports dial-up connections to an Internet Service Provider and sending and receiving e-mail with file attachments.
-
Page 27: Caring For The Unit And Powerboot Module
Caring for the Unit and PowerBoot Module Cleaning the unit and PowerBoot Module Clean with a soft cloth dampened with either water or a diluted mild detergent. Solvents and harsh cleaning agents will quickly damage impact-resistant plastics in the case and battery. Do not use any chemical cleaners or put the unit in the dishwasher. - Page 28 Care of the PowerBoot Module The PowerBoot Module contains rechargeable Lithium-Ion (Li-Ion) cells that power the unit. Charging guidelines: • It is not possible to overcharge the batteries. They are self- regulated. You may leave them on charge indefinitely with no adverse consequences to their service life.
-
Page 29: Environmental Considerations
Environmental Considerations The unit’s rugged design allows you to run your applications in harsh outdoor environments. Here are some considerations that will help you get the most out of your unit when working in very wet, hot or cold conditions. Water This unit is designed to withstand accidental immersion. -
Page 30: Hardware Specifications
will improve by keeping the unit and the spare battery warm (for instance, keeping them inside your coat). At moderate temperatures, you can expect your battery to last about 300 full charge/discharge cycles before its performance begins to noticeably but gradually decline. Hardware Specifications Windows Mobile 5.0 Intel®... -
Page 31: Environmental Specifications
Environmental Specifications Operation: -30°C to +60°C (-22°F to +140°F) EMPERATURE Storage: -40°C to +70°C (-40°F to +158°F) Submersible to 1 meter for 30 minutes, IP67, ATER MIL-STD 810F, Method 512.4, Procedure 1 1.22 m (4.0 ft.) onto concrete Sealed against dust, IP67, MIL-STD 810F, AND AND Method 510.4, Procedures I and II Mil-STD 810F Method 514.5... -
Page 32: Safe Use Of Your Unit
Safe Use of Your Unit Carrying the unit Due to radio frequency emissions, it is unsafe to operate the radio with the unit in a holster, dangling from a lanyard, or with any method that keeps the powered unit in very close proximity to the head or torso. -
Page 33: Environmental Hazards
• Handle a damaged or leaking battery with extreme care. If the electrolyte comes in contact with your skin, wash the exposed area with soap and water. If it comes in contact with the eye, flush the eye with water for 15 minutes and seek medical attention. •... -
Page 34: Troubleshooting
Troubleshooting I am worried that my battery isn’t performing as well as it should. Is there any way that I can test it to see whether it’s ok? First ensure the two battery screws are tightened securely. Intermittent problems can occur if the screws are loose. The operating system includes a Battery Logger utility to help evaluate battery performance. - Page 35 How can I make the display more viewable? The default backlight brightness is set to about 65 percent of the maximum brightness. Tap Start / Settings / System / Backlight / Brightness, and adjust the slider to increase display brightness; however, doing this will reduce battery life.
- Page 36 How can I enable caps lock? Press Fn key (to the left of the “A” button), and then the up arrow key (to the right of the “D” button) to toggle caps lock. How can I see file extensions or file attributes? The File Explorer included in Windows Mobile does not have any support for viewing file extensions or attributes like the Windows Explorer program on a desktop PC.
-
Page 37: Regulatory Information
Regulatory Information U.S.A. This device complies with Part 15 of the FCC Rules. Operation is subject to the following two conditions: (1) this device may not cause harmful interference, and (2) this device must accept any interference received, including interference that may cause undesired operation. -
Page 38: Declaration Of Conformity
Corvallis, OR 97333 USA Declares, under our sole responsibility, that the product: Product Name: Field Data Collector Model Number: Ranger X Product Options: conforms to the following Product Specifications: Safety: EN60950-1:2001 EMC: EN 55022: 1994 +A1, A2: 1997 EN 55022: 1998 +A1:2000... - Page 39 TRIPOD DATA SYSTEMS A TRIMBLE COMPANY 345 SW Avery Avenue Corvallis, OR 97333 FOR MORE INFORMATION, VISIT: TDSWAY.COM OR CALL 5417539322 ® ®...
- Page 40 We endeavor to meet your needs, not only when you purchase and use our products, but also when you are ready to dispose of them. That is why TDS and our parent company Trimble Navigation are actively pursuing the expanded use of environmentally friendly materials in all our products and why we have established a convenient recycling program.
Need help?
Do you have a question about the Ranger and is the answer not in the manual?
Questions and answers