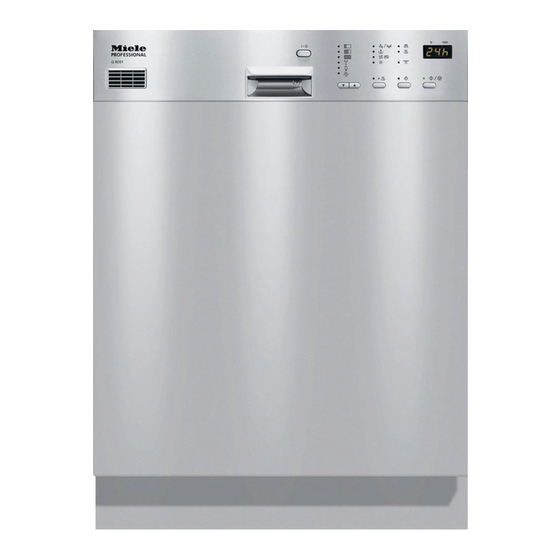
Miele G 8050 Operating Instructions Manual
Commercial dishwasher
Hide thumbs
Also See for G 8050:
- Operating instructions manual (76 pages) ,
- Operating instructions manual (72 pages)
Table of Contents

Related Manuals for Miele G 8050


Summary of Contents for Miele G 8050
-
Page 1: Operating Instructions
Operating instructions Commercial dishwasher G 8050 / G 8051 To avoid the risk of accidents or damage to the machine it is essential to read these instructions before it is installed, commissioned and used for the first time. M.-Nr. 06 749 290... -
Page 2: Table Of Contents
Contents Guide to the machine..........4 Overview . - Page 3 Free-standing (G 8050) ........
-
Page 4: Guide To The Machine
Guide to the machine Overview a Upper spray arm (not visible) g Four height adjustable screw feet b Upper basket h Filter combination c Water feed for middle spray arm i Salt reservoir d Middle spray arm j Dual compartment detergent dispenser e Lower spray arm k Rinse aid reservoir (with dosage... -
Page 5: Control Panel
Guide to the machine Control panel a On/Off button k Check spray arm indicator light b MAXI programme l Drying button indicator light m Add rinse aid indicator light c MIDI programme n Add salt indicator light indicator light o Programme selector buttons d MINI programme p COLD programme indicator light... -
Page 6: Warning And Safety Instructions
This machine should be requirements. Incorrect use can lead commissioned and then maintained to personal injury and damage to by a Miele authorised service technician property. or other suitably qualified and To avoid the risk of accidents and competent approved person. Repairs... - Page 7 Warning and Safety instructions Personnel operating the machine Be careful when sorting items with should be trained regularly. sharp pointed ends and Untrained personnel should not be positioning them in the machine that allowed access to the machine or its you do not hurt yourself or create a controls.
- Page 8 Foam can have an adverse effect on etc., are discussed with the Miele the cleaning process. Application Technology specialists. Where a chemical additive is...
- Page 9 Accessories The manufacturer cannot be held liable for damage caused by Only use genuine Miele non-compliance with these Warning accessories with this machine. Consult Miele on the type and and Safety instructions. application of such equipment.
-
Page 10: Caring For The Environment
Caring for the environment Disposal of the packing It should be unplugged or disconnected from the mains electricity material supply by a competent person. The The transport and protective packing plug must be rendered useless, and the has been selected from materials which cable cut off directly behind it to are environmentally friendly for disposal prevent misuse. -
Page 11: Before Using For The First Time
Before using for the first time Before using the machine for the first time you require: – approx. 2 litres of water, – approx. 2 kg dishwasher reactivation salt, – dishwasher detergent, – rinse aid. Every dishwasher is tested at the factory. -
Page 12: To Open The Door
Before using for the first time To open the door Child safety lock The yellow key for the child safety lock is on one of the spikes at the front of the upper basket. Remove the key before switching on the dishwasher and keep it in a safe place away from the dishwasher. -
Page 13: Water Softener
Before using for the first time Water softener The dishwasher is programmed at the factory for a water hardness level In order to achieve good cleaning of 3.4 mmol/l (19 °d). results, the dishwasher needs to operate with soft water. Hard water If this setting corresponds to the results in the build-up of calcium hardness of your water you do not need... -
Page 14: Programming The Water Hardness Level
Before using for the first time ^ Use the programme selector buttons Programming the water hardness level %$ to select the value that corresponds to your water hardness ^ Switch the dishwasher off with the level (see chart on the right). On/Off button I-0. -
Page 15: Checking The Programmed Water Hardness Level
Before using for the first time Checking the programmed water hardness level Value displayed °d mmol/l °f ^ Switch the dishwasher off with the German On/Off button I-0. scale ^ Press the +c and h/f buttons in and whilst holding them in switch the dishwasher on with the On/Off button I-0. -
Page 16: Filling The Salt Reservoir
Before using for the first time Filling the salt reservoir Only use special coarse grained In order to achieve good cleaning dishwasher salt for reactivation. Do results, the dishwasher needs to not use other salts such as cooking operate with soft water. Hard water salt, agricultural grade or gritting results in the build-up of calcium salt. -
Page 17: Salt Indicator
Before using for the first time As the salt reservoir is filled, displaced Note water will overflow. If the water in your area is very soft and ^ Clean any excess salt from around constantly lower than 0.7 mmol (4 °d) the reservoir opening and then screw you do not need to add salt to the the cap on again firmly. -
Page 18: Rinse Aid
Before using for the first time Rinse aid Adding rinse aid Rinse aid is necessary to ensure water does not cling and leave marks on crockery during the drying phase and helps crockery dry faster after it has been washed. Rinse aid is poured into the storage reservoir and the amount set is dispensed automatically. -
Page 19: Rinse Aid Indicator
Before using for the first time Rinse aid indicator When the light comes on the reservoir contains sufficient rinse aid for 2 - 3 programmes only. ^ Add rinse aid only until it is visible on the surface of the filter in the opening. -
Page 20: Setting The Rinse Aid Dosage
Before using for the first time Setting the rinse aid dosage The dosage selector has settings from 1-6. It is set to "3" (3 ml) at the factory. Approx. 3 ml of rinse aid are then used per programme. This is a recommended setting. -
Page 21: Loading The Machine
Loading the machine ^ The spray arms must not be blocked Preparing the load by items which are too tall or which ^ Remove coarse residues and empty hang down in their path. If in doubt, all containers before loading into the test for free movement by manually machine. -
Page 22: Items Not Suitable For Dishwashers
Loading the machine Items not suitable for Please note dishwashers: Silverware previously cleaned with a silver polish may still be damp or – Wooden cutlery and crockery or spotted at the end of a programme, items with wooden parts: these may where water has not run off smoothly. -
Page 23: Upper Basket
Loading the machine Upper basket Hinged cup rack For small, lightweight, delicate items To make room for tall items, raise the such as cups, saucers, glasses, rack upwards. dessert bowls, etc. Shallow pans or casserole dishes can also be placed in the upper basket. Long items such as soup ladles, mixing spoons and long knives should be placed lying down across the front of... -
Page 24: Adjusting The Upper Basket
Loading the machine Adjusting the upper basket Depending on the setting of the upper basket, the following plate dimensions In order to gain more space for taller can be accommodated. pieces of crockery in the bottom or upper basket, the upper basket can be Upper Plate Ø... -
Page 25: Lower Basket
Loading the machine Lower basket Height limitation For larger and heavier items such as The stay at the front of the upper basket plates, serving platters, saucepans, determines the maximum height bowls, etc. permissible for items placed in the Glasses and small items such as lower basket to ensure they do not saucers can also be placed in the lower impede the movement of the middle... -
Page 26: Lower Basket Inserts
Loading the machine Lower basket inserts A variety of inserts for washing crockery in the lower basket are available to order. To remove an insert ^ Pull upwards by the handle as shown. To refit it ^ Fit the insert into the lower basket with the hooks going under the long cross piece as illustrated. -
Page 27: Operation
Operation Detergent Detergent manufacturers give the required amount of detergent for a Only use detergents formulated particular programme on their for dishwashers. Do not use washing packaging. up liquid. ^ Use at least 30 ml of detergent for a full load in the following programmes:: Do not use tablet detergent as the - MINI,... -
Page 28: Adding Detergent
Operation Adding detergent Avoid inhalation of powder detergents and do not ingest dishwasher detergent. Dishwasher detergents contain irritant or corrosive ingredients. They can cause burning in the nose, mouth and throat if swallowed, or inhibit breathing. Consult a doctor immedi- ately if detergent has been swallowed or inhaled. -
Page 29: Switching On
Operation Switching on Starting a programme ^ Make sure the spray arms are not ^ Please refer to the programme chart obstructed. before selecting a programme. ^ Close the door. ^ Then use the programme selector buttons %$ to select the ^ Open the stopcock, if it is closed. -
Page 30: Programme Sequence Indicators
Operation Display Note: You can now select the "Delay start" d The duration of the programme or "Drying" +c additional functions if selected appears in hours and minutes wished (see "Additional functions"). in the display before the programme ^ Press the Start/Stop button h/f. begins. -
Page 31: At The End Of A Programme
Operation At the end of a programme Switching off 0 appears in the display when the At the end of a programme: programme has finished. ^ Press the On/Off button I-0. The dishwasher can now be opened The Start/Stop indicator light h/f will and unloaded (see "Unloading the go out. -
Page 32: Interrupting A Programme
Operation Interrupting a programme Changing a programme A programme is interrupted as soon as Important: the door is opened. If the detergent dispenser flap has If the door is closed again, the already opened, do not change the programme will continue from the point programme. -
Page 33: Additional Functions
Operation Additional functions Pressing the "Delay start" button d again when a delay period of 24^ is Delay start showing in the display switches the function off. The starting time of a programme can The duration of the programme be delayed, e.g. to benefit from selected will appear again in the economy rates of electricity. -
Page 34: Drying
Operation How the Delay start time is shown in Note: If the "Drying" additional function had the display: been selected, then you will need to up to 59 minutes: select it again. e.g. 30 minutes = 30 ^ Press the Start/Stop button h/f. between 1 hour and 9 hours 30 The programme will begin. -
Page 35: Programming Special Functions
Programming special functions Dispensing system settings for ^ Press the +c button once. DOS Module G 60 or C 60 The set dispensing time will appear in (optional extras) the display, e.g. 10 (factory setting). The c indicator light will come on. For future servicing work, please (This shows the programming level) document any alterations to the stan-... -
Page 36: Venting The Dispensing System
Programming special functions ^ Press the +c button once. Having changed a value or all values: ^ Press the Start/Stop button h/f The set dispensing time will appear in twice. the display, e.g. 10 (factory setting). The indicator light beside the h/f The c indicator light will come on. -
Page 37: Special Function 1
Programming special functions Special function 1 Then release these buttons. Increasing the final rinse The "Main wash/Rinses" l indicator temperature light will come on and the "Salt" k indicator light will flash. If you alter the final rinse The set water hardness will then appear temperature, make a note of the new in the Time left display. - Page 38 Programming special functions Having changed a value or all values: ^ Press the Start/Stop button h/f twice. The indicator light beside the h/f button will flash. The programmed setting is now stored in memory. ^ Switch the dishwasher off with the On/Off button I-0.
-
Page 39: Special Function 2
Programming special functions Special function 2 ^ Press the +c button twice. Increasing the water level To start with, Special function 1 "final rinse temperature increased" is For future servicing work, please selected and will be shown in the document any alterations to the stan- display in double digits (10 or 11). - Page 40 Programming special functions Having changed a value or all values: ^ Press the Start/Stop button h/f twice. The indicator light beside the h/f button will flash. The programmed setting is now stored in memory. ^ Switch the dishwasher off with the On/Off button I-0.
-
Page 41: Cleaning And Care
Cleaning and care Check your dishwasher regularly (approx. every 4 - 6 months). This way faults and problems can be avoided. Cleaning the filters in the wash cabinet The filter combination in the base of the wash cabinet retains coarse soil from the suds solution, preventing it accessing the circulation system and re-entering the cabinet through the... - Page 42 Cleaning and care ^ Replace the filter combination so that To clean the inside of the filter, the flap must be opened: it lies flat in the base of the wash cabinet. ^ Pull back the yellow clip to do this. ^ Then turn the handle clockwise to ^ Rinse all parts under running water, lock the filter combination in place.
-
Page 43: Cleaning The Spray Arms
Cleaning and care Cleaning the spray arms Particles of food can get stuck in the spray arm jets and bearings. The spray arms should therefore be inspected and cleaned regularly (approx. every 4 - 6 months). ^ Switch the dishwasher off. Remove the spray arms as follows: ^ Push the top spray arm upwards to engage the inner ratchet. -
Page 44: Cleaning The Wash Cabinet
Neoblank drip onto the sides of the dishwasher (available from the Miele Spare Parts door. These surfaces are outside the Department) can also be used. wash cabinet and are not accessed by water from the spray arms. -
Page 45: Cleaning The Door Front
Cleaning and care Cleaning the door front ^ Clean the front using a Miele E-cloth or with a suitable cleaning agent for the type of material the front is made of. Follow the manufacturer's instructions. ^ Door fronts made from wood should... -
Page 46: Problem Solving Guide
Problem solving guide With the aid of the following guide, minor problems can be easily corrected without calling in a Miele service technician, saving you both time and money. Repairs should only be carried out by a suitably qualified and trained person in accordance with local and national safety regulations. - Page 47 Problem solving guide Problem Possible cause Remedy The "Water inlet" Before rectifying the problem you must: indicator light is flashing and the programme does – Press the "Start/Stop" not continue. button for at least one second. – Start the programme again.
- Page 48 Problem solving guide Problem Possible cause Remedy The "Drain" indicator Before rectifying the light is flashing and the problem you must: programme has – Press the "Start/Stop" stopped. button for at least one second. – Switch the dishwasher off using the "On/Off" button.
- Page 49 – Press the "Start/Stop" button If the three horizontal bars appear again at the end of the programme, there is a technical fault. – Call the Miele Service Department. Knocking noise in the The spray arm is Interrupt the programme wash cabinet.
- Page 50 Problem solving guide Problem Possible cause Remedy The dishes are not The dishes were not See notes in "Loading the clean. loaded correctly. Dishes dishwasher". were placed inside other pieces, water could not access all surfaces. The outlet of the water Make sure that dishes intake pipe for the middle placed in the rear section...
- Page 51 Problem solving guide Problem Possible cause Remedy Dishes, cutlery and The rinse aid amount may Increase the dosage or glasses are not dry or be insufficient or the rinse replenish the reservoir, are flecked. aid reservoir empty. see "Before using for the first time".
- Page 52 Problem solving guide Problem Possible cause Remedy Glassware is dull The glassware is not There is no remedy. and discoloured; dishwasher-proof. The Purchase glassware film cannot be surfaces are affected. which is dishwasher-proof. wiped off. Tea or lipstick stains The wash temperature of the Select a programme with a have not been programme selected was too...
- Page 53 Problem solving guide Problem Possible cause Remedy Detergent residue is left The dispenser was still Make sure the dispenser in the dispenser at the damp when detergent is dry before adding end of a programme. was added. detergent. The detergent lid cannot Clogged detergent Remove the residue.
-
Page 54: Problem Solving
^ Replace the filter and seal, making union. sure they are sitting correctly. This filter is available from your Miele dealer or the Miele Spare Parts ^ Reconnect the inlet hose to the Department. -
Page 55: Cleaning The Drain Pump And Non-Return Valve
Problem solving Cleaning the drain pump and non-return valve If the water has not been pumped away at the end of a programme the drain pump or the non-return valve might be blocked. They are, however, easy to clean. Watch out for glass or bone splinters which could cause injury. - Page 56 Problem solving ^ Lift out the non-return valve and rinse The drain pump is situated under the well under running water. non-return valve (see arrow). ^ Remove all foreign objects from the ^ Remove all foreign objects from the non-return valve. drain pump (watch out for glass or bone splinters which are particularly difficult to detect and could cause...
-
Page 57: After Sales Service
Programme update function - PC cannot remedy yourself, please The programme update function (PC) is contact: designed to enable a service – your authorised Miele Service Dealer technician to update your machine's electronics in keeping with advances in technology. – the Miele Service Department (see back cover for contact details). -
Page 58: Installation
– The dishwasher does not have a The G 8050 machine is available in two plinth facing. The plinth area of the installation versions: dishwasher needs to be covered... -
Page 59: Built-Under ("U") (Without A Lid Or Rear Panel) (G 8050 U)
Installation Built-under ("U") (without a lid or rear Aligning and securing a "U" panel) (G 8050 U) dishwasher ^ Building-under: To ensure stability, the dishwasher must be fixed securely to the worktop. Two Built-under machines are delivered securing pieces are supplied with the without a lid or rear panel. - Page 60 Installation Granite and marble worktops: With these worktops the dishwasher must be securely screwed to neighbouring units on the right and left hand sides. For this you will require two special fixing brackets (available as a special accessory at extra cost). ^ Screw the countersunk screws (3.9 x 22) supplied upwards through the securing pieces on the left and...
-
Page 61: Electrical Connection
Electrical connection Electrical connection U.K. Non-rewireable plugs BS 1363 All electrical work should be carried out The fuse cover must be refitted when by a suitably qualified and competent changing the fuse, and if the fuse cover person, in strict accordance with is lost, the plug must not be used until a current national and local safety suitable replacement is obtained. -
Page 62: Plumbing
(see illustration). the p / 6 indicator light may come on and the fault code "F2E" show in See also the installation diagram the display. Please contact the Miele supplied. Service Department. – The machine is supplied as standard for connection to a cold or a hot wa- ter supply up to a max. - Page 63 Hose clips are supplied for securing it in position. – A longer drain hose (up to 4 m long) is available to order from the Miele Spare Parts Dept. – The drainage system must not exceed 4 metres. See also the installation diagram...
-
Page 64: Programme Chart
Programme chart Programme When to use Powder detergent (when not using liquid cleaning agent) Follow manufacturers instructions For normally soiled loads. 30 g in the powder dispenser MINI For normally soiled items with a higher wash 30 g in the powder temperature for removing foods rich in starch. - Page 65 Cold X = Sections included in a programme (with temperature/temperature holding time) 1) If a second interim rinse is required, this must be programmed into the machine by a Miele service techician or authorised dealer. 2) With cold water and without rinse aid.
-
Page 66: Technical Data
Technical data Height: 85 (82) cm Width: 60 cm Depth: 60 cm Voltage: see data plate Connected load: see data plate Fuse rating: see data plate Mains connection cable: approx. 1.8 m Water pressure (flow rate): 0.5 - 10 bar (50 - 1000 kPa) Cold or hot water connection: up to max. - Page 68 Alteration rights reserved/4505 M.-Nr. 06 749 290 / 00 en - GB...
Need help?
Do you have a question about the G 8050 and is the answer not in the manual?
Questions and answers