WaterRower A1 Owner's Manual & Assembly Instructions
Hide thumbs
Also See for A1:
- Owner's manual (53 pages) ,
- Assembly manual (9 pages) ,
- Operating instructions (2 pages)
Table of Contents
Advertisement
Advertisement
Table of Contents

Related Manuals for WaterRower A1


Summary of Contents for WaterRower A1
- Page 1 Owner’s Manual asseMbly InsTruCTIOns MOnITOr InsTruCTIOns warranTy & COnTaCT InfO...
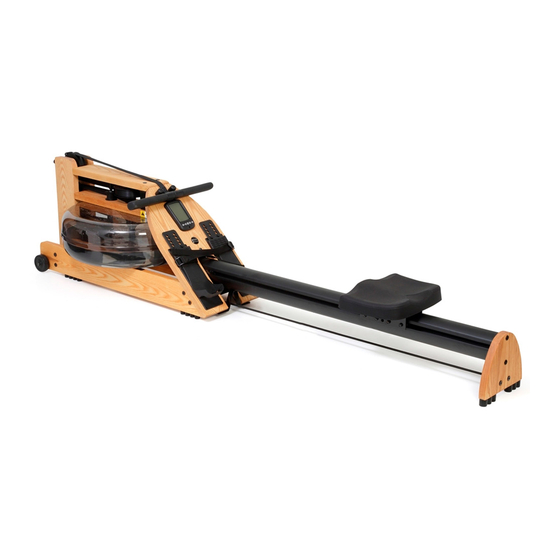
- Page 2 Your WaterRower has been carefully hand-crafted to give you years of trouble-free use. You will notice that each WaterRower is unique due to the variance in color and grain that occurs naturally in genuine hardwood.
- Page 3 MaInTenanCe We recommend consulting a physician before starting out with an exercise During the first weeks of use, the wood in your WaterRower will adjust to program. Please read all instructions before using the WaterRower. the temperature and humidity of the environment. During this period it is...
- Page 4 Of yOur waTerrOwer Most of us recognize the benefit of exercise and the potential Your WaterRower can be stored upright. Lift the Rear Leg end, pull the improvements to our general health and well being. However few of us...
- Page 5 TraInIng guIDelInes A sustained exercise program will improve the efficiency with which the To ensure you get the maximum benefit from training on your WaterRower respiratory and cardiovascular system can supply oxygen. This improves and to avoid unnecessary problems or injuries here are a few guidelines: lung function, heart function, vascular efficiency and capillary growth, A health check before starting an exercise program.
- Page 6 We have done our best to keep the assembly instructions as clear and concise as possible. Assembling your WaterRower takes about 30-45 minutes and the only tool you need is a 5mm Allen Key that is included on the rear spacer or in the assembly bag.
- Page 7 sTep 1 sTep 3 Lay the sub rails on the floor with ends parallel. Dolly wheels on the outside. First remove the Back of Footboard Bolts (K) from behind the footboard. These bolts are used in steps 6 and 8. Attach the end of the mono rail to the angled ends of the sub rails with the Allen key (M) and 4 pairs of the JCN nuts (F) and JCB bolts (E) .
- Page 8 sTep 5 sTep 8 Tighten the footboard to the mono rail by screwing in the clamp bar bolt (I). screw in the rail sub bracket (L) underneath the footboard using the 2 remaining back of footboard bolts (K). Tighten all the way. Do not tighten all the way.
- Page 9 Do not fill above the 19 level mark. Information on the sticker includes the serial Number, WaterRower contact information and the Insert one purification tablet (P) every six months. Additional purification Water Level Gauge. The standard Calibration Level tablets are available upon request at: is Level 17.
- Page 10 Ready Mode. The monitor will InTrODuCTIOn commence monitoring as soon as you begin rowing. The WaterRower A1 Monitor has been designed to balance function with Note the monitor will turn off automatically after about 2 minutes of no use. user friendliness.
- Page 11 seTTIng unITs seTTIng wOrkOuTs Display units may be changed by pressing the button. Press the button Workouts may be set by pressing the button. Press the button once to once to change intensity units and again to change distance units. set Distance Workouts and again to set Time Workouts.
- Page 12 Loosening bolts - over time and with use bolts can come loose, use the 5mm Allen key to gently tighten the bolts. If the bolts continue to loosen The warranty will be voided if, in the opinion of WaterRower, the claim is found to be use a small amount medium strength Loctite to fasten the nuts and bolts ®...
- Page 13 UnITEd KInGdOM | www.waterrower.co.uk 19 Acton Park Estate | The vale, London W3 7QE Tel: +44 (0)20 8749 9090 | info@waterrower.co.uk AUSTRALIA | www.waterrower.com.au Unit 8/46-50 Wellington Rd. | South Granville, nSW 2142 Tel: +61 (0) 2 9681 4221 | info@waterrower.com.au WRM7220 RevB...
Need help?
Do you have a question about the A1 and is the answer not in the manual?
Questions and answers
I was trying to fix the water tank and removed the top to the mechanism and it fell apart. I would like to know how to reassemble.
To reassemble the water tank mechanism for a WaterRower A1:
1. Attach the Sub Rails:
- Position the dolly wheels on the outside.
- Use two pairs of JCN nuts and JCB bolts to connect each wooden sub rail to the monorail.
- Partially tighten the bolts using the provided 5mm Allen key.
2. Install the Tank Assembly:
- Place the tank assembly onto the sub rails.
- Use four pairs of JCN nuts and JCB bolts (two pairs per side) to secure it.
- Attach the forward riser bracket to the rails.
- You may need to lift and adjust the tank assembly to align the holes.
- Partially tighten the bolts.
3. Final Tightening:
- Once all components are aligned, go back and tighten all bolts securely.
4. Filling the Tank:
- Close the valve by turning the knob clockwise.
- Position the water source above the tank.
- Squeeze the pump 4-5 times until water flows.
- Turn the knob counterclockwise to stop siphoning.
5. Check the Level Gauge:
- Stand the machine up and check the Level Gauge sticker.
- The standard Calibration Level is 17, and the maximum fill level is 19.
If alignment issues occur, loosen all bolts, adjust, and retighten.
This answer is automatically generated