WaterRower A1 Assembly Manual
Hide thumbs
Also See for A1:
- Owner's manual (53 pages) ,
- Owner's manual & assembly instructions (14 pages) ,
- Assembly manual (9 pages)
Advertisement
Quick Links
25 Acton Park Estate, The Vale, London, W3 7QE
T: +44(0)20 8749 8400 F: +44 (0)20 8749 8600 E: info@waterrower.co.uk
WaterRower A1
ASSEMBLY MANUAL
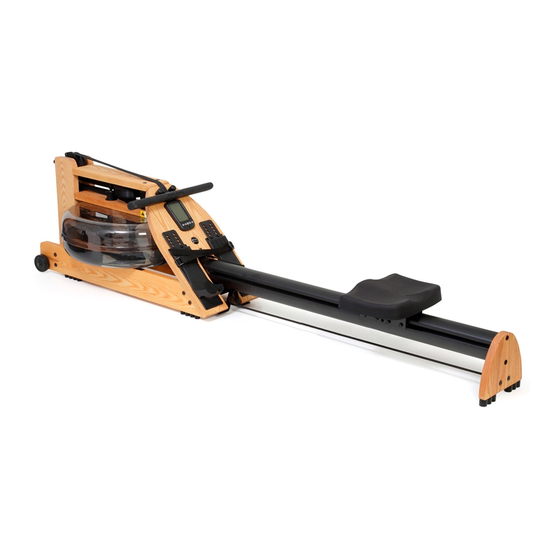
Main Parts
A
Mono Rail Assembly (with seat)
B
Tank Assembly
B
C
Sub Rails × 2
D
Footboard
Other Parts
E
JCB 23mm (WRB-B700) × 8
F
JCN (WRP-B711) × 8
G
Handle Rest (WRP-P430) × 2
H
Handle Rest Bolt (WRP-P455) × 2
I
Clamp Bar Bolt (WRP-P1140) × 1
J
Rail Bracket Bolt (WRP-S210) × 1
K
Back of Footboard Bolt (WRP-B720) × 4
L
Mono Rail Bracket (WRP-R1500) × 1
M
5mm Allen Key (WRP-B740) × 1
N
Heel Rests (WRP-P700) × 2
O
Syphon Pump (WRP-B405) × 1
P
Chlorine Tablets (WRP-B960) × 3
A
C
E
G
F
H
I
J
K
L
M
N
P
O
D
Advertisement

Related Manuals for WaterRower A1


Summary of Contents for WaterRower A1
-
Page 1: Assembly Manual
5mm Allen Key (WRP-B740) × 1 Heel Rests (WRP-P700) × 2 Syphon Pump (WRP-B405) × 1 Chlorine Tablets (WRP-B960) × 3 25 Acton Park Estate, The Vale, London, W3 7QE T: +44(0)20 8749 8400 F: +44 (0)20 8749 8600 E: info@waterrower.co.uk... - Page 2 (M) and 4 pairs of the JCN nuts (F) and JCB bolts (E) . Do not tighten all the way. Make note of the serial number. This number can be found on the level gauge sticker and is required when contacting WaterRower for customer support. × 4 ×...
- Page 3 How to Fill and Empty the Tank Step 4 Using the 5mm allen key (M), screw the handle rests and bolts (G & H) through the top 1) To pump water be sure to turn knob clockwise to close valve as shown in fi gure A of the footboard into the rivnuts mentioned in the previous step.
- Page 4 Step 7 Step 10 Screw in the mono rail bracket (L) underneath the footboard using the 2 remaining Unwrap the recoil belt from the forward riser bracket, making sure the belt runs below back of footboard bolts (K). and around the pulley. Attach the D ring on the recoil belt to the bungee hook.
Need help?
Do you have a question about the A1 and is the answer not in the manual?
Questions and answers