
Related Manuals for WaterRower S1


Summary of Contents for WaterRower S1
- Page 1 OWNER’S MANUAL / 02-09 ASSEMBLY INSTRUCTIONS / 10-16 MONITOR INTRODUCTIONS / 17-23 WARR ANT Y / 24-25...
- Page 2 Your WaterRower has been carefully hand-crafted to give you years of trouble- free use. We recommend that you closely follow the assembly details provided, particularly by assembling the machine in the correct sequence, and adhering to the suggested maintenance schedule.
-
Page 3: Operation
OPERATION The WaterRower is unique in using the effect of drag to provide an exercise which is entirely self paced. Because drag is linked to speed, a crew rowing down a river chooses its intensity of exercise simply by altering the pace at which they row: the faster the boat travels the greater the drag and the harder the crew must work. - Page 4 START UP MAINTENANCE During the first weeks of use, the WaterRower will adjust to use and its environment. During this period, it is strongly advised that you GENTLY tighten all of the connecting bolts with the Allen key stored under the rear spacer.
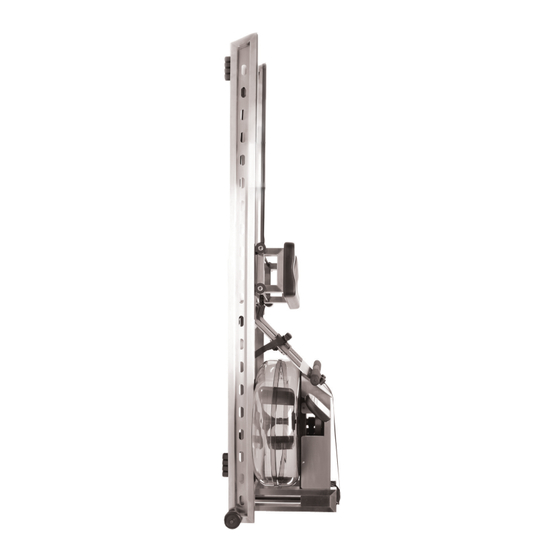
- Page 5 STORAGE OF YOUR WATERROWER Your WaterRower can be stored upright. Lift the rear leg end, pull the WaterRower towards you and use the momentum to stand it in an upright position. When storing the WaterRower, please ensure the seat is in the forward position (close to the footboard).
- Page 6 - a rowing education program for the rowing machine ▪ user, at a gym. We hope that this expanded knowledge enables you to realize the unrivalled physical benefits of rowing and get the best from your WaterRower. For more information, please visit www.HowToRow.com. YOUR EXERCISE PROGRAM Most of us recognize the benefit of exercise and the potential improvements to our general health and well-being.
-
Page 7: Weight Maintenance
WEIGHT MAINTENANCE At lower intensities, our body uses a mixture of fat and carbohydrate as its source of fuel. As the maximum aerobic output is approached, the percentage of fat consumed as fuel reduces to zero. Also, as the duration of exercise is increased, the percentage of fat consumed tends to increase. -
Page 8: Training Guidelines
TRAINING GUIDELINES To ensure you get the maximum benefit from training on your WaterRower and to avoid unnecessary problems or injuries here are a few guidelines: A health check before starting an exercise program. - Page 10 We have done our best to keep the assembly instructions as clear and concise as possible. Assembling your WaterRower takes about 30-45 minutes and the only tool you need is a 5mm Allen Key that is included on the Rear Spacer or in the Assembly Bag.
- Page 11 STEP 1 Lay the rails on the floor and connect the rear spacer using 4 (2 on either side) of the male button head screws and the Allen key provided. 5mm Allen Key Button Head Screw x 4 Rear Spacer Note: The black extrusions are positioned on the inside.
- Page 12 Use the included syphon pump (or a hose if available) to fill the tank to the desired level with municipal water. Do not overfill your WaterRower. Anything beyond Level 19 (the maximum level) may risk leaking and void the warranty.
- Page 13 STEP 6 Insert one purification tablet (provided) now and every six months. Additional purification tablets are available upon request at: www.waterrowerservice.com/puritabs Once completed, insert the Tank Stopper; it may be necessary to moisten the Stopper to assist with replacement. Please wipe excess water from wooden components after filling ►...
- Page 14 STEP 8 Place the Footboard between the Rails. STEP 9 Connect the base of the Footboard to the Rails using 2 of the Button Head Screws. The bolt goes into the rail through the Spacer on the inside of the Footboard, similar in fashion to Step Four.
- Page 15 Note: the Wheel goes on the outside of the Rail. STEP 13 Stand the WaterRower upright. Release the Recoil Belt which is fastened to the bracket at the base of the machine. Ensure that the Recoil Belt is passing over all Guide Pulleys.
-
Page 16: Troubleshooting
HOW TO FILL AND EMPTY THE TANK 1) To pump water, turn the knob clockwise to close valve as shown in figure A 2) Locate water source above (higher than) water destination: See Figure B for filling tank ▪ See Figure C for emptying tank ▪... - Page 17 The WaterRower S4 Performance Monitor has been designed to balance a high level of technical sophistication with user friendliness. The WaterRower S4 Monitor consists of the following information buttons and windows (see the following pages for specifi c details about each button and window):...
- Page 18 INFORMATION AND PROGRAMMING WINDOWS WaterRower Series IV Performance Monitor The WaterRower S4 Monitor average intensity strokerate strokes/min has 6 main information windows that will display /500m when the monitor is in use: /2km watts heartrate cal/hr beats/min A. Strokerate Work B.
- Page 19 WORKOUT PROGRAMS BUTTON DISTANCE WORKOUT 1. Press the Workout Programs button WaterRower Series IV Performance Monitor strokerate intensity one (1) time. 2. Using the Arrows, scroll to the desired heartrate workout distance. duration workout distance meters 3. Press OK; Row.
- Page 20 When operating between the upper and lower zone limits, the position in this range will be displayed by the divisional zone bars. HEART RATE ZONE SETTING 1. Press the Zones button one (1) time. WaterRower Series IV Performance Monitor WaterRower Series IV Performance Monitor strokerate work...
-
Page 21: Advanced Button
ADVANCED BUTTON ADVANCED PROGRAM 1: STORE WORKOUT SETTINGS This program allows manual storage of WaterRower Series IV Performance Monitor intensity strokerate workout settings. This is useful if the S4 monitor is used by numerous users and the heartrate AutoStore programs are overwritten. - Page 22 ADVANCED BUTTON (CONTINUED) ADVANCED PROGRAM 5: RATIO Advanced Program 5 allows you to view the WaterRower Series IV Performance Monitor strokerate ratio intensity ratio between the power and recovery parts of the stroke. The recovery ratio must be heartrate selected immediately prior to the workout and is current only for that workout.
- Page 23 4. The total lifetime distance (in km) and Firmware version will be displayed. STORED PROGRAMS BUTTON AUTOSTORE PROGRAMS The WaterRower S4 monitor includes an WaterRower Series IV Performance Monitor strokerate intensity AutoStore function which automatically stores the last 9 historic workout program settings.
-
Page 24: Limited Warranty
WaterRower warrants against any replacement WaterRower spare part received from WaterRower or any of its authorized dealers for a period of NINETY (90) DAYS after the date of shipment. This Limited Warranty applies to the initial purchasers of the Product or spare part and is not transferable to any other party. - Page 25 Restriction on Other Damages: WaterRower shall not be liable for any direct, consequential, incidental, indirect or special damages under this Limited Warranty or any implied warranty that may arise under your country, province or state law. Some states (countries and provinces) do not allow the exclusion or limitation of incidental or consequential damages, so the above limitation or exclusion may not apply to you.
- Page 28 UNITED STATES | www.waterrower.com 560 Metacom Avenue Warren, RI 02885 Tel: +1 (401) 247 7742 info@waterrower.com UNITED KINGDOM | www.waterrower.co.uk 19 Acton Park Estate The Vale, London W3 7QE Tel: +44 (0)20 8749 9090 info@waterrower.co.uk AUSTRALIA | www.waterrower.com.au 72 South Street | Rydalmere NSW 2116 Australia Tel: +61 (0) 2 9898 1405 info@waterrower.com.au...
Need help?
Do you have a question about the S1 and is the answer not in the manual?
Questions and answers