Table of Contents
Advertisement
Advertisement
Table of Contents

Related Manuals for Life Fitness Leg Press/Calf 8245102


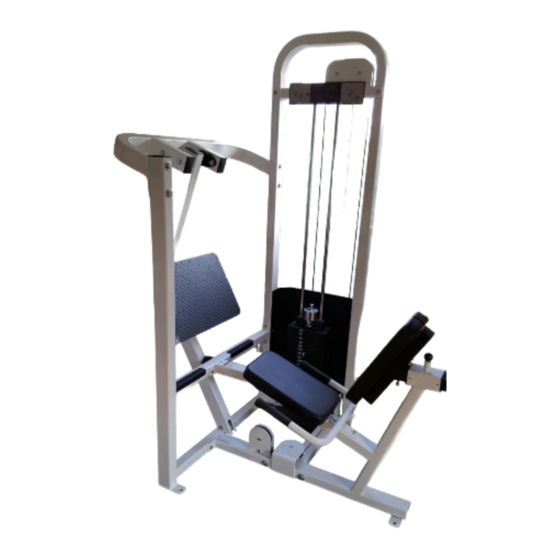
Summary of Contents for Life Fitness Leg Press/Calf 8245102
-
Page 1: Assembly Instructions
8245102 LEG PRESS/CALF ASSEMBLY INSTRUCTIONS Part # 6870101 Revision:01/24/00... -
Page 2: Important Notes
2. Do not allow minors or children to play on or around this equipment. 3. Exercise with care to avoid injury. 4. If unsure of proper use of equipment, call your local LIFE FITNESS STRENGTH distribu- tor or call the LIFE FITNESS STRENGTH customer service department at (800) 328-9714. -
Page 3: Parts List
PART # DESCRIPTION 6802903 TOWER 6804803 FRAME 6803802 FOOTPLATE 6780703 LOWER CROSS SUPPORT 6801703 UPPER CROSS SUPPORT 6804102 PIVOT FRAME 6803503 PIVOT ARM 6781303 TOWER BRACE 6802002 SEAT ADJUST 6803203 HANDLE 6791102 SHROUD 6805101 6523401 72-3/8” GUIDE ROD 6807401 CABLE 3116101 4-1/2”... - Page 4 39 1/2 X 4” FIGURE 1 STEP 1: • LOOSELY assemble LOWER CROSS SUPPORT (4) to the TOWER (1) using two 1/2 X 4” BOLTS (39), two 1/2” WASHERS (40) and one 1/2” LOCK NUT (41). See FIGURE 1.
- Page 5 1/2 X 3” 38 1/2 X 4” 39 FIGURE 2 STEP 2: • LOOSELY assemble the FRAME (2) to the LOWER CROSS SUPPORT (4) using two 1/2 X 4” BOLTS (39), two 1/2” WASHERS (40) and two 1/2” LOCK NUTS (41). See FIGURE 2. •...
- Page 6 FIGURE 3 STEP 3: • LOOSELY assemble the PIVOT FRAME (6) to the TOWER (1) using four 1/2 X 4” BOLTS (39), four 1/2” WASHERS (40) and three 1/2” LOCK NUTS (41) as shown in FIGURE 3. • LOOSELY assemble the UPPER CROSS SUPPORT (5) to the PIVOT FRAME (6) using two 1/2 X 4” BOLTS (39), two 1/2” WASHERS (40), and one 1/2”...
-
Page 7: Sleeve
FIGURE 4 STEP 4: • Slide one RUBBER BUMPER (21) over the short round tube on the PIVOT FRAME (6) as shown in FIGURE 4. • Slide two 1-3/4” VINYL SLEEVES (22) over the shafts on the PIVOT ARM (7) as shown in FIGURE 4. •... - Page 8 1/2 X 4” 39 FIGURE 5 STEP 5: • SECURELY assemble the FOOTPLATE (3) to the PIVOT ARM (7) using four 1/2 X 4” BOLTS (39), four 1/2” WASHERS (40), and four 1/2” LOCK NUTS (41) as shown in FIGURE 5.
- Page 9 FIGURE 6 STEP 6: • SECURELY assemble the HANDLE (10) to the FRAME (2) using two 1/2 X 3” BOLTS (38), two 1/2” WASHERS (40), and two 1/2” LOCK NUTS (41) as shown in FIGURE 6. • Apply two 2-1/2 X 9-1/2” NON-SKID STRIPS (19) a foot stance apart on the PIVOT FRAME (6) as shown in FIGURE 6. 1/2 X 3”...
- Page 10 FIGURE 7 STEP 7: • SECURELY assemble one PAD (12) to the FRAME (2) using two 3/8 X 3” BOLTS (34) and two 3/8” WASHERS (36) as shown in FIGURE 7. 3/8 X 3” 34...
-
Page 11: Spring Pin Assembly
FIGURE 8 STEP 8: • SECURELY assemble the SEAT PAD (12) to the SEAT ADJUST (9) using two 3/8 X 3” BOLTS (34) and two 3/8” WASHERS (36). See FIGURE 8. • SECURELY assemble one SPRING PIN ASSEMBLY (24) to the spring pin barrel on the FRAME (2) as shown in FIGURE 8. •... - Page 12 3/8 X 1-1/4” 31 STEP 12: • Insert two GUIDE RODS (13) into the base of • Slide two RUBBER BUMPERS (21) down • Using EXTREME CARE slide twenty WEIGHT • Securely assemble the 20 HOLE SELECTOR • Carefully Slide the HEAD PLATE ASSEMBLY •...
- Page 13 FIGURE 11 STEP 11: • SECURELY assemble two 4-1/2” PULLEYS (15) to the TOWER BRACE (8) using two 3/8 X 2” BOLTS (32), and two 3/8” LOCK NUTS (37). See FIGURE 11. FIGURE 12 STEP 12: • Place TOWER BRACE (8) over the GUIDE RODS (13) and SECURELY assemble TOWER BRACE (8) to TOWER (1) using two 1/2 X 4”...
- Page 14 FIGURE 13 STEP 13: • Route the swivel end of the CABLE (14) through the holes and around the pulleys in the TOWER BRACE (8) as shown in FIGURE 13. FIGURE 14 STEP 14: • Route the CABLE (14) around one 4-1/2” PULLEY (15) and assemble the pulley to the bracket on the LOWER CROSS SUPPORT (4), using two 3/8 X 2”...
-
Page 15: Cable Retaining Clip
32 3/8 X 2” FIGURE 15 STEP 15: • SECURELY assemble two 4-1/2” PULLEYS (21) to the brackets on the FRAME (2) using three 3/8 X 2” BOLTS (32), one CABLE RETAINING CLIP (25), and three 3/8” LOCK NUTS (37) as shown in FIGURE 16. (NOTE: Position the CABLE RETAINING CLIP before tightening.) •... -
Page 16: Weight Plate
FIGURE 17 STEP 17: • Screw the threaded end of the CABLE (14) approximately 3/4” into the end of the 20 HOLE SELECTOR SHAFT (16) and tighten jam nut securely. See FIGURE 17. • If the HEAD PLATE (17) does not sit on top of the first WEIGHT PLATE (29), push the head plate down, insert the SELECTOR PIN (23) and perform several repetitions on the machine. - Page 17 30 3/8 X 1” BUTTON HEAD CAP SCREW FIGURE 18 STEP 18: • SECURELY assemble the SHROUD (11) to the TOWER (1) using four 3/8 X 1” BUTTON HEAD CAP SCREWS (30) as shown in FIGURE 18. Thank you for purchasing the LifeFitness 8245 LEG PRESS/CALF. If unsure of proper use of equipment, call your local LifeFitness distributor or call the LifeFitness customer service department at (800) 328-9714.
Need help?
Do you have a question about the Leg Press/Calf 8245102 and is the answer not in the manual?
Questions and answers