Table of Contents
Advertisement
Advertisement
Table of Contents

Related Manuals for Janome 3022


Summary of Contents for Janome 3022
- Page 1 INSTRUCTION BOOK MANUAL DE INSTRUCCIONES MANUEL D’INSTRUCTIONS...
-
Page 2: Important Safety Instructions
IMPORTANT SAFETY INSTRUCTIONS This appliance is not intended for use by persons (including children) with reduced physical, sensory or mental capabilities, or lack of experience and knowledge, unless they have been given supervision or instruction concerning use of the appliance by a person responsible for their safety. When using an electrical appliance, basic safety precautions should always be followed, including the following: This sewing machine is designed and manufactured for household use only. -
Page 3: Instrucciones Importantes De Seguridad
INSTRUCCIONES IMPORTANTES DE SEGURIDAD Cuando se utiliza un aparato eléctrico es necesario tomar ciertas precauciones básicas de seguridad, como las siguientes: Lea todas las instrucciones antes de utilizar este aparato. PELIGRO — Para reducir el riesgo de choque eléctrico: 1. No deje nunca el aparato sin vigilancia mientras esté enchufado. Desenchufe siempre la máquina de la toma eléctrica inmediatamente después de utilizarla y antes de limpiarla. - Page 4 CONSIGNES IMPORTANTES DE SECURITE Pour utiliser un appareil électrique, il faut toujours respecter les consignes de sécurité fondamentales, notamment les consignes suivantes : Avant d’utiliser cet appareil, lisez toutes ces instructions. DANGER : Pour réduire les risques d’électrocution. 1. Il ne faut jamais laisser un appareil sans surveillance lorsqu’il est branché. Il faut toujours débrancher cette machine à...
-
Page 5: Table Of Contents
TABLE OF CONTENTS SECTION 1. ESSENTIAL PARTS SECTION 5. CARE OF YOUR MACHINE Names of Parts ............2 Cleaning the Bobbin Case and the Hook ....50 Standard Accessories ..........4 Cleaning the Feed Dog ..........50 Sewing Light ............52 SECTION 2. - Page 6 INDICE SECCIÓN 5. CUIDADO DE SU MÁQUINA SECCIÓN 1. COMPONENTES PRINCIPALES Desmontaje y Montaje Pista de la Lanzadera ..51 Nombres de las partes ..........3 Limpieza del Corretelas ..........51 Accessorios estandares ..........5 Luz para coser ............53 Lubricación de la máquina ........
- Page 7 TABLE DES MATIÈS PARTIE 1. PIECES MAITRESSES SECTION 5. ENTRETIEN DE VOTRE MACHINE Identification des pièces ..........3 Démontage et Remontage du Crochet de la Accessoires standard ..........5 Navette ..............51 Nettoyage des Griffes d’entraînement ...... 51 PARTIE 2. PRÉPAREZ-VOUS À COUDRE Lumière pour la couture ...........
-
Page 8: Section 1. Essential Parts
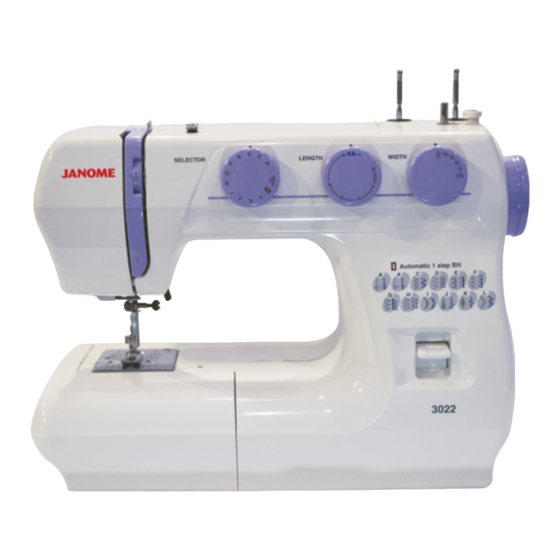
SECTION 1. ESSENTIAL PARTS Names of Parts q Reverse stitch cotrol w Stitch width dial e Stitch length dial r Bobbin winder stopper t Bobbin winder spindle y Spool pin u Pattern selector dial i Bobbin winder thread guide o Upper thread guide !0 Thread take-up lever !1 Thread tension dial !2 Face plate... -
Page 9: Sección 1. Componentes Principales Nombres De Las Partes
SECCIÓN 1. COMPONENTES PARTIE 1. PIECES MAITRESSES PRINCIPALES Nombres de las partes Identification des pièces q Control de puntada reversa q Bouton de marche arrière w Perilla de anchura de puntada w Cadran de réglage de la Largeur du point e Perilla de longitud de puntada e Cadran de réglage de la longeur du point r Tope del enrollador de la bobina... -
Page 10: Standard Accessories
Standard Accessories q Zipper foot w Hem guide e Automatic buttonhole foot r Hemmer foot t Satin stitch foot y Overcasting foot u Bobbins i Needle set o Seam ripper/Buttonhole opener !0 Small screwdriver !1 Large screwdriver !2 Oil... -
Page 11: Accessorios Estandares
Accessorios estandares Accessoires standard q Prensatelas para cremalleras q Pied pour femetures éclair w Guía de dobladillos w Guide à ourlets e Prensatelas para ojales automático e Pied pour boutonnière automatique r Prensatelas para dobladillo r Pied ourleur t Prensatelas para puntada decorativa t Pied à... -
Page 12: Section 2. Getting Ready To Sew Connecting Machine To Power Supply
SECTION 2. GETTING READY TO SEW Connecting Machine to Power Supply q Power supply plug w Power switch e Outlet r Machine socket t Machine plug Before connecting the power cord, make sure the voltage and frequency shown on the ma- chine conform to your electrical power. -
Page 13: Seccion 2. Preparacion De La Maquina Para Coser Conexión De La Máquina A La Red Eléctrica
SECCION 2. PREPARACION DE LA PARTIE 2. PRÉPAREZ-VOUS À MAQUINA PARA COSER COUDRE Conexión de la máquina a la red eléctrica Branchez la machine q Clavija de toma de corriente q Prise électrique w Interruptor de corriente w Interrupteur de courant e Red eléctrica e Prise de courant r Enchufe de la máquina... -
Page 14: Extension Table
Extension Table The extension table provides added sewing surface and can be easily removed for free arm sewing. Detaching the table: Pull the table away from the machine. Free Arm Sewing Avoid fabric bunching around the needle when bartacking to reinforce pockets, plackets and waistlines. -
Page 15: Mesa Supletoria
Table d’extension Mesa supletoria La table d’extension ajoute de la surface pour coudre La mesa supletoria proporciona una superficie de et peut être facilement enlevée. costura añadida y puede desmontarse fácilmente para coser con el brazo libre. Pour remettre la table: Poussez la table d’extension jusqu’à... -
Page 16: Changing Presser Foot
Changing Presser Foot • To remove Turn the handwheel toward you to raise the needle to its highest position. Press the lever q on the back of the foot holder. The presser foot will drop off. • To attach Place the presser foot so the pin e on the foot lines up just under the groove w of the foot holder. -
Page 17: Cambio De Prensatelas
Changement de pied presseur Cambio de prensatelas • Pour dettacher le pied-de-biche: • Para remover tournez le volant ver vous pour lever q l’aiguille à la Girar manualmente, hacia uno mismo, el volante position la plus élevée. Levez le pied-de-biche. que la aguja alcance su posición más elevada;... -
Page 18: Changing Needle
Changing Needle q Needle clamp screw w Needle clamp z Turn off the power switch. Raise the needle to its highest position by turning the handwheel counterclockwise, toward you, and lowering the presser foot. Loosen the needle clamp screw q by turning it counterclockwise. -
Page 19: Cambio De Aguja
Cambio de aguja Changer l’aiguille q Tornillo de sujeción de la aguja q Vis du pince l’aiguille w Alojamiento de la aguja w Pince l’aiguille z Apague la máquina con el interruptor de corriente. z Éteignez la machine. Faites monter l’aiguille le Suba la aguja hasta su posición más alta girando plus haut possible en tournant le volant en sens el volante en el sentido contrario a las agujas del... -
Page 20: Reverse Stitch Control
Reverse Stitch Control Press the stitch control to sew in reverse. Setting Spool Pins The spool pins are used for holding the spools of thread when feeding the thread to the ma- chine. To use, pull up the spool pins. Push down for storage. -
Page 21: Control De Puntada Reversa
Control de puntada reversa Bouton de marche arrière La máquina coserá hacia atrás hasta que suelte el La machine coud en marche arrière tant que l’on botón. appuie sur le bouton de marche arrière. Ajuste de los porta-carretes Pose de la broche à bobine Los portacarretes se utilizan para sostener los Les broches à... -
Page 22: Winding The Bobbin
Winding the Bobbin z Pull the handwheel out. x Draw the thread from spool. Guide the thread around the bobbin winder thread guide. c Insert the thread through the hole in the bobbin from the inside to the outside. Put the bobbin on the bobbin winder spindle. v Push it to the right. -
Page 23: Embobinado De La Canilla
Embobinado de la canilla Bobinage d’une canette de fil z Libere el embrague jalando el volante y así evitar z Tourneg le volant vers la droite pour empêcher que la aguja se mueva mientras devane la bobina. l’aiguille de se déplacer lorseque vous bobinez la x Saque el hilo del carrete. -
Page 24: Threading The Machine
Threading the Machine Raise the take–up lever to its highest position by turning the handwheel toward you. Raise the presser foot. Place a spool on the spool pin as shown, with thread coming from back of the spool. z Draw the thread into thread guide using both hands. -
Page 25: Enhebrado Del Hilo De La Aguja
Enfilage de la machine Enhebrado del hilo de la aguja Faites monter le levier releveur tendeur de fil le Suba el tirahilos hasta su posición más alta girando plus haut possible en tournant le volant à main en el volante en el sentido contrario a las agujas del sens antihoraire. -
Page 26: Drawing Up Bobbin Thread
Drawing Up Bobbin Thread z Raise the presser foot and hold the needle thread lightly with your left hand. x Turn the handwheel slowly toward you with your right hand until the needle goes down and continue turning the handwheel until the take-up lever is at its highest position. -
Page 27: Extracción Del Hilo De La Canilla
Extracción del hilo de la canilla Comment faire monter le fil de la canette z Suba el prensatelas. Sujete ligeramente el hilo de z Faites monter le pied presseur. Tenez le fil de la aguja con su mano izquierda. l’aiguille souplement de la main gauche. x Gire el volante en el sentido contrario a las agujas x Tournez le volant d’un tour complet en sens del reloj una vuelta completa. -
Page 28: Adjusting Bobbin Thread Tension
Adjusting Bobbin Thread Tension For general sewing, the bobbin thread tension does not need to adjust. However, you can adjust the bobbin thread tension for a specific sewing need. Turn the adjusting screw to the right to tighten or, to the left to loosen the tension. Pattern Selector Dial Raise the needle and presser foot. -
Page 29: Ajuste De La Tensión Del Hilo De La Canilla
Ajuste de la tensión del hilo de la canilla Régler la tension du fil de la canette Para la costura general no es necesario ajustar la Pour la couture en général il n’est pas nécessaire tensión del hilo de la canilla. Sin embargo, puede d’ajuster la régulation du fil de la canette. -
Page 30: Section 3. Basic Sewing Straight Stitch Sewing
SECTION 3. BASIC SEWING Straight Stitch Sewing q Pattern selector: w Presser foot: Zigzag foot e Thread tension: 2–6 r Stitch length: 1.5–4 t Stitch width: (0) or • Starting to sew Raise the presser foot and position the fabric next to a seam guide line on the needle plate (5/8˝... -
Page 31: Sección 3. Operaciones Básicas De Costura Costura De Puntada Recta
PARTIE 3. COUTURE DE BASE SECCIÓN 3. OPERACIONES BÁSICAS DE COSTURA Costura de puntada recta Utilisation du point droit q Selector de patrón: q Selecteur de point: w Pied presseur: w Prensatelas: Prensatelas para zigzag Pied zigzag e Tensión del hilo: e Tension du fil: 2–6 2–6... -
Page 32: Variable Needle Position
Variable Needle Position When the straight stitch (pattern A) is selected, you can move the needle between center and left needle position by turning the stitch width dial. Zigzag Sewing q Pattern selector: w Presser foot: Zigzag foot e Thread tension: 2–5 r Stitch length: 0.5–4... -
Page 33: Posición Variable De La Aguja
Position d’aiguille variable Posición variable de la aguja Quand on sélectionne le point droit (modèle A), on Al seleccionar la puntada recta (patrón A), usted puede peut déplacer l’aiguille entre les positions d’aiguille mover la aguja entre la posición central e izquierda de centrale et gauche, en tournant le bouton sélecteur la aguja, girando la perilla de ancho de puntada. -
Page 34: Tricot Stitch
Tricot Stitch q Pattern selector: w Presser foot: Zigzag foot e Thread tension: 1–4 r Stitch length: 0.5–4 t Stitch width: This stitch is used to finish the raw edge on synthetics and other fabrics that tend to pucker. Place your fabric to allow a 1.6 cm (5/8") seam. Trim the seam allowance after sewing. -
Page 35: Puntada De Múltiple Zigzag
Puntada de múltiple zigzag Point zig-zag multiple q Selector de patrón: q Selecteur de point: w Prensatelas: w Pied presseur: Prensatelas para zigzag Pied zigzag e Tensión del hilo: e Tension du fil: 1 – 4 1 – 4 r Control de longitud: r Longueur du point: 0.5 –... -
Page 36: Straight Stretch
Straight Stretch q Pattern selector: w Presser foot: Zigzag foot e Thread tension: 2–6 r Stitch length: S.S. t Stitch width: (0) or This strong, durable stitch is recommended where both elasticity and strength are necessary to ensure comfort and durability. Use it to reinforce areas such as crotch and armhole seams as well as to eliminate puckering on knits and stretch fabrics. -
Page 37: Puntada Recta Triple
Puntada recta triple Point droit extensible q Selector de patrón: q Sélecteur de point: w Prensatelas: w Pied presseur: Prensatelas para Pied zigzag e Tension du fil: zigzag 2 à 6 e Tensión del hilo: r Longueur du point: 2 a 6 S.S. -
Page 38: Button Sewing
Button Sewing q Pattern selector: w Presser foot: Satin stitch foot e Thread tension: 2–6 r Stitch length: t Stitch width: Adjust as necessary y Feed dog: Dropped Drop the feed dogs. Match the holes in a button with the horizontal slot on the Presser foot. Adjust stitch width matching the distance of the holes on the button. -
Page 39: Costura De Botones
Costura de botones Pose des boutons q Selector de patrón: q Sélecteur de point: w Prensatelas: w Pied presseur: Prensatelas para Pied à point lance e Tension du fil: puntada decorativa 2 à 6 e Tensión del hilo: r Longueur du point: 2 a 6 Toute r Control de la longitud:... -
Page 40: Automatic Buttonhole
Automatic Buttonhole q Stitch pattern: w Presser foot: R: Automatic buttonhole foot e Thread tension dial: 1–5 r Stitch length: 0.5–1 t Stitch width: 3–5 * The size of buttonhole is automatically set by placing the button in the rear of the automatic buttonhole foot R. -
Page 41: Ojal Automático
Ojal automático Les boutonnières automatiques q Selector de patrón: w Prensatelas: q Sélecteur de point: R: Prensatelas para ojales w Pied presseur: automáticos R: Pied à boutonnière e Tensión de hilo: 1–5 automatique r Control de longitud: e Tension du fil: 0.5–1 1–5 t Control de anchura:... - Page 42 b Depress the foot control to sew a buttonhole. The machine will sew the front bartack, left row, back bartack and right row automatically. Stop the machine at the ending point. !1 Ending point n Raise the presser foot and cut the both needle and bobbin threads leaving 10 cm (4˝) thread ends.
- Page 43 b Oprima el pedal de control para coser el ojal. b Appuyer sur la commande à pédale pour coudre La máquina coserá automáticamente el remate une boutonnière. La machine coud delantero, la fila izquierda, el remate trasero y la automatiquement les barrettes de renfort avant, fila derecha.
-
Page 44: Corded Buttonhole
Corded Buttonhole q Stitch pattern: w Presser foot: R: Automatic BH foot e Thread tension dial: 1–5 r Stitch length: 0.5–1 t Stitch width: 3–5 z With the buttonhole foot raised, hook the filler cord on the cord spur at the back of the buttonhole foot. -
Page 45: Ojale Acordonado
Ojale acordonado Les boutonnières gansées q Selector de patrón: q Sélecteur de point: w Prensatelas: w Pied presseur: R: Prensatelas para R: Pied à boutonnière ojales automáticos automatique e Tensión del hilo: e Tension du fil: 1–5 1–5 r Control de longitud: r Longueur du point: 0.5–1 0,5–1... -
Page 46: Zipper Application
Zipper Application q Pattern selector: w Presser foot: Zipper foot e Thread tension: 2–6 r Stitch length: 1.5–4 r Stitchwidth: Pin or baste zipper tape to fabric and place it under the foot. Smooth the threads toward the back and lower the foot. -
Page 47: Aplicación De Cremalleras
Aplicación de cremalleras Installation des fermeture-éclair q Selector de patrón: q Sélecteur de point: w Prensatelas: w Pied presseur: Prensatelas para Pied pour fermetures cremalleras éclair e Tensión del hilo: e Tension du fil: 2 a 6 2 à 6 r Control de la longitud: r Longueur du point: 1.5–4... -
Page 48: Blind Stitch Hemming
Blind Stitch Hemming q Pattern selector: E or F w Presser foot: Zigzag foot e Thread tension: 2–4 r Stitch length: 1–3 t Stitch width: y Hem guide z Fold up the hem and fold it back to from a 0.4 to 0.7cm (1/4˝) allowance as illustrated. -
Page 49: Dobladillo Invisible
Dobladillo invisible Ourlet invisible q Selector de patrón: E o F q Sélecteur du point: E ou F w Prensatelas: Prensatelas para w Pied presseur: Pied zig-zag zigzag e Tension du fil: 2 à 4 e Tensión del hilo: 2 a 4 r Longueur du point: 1 à... -
Page 50: Rolled Hem
Rolled Hem q Pattern selector: w Presser foot: Hemmer foot e Thread tension: 2–6 r Stitch length: r Stitchwidth: z Trim off the corner of the fabric 1.5 cm (3/16˝) by 0.8 cm (5/16˝) to avoid a bulkiness of the hem at the corner. -
Page 51: Dobladillos Enrollados
Dobladillos enrollados Ourleur présente q Selector de patrón: q Sélecteur de point: w Prensatelas: w Pied presseur: Prensatelas para Pied ourleur e Tension du fil: dobladillo 2 à 6 e Tensión del hilo: r Longueur du point: 2 a 6 r Control de la longitud: t Largeur du point: t Control de la anchura:... -
Page 52: Stretch Stitch Patterns
Stretch Stitch Patterns B C D E q Pattern selector: A–E w Presser foot: Zigzag foot e Thread tension: 1–4 r Stitch length: S.S. t Stitch width: If forward and reverse feeds become unbalanced due to the type of fabric, adjust the balance by turning the stitch length dial as follows: If patterns are compressed, turn the dial toward “+”. -
Page 53: Patrones De Puntadas Elásticas
Points stretch décoratifs Patrones de puntadas elásticas q Sélecteur de point: A – E q Selector de patrón: A–E w Pied presseur: Pied Zigzag w Prensatelas: Prensatelas para zigzag e Tension du fil: 1 – 4 e Tensión del hilo: 1–4 r Longueur de point: S.S. -
Page 54: Applique
Applique q Pattern selector: w Presser foot: Satin stitch foot e Thread tension: 1–4 r Stitch length: 0.5-1 t Stitch width: Baste (or fuse with iron-on fabric joiner) applique pieces on the fabric. Stitch around the applique making sure the needle falls along the outer edge of the applique. -
Page 55: Aplicaciones
Aplicaciones Appliqué q Selector de patrón: q Sélecteur de point w Prensatelas: w Pied presseur Prensatelas para Pied à point lance e Tension du fil puntada decorativa e Tensión del hilo: r Longueur de point 1–4 0.5-1 r Control de la longitud: t Largeur du point: 0.5–1 t Control de la anchura:... -
Page 56: Section 5. Care Of Your Machine Cleaning The Bobbin Case And The Hook
SECTION 5. CARE OF YOUR MACHINE Cleaning the Bobbin Case and the Hook CAUTION: Turn off the power switch and/or unplug the machine before cleaning the feed dog. To dismantle shuttle race unit: Raise the needle to its highest position and open the hook cover. -
Page 57: Sección 5. Cuidado De Su Máquina
SECTION 5. SECCIÓN 5. CUIDADO DE SU MÁQUINA ENTRETIEN DE VOTRE MACHINE Desmontaje y Montaje Pista de la Lanzadera Démontage et Remontage du Crochet de la Navette Precaution: Apague el interruptor de alimentación y/o Attention: desenchufe la máquina. Mettez le commutateur sur arrêt et/ou débranchez la prise de la machine. -
Page 58: Sewing Light
Sewing Light The sewing light is located behind the face plate. To change the bulb, take the face plate off the sewing machine by removing the setscrew. * Unplug the power supply before changing the bulb. * Do not dismantle the machine other than explained in this manual. -
Page 59: Luz Para Coser
Lumière pour la couture Luz para coser L’ampoule lumineuse pour la couture est placée à La luz para coser se encuentra detrás de la placa l’arrière du capot frontal. frontal. Coupez la machine avant de changer l’ampoule. Para cambiar la bombilla, quite el tornillo y la placa Ne démontez pas la machine selon une méthode frontal de la máquina de coser. -
Page 60: Troubleshooting
Troubleshooting Condition Cause Reference The needle thread 1. The needle thread is not threaded properly. Page 18 breaks. 2. The needle thread tension is too tight. Page 20 3. The needle is bent or blunt. Page 12 4. The needle is incorrectly inserted. Page 12 5. -
Page 61: Soluciones Para Problemas De Funcionamiento
Soluciones para problemas de funcionamiento Condición Causa Probable Referencia Se rompe el hilo de 1. El hilo de la aguja no se ha enhebrado correctamente. Página 19 la aguja. 2. La tensión del hilo de la aguja es excesiva. Página 21 3. -
Page 62: En Cas De Problème
En cas de problème Problème Cause Reference Le fil d’aiguille se 1. Le fil d’aiguille n’est pas passé correctement. Page 19 casse. 2. La tension du fil d’aiguille est trop forte. Page 21 3. L’aiguille est tordue ou émoussée. Page 13 4. - Page 64 Printed in Taiwan 306-870-017(E/S/F)
Need help?
Do you have a question about the 3022 and is the answer not in the manual?
Questions and answers