Epson SC-F2000 Series User Manual
Hide thumbs
Also See for SC-F2000 Series:
- Service manual (312 pages) ,
- Setup manual (33 pages) ,
- How to use (2 pages)
Table of Contents
Advertisement
Quick Links
Download this manual
See also:
Setup Manual
Advertisement
Table of Contents

Related Manuals for Epson SC-F2000 Series


Summary of Contents for Epson SC-F2000 Series
- Page 1 User’s Guide CMP0006-02 EN...
-
Page 2: Copyrights And Trademarks
(excluding the U.S.) failure to strictly comply with Seiko Epson Corporation’s operating and maintenance instructions. Seiko Epson Corporation shall not be liable for any damages or problems arising from the use of any options or any consumable products other than those designated as Original Epson Products or Epson Approved Products by Seiko Epson Corporation. -
Page 3: Table Of Contents
........48 Using EPSON LFP Remote Panel 2..22 Disposing of Used Consumables and Optional Removing the Software. - Page 4 Technical Support Web Site....94 Contacting Epson Support....94 Before Contacting Epson.
-
Page 5: Introduction
SC-F2000 Series User’s Guide Introduction ❏ Keep the entire computer system away from Introduction potential sources of electromagnetic interference, such as loudspeakers or the base units of cordless telephones. ❏ Use only the type of power source indicated on the Important Safety product’s label. -
Page 6: When Handling The Ink Cartridges
SC-F2000 Series User’s Guide Introduction ❏ Do not move the print heads by hand; otherwise Note Notes contain useful or you may damage this product. additional information on the operation of this product. ❏ Always turn the product off using the Power button on the control panel. -
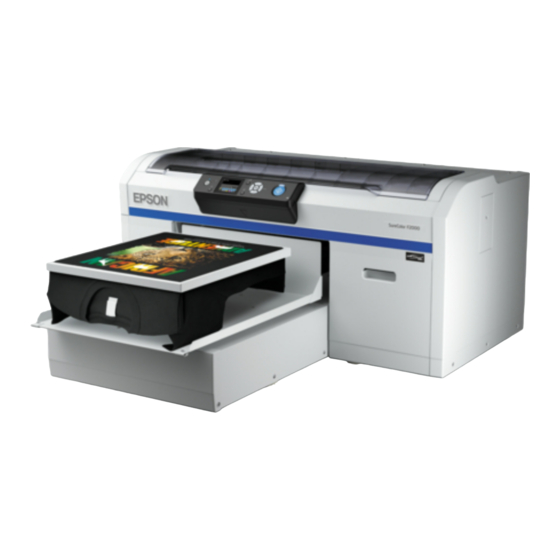
Page 7: Printer Parts
SC-F2000 Series User’s Guide Introduction Printer Parts Front section Printer cover Open when cleaning the inside of the printer. Airflow vents Lets out air from the printer. Do not block the airflow vents. Cartridge cover (left) Open when replacing or shaking ink cartridges. - Page 8 SC-F2000 Series User’s Guide Introduction Height adjustment lever Adjusts the height of the platen. The height can be selected from nine stages. “Adjusting the Height” on page 35 Fixing lever Fixes the height adjustment lever in place. You can adjust the angle of the lever.
-
Page 9: Interior
SC-F2000 Series User’s Guide Introduction Interior Carriage scale Guides the print head when it is operating. Except when performing maintenance, do not touch this as it could be damaged or soiled which may cause a malfunction. “Cleaning the scale and replacing the filter” on page 61 Carriage shaft A metal shaft that supports the carriage. - Page 10 SC-F2000 Series User’s Guide Introduction Anti-drying caps Caps that close the print head nozzles to prevent them from drying while not printing. Replace it if a message is displayed. “Replacing the Head Cleaning Set” on page 52 Suction cap Sucks out the ink during head cleaning to unclog the nozzles.
-
Page 11: Rear Section
SC-F2000 Series User’s Guide Introduction Rear section AC inlet Connect the supplied power cable here. Waste ink outlet (Left) An outlet for the waste ink tube. Waste ink is ejected from here. Tube clamp A clamp that fixes the waste ink tube to the printer. Use the remaining clamps to secure the cables if necessary. See the Setup Guide for details on attaching and removing the clamp. - Page 12 SC-F2000 Series User’s Guide Introduction Data light Indicates the network connection status and data reception by lighting or flashing. Connected. Flashing Receiving data. Status light Indicates the network transmission speed by the color of the light. Green 10Base-T 100Base-T USB port Connect the USB cable here.
-
Page 13: Control Panel
SC-F2000 Series User’s Guide Introduction Control panel Plight (Power light) Indicates the printer's operational status by lighting or flashing. The power is on. Flashing The printer is operating such as receiving data, shutting down, or moving the movable base. The power is off. - Page 14 SC-F2000 Series User’s Guide Introduction l button If you press this button while the menu is displayed, you move back a step in the following order: setting value -> setting item -> menu. “Menu Operations” on page 69 u/d buttons (Up/Down buttons) When menus are displayed, these buttons can be used to select a setting item or a setting value.
-
Page 15: Screen View
SC-F2000 Series User’s Guide Introduction The waste ink bottle status is indicated as follows. Screen View : The height of the indicator corresponds to the remaining capacity. : The waste ink bottle is almost full. Prepare a new waste ink bottle. -
Page 16: Features
Automatic wiper system A built-in automatic wiper system has been newly developed for Epson pigment ink textile printers. Stable print quality has been achieved by automatically cleaning the surface of the print head nozzles. -
Page 17: Ease-Of-Use
Notes on Usage and High density white printing has been achieved by using White ink and pre-treatment liquid developed specially Storage for Epson pigment ink textile printers. Installation space Ease-of-Use Make sure that you secure the following space, clear of... -
Page 18: Notes For When Not Using The Printer
SC-F2000 Series User’s Guide Introduction ❏ Do not bend or pull the waste ink tubes. Otherwise As well as the following, there are additional points to ink may leak inside or outside the printer. note when using White ink. Check the following points. -
Page 19: Notes On Handling Cartridges
SC-F2000 Series User’s Guide Introduction ❏ If you remove an ink cartridge before it is empty, Notes on Handling Cartridges wipe off any ink that is stuck on the ink supply port using the cleaning stick in the supplied Note the following points when handling cartridges to maintenance kit. -
Page 20: Notes On Handling T-Shirts (Media)
SC-F2000 Series User’s Guide Introduction ❏ Wash the ink tubes when a message is displayed to ❏ Do not use organic solvents such as alcohol. prevent print quality declining due to ❏ Do not rub the printed surface against vinyl sedimentation in the tubes. -
Page 21: Using The Software
Installs the Epson communication driver (EPSON SC-F2000 Series Comm Driver). (Windows only) The Epson communication driver is not the printer driver. If you connect the printer to a computer using a USB cable without installing the Epson communication driver, the printer's status may not be displayed in Garment Creator or software RIP. -
Page 22: Using Epson Lfp Remote Panel 2
Select EPSON LFP Remote Panel 2 to remove EPSON LFP Remote Panel 2. Select the target printer icon, and then click OK. Click the item you want to use on the EPSON LFP Remote Panel 2 main screen. Follow the on-screen instructions to continue. -
Page 23: Basic Printing
SC-F2000 Series User’s Guide Basic Printing Basic Printing Overview This section explains the basic workflow from preparing a T-shirt before printing to post-treatment after printing. Operation Item Description Reference Page Preparation Check items required in addition to the printer. “Necessary Items” on... - Page 24 SC-F2000 Series User’s Guide Basic Printing Post-treatment Fixate the ink to the T-shirt. “Post-treatment” on page 38...
-
Page 25: Necessary Items
SC-F2000 Series User’s Guide Basic Printing Pure water (commercially available) Necessary Items Pure water, such as distilled and purified water, is used to dilute the pre-treatment liquid. To print on a T-shirt using this printer, you also need the Pre-treatment liquid roller (option or commercially following devices and parts. -
Page 26: Pre-Treatment
“Necessary Items” on page 25 Important: Read the safety data sheet before use. You can download ❏ Liquid may be spattered about when applying the safety data sheet from the Epson Web site. the pre-treatment liquid. Always wear protective eyewear and gloves when URL: http://www.epson.com... - Page 27 SC-F2000 Series User’s Guide Basic Printing Disposal method Remove the cap. Pre-treatment liquid is classified as industrial waste. Dispose of pre-treatment liquid according to your local laws and statutes such as entrusting it to an industrial waste disposal company. When handing over the pre-treatment liquid to the industrial waste disposal company, make sure you include the safety data sheet.
- Page 28 SC-F2000 Series User’s Guide Basic Printing Pouring If you do not dilute the pre-treatment liquid or make it Remove the cap from the tap, and then turn the too strong, the liquid leaves noticeable traces or the lever until the hole is facing down.
-
Page 29: Fixating The Pre-Treatment Liquid (Heat Press)
SC-F2000 Series User’s Guide Basic Printing Squeeze the pre-treatment liquid out of the roller Place the T-shirt on a flat surface, and then spray by pressing it against the edge of the tray, and the pre-treatment liquid evenly over the print apply the liquid evenly. -
Page 30: Preparing The Printer
SC-F2000 Series User’s Guide Basic Printing When White ink is loaded, shake the White ink Pre-treatm Temperatu Time Pressure cartridge. ent Liquid Applicatio n Area “Replacing and Shaking Cartridges” on page 58 A4 and 170 °C 45 secs. 4.2 N/cm smaller Check for clogged nozzles. -
Page 31: Creating And Transmitting Data
M size platen 14 x 16 inch (356 x 406 mm) S size platen 10 x 12 inch (254 x 305 mm) It can be downloaded from the Epson website. Sleeve platen 4 x 4 inch (102 x 102 mm) http://www.epson.com... -
Page 32: From Photoshop/Illustrator
SC-F2000 Series User’s Guide Basic Printing Load the T-shirt (media) From Photoshop/Illustrator To print data created in Adobe Photoshop or Adobe This section explains how to load a T-shirt (media) into Illustrator, open the data you want to print in the the printer. -
Page 33: Loading On The Platen
SC-F2000 Series User’s Guide Basic Printing “Head Alignment” on page 47 Attach the platen frame again. Loading on the Platen Check that the platen is ejected forward. If it is not ejected, press the } button to move the platen forward. - Page 34 SC-F2000 Series User’s Guide Basic Printing Pull the T-shirt outside of the frame to remove Tuck in the T-shirt around the frame so that it any creases and slack. does not drape over the movable base. If the height sensor reacts while...
-
Page 35: Adjusting The Height
SC-F2000 Series User’s Guide Basic Printing To adjust the height again, move the height Adjusting the Height adjustment lever to change the recommended position. The optimum height of the platen is one step lower than the position where Platen Height Error is displayed on the control panel. - Page 36 SC-F2000 Series User’s Guide Basic Printing Press the } button to move the platen into the Pull the fixing lever to the right, and then adjust it printer. to an easy to use position. Check that Platen Height Error is displayed on the control panel.
-
Page 37: Starting And Canceling Printing
SC-F2000 Series User’s Guide Basic Printing Press the u/d buttons to highlight Yes, and then Starting and Canceling press the Z button. Printing Printing stops immediately when the button is pressed, and data is deleted. Starting When the printer has finished receiving data, the x light turns on. -
Page 38: Post-Treatment
SC-F2000 Series User’s Guide Basic Printing Fixation conditions differ between the heat press and Post-treatment the oven. As the optimum conditions vary depending on the type of heat press or oven being used and the amount of ink, the following values are only a guide. If... - Page 39 SC-F2000 Series User’s Guide Basic Printing Type of Oven Temperature Time Conveyor type 160 °C* 3.5 to 4.5 minutes * Temperature of the fixating surface of the T-shirt. Not the internal temperature. If the surface of the T-shirt exceeds 180 °C, the T-shirt and the print surface may change color.
-
Page 40: Other Printing Methods
SC-F2000 Series User’s Guide Other Printing Methods Save the data in the root folder on the USB memory. If Other Printing the data is saved in a sub-folder, it is not displayed even if the USB memory stick is connected to the printer. -
Page 41: Deleting
SC-F2000 Series User’s Guide Other Printing Methods Confirm that USB File List is highlighted, and Printing on Thick Material then press the r button. (Media) Confirm that Select Print File is highlighted, and then press the r button. You can lower the height of the printing surface by 10... - Page 42 SC-F2000 Series User’s Guide Other Printing Methods Loosen the fixing lever. Remove the three screws inside the height adjustment lever. Keep the removed screws in a safe place. Remove the screw that secures the parallel adjustment plate. Keep the removed screws in a safe place.
-
Page 43: Installing The Labeled Round Part
SC-F2000 Series User’s Guide Other Printing Methods Tighten the fixing lever, and then secure the height adjustment lever. Attach the height adjustment lever. Do not attach the screw removed in step 7. Attach the platen. Attach the parallel adjustment plate. -
Page 44: Maintenance
SC-F2000 Series User’s Guide Maintenance Loading paper Maintenance This section explains how to load paper to print a nozzle check pattern. Prepare the following A4 or letter size media depending on the mode being used. Adjusting the Print Head White ink mode: Transparent media such as an OHP... -
Page 45: Cleaning The Print Head
SC-F2000 Series User’s Guide Maintenance Secure the paper with cellophane tape and so on Check that paper is loaded on the platen. to keep it in place. “Loading paper” on page 44 Press the - button. The Maintenance menu is displayed. -
Page 46: Correcting The Print Misalignment
SC-F2000 Series User’s Guide Maintenance Head cleaning levels Press the u/d buttons to highlight the method You can select from three levels of head cleaning. Use for cleaning the nozzle row, and then press the r light or medium for normal cleaning. Use heavy button. -
Page 47: Head Alignment
SC-F2000 Series User’s Guide Maintenance ❏ Head Alignment (when there are vertical lines or Check that T-shirt is loaded, and then press the faint text) Z button again. ❏ Offset Head Alignment (when you want to fine tune The check pattern is printed. -
Page 48: Periodic Maintenance
SC-F2000 Series User’s Guide Maintenance Periodic Maintenance Suction cap When a message is displayed “Cleaning Caps” on page 51 To maintain optimum print quality, as well as adjusting the print head and so on, you also need to clean and Scale cleaning replace parts periodically. - Page 49 ❏ To prevent the print head from drying, complete Read the safety data sheet before performing operations. the following maintenance activities within ten You can download the safety data sheet from the Epson minutes. A message is displayed after 10 minutes Web site.
-
Page 50: Disposing Of Used Consumables And Optional Parts
SC-F2000 Series User’s Guide Maintenance ❏ Do not touch the tip of the cleaning stick with your Let the ink cleaner soak into the cleaning stick or hand. Oils on your hand may compromise the cleaning cloth. cleaning ability. Make sure that ink cleaner does not drip from the ❏... -
Page 51: Cleaning Caps
SC-F2000 Series User’s Guide Maintenance If there is a lump or film of waste liquid stuck to Cleaning Caps the suction cap, remove it with the supplied pair of tweezers. When it is time to clean the suction cap, a message is displayed on the control panel. -
Page 52: Replacing The Head Cleaning Set
“Options and Consumable Products” on page 87 Read the safety data sheet before use. You can download the safety data sheet from the Epson Web site. URL: http://www.epson.com Important: ❏ Do not move the print head or the platen manually. - Page 53 SC-F2000 Series User’s Guide Maintenance Confirm that the printer is on, and then press the Place your fingers into the groove at the back of - button. the wiper unit, and raise it a little towards you. The Maintenance menu is displayed.
- Page 54 SC-F2000 Series User’s Guide Maintenance Disposal method Press the lever towards you, and then lift the The wiper unit is classified as industrial waste. anti-drying cap to remove it. Dispose of the wiper unit according to your local laws and statutes such as entrusting it to an industrial waste disposal company.
- Page 55 SC-F2000 Series User’s Guide Maintenance Press the u/d buttons to highlight Yes, and then Hold it at an angle and wait until the waste ink stops dripping from the flushing pad. press the Z button. If any waste ink drips into the printer, make sure Press the Z button to move the print head to the you clean it up.
-
Page 56: Tube Washing
SC-F2000 Series User’s Guide Maintenance White ink mode Setting (color) New cartridge ❏ White ink White ink x2 ❏ Cleaning liquid x2 ❏ Color Ink Cyan ink x1 ❏ Magenta ink x1 ❏ Yellow ink x1 ❏ Black ink x1 ❏... - Page 57 SC-F2000 Series User’s Guide Maintenance Press the d/u buttons to highlight White Ink or Holding the cartridge with the label side facing out, slide it all the way into the slot. Color Ink, and then press the r button. Press the d/u buttons to highlight Yes, and then press the Z button.
-
Page 58: Replacing And Shaking Cartridges
Important: When replacing a cartridge, remove it from the Epson recommends the use of genuine Epson ink bag before shaking. cartridges. Epson cannot guarantee the quality or reliability of nongenuine ink. The use of... -
Page 59: Disposing Of Waste Ink
SC-F2000 Series User’s Guide Maintenance If you need to replace or shake another ink White ink cartridge, repeat steps 3 to 5. Important: Install ink cartridges into all slots. The printer cannot print unless ink cartridges are installed in all slots. -
Page 60: Replacing The Waste Ink Bottle
SC-F2000 Series User’s Guide Maintenance Caution: Note: ❏ Always wear protective eyewear and gloves If you have replaced the waste ink bottle before a message when applying the liquid. is displayed on the control panel telling you to do so, reset the Waste Ink Counter from the Maintenance menu. -
Page 61: Cleaning The Scale And Replacing The Filter
SC-F2000 Series User’s Guide Maintenance Remove the waste ink tube from the used waste ink bottle, and insert it into the new waste ink bottle taking care not to spill any waste ink. Press the Z button. Place the caps onto the used waste ink bottle. - Page 62 SC-F2000 Series User’s Guide Maintenance Open the printer cover. Important: ❏ Do not pull the carriage scale with excessive force. If it is pulled with too much force, the right section may detach. Let the ink cleaner soak into the cleaning cloth (one) supplied with the new air filter.
-
Page 63: Cleaning Around The Print Head
SC-F2000 Series User’s Guide Maintenance Put the old air filter into the bag of the new air Buttons that are used in the following operations filter. “Disposing of Used Consumables and Optional Parts” on page 50 Let the ink cleaner soak into a new, large cleaning stick. - Page 64 SC-F2000 Series User’s Guide Maintenance (1) Wipe the edges at the front and rear of the After the print head has moved to the nozzle surface. maintenance position, place a metal or plastic tray, or paper under the print head.
-
Page 65: Cleaning The Platen Path For The Print Head
SC-F2000 Series User’s Guide Maintenance Wipe the border of the metal on the left of the Cleaning the platen path for the wiper unit using a soft, clean cloth dampened print head with water and wrung tight. Perform this operation when printing is not completed Important: normally, even if you have performed head cleaning. -
Page 66: Replacing White Ink
SC-F2000 Series User’s Guide Maintenance Wipe the border of the metal on the right of the Buttons that are used in the following operations flushing pad. Confirm that the printer is on, and then press the - button. The Maintenance menu is displayed. - Page 67 SC-F2000 Series User’s Guide Maintenance When the replacement is complete, a message on Mode Used Unused Notes the control panel prompts you to replace the Period waste ink bottle. Dispose of the waste ink, and White Ink Two weeks Replace the White ink turn off the printer.
-
Page 68: Cleaning The Printer
SC-F2000 Series User’s Guide Maintenance Cleaning the Printer To maintain the printer in optimum condition, you need to perform periodic cleaning. Clean the platen and the platen frame using the same procedure. Check that the platen is ejected forward. If it is not ejected, press the } button to move the platen forward. -
Page 69: Using The Control Panel Menu
SC-F2000 Series User’s Guide Using the Control Panel Menu Using the Control Panel Menu Menu Operations The steps for displaying the various menus are shown below. * The operation performed when you press the Z button depends on the selected item. -
Page 70: Menu List
SC-F2000 Series User’s Guide Using the Control Panel Menu Menu List The items and options available in the menu are described below. See the reference pages for more details on each item. * High-speed color mode is not supported. Menu... - Page 71 SC-F2000 Series User’s Guide Using the Control Panel Menu Menu Setting Item Setting Printer Status Level “Printer Status” on page 75 Head Cleaning Set Firmware Version xxxxxxx,x.xx,xxxx Print Status Sheet Print Administrator Menu Network Setup “Administrator Menu” on IP Address Setting...
-
Page 72: Menu Descriptions
SC-F2000 Series User’s Guide Using the Control Panel Menu Menu Descriptions USB File List *1 indicates the default settings Setting Item Setting Description Select Print File xxxxxxxxxxxxxxxxxxxxxx x to xxx (1*1) If the data on the connected USB memory stick is supported, the name of the data file is displayed with up to 23 single-byte characters. - Page 73 SC-F2000 Series User’s Guide Using the Control Panel Menu Setting Item Setting Description Selected Nozzles Execute (Light)*1 Find the number of the patterns with faint or missing areas on the check pattern sheet, specify all rows or specific nozzle rows Execute (Medium) containing the numbers, and clean the print head.
-
Page 74: Printer Setup
SC-F2000 Series User’s Guide Using the Control Panel Menu Setting Item Setting Description Prolonged Storage If you do not use the printer for one month or more, replace the ink with Cleaning liquid to prevent print quality from declining No*1 due to ink sedimentation. -
Page 75: Print Logs
Notes on ink consumption This is a simple tool for estimating ink consumption for a given print job. EPSON DOES NOT WARRANT ACCURACY. Actual ink consumption varies considerably depending on such factors as software used, firmware version, image printed, print... -
Page 76: Administrator Menu
SC-F2000 Series User’s Guide Using the Control Panel Menu Administrator Menu *1 indicates the default settings Setting Item Setting Description Network Setup IP Address Setting Auto*1 Select whether to use DHCP to set the IP address (Auto), or to set the address manually (Panel). When you select Panel, set Panel the IP Address, Subnet Mask, and Default Gateway. -
Page 77: Maintenance Mode
SC-F2000 Series User’s Guide Using the Control Panel Menu Setting Item Setting Description Reset All Settings Select Yes to revert all setting values to their default values expect for the following. No*1 ❏ Date & Time ❏ Language ❏ Maintenance Mode... -
Page 78: What To Do When A Message Is Displayed
SC-F2000 Series User’s Guide Problem Solver Problem Solver What to Do When a Message Is Displayed If the printer displays one of the messages shown below, refer to the solution listed and take the necessary steps. Message What to do ❏... -
Page 79: Problem Solver
Use EPSON LFP Remote Panel 2 to re-attempt the update. Restart the printer. If this message appears on the LCD panel again, contact your dealer or Epson Support. Command Error Press the + button and cancel the print job. Check that the installed RIP software is Check print settings on RIP. - Page 80 Turn the printer on and off several times. If the same call for service is displayed on the LCD panel, contact your dealer or Epson Support for assistance. Tell them the call for service code is "XXXX".
-
Page 81: Troubleshooting
SC-F2000 Series User’s Guide Problem Solver You cannot print in the network Troubleshooting environment. You cannot print (because the Are the network settings correct? Ask your network administrator for the network printer does not work) settings. The printer does not turn on. -
Page 82: Print Results Are Not What You Expected
Are you using genuine Epson ink cartridges? it moves which may prevent ink from firing. Clean the This printer is developed for use with Epson ink platen path if performing head cleaning several times cartridges. If you use non-Epson ink cartridges, the does not clear the problem. - Page 83 SC-F2000 Series User’s Guide Problem Solver Are you using old ink cartridges? Does the T-shirt you are printing on absorb The print quality declines if you use old ink cartridges. ink easily? Replace them with new ones. We recommend using...
-
Page 84: Others
SC-F2000 Series User’s Guide Problem Solver Is there any lint or standing fibers on the print Have you optimized the temperature and surface? pressure of the heat press? Lint or standing fibers on the print surface may stick to The temperature of the heat press decreases when the print head and stain other areas of the T-shirt. -
Page 85: Printing Does Not Start
Settings menu and data has been saved, or when data If this message appears on the LCD panel again, is transmitted from a computer to the USB memory contact your dealer or Epson Support. stick connected to the printer. - Page 86 SC-F2000 Series User’s Guide Problem Solver There is a red light inside the printer This is not a failure. The light is a light inside the printer. I have forgotten the network password If you have forgotten the password created during network setup, perform Restore Settings from the control panel's menu list.
-
Page 87: Appendix
* Epson recommends the use of genuine Epson ink cartridges. Epson cannot guarantee the quality or reliability of non-genuine ink. The use of non-genuine ink may cause damage that is not covered by Epson’s warranties, and under certain circumstances, may cause erratic printer behavior. Information about non-genuine ink levels may not be... - Page 88 SC-F2000 Series User’s Guide Appendix “Replacing and Shaking Cartridges” on page 58 Others Product name Product Explanation number Cleaning cartridge T7360 For washing the print head and washing the tubes. Pre-treatment Liquid T7361 20 liters. Dilute before use. “Using Pre-treatment Liquid” on page 26...
-
Page 89: Notes When Moving Or Transporting The Printer
SC-F2000 Series User’s Guide Appendix Notes When Moving or Preparing to Move Transporting the Printer This section explains how to move the printer on the same floor without any changes in the floor level. See the following for instructions on moving the printer to This section explains how to move or transport the another floor or building. -
Page 90: Setting Up The Printer After Moving
SC-F2000 Series User’s Guide Appendix Adjust the print head misalignments, and then check the print quality. “Correcting the print misalignment” on page 46 Transporting the Printer When transporting the printer, protect the printer from shock and vibration using the protective materials and packing materials used when it was initially delivered after preparing the printer for the move. -
Page 91: System Requirements
SC-F2000 Series User’s Guide Appendix System Requirements Specifications Table The following describes the system requirements Printer Specifications necessary to install and use the software for this printer. Printing method On-demand ink jet Windows Nozzle configuration Operating System Windows XP/Windows Vista/... - Page 92 SC-F2000 Series User’s Guide Appendix Printer Specifications Ink Specifications Temperature Operating: 10 to 35 °C Temperature Operating: 10 to 35 °C Storage (before unpacking): -20 to In storage (in package) and after 60 °C (within 120 hours at 60 °C, installation in printer: -20 to 40 °C...
-
Page 93: Standards And Approvals
SC-F2000 Series User’s Guide Appendix Pre-treatment liquid specifications Dimensions (W) 300 x (D) 300 x (H) 300 mm Ink cleaner specifications Expiry date See the date printed on the package (at normal temperature) Temperature Operating: 10 to 35 °C In storage (in package): -20 to 40 °C (within 4 days at -20 °C, a... -
Page 94: Where To Get Help
Support Technical Support Web Before Contacting Epson Site If your Epson product is not operating properly and you cannot solve the problem using the troubleshooting Epson’s Technical Support Web Site provides help with information in your product documentation, contact problems that cannot be solved using the Epson support services for assistance. -
Page 95: Help For Users In North America
Internet Support Help for Users in Australia Visit Epson’s support website at http://epson.com/ Epson Australia wishes to provide you with a high level support and select your product for solutions to of customer service. In addition to your product common problems. You can download drivers and... -
Page 96: Help For Users In Singapore
The more information you ❏ Product usage questions or problems prepare, the faster we can help solve the problem. This information includes your Epson product ❏ Enquiries on repair service and warranty documentation, type of computer, operating system, application programs, and any information you feel is required. -
Page 97: Help For Users In Malaysia
603-56288222 Internet Home Page ❏ Enquiries on repair services & warranty, product Epson Hong Kong has established a local home page in usage and technical support (Techline) both Chinese and English on the Internet to provide users with the following information:... -
Page 98: Help For Users In The Philippines
- 6PM) Prefix local STD code Help for Users in the Philippines To obtain technical support as well as other after sales services, users are welcome to contact the Epson Philippines Corporation at the telephone and fax numbers and e-mail address below:... -
Page 99: Bonjour
SC-F2000 Series User’s Guide Software License Terms Software License Terms Bonjour This printer product includes the open source software programs which apply the Apple Public Source License Version1.2 or its latest version ("Bonjour Programs"). We provide the source code of the Bonjour Programs pursuant to the Apple Public Source License Version1.2 or its latest version until five (5) years after the discontinuation of same model of this printer product. - Page 100 SC-F2000 Series User’s Guide Software License Terms 1.7 "Original Code" means (a) the Source Code of a program or other work as originally made available by Apple under this License, including the Source Code of any updates or upgrades to such programs or works made available by Apple under this License, and that has been expressly identified by Apple as such in the header file(s) of such work;...
- Page 101 SC-F2000 Series User’s Guide Software License Terms 2.4 Third Party Rights. You expressly acknowledge and agree that although Apple and each Contributor grants the licenses to their respective portions of the Covered Code set forth herein, no assurances are provided by Apple or any Contributor that the Covered Code does not infringe the patent or other intellectual property rights of any other entity.
- Page 102 SC-F2000 Series User’s Guide Software License Terms 9. LIMITATION OF LIABILITY. TO THE EXTENT NOT PROHIBITED BY LAW, IN NO EVENT SHALL APPLE OR ANY CONTRIBUTOR BE LIABLE FOR ANY INCIDENTAL, SPECIAL, INDIRECT OR CONSEQUENTIAL DAMAGES ARISING OUT OF OR RELATING TO THIS LICENSE OR YOUR USE OR INABILITY TO USE THE...
- Page 103 SC-F2000 Series User’s Guide Software License Terms 13.2 Relationship of Parties. This License will not be construed as creating an agency, partnership, joint venture or any other form of legal association between or among You, Apple or any Contributor, and You will not represent to the contrary, whether expressly, by implication, appearance or otherwise.
-
Page 104: Info-Zip Copyright And License
SC-F2000 Series User’s Guide Software License Terms Info-ZIP copyright and license This is version 2007-Mar-4 of the Info-ZIP license. The definitive version of this document should be available at ftp://ftp.info-zip.org/pub/infozip/license.html indefinitely and a copy at http://www.info-zip.org/pub/infozip/ license.html. Copyright © 1990-2007 Info-ZIP. All rights reserved.
Need help?
Do you have a question about the SC-F2000 Series and is the answer not in the manual?
Questions and answers