Do you have a question about the 820E and is the answer not in the manual?
Questions and answers
JACK Goldstone
January 30, 2025
need new display board for 820E
1 comments:
Mr. Anderson
May 14, 2025
You can obtain a new display board for the Fitness Gear 820E by purchasing the replacement part identified as "Replacement Display Board 100436902". This board is compatible with Fitness Gear equipment, including the 820E model.
This answer is automatically generated
jack goldstone
January 30, 2025
820E display board
1 comments:
Mr. Anderson
February 10, 2025
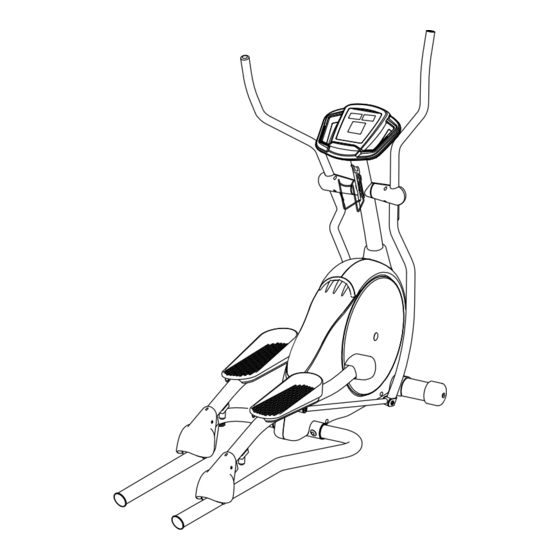
The display board for the Fitness Gear 820E includes the following features: - Monitor Display: Shows RPM, Time, Pulse, Distance, Level, Calories, and Program Profiles. - Start Button: Press to start the workout. - Stop Button: Press to pause or end the workout; hold for 2 seconds to reset the elliptical. - Enter Button: Used to set programs. - Arrow Keys: Adjust resistance and make selections. - One-Touch Resistance Keys: Quickly adjust resistance. - Pulse Grips: Displays heart rate. - Music Player Holder: Holds a music player.


Need help?
Do you have a question about the 820E and is the answer not in the manual?
Questions and answers
need new display board for 820E
You can obtain a new display board for the Fitness Gear 820E by purchasing the replacement part identified as "Replacement Display Board 100436902". This board is compatible with Fitness Gear equipment, including the 820E model.
This answer is automatically generated
820E display board
The display board for the Fitness Gear 820E includes the following features:
- Monitor Display: Shows RPM, Time, Pulse, Distance, Level, Calories, and Program Profiles.
- Start Button: Press to start the workout.
- Stop Button: Press to pause or end the workout; hold for 2 seconds to reset the elliptical.
- Enter Button: Used to set programs.
- Arrow Keys: Adjust resistance and make selections.
- One-Touch Resistance Keys: Quickly adjust resistance.
- Pulse Grips: Displays heart rate.
- Music Player Holder: Holds a music player.
This answer is automatically generated
Where is the battery compartment on forget 830e