ABB M22311 Series User Manual
4.3" video hands-free indoor station
Hide thumbs
Also See for M22311 Series:
- Manual (52 pages) ,
- Product manual (32 pages) ,
- User manual (43 pages)
Table of Contents
Advertisement
Quick Links
See also:
Manual
VER:1.0 │
│ 31.03.2014
ABB-Welcome M
Pos: 2 /DinA4 - Anl eitun gen Online /Inh alt/KNX/Doo rEntry /832 20-AP- xxx/Tit elblat t - 832 20-AP-xxx - ABB @ 1 9\m od_ 132 3249 806 476 _15. docx @ 11 108 4 @ @ 1
M22311-.
M22313-.
4.3" Video hands-free
indoor station
=== E nde der Liste für Tex tma rke C over == =
Advertisement
Table of Contents

Related Manuals for ABB M22311 Series


Summary of Contents for ABB M22311 Series
- Page 1 ABB-Welcome M Pos: 2 /DinA4 - Anl eitun gen Online /Inh alt/KNX/Doo rEntry /832 20-AP- xxx/Tit elblat t - 832 20-AP-xxx - ABB @ 1 9\m od_ 132 3249 806 476 _15. docx @ 11 108 4 @ @ 1 M22311-.
-
Page 2: Table Of Contents
Pos: 4 /Busc h-Ja ege r (N eust rukt ur)/ Mo dul-St ruktu r/Onli ne-D oku ment ation /Inh altsve rzeich nis ( --> Fü r alle Doku men te <-- )/In haltsve rzeic hnis @ 19\ mod _13 206 490 4438 6_1 5.d ocx @ 109 653 @ @ 1 Safety ....................... 3 Intended use ..................... 3 Environment ....................3 ABB devices ................3 Operations ....................5 Standard operations ..............5 4.1.1 Control elements ............... -
Page 3: Safety
Therefore, dispose of the device at the appropriate collecting depot. Pos: 12 /Di nA4 - A nleitu ngen Onlin e/Ueb ersc hrift en/2 ./ABB Gera ete @ 19 \mo d_1 323 162 843 832_ 15. docx @ 11 087 5 @ 2 @ 1 ABB devices Pos: 13 /B usch-J aeg er (Neus truk tur )/M odul -Strukt ur/O nline -Doku me ntatio n/Umw elt ( -->... - Page 4 ABB-Welcome M Environment ABB products meet the legal requirements, in particular the laws governing electronic and electrical devices and the REACH ordinance. (EU-Directive 2002/96/EG W EEE and 2002/95/EG RoHS) (EU-REACH ordinance and law for the implementation of the ordinance (EG) No.1907/2006)
-
Page 5: Operations
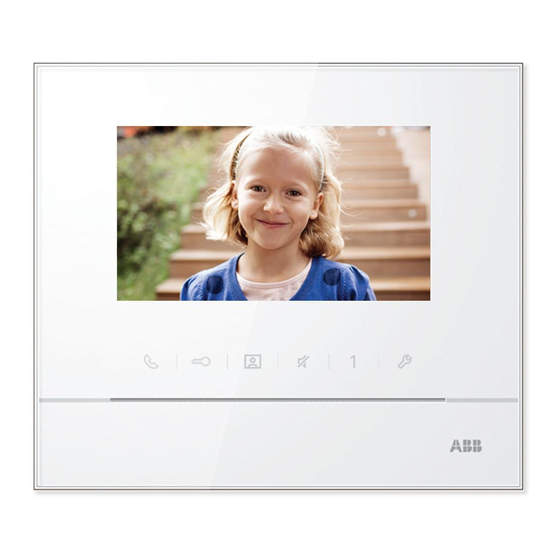
ABB-Welcome M Operations Pos: 18 /Di nA4 - A nleitu ngen Onlin e/Ueb ersc hrift en/1 ./Bedie nun g @ 18\m od_ 130 261 392 416 5_15 .docx @ 1 033 65 @ 1 @ 1 Operations Pos: 19 /Di nA4 - A nleitu ngen Onlin e/Ueb ersc hrift en/2 ./Nor male r Bet rieb @ 18 \mo d_1 302 768 8209 65_ 15. docx @ 10 3540 @ 2 @ 1 Standard operations Pos: 20 /Di nA4 - A nleitu ngen Onlin e/Ueb ersc hrift en/3 ./Bedie nele men te @ 20\ mod _13 232 6022 055 9_1 5.do cx @ 1 116 47 @ 3 @ 1... - Page 6 ABB-Welcome M Operations Functions 4.3" Color display Comunication button 2A When a call is coming, press this button to activate the communication within 30 seconds and press it again to end the call. 2B In standby mode, press this button to enter the communication menu.
- Page 7 ABB-Welcome M Operations Programmable button 1 6A Release the lock connected with an outdoor station (COM-NC-NO) (default function). 6B In standby mode, hold this button for 3 seconds to send SOS alarm to the guard unit. If LED flashes slowy, it means success; and if flashes rapidly, it means failure.
-
Page 8: Control Actions
ABB-Welcome M Operations Pos: 26 /Di nA4 - A nleitu ngen Onlin e/Ueb ersc hrift en/2 ./Bedie nakti onen @ 2 0\m od_ 1323 262 294 281 _15. docx @ 11 191 1 @ 2 @ 1 Control actions Pos: 27 /Di nA4 - A nleitu ngen Onlin e/Ueb ersc hrift en/3 ./Spr ech- und Videov erbi ndu ng @ 20\ mod _13 232 6236 870 0_1 5.do cx @ 1119 27 @ 3 @ 1 4.2.1... -
Page 9: Display & Volume Settings During Calling
ABB-Welcome M Operations Pos: 30 /Di nA4 - A nleitu ngen Onlin e/Ueb ersc hrift en/3 ./T uer oeff nen @ 2 0\mo d_1 323 263 277 453 _15. docx @ 11 193 5 @ 3 @ 1 4.2.2 Display & volume settings during calling Pos: 31 /Di nA4 - A nleitu ngen Onlin e/In halt/KNX/Do orEnt ry/83 220 -AP-xxx/ Tue r o effne n - 832 20-AP-x xx @ 20\m od_ 132 326 795 847 9_15 .docx @ 1 121 09 @ @ 1... -
Page 10: Communication Menu
ABB-Welcome M Operations Pos: 33 /Di nA4 - A nleitu ngen Onlin e/Ueb ersc hrift en/3 ./Stum m sc halte n @ 2 0\m od_ 132 326 360 7142 _15 .docx @ 1 119 51 @ 3 @ 1 Pos: 66 /B usch-J aeg er (Neus truk tur )/M odul -Strukt ur/O nline -Doku me ntatio n/Steu er mod ule - Onlin e-Dok ume ntati on ( -- > F ür alle Dok ume nte <- -)/ +++ ++ ++ +++ ++ S eiten umb ruch + +++ ++ ++ +++ + @ 9\m od_ 126 8898 668 093 _0. docx @ 521 49 @ @ 1 4.2.3... - Page 11 ABB-Welcome M Operations 4.2.3.3 Call to guard unit CALL GUARD UNIT Call Guard Unit Fig. 5: Call to guard unit 4.2.3.4 Broadcast BROADCAST Long-pressing “√“ button to broadcast Fig. 6: Broadcast call — 11 —...
- Page 12 ABB-Welcome M Operations 4.2.3.5 Switch actuator SWITCH ACTUATOR Actuator 1 (001) Fig. 7: Switch actuator Set the actuator list in the “system settings-switch actuator“ menu first. After chosing a list, press button √ to enable the lock or light which is connected with the switch actuator.
-
Page 13: Settings
ABB-Welcome M Operations Settings 4.3.1 Overview Press button to enter the system settings menu. The following functions are available: Functions Intercom settings -Set intercom lists among different apartments or within the same apartment Switch actuator -Set the actuator list in this menu... -
Page 14: Intercom Call Settings
ABB-Welcome M Operations 4.3.2 Intercom call settings Intercom 1 (001) Intercom 2 Add New Fig. 8: intercom settings menu Functions Choose the previous selection or scroll up Choose the next selection or scroll down Confirm the selection you choose or enter to edit it Return to the previous screen Add a new intercom list . - Page 15 ABB-Welcome M Operations Add a new list INTERCOM External Intercom Call Type Target Address Rename mike Save Cancel Fig. 9: Add a new intercom Functions Enter to choose the call type : -an external intercom means a call from different apartments -an internal intercom means a call within the same apartment Enter to change the target address, from 001 to 250.
-
Page 16: Switch Actuator Settings
ABB-Welcome M Operations 4.3.3 Switch actuator settings SWITCH ACTUATOR Actuator 1 (001) Add New Add a new list SWITCH ACTUATOR Target Address Rename light Save Cancel Fig. 10: Switch actuator settings Functions Existing switch actuator list: Press button √ to modify the settings. -
Page 17: Program Button Settings
ABB-Welcome M Operations 4.3.4 Program button settings PROGRAM BUTTON Button 1 Release 2nd-Lock Fig. 11: Program button settings Functions Set functions for the program button, e.g. releasing 2nd-lock, calling guard unit, intercom call, enabling the switch actuator. *2nd-lock means the lock is connected with an outdoor station (NC-NO- COM) *Only the existing intercom call list &... -
Page 18: Call Forward Settings
ABB-Welcome M Operations 4.3.5 Call forward settings CALL FORWARD √ Call Forward Call Type Indoor Target Address Save Cancel Fig. 12: Call forward settings Functions Enable/disable the call forward function. Enter to choose a call type, including indoor or guard unit. -
Page 19: Auto Unlock Settings
ABB-Welcome M Operations 4.3.6 Auto unlock settings AUTO UNLOCK √ Auto Unlock √ Time 1 Time 2 : : : : Fig. 13: Auto unlock settings Functions Enable/disable the auto unlock function. Enable/disable the auto unlock during Time 1. Set starting time and ending time for Time 1 Enable/disable auto unlock during Time 2. -
Page 20: Os Password Settings
ABB-Welcome M Operations 4.3.7 OS password settings SET OS PASSWORD √ Enable Password 123456 Enter Password (6-8 digits) Fig. 14: OS password settings Functions Enable/disable the password functions Enter the password as you wish in 6~8 digits. *only available with the keypad. -
Page 21: Ringtone Settings
ABB-Welcome M Operations 4.3.8 Ringtone settings RING TONE Ring Tone 1 Default Outdoor Ring Tone 2 Other Outdoors Ring Tone 3 Doorbell Ring Tone 4 Others Fig. 15: Ringtone Functions Select the bell sound for the default outdoor station. Select the bell sound for other outdoor stations. -
Page 22: Volume Settings
ABB-Welcome M Operations 4.3.9 Volume settings VOLUME Volume 3 Ringtone Volume √ Touchbutton Tone Fig. 16: Volume settings Functions Set the volume of bell sound. Enable/disable the feedback tone which sounds when the touch button is pressed. — 22 —... -
Page 23: Date And Time Settings
ABB-Welcome M Operations 4.3.10 Date and time settings DATE AND TIME 2013 Date(YYYY-MM-DD) : Time Summer Time √ Fig. 17: Date and time settings Functions Set the date. Set the time. Enable/disable the summer time function. — 23 —... -
Page 24: Door Entry System Settings
ABB-Welcome M Operations 4.3.11 Door entry system settings DOOR ENTRY SYSTEM Auto Full Screen √ √ Auto-snapshots √ Door Status Check √ Missed Fig. 18: Door entry system settings Functions Enable/disable the auto full screen function. Enable/disable the auto-snapshot function. -
Page 25: Blacklist Settings
ABB-Welcome M Operations 4.3.12 Blacklist settings BLACKLIST Blacklist 1 (001) Add New BLACKLIST Target Address Save Cancel Fig. 19: Blacklist settings Functions Existing blacklist: Press button √ to modify the settings. Add new blacklists: In total, up to 32 black lists can be added. -
Page 26: History Review
ABB-Welcome M Operations 4.3.13 History review HISTORY 1/63 2013-03-21 Outdoor - 1 ● 16:45 ● 2013-03-21 Outdoor - 1 16:45 ● 2013-03-21 Outdoor - 1 14:24 Outdoor -1 Fig. 20: History review Functions Up to 100 events can be recorded in the history menu. - Page 27 ABB-Welcome M Operations Press this button to view details of this event. Two pictures are always made when a visitor rings the bell. Press this button to delete a record item — 27 —...
-
Page 28: Language Settings
ABB-Welcome M Operations 4.3.14 Language settings LANGUAGE English Française Italiano Español Português Fig. 21: Language settings 4.3.15 Information INFORMATION Flash Version: V0.11_130723 MCU Version: V0.11_130722 M/S: Master Indoor St. Add.: Default Outdoor: Fig. 22: Information of the indoor station (scanning the QR code to get the detailed instruction of the indoor station) —... -
Page 29: Reseting Factory Default
ABB-Welcome M Operations 4.3.16 Reseting factory default RESET FACTORY DEFAULT Are you sure to reset? Reset All Settings √ Clear All Data × Cancel Fig. 23: Reseting factory default Functions Reset all settings: Reset the device and restore all default configurations. The operation does not delete the programmed data and history, such as intercom lists and switch actuator lists. -
Page 30: Cleaning
ABB-Welcome M Operations Pos: 67 /Di nA4 - A nleitu ngen Onlin e/Ueb ersc hrift en/2 ./Reini gung @ 1 9\m od_ 131 0733 980 533 _15. docx @ 10 785 3 @ 2 @ 1 Cleaning Pos: 68 /Di nA4 - A nleitu ngen Onlin e/In halt/KNX/Do orEnt ry/Reini gun g/Reini gun g T ouchsc ree nm onito r @ 19\m od_ 131 073 410 897 8_15 .docx @ 1 078 62 @ @ 1 Caution Risk of damage to the screen surface. -
Page 31: Adjusting The Device
ABB-Welcome M Operations Pos: 70 /Di nA4 - A nleitu ngen Onlin e/Ueb ersc hrift en/2 ./Ge raet eeins tellun gen @ 1 8\mo d_1 302 768 847 744 _15. docx @ 10 354 8 @ 2 @ 1 Adjusting the device Pos: 71 /Di nA4 - A nleitu ngen Onlin e/Ueb ersc hrift en/3 ./Abschl usswide rsta nd @ 19\ mod _13 219 5807 990 6_1 5.do cx @ 1100 83 @ 3 @ 1... -
Page 32: Technical Data
ABB-Welcome M Technical data Pos: 76 /Di nA4 - A nleitu ngen Onlin e/Ueb ersc hrift en/1 ./T echnisc he D aten @ 18 \mo d_1 302 615 863 001 _15. docx @ 10 341 6 @ 1 @ 1 Technical data Pos: 77 /Di nA4 - A nleitu ngen Onlin e/In halt/KNX/Do orEnt ry/83 220 -AP-xxx/ Tech nische Date n - 832 20-AP-x xx @ 1 8\m od_ 130 321 285 4559 _15 .docx @ 1 037 05 @ @ 1... -
Page 33: Mounting / Installation
ABB-Welcome M Mounting / Installation Pos: 79 /B usch-J aeg er (Neus truk tur )/M odul -Strukt ur/O nline -Doku me ntatio n/Übe rsch rifte n ( --> Fü r alle Doku men te < -- )/1. E bene /M - O/ Mont age / Ins tallatio n @ 18\ mod _13 0261 396 611 1_1 5.do cx @ 1 033 73 @ 1 @ 1 Mounting / Installation Pos: 80 /B usch-J aeg er (Neus truk tur )/M odul -Strukt ur/O nline -Doku me ntatio n/Siche rheit (- ->... -
Page 34: General Installation Instructions
ABB-Welcome M Mounting / Installation General installation instructions • Terminate all branches of the wiring system via a connected bus device (e.g., indoor station, outdoor station, system device). • Do not install the system controller directly next to the bell transformer and other power supplies (to avoid interference). -
Page 35: Mounting
ABB-Welcome M Mounting / Installation Pos: 84 /B usch-J aeg er (Neus truk tur )/M odul -Strukt ur/O nline -Doku me ntatio n/Übe rsch rifte n ( --> Fü r alle Doku men te < -- )/2. E bene /M - O/ Mont age @ 1 8\m od_1 302 615 960 458 _15. docx @ 10 342 4 @ 2 @ 1 Mounting Pos: 85. - Page 36 ABB-Welcome M Mounting / Installation Installation dimension The bottom of the device has screw holes for fastening on the wall according to the above dimension instructions. In addition, the bottom of the device can be fixed to the existing flush-mounted box.
- Page 37 ABB-Welcome M Mounting / Installation Settings Set addresses of the preferred outdoor stations and the address of the indoor station on the jumper (see chapter " Adjusting the device "). Three types of installation: Surface-mounted Mounted on the wall Fix the bottom of the device to the wall.
- Page 38 ABB-Welcome M Mounting / Installation Desktop-mounted Mounted with desktop bracket Fix the bottom of the device to the desktop bracket. Latch the upper part of the device onto its bottom part: place the upper side of the device on the lock-in lugs and then press the bottom side onto the bottom part of the device until it is caught by the clamp.
- Page 39 ABB-Welcome M Mounting / Installation Latch the upper part of the device onto its bottom part: place the upper side of the device on the lock-in lugs and then press the bottom side onto the bottom part of the device until it is caught by the clamp.
- Page 40 W e reserve the right to at all times make technical changes as well as changes in the contents of this document without prior notice. The detailed specifications agreed to at the time of ordering apply to all orders. ABB accepts no responsibility for possible errors or incompleteness in this document.
Need help?
Do you have a question about the M22311 Series and is the answer not in the manual?
Questions and answers